HALO 2 Orbital Drop Shock Trooper

Loess

Member
I've been lurking here for quite some time, and since I'd managed to get in in the last registration period I've still mostly been lurking. But, I figured it as time for me to show off my current project.

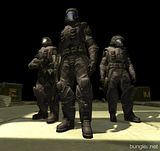
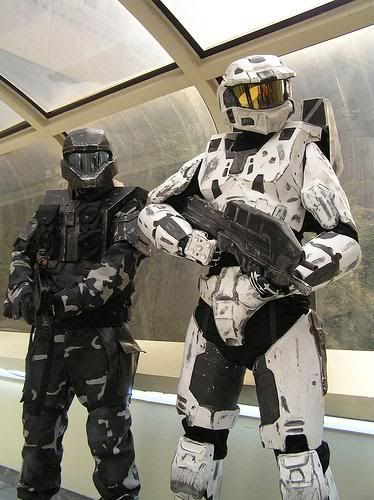
For the last few months, I've been working on a buildup of an ODST costume, with the HALO 2 version armor, using the Pepakura model process that I'd learned over at the 405th.


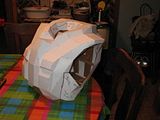
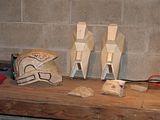
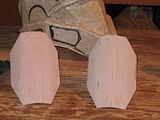
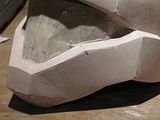
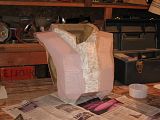
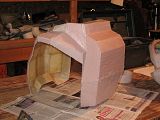
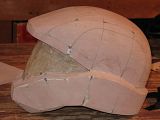
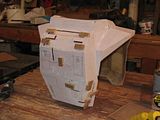
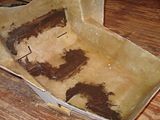
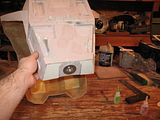
These are the first stages of the armor, just paper models, coated with polyester resin to prep them for lining with fiberglass.


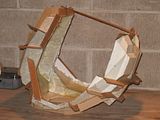
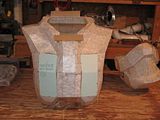
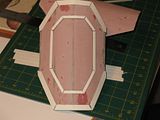
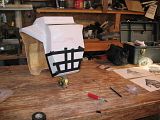
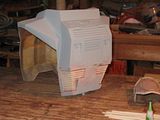
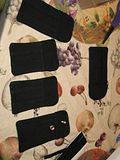
The torso needed some reinforcing while I was laying up the glass inside it. The pouches on the paper model are cut out, and filled in with illustration board before laying glass in the front of the torso. This is so that I can fit functional cloth pouches to the chest.


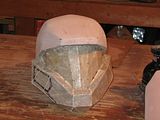
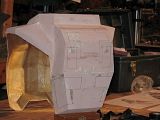
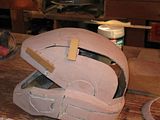
Smoothing out the angular models with bondo, and reinforcing around the visor with bondo-glass putty.


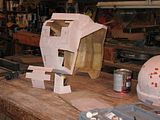
More bondo work, and illustration board detailing, and the layout for helmet and torso detailing.


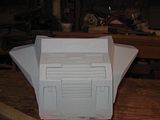
The details cut into the torso, then reattached with bondo-glass. Starting to carve some details into the helm with a dremel.
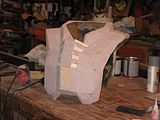

More torso details.


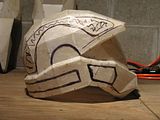
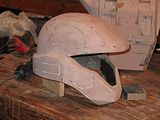
Details cut out of the helm, then inset and reattached. The carved detailing is also fairly far along.


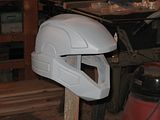
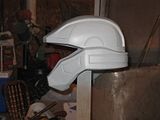
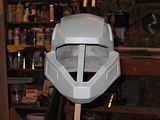
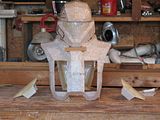
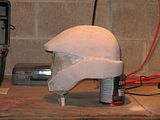
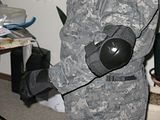
The helm is pretty much done except for paint and installing the visor.


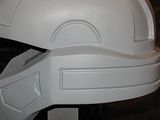
Went after the torso with spot putty, then added all the vent detailing on the back, it's mostly wrapped up, too.


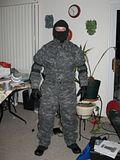
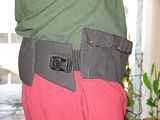
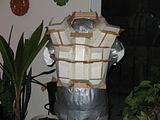
Here's the under-suit, and some of the soft armor progress.

That's a rush through the last six months of my weekends and most of my other free time, in mostly chronological order. If you want to see a slightly longer and in-depth explanation, my WIP over at the 405th basically has a week-by-week as I was working on this.

Thanks for reading, and hopefully, I'll have this done fairly soon so I can tackle some other projects.
 
Holy COW that is awesome mate! Anyone that can detail with a Dremel has mad skilz in my books. Looking forward to seeing more mate and WELCOME!!!

Regards
TAZ
 
the ODST is a great suit to have around.. here is me in the spartan suit and my friend in his ODST suit from DragonCon 2007

l_332d14be69f241b4874dd4e1318ac81e.jpg
 
Lovely bit of work, very crisp which is lovely to look at. I was somewhat shocked to see you cut bits out of your helm, but then thought it quite clever. How did you do the insetting to cut such a nice line?

Looks great, hope it doesn't crack on you!
 
Holy COW that is awesome mate! Anyone that can detail with a Dremel has mad skilz in my books. Looking forward to seeing more mate and WELCOME!!!

Regards
TAZ

The secret to detailing with a Dremel is this.

And about 5 hours of cleanup with files and tiny little sanding blocks.

the ODST is a great suit to have around.. here is me in the spartan suit and my friend in his ODST suit from DragonCon 2007

l_332d14be69f241b4874dd4e1318ac81e.jpg

I've always loved your white suit, but I don't recognize your friend's armor. Is he on 405th, or did he make it before I started there?

Lovely bit of work, very crisp which is lovely to look at. I was somewhat shocked to see you cut bits out of your helm, but then thought it quite clever. How did you do the insetting to cut such a nice line?

Looks great, hope it doesn't crack on you!

The insetting was done by hotgluing the temporary wood spacers to hold the panel at the correct depth, and then I came in from the inside with bondo-glass putty, the stuff that's pre-mixed with short glass fibers in regular bondo. I let the bondo set up for about 5-10 minutes, then twisted off the spacers, and trimmed the putty that had squeezed out with a utility knife with a brand new blade. Hopefully, I can get this stuff molded before the next con I'm going to in April, I'm kinda nervous about wearing the masters out in public where they're vulnerable to over-excited young'ns.

Thanks everyone for the warm welcome to the RPF.:cool
 
Thanks that is a old picture of my armor. that was the version 1 i had. i am glad to see more ODST's being built. cant wait to see you armor completed.


he had that suit awhile back.. he has already sold it to someone in canada i believe.
 
Wow - Looks Great!!! I didn't realize that you were this far along - can't wait to see it finished out...

Thanks, except for the shins, the hard armor is all to the spot putty, sand, repeat, prime, spot putty..... stage.

I was originally going to try to have this for a con in November, but then the weather turned cold, and I only get to work one day a week on anything messy over in my dad's heated shop.

The shins basically have to start over again, I've decided that they're 4cm too short.
 
Thanks for the kind words guys, here's the next round of progress pics. Not a whole lot that's really apparent, since it's all spot-putty work. But, I needed to snap a couple to convince myself that I'm actually making progress.

 
It's been a while.... and I've been busy with non-armor things during a lot of that time, but I did manage to make some progress.

With a coat of paint, and some padding, the helm will be done.


These pic show how I fitted and installed the visor. I used tee-nuts epoxied into the helm to anchor the machine screws it's held in with. Yay for easily removable visor.


The shoulders are primed and ready for straps and paint.


The torso is nearly done, all I have left is spot putty on some of the vents, and the front detailing, then it's time to paint and mount the pockets on the front.

The soft armor is pretty far along, so that should be done soon.

I head to a con in St. Paul in 8 days, I think I can make it. Hopefully, no one there really notices that I won't be wearing any leg armor. I might just go with some knee pads that match the elbows. I'm expecting that not many people will be taking pics of my shins, though.
 
Wow! The torso looks great man! Btw, where did you get the dremel attachment you used for the detailing. I use my dremel 24/7, and I think that attachment would save me a lot of headache. Keep up the great work!

Kody
 
Wow! The torso looks great man! Btw, where did you get the dremel attachment you used for the detailing. I use my dremel 24/7, and I think that attachment would save me a lot of headache. Keep up the great work!

Kody

I got that at the local Menards, it's a rotary saw base accessory. At least, I think that's what Dremel was calling it. I immediately decided it would be a great detail router.
 
I got that at the local Menards, it's a rotary saw base accessory. At least, I think that's what Dremel was calling it. I immediately decided it would be a great detail router.

Thanks for the info. I'll have to go to Menards tomorrow. It looks REALLY handy.
 
This weekend's progress, nearly done with it. (Still need to make the shins, but I'm out of time for Anime Detour.)

Soft armor is 95% finished:


Hard armor (well, the upper body, at least) is painted, awaiting weathering:


The helm has most of the padding, it still needs a liner and chinstrap. I've been a fighter in the SCA too long to not have a chinstrap in my helm, it just doesn't feel right without it.


And how it fits me:


I'll have more pics soon, with everything together: undersuit, soft armor, hard armor, helm, and boots.
 
Looks great man! Haha! I saw the farm in the background and wondered where you were from. Always good to have a fellow Iowan producing a nice costume! What part of Iowa are you from?
 
This thread is more than 3 years old.

Your message may be considered spam for the following reasons:

  1. This thread hasn't been active in some time. A new post in this thread might not contribute constructively to this discussion after so long.
If you wish to reply despite these issues, check the box below before replying.
Be aware that malicious compliance may result in more severe penalties.
Back
Top