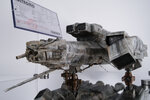
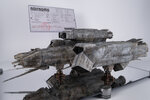
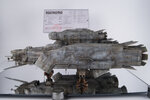
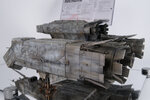
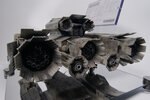
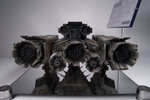
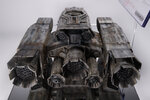
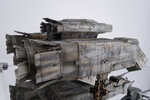
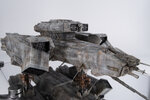
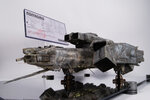
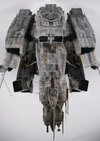
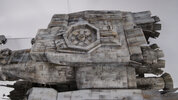
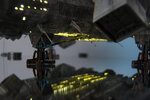
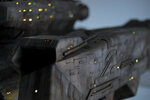
Halcyon Models Nostromo 1:960 build

Thank you Hunk a Junk!
Yeah, my modellingspace is very limited so I really have to run a tight ship. I run out of benchspace in no time. Its a constant battle but it works.
Everything has its place and lives there, unless it is in use. If I find it is not being used regularly it loses its home and goes into my small storageroom.
 
Stumbled across this post and signing on to follow this build. Very impressive work here!

I think I need to get a more permanent work bench. Currently a mobile board with open space on a table or counter as opportunity permits. :p
 
Things are moving forward. Finished the lighting setup and did a few tests. It works!
I cut the fibers a bit short so fixing them to the lightsources was a huge pain in the ass. I also broke a few, stuffing everything into the hull. Got a bit crowded in there, but not as bad as I thought.

After gluing everything together, the weight I intended to put in the front was lying on the bench. (n) I put it in a drawer and pretended it was ok. Its a wheelie-space-truck now, or whatever.

I left it and focused on the landing gear instead. Ended up stripping it after the first try because I got carried away and careless with the weathering.

45 - Copy.jpg


46 - Copy.jpg


47 - Copy.jpg


48 - Copy.jpg


49 - Copy.jpg


50 - Copy.jpg


51 - Copy.jpg


52 - Copy.jpg


53 - Copy.jpg


54 - Copy.jpg


55 - Copy.jpg


56 - Copy.jpg


57 - Copy.jpg


58 - Copy.jpg


59 - Copy.jpg


60 - Copy.jpg


61 - Copy.jpg


Did some filling, priming and general cleanup and primed the whole model. I then cut hundreds of tape-pieces of varying dimensions, put them on and layed down another layer with a slightly different shade. I did this two times to get "panels" with varying shades. Then toned it down to base the rest of the paintjob on.
No idea if this approach will work. I am a bit on the fence about the initial results to be honest.

62 - Copy.jpg


63 - Copy.jpg


64 - Copy.jpg


65 - Copy.jpg


Thanks for taking a look!
More to paintbooth pics coming.
 
Looking great from this perspective especially after the latest tone down coat. I like the nice weathering job on the landing gear as well.

Nice styrene cutter. Looks like an RP Toolz?
 
Thank you for the encouragement guys. :)
The paintjob still has a long way to go with oils, washes, filtering and highlights.
Looking great from this perspective especially after the latest tone down coat. I like the nice weathering job on the landing gear as well.

Nice styrene cutter. Looks like an RP Toolz?
Sharp eyes Hagoth, the styrene cutter is one I built based on the RP Toolz cutter. It`s a bit rough around the edges but gets the job done.

Wow, wow! This is one of my favorite ships of all time and you certainly have done it justice, nice work! The scratch building and paint are top notch.
Definately one of my favorites aswell! I really liked your Sulaco build by the way.
 
Been chipping away at the paintjob almost every night this week.

Sealed the laquercoats and appliead a several filters. I did go a bit too far, loosing some of my previous work, but I am ok with that.
Went to town on it with oils. Things get dark and uniform pretty fast, so I did a light white/grey wash on the entire model and airbrushed very dilluted offwhite around. Then went back to the oilpaint and pinwash.
This process gives a very nice layered effect. The oils take some time to dry though, even in very thin layers.

66.jpg


67.jpg


68.jpg


69.jpg


71.jpg


While it was drying I cut out a bunch of decals and applied them after a few days. They are participating in the final rounds of weathering to blend in better.

72.jpg


73.jpg


74.jpg


Got the displaybase pieces mostly done and mocked up.

75.JPG


76.jpg


77.jpg


78.jpg


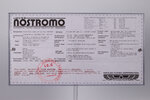
I couldn't agree with myself about the plaque design, so I imagined what a registration certificate would look like for one of these ships instead.
Have to admit I'm very pleased with this piece.

79.JPG


80.png


I think the build is on the final stretch. Stay tuned, healthy and model hard!
Thanks for looking.
 
Excuse me while I pick my jaw up off the floor!

That lighting looks great, especially for the scale. Sometimes the models wind up looking like Christmas trees but the color for the LEDs look perfect
 
This build is wrapping up now, to the shelves with it! Ended up with heavier weathering than I set out for initially, but im fine with it at this stage.
Anyway, Im pleased with how it came out.
Im thinking of maybe starting another of Halcyons PVC kits thats in my stash, it should complement the Nostromo quite nicely. We`ll see...

PVC wasnt as difficult to work with as I thought initially, but I definately still prefer styrene or resin. Everything has its use I guess.
I will probably think a bit different about fit and kit-quality going forwards though, having one of these "older" kits under my belt.

Thanks for following along! :)
 

Attachments

  • 1.jpg
    1.jpg
    5.6 MB · Views: 281
  • 2-1.jpg
    2-1.jpg
    6.2 MB · Views: 393
  • 3.jpg
    3.jpg
    6.6 MB · Views: 311
  • 3-1.jpg
    3-1.jpg
    4.7 MB · Views: 293
  • 3-2.jpg
    3-2.jpg
    8.2 MB · Views: 219
  • 3-3.jpg
    3-3.jpg
    7.7 MB · Views: 193
  • 3-4.jpg
    3-4.jpg
    3.7 MB · Views: 206
  • 3-5.jpg
    3-5.jpg
    6 MB · Views: 237
  • 3-6.jpg
    3-6.jpg
    5.8 MB · Views: 203
  • 3-7.jpg
    3-7.jpg
    6.6 MB · Views: 213
  • 3-8.jpg
    3-8.jpg
    6.5 MB · Views: 286
  • 3-9.jpg
    3-9.jpg
    5.1 MB · Views: 258
  • 5.jpg
    5.jpg
    7.2 MB · Views: 248
  • 5-1.jpg
    5-1.jpg
    7.2 MB · Views: 230
  • 15.jpg
    15.jpg
    8.2 MB · Views: 222
  • 16.jpg
    16.jpg
    8.3 MB · Views: 213
  • 17.jpg
    17.jpg
    4.3 MB · Views: 215
  • 18.jpg
    18.jpg
    8.9 MB · Views: 321

Your message may be considered spam for the following reasons:

If you wish to reply despite these issues, check the box below before replying.
Be aware that malicious compliance may result in more severe penalties.
Back
Top