Koda Vonnor
Well-Known Member
Some may know that I am building a Rahm Kota armor costume from The Force Unleashed II. I had originally planned to use the lightsaber from my TFU costume with the new armor, but since it was designed off of the action figure and not the game renders, the accuracy was lacking.
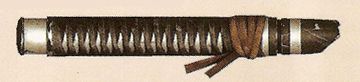
Other than the in-game cut-scenes, the only official visual reference in existence was the low-resolution shot seen here:
Based on this, and having viewed all of the game cut-scenes in HD ad nauseam, I drew up some 2D orthos and commissioned Don Close of Do-Clo Props to build the frame and electronics:
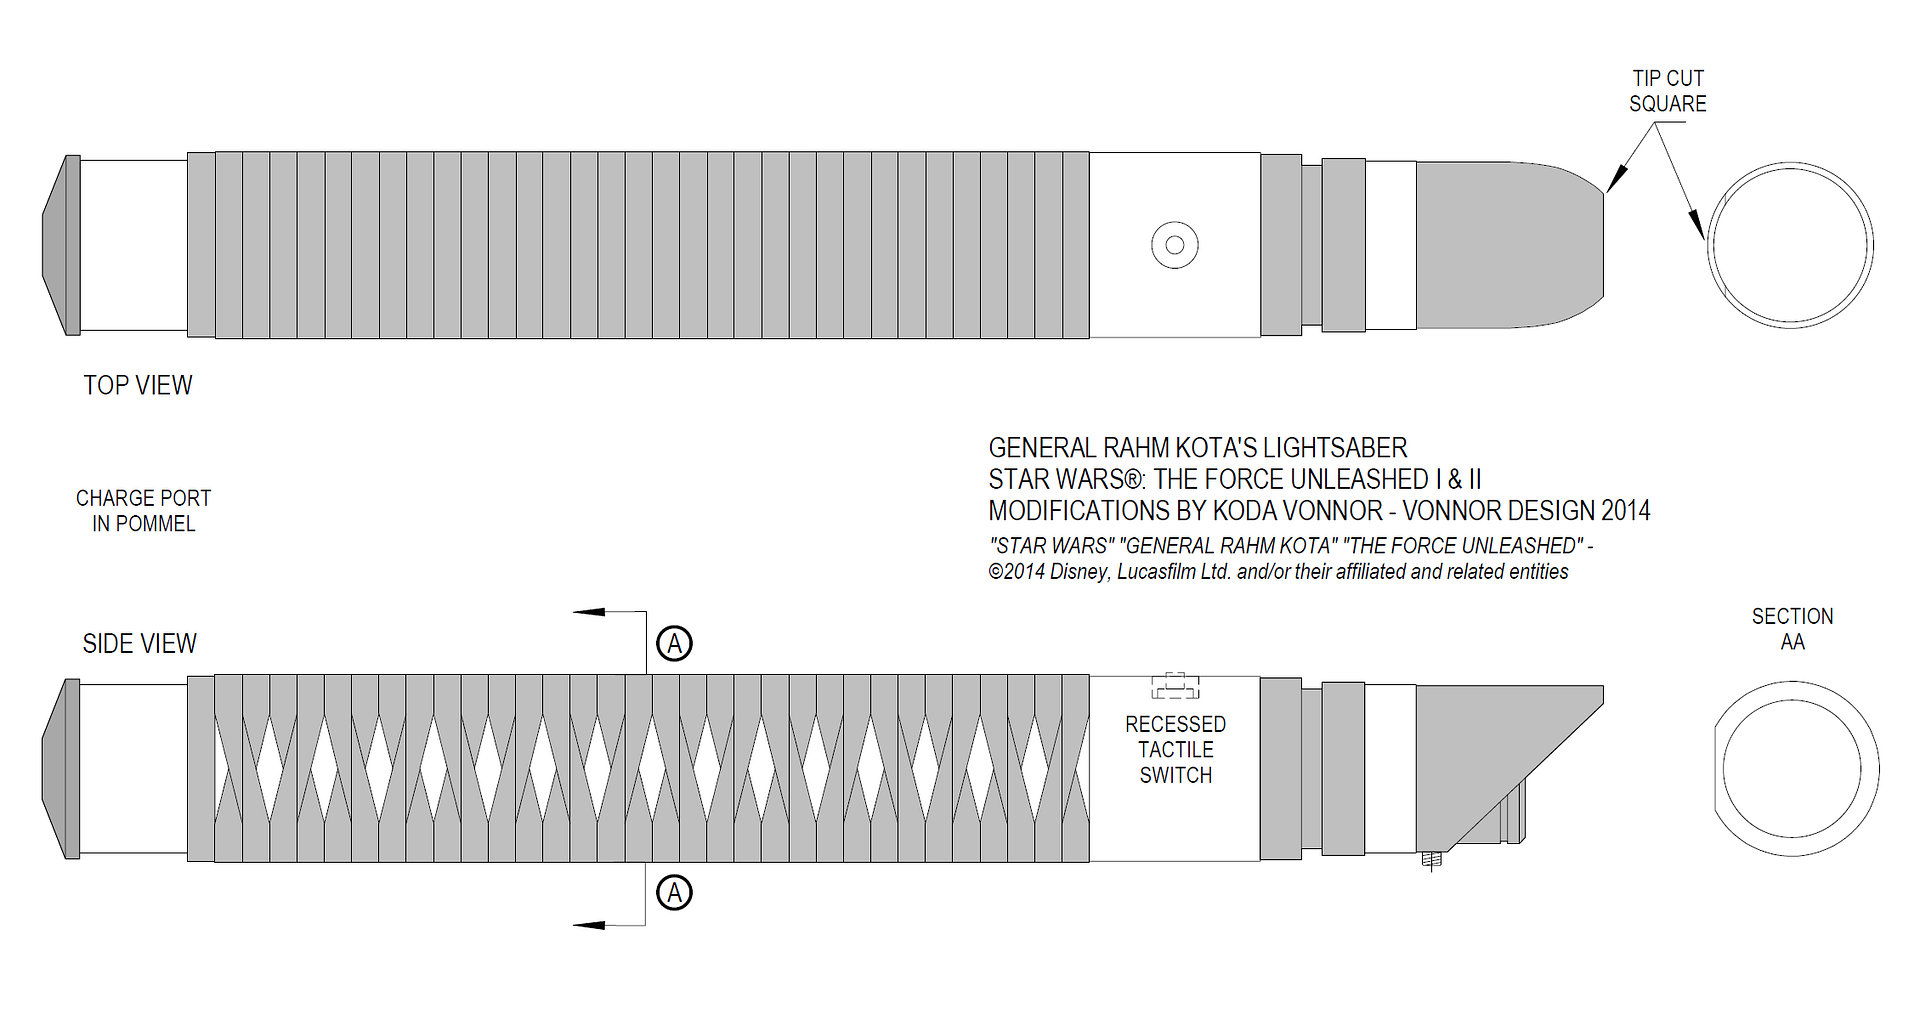
The most interesting (at least to me) and challenging features of the design is that all of the in-game references suggest the diamond pattern of the hilt wrap is only on one side of the hilt, with the opposite side being solid black wrap. The topology of this enigma eluded me for a very long time, but after much experimentation I discovered a way to visually simulate the pattern.
And so I present, from Star Wars: The Force Unleashed, Jedi General Rahm Kota's lightsaber:
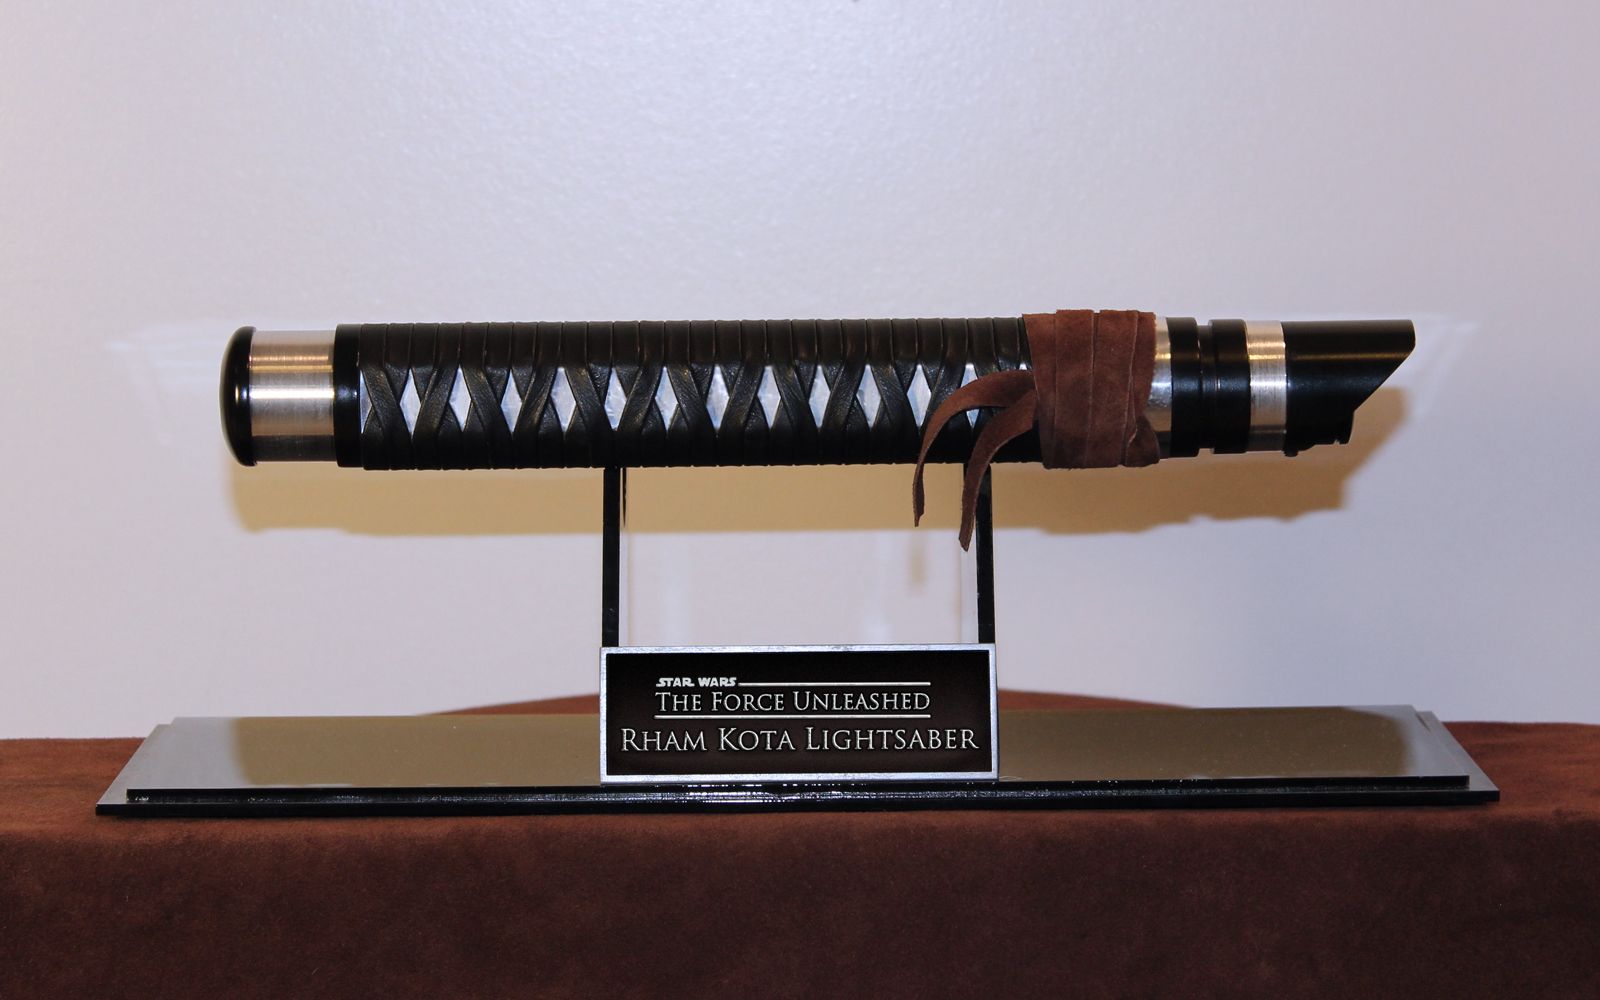


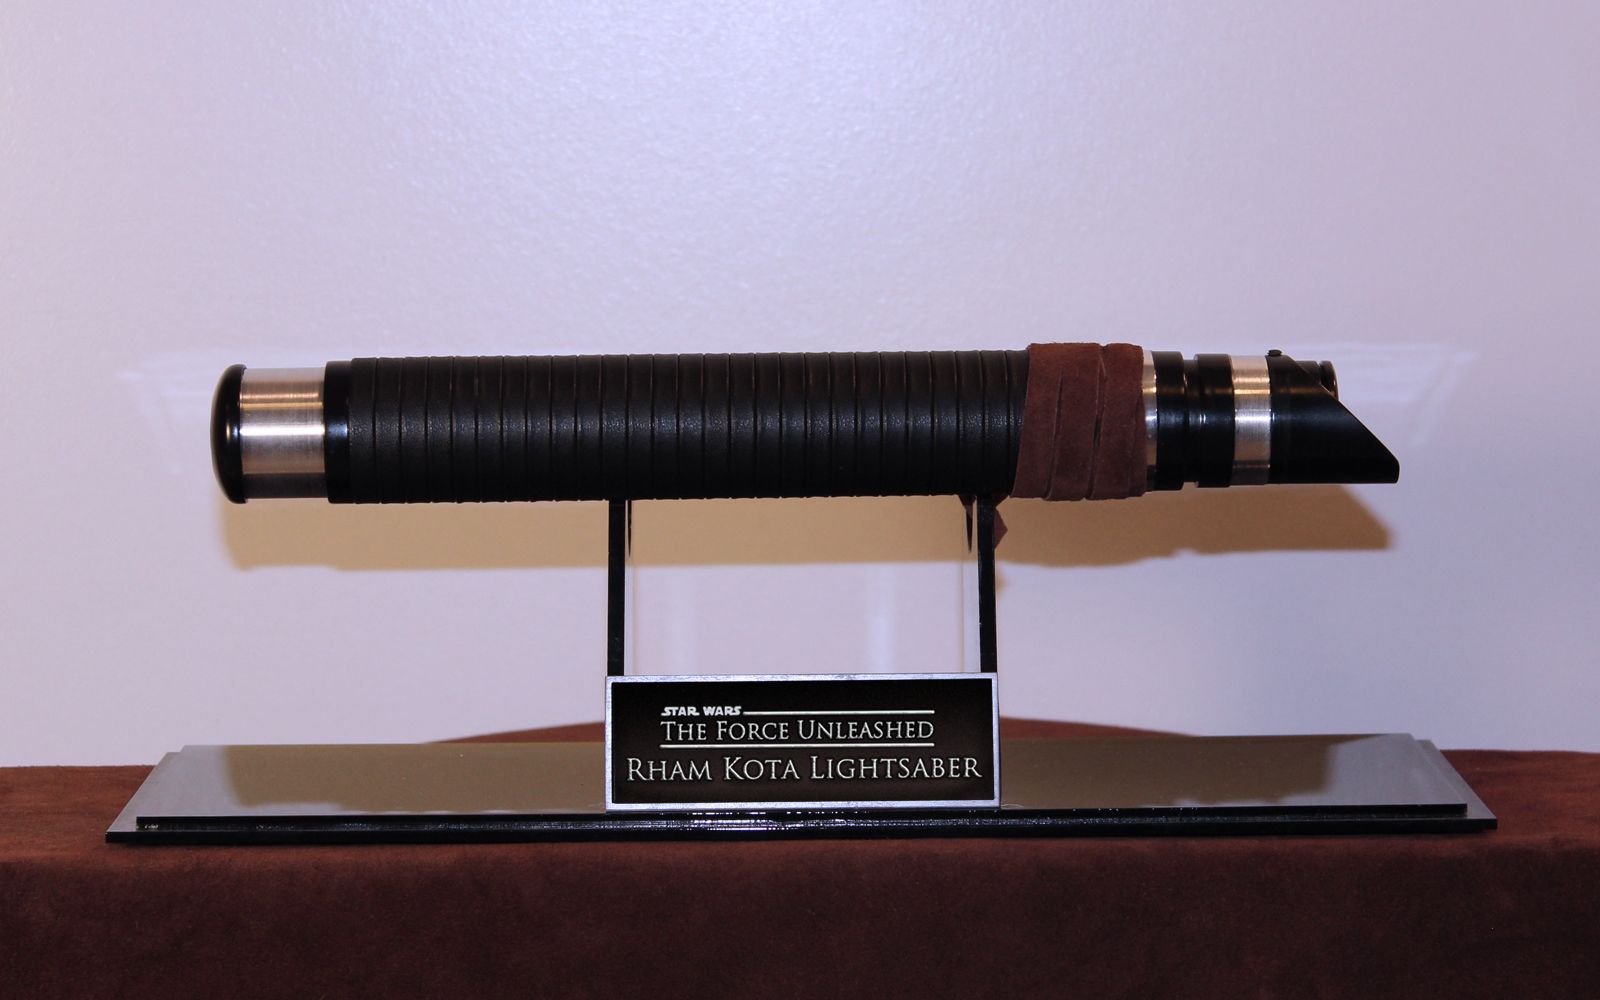
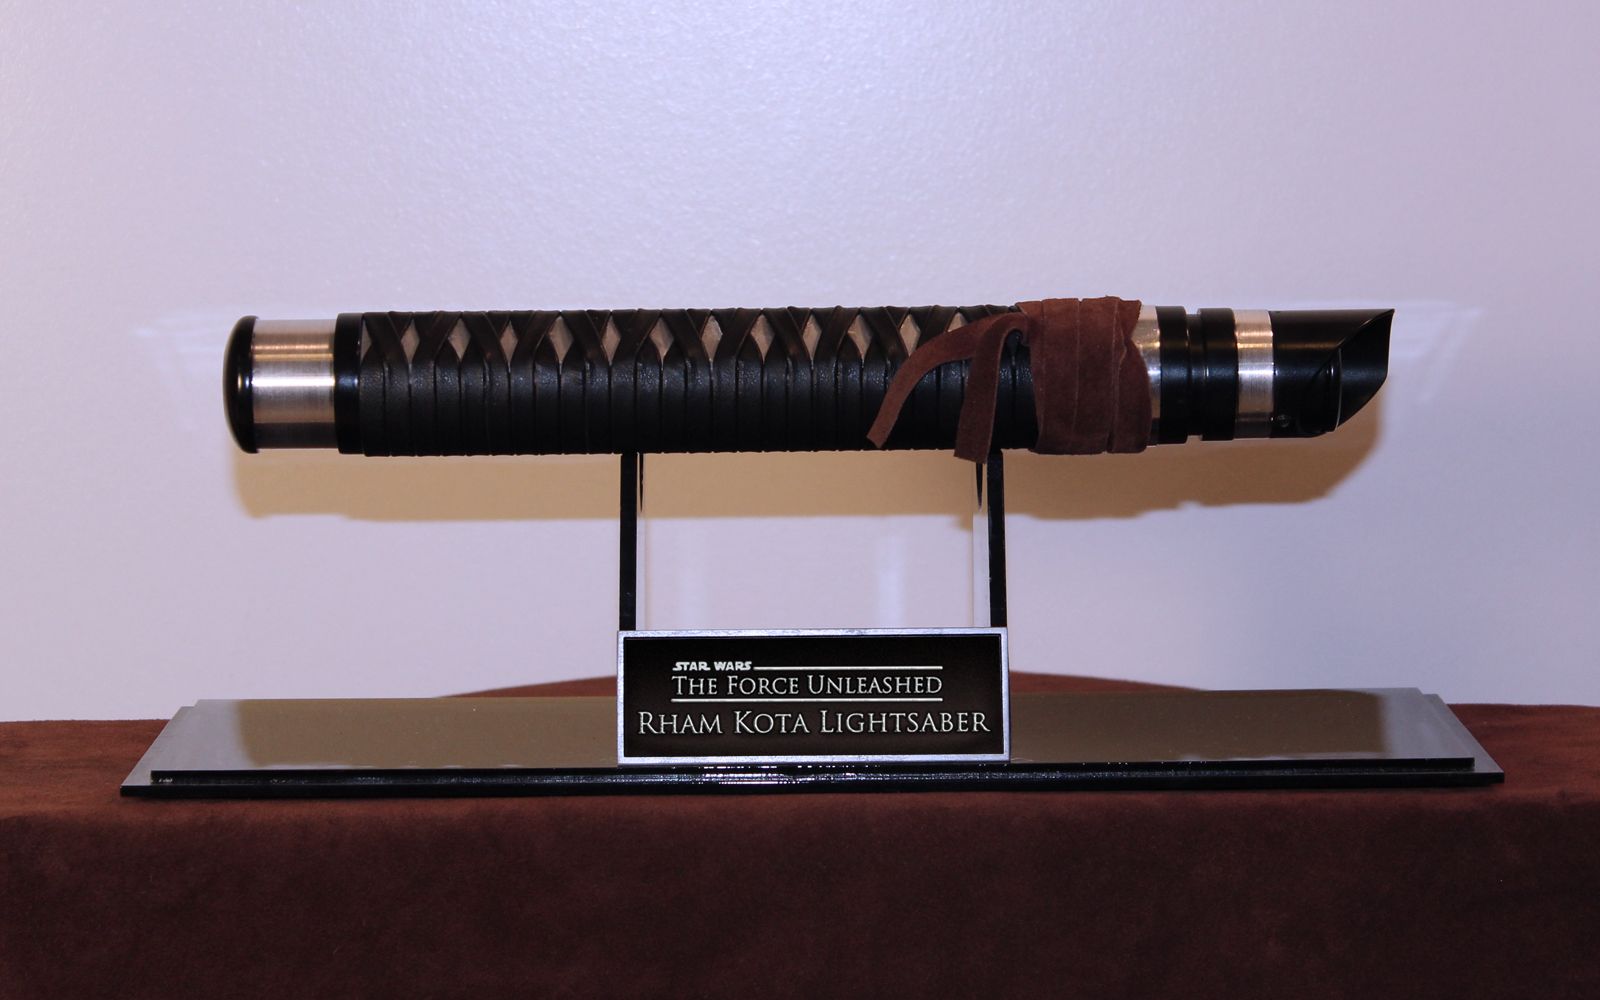
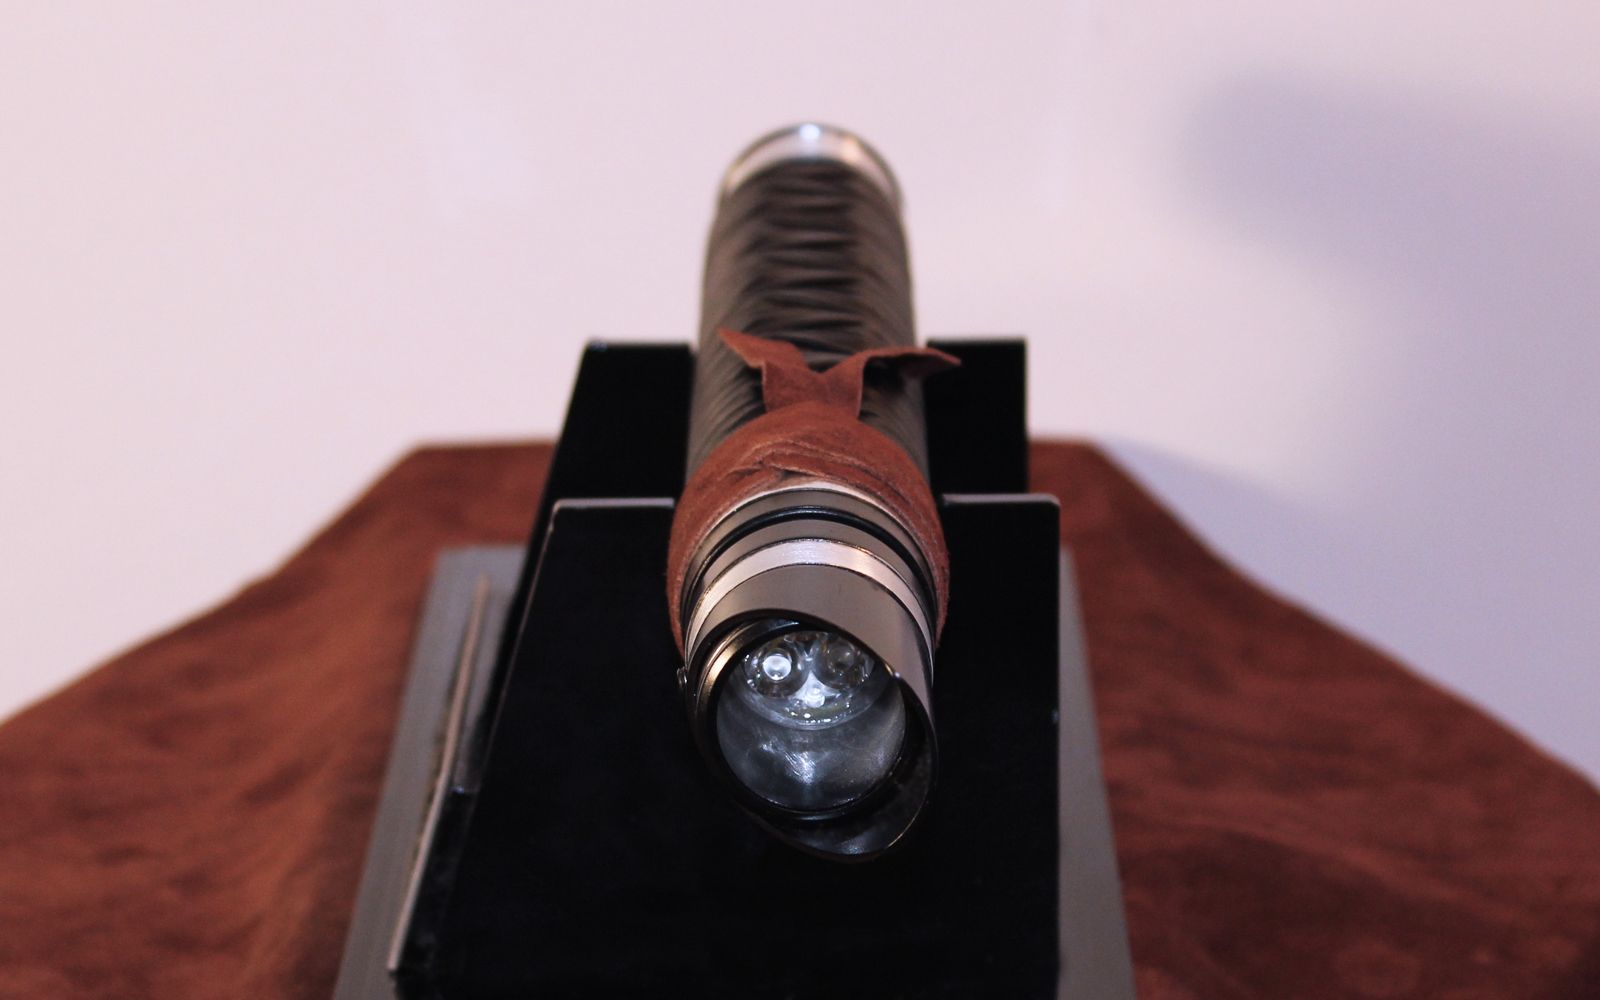
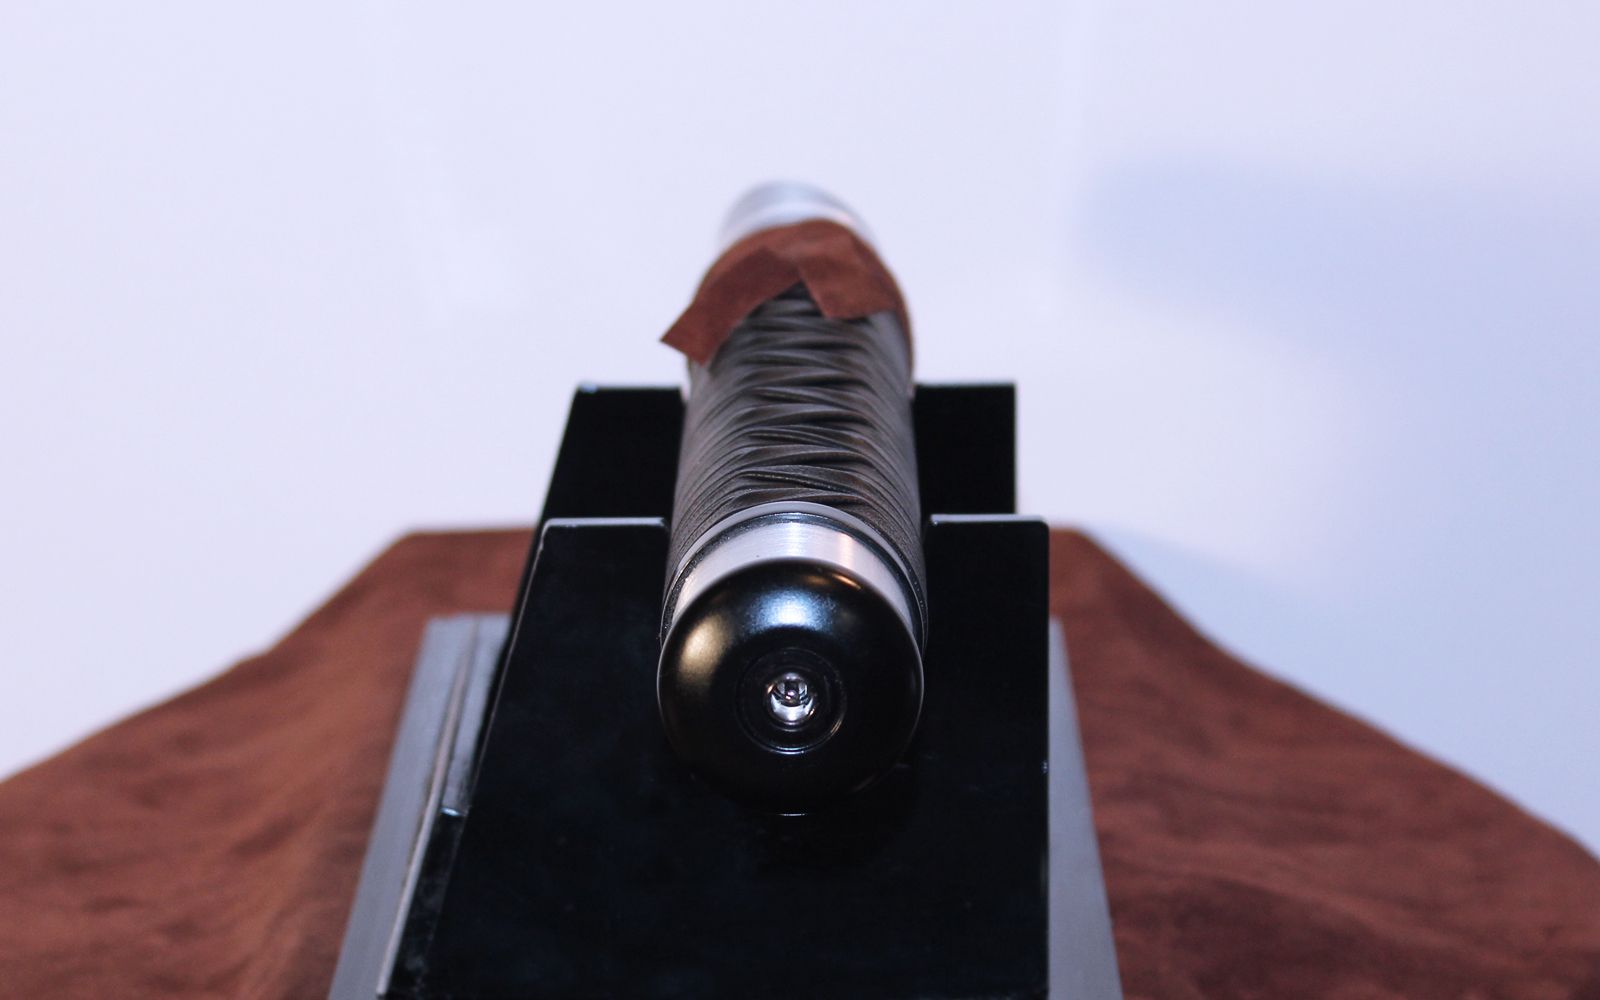
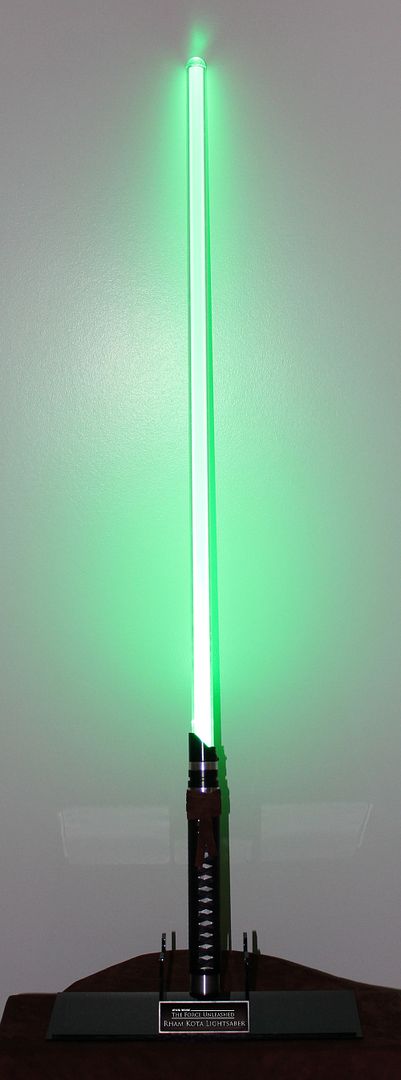
This lightsaber features a green Tri-Rebel LED with a driver for fade-in/fade-out and flicker, and no sound with a 7.4v power pack. I believe it to be the first replica in existence with the screen-accurate single-side diamond wrap pattern, as well as an extremely close scale match to the reference shown above. It will be worn with the TFU II Rahm Kota armor when the costume is completed.
~ Vonnor
Other than the in-game cut-scenes, the only official visual reference in existence was the low-resolution shot seen here:
Based on this, and having viewed all of the game cut-scenes in HD ad nauseam, I drew up some 2D orthos and commissioned Don Close of Do-Clo Props to build the frame and electronics:
The most interesting (at least to me) and challenging features of the design is that all of the in-game references suggest the diamond pattern of the hilt wrap is only on one side of the hilt, with the opposite side being solid black wrap. The topology of this enigma eluded me for a very long time, but after much experimentation I discovered a way to visually simulate the pattern.
And so I present, from Star Wars: The Force Unleashed, Jedi General Rahm Kota's lightsaber:
This lightsaber features a green Tri-Rebel LED with a driver for fade-in/fade-out and flicker, and no sound with a 7.4v power pack. I believe it to be the first replica in existence with the screen-accurate single-side diamond wrap pattern, as well as an extremely close scale match to the reference shown above. It will be worn with the TFU II Rahm Kota armor when the costume is completed.
~ Vonnor