Foam insert into resin casts: Any experience?

Volpin

Sr Member
RPF PREMIUM MEMBER
I've been working on a few rifle castings recently, and in the past I've tried hand slushing these to be hollow casts. My success with this technique was pretty low, and a lot of them ended up warped or too thin in some spots. I'd say the failure rate was 30%. With a big rifle body mold, that makes for some expensive mistakes.

I had the idea to make a foam insert trimmed to an approximate interior shape that I wanted the empty cavity to be. The idea here is to pour one side, embed the insert, let cure about halfway, then pour the rest of the cast.

6755728123_f3a381c758_b.jpg


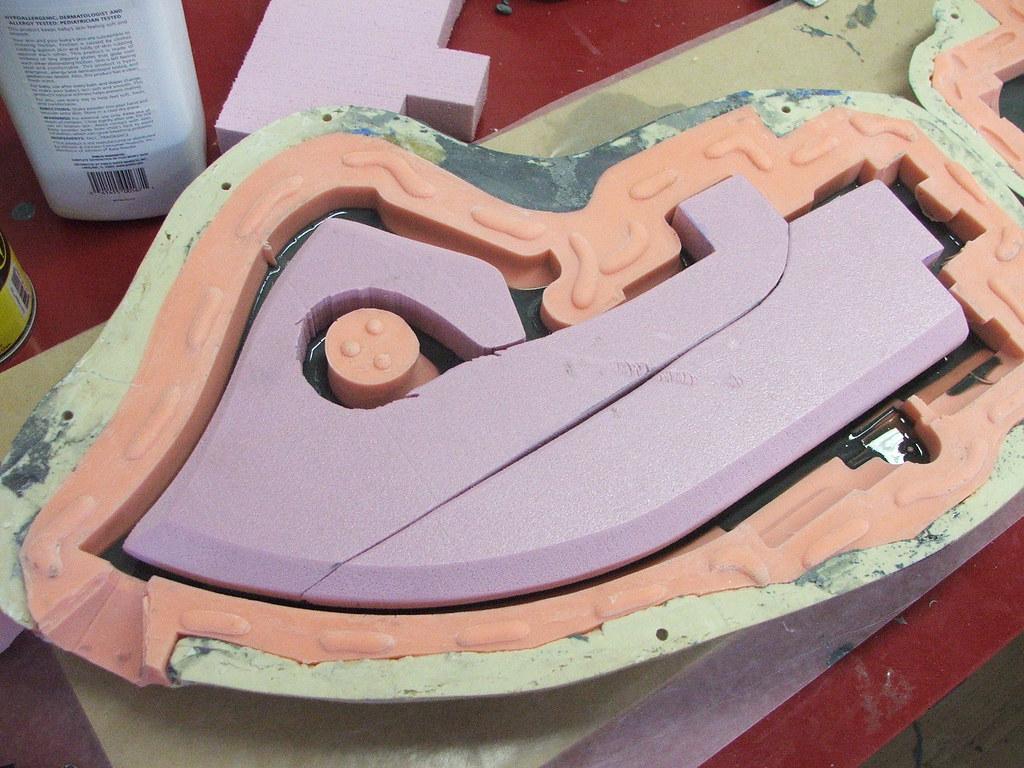
I'm using SmoothCast 321, long pot life and cure time to give me a lot of time to pour these casts and position the insert. I've actually already done the barrels and rear stock pours with really good results.

The only hurdle I've come across is the resin's tendency to bubble along the foam somewhat:

6755728493_dac8c5a429_b.jpg

6755728753_6c6cc6b4f2_b.jpg


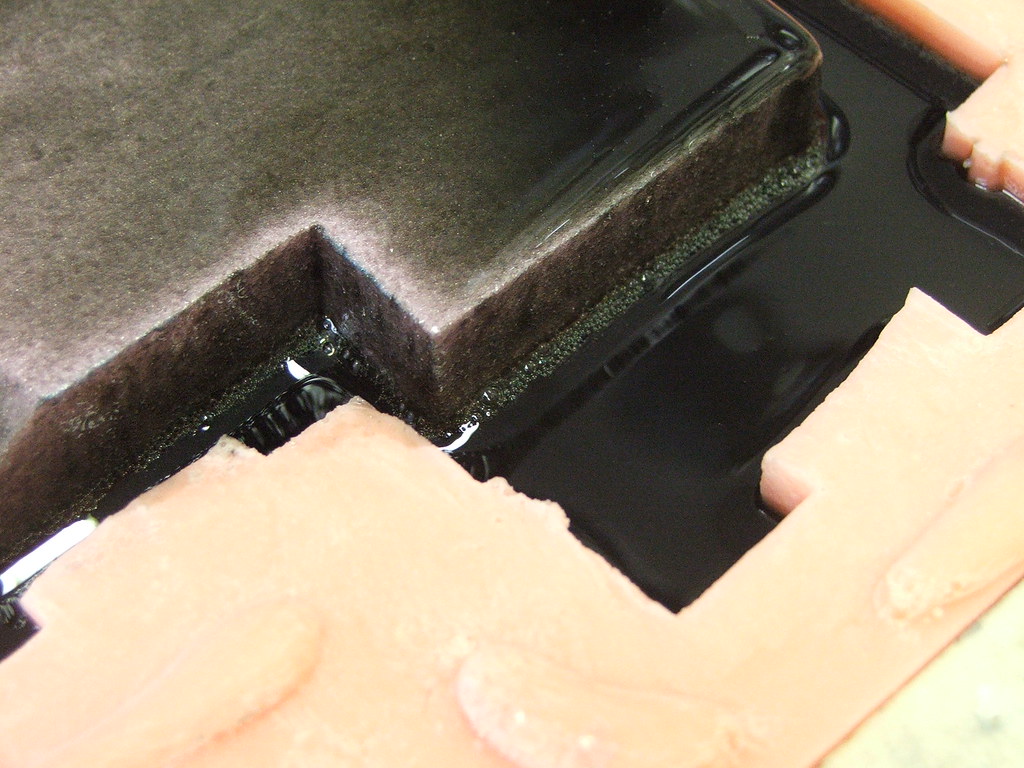
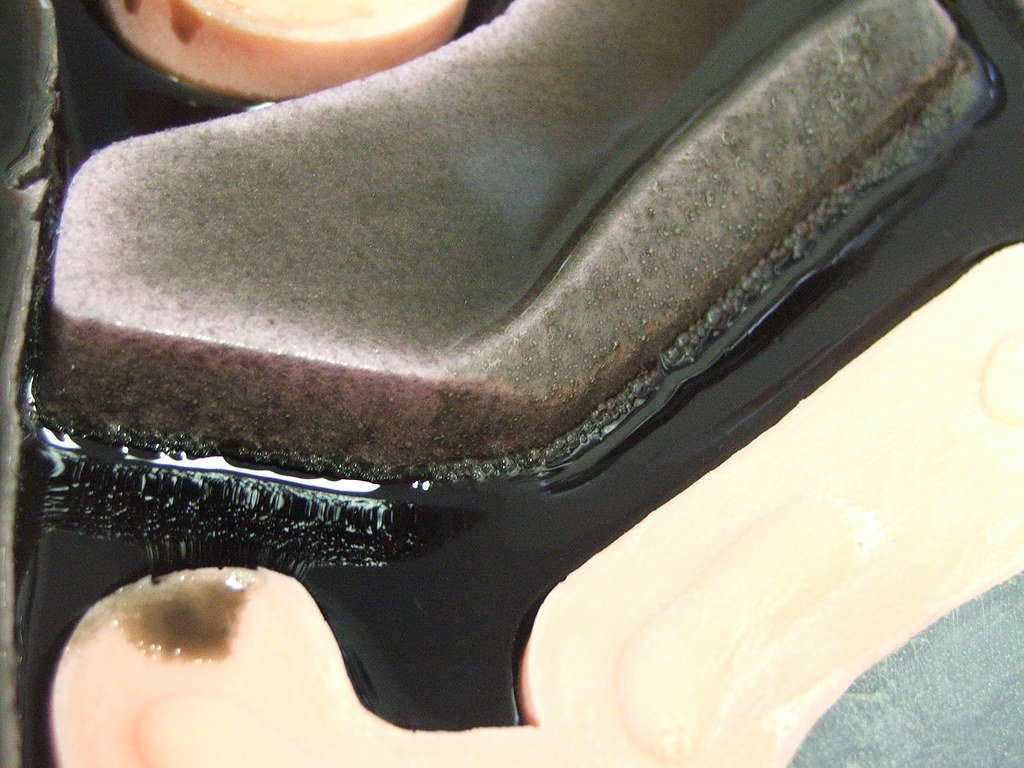
To combat this as much as possible I've taken to pouring a small amount of resin over the foam insert to "seal" it somewhat, then joining the mold halves and pouring the whole thing. Without that step, these little bubbles would continue to rise from the foam block and cause a lot of pits and holes in the upper part of my cast.

I tried wiping the foam down with alcohol to get rid of any moisture that might be on it, but I really think this is just the nature of the porous foam.

These have been a pretty decent success so far. Lightweight casts, and the foam insert keeps the walls rigid even if they are somewhat thin.

Has anyone else tried a technique like this before? Is there a more appropriate foam to use instead of the polystyrene I've been trying out so far? I'd really like to know anyone's experience with a method similar to this; might be useful in a ton of pour molds to make things lighter but keep the rigidity.
 
Have you thought of doing a slush cast and then back filling with 2 part polyurethane foam? I would do it while still in the mold to help avoid blow outs and distortion... but it might be a way to go.
 
I've tried that in the past with similar limited success. The pressure the foam puts on the resin was enough to balloon out the casting almost every time.

I was using Foam-It 5, so pretty low expansion.
 
i've tried this once or twice before but with a different foam. It worked no problem although if you use an expanding foam it should be even lighter :)
 
I have long considered the same problem for large castings such as the D9 Arc Generator, or the long clone rifle: how to get a foam core and still get all the suface detail in the casting.

My only solution, and mind you, this is theory, as I have not yet applied it, is to create a multi-piece mold that would cast the part in two halves. Then the two halves would be assembled in the mold.

This is not easily visualized without pictures, but here goes:

1) Standard two-part mold with right and left halves with all the right location points and bolt holes.

2) line each half of mold with 1/8" tooling wax ( FMSC - PL165 Regular Sheet Wax 12" x 24" (Plain back) - Inches ) This represents the wall thickness of the resin. Add sprues for air bleed holes and

3) create new mold half. This is where pictures would help, but essentially you are molding the interior of the part, using the the original mold halves, original mold locators, and bolt holes. Your two-piece mold just became a four-piece mold. When the wax is removed, a 1/8" cavity remains between the 1st mold half, and the 2nd mold half. So when resin is poured into the cavity, you are casting half a hollow piece. When the two original mold halves are joined, they form a hollow part. (if they were glued together)

Here is where the explanation begins to get a little confusing, so let me know if it makes sense after reading this:

4) Once the 2nd mold half is removed, the wax may, or may not remain in the 1st mold half. Either way, fill the 1st mold cavities to the top with clay. This needs to be level with the top of the mold, or slightly below the top of the parting surface. This represents the space needed for the foam.

5) make mold half #3. This probably doesn't need to be RTV, as there is no detail, just a flat surface. This mold half still uses all the same location points and bolt holes from the 1st mold half. This makes 6 (six) pieces to the mold. the 1st mold is the outside surface, the 2nd mold makes the hollow shell and leave room for a foam core, and the 3rd mold make the foam core.

6) assemble the 1st and 2nd halves of the right and left sides of the part. Pour resin and let set up.

7) remove 2nd mold half from 1st mold half, and what remains is the resin shell (half)

8) asseble the 3rd mold half to 1st mold half, with cured resin half still inside. pour 2 lb A/B foam and let cure. (good bleed holes are important here, as foam will expand to fill cavity) Now remove 3rd mold halves from 1st mold halves, and you are left with 2 (1/2) foam parts with a resin skin.

9) you can use resin or epoxy. brush a layer onto the foam core and assemble 1st mold together. The epoxy will be squeezed out and fill the space between the two hlaves. When set, separate teh two halves of 1st mold, and you should have a part that is foam filled with a 1/8" skin of resin.


After reading all that, does that make sense? This is only theory, as that is 3X the amount of mold making for one part. You would need to make many casts to justify the work and cost involved.
 
Have you thought of doing a slush cast and then back filling with 2 part polyurethane foam? I would do it while still in the mold to help avoid blow outs and distortion... but it might be a way to go.

This is how I cast the portal guns, though the parts are smaller than what Volpin is working with so maybe that is why I don't have problems with bowing. Them being curvish in shape probably helps too.

Volpin, I'd give slush casting + foam another try. Maybe do an extra layer of resin first, and give it time to set before adding the foam. Make sure the extra foam can escape. If you still have trouble with bowing, consider adding some sort of bracing to your mother mold, maybe some strips of wood.

Also, don't cast drunk!
 
Foam it 5 is still a pretty high expansion foam. I would either go with a higher density foam that doesn't expand as much... or an even lower density that collapses a bit more and doesn't build quite as much pressure.

Have you tried the use of cotton flocking in your resin? Do a thin slush cast of each side of your mold for the fine detail... then mix a second coat of resin with cotton flocking added to thicken and strengthen it. I used this method as well as back filling with foam to make these...
Rock-TNFCInstallation_2011-07-0618.jpg

I got stuck with some of the worst molds you can imagine to make these and they were a pain in the ***** to say the least... but I think I did a good job in the end. It is for a display for NorthFace stores...
 
I dont do a lot of casting, but I think if the bubbles are from air trapped in the foam being replaced by the resin, or out gassing from the resin coming up along edges of the foam, then changing the air pressure around the mold would probably help. Putting the mold in an airtight container and pulling a small vacuum on it, may help. At the least it would make it harder for the surface tension of the bubbles to remain long enough to harden.
 
I have long considered the same problem for large castings such as the D9 Arc Generator, or the long clone rifle: how to get a foam core and still get all the suface detail in the casting.

My only solution, and mind you, this is theory, as I have not yet applied it, is to create a multi-piece mold that would cast the part in two halves. Then the two halves would be assembled in the mold.

This is not easily visualized without pictures, but here goes:

1) Standard two-part mold with right and left halves with all the right location points and bolt holes.

2) line each half of mold with 1/8" tooling wax ( FMSC - PL165 Regular Sheet Wax 12" x 24" (Plain back) - Inches ) This represents the wall thickness of the resin. Add sprues for air bleed holes and

3) create new mold half. This is where pictures would help, but essentially you are molding the interior of the part, using the the original mold halves, original mold locators, and bolt holes. Your two-piece mold just became a four-piece mold. When the wax is removed, a 1/8" cavity remains between the 1st mold half, and the 2nd mold half. So when resin is poured into the cavity, you are casting half a hollow piece. When the two original mold halves are joined, they form a hollow part. (if they were glued together)

Here is where the explanation begins to get a little confusing, so let me know if it makes sense after reading this:

4) Once the 2nd mold half is removed, the wax may, or may not remain in the 1st mold half. Either way, fill the 1st mold cavities to the top with clay. This needs to be level with the top of the mold, or slightly below the top of the parting surface. This represents the space needed for the foam.

5) make mold half #3. This probably doesn't need to be RTV, as there is no detail, just a flat surface. This mold half still uses all the same location points and bolt holes from the 1st mold half. This makes 6 (six) pieces to the mold. the 1st mold is the outside surface, the 2nd mold makes the hollow shell and leave room for a foam core, and the 3rd mold make the foam core.

6) assemble the 1st and 2nd halves of the right and left sides of the part. Pour resin and let set up.

7) remove 2nd mold half from 1st mold half, and what remains is the resin shell (half)

8) asseble the 3rd mold half to 1st mold half, with cured resin half still inside. pour 2 lb A/B foam and let cure. (good bleed holes are important here, as foam will expand to fill cavity) Now remove 3rd mold halves from 1st mold halves, and you are left with 2 (1/2) foam parts with a resin skin.

9) you can use resin or epoxy. brush a layer onto the foam core and assemble 1st mold together. The epoxy will be squeezed out and fill the space between the two hlaves. When set, separate teh two halves of 1st mold, and you should have a part that is foam filled with a 1/8" skin of resin.


After reading all that, does that make sense? This is only theory, as that is 3X the amount of mold making for one part. You would need to make many casts to justify the work and cost involved.

How about a video that shows something similar? Updated - Mold Making - Surface Casting - YouTube

I stumbled onto this last summer when I first started thinking about getting into making props. I was going to use this company until I found Smooth-On has a relatively nearby distributor.
 
I'd maybe try one of Hazelrah's earlier suggestions. I use Foam It! 3 for my casts, and while it has a higher expansion rate, it's not as dense. It will probably fill up the mold, the excess foam will force it into all the little areas (which you want), then push the rest out the pour opening or just stop expanding. Maybe get some trial sizes of the various foams and give it a shot.

Also, I was looking at the spec sheet for the Foam It! series, and I noticed that the pot life for Foam It! 3 is ~30 seconds less than that of the other foams. It might not seem like much, but perhaps the additional pressure being created in that 30 seconds is enough to warp your castings.
 
How about a video that shows something similar? Updated - Mold Making - Surface Casting - YouTube

I stumbled onto this last summer when I first started thinking about getting into making props. I was going to use this company until I found Smooth-On has a relatively nearby distributor.


Yes, similar to this, but since 3 dimensions are required and the core woulf be expanding foam, it is a little trickier. It is the expanding foam that will be this parts undoing. Expanding foam generates a lot of pressure, and can easily distort a part.
 
You might just be having a chemical reaction between the foam and the resin. Just like some spray paints will melt foam. There are lots of foams on the market. you could try a different type or maybe an organic product like homasote, dried out in the oven first. Another thing would be to use an acrylic paint on the foam that you know won't react this the foam or the urethane resin. and create a barrier for the reaction.
 
primarily it is moisture that causes the resin to foam...as long as your detail pour is thick enough the foaming won't affect it. When I was doing the rocks I would do a painted on layer of smooth cast 325... then a thicker coat or 2 of 325 with flocking added... then I would put in chopped styrofoam as filler before filling with foam it 3... the results are a thick hard shell back filled with foam for a solid lightweight casting.
 
I've been working on a few rifle castings recently, and in the past I've tried hand slushing these to be hollow casts. My success with this technique was pretty low, and a lot of them ended up warped or too thin in some spots. I'd say the failure rate was 30%.

I have no experience with resin or castings, and all my knowledge is theoretical, so please excuse if this is a noobish question, but couldn't you brush the resin into the mold to get a uniform thickness?
If you brush a layer of resin into the mold and let it cure and THEN pour some more resin to embed the insert, I don't think that the bubbles should be a big problem
 
couldn't you just seal the foam insert with some elmers glue? that should seal it efficiently enough. no need for all these complicated routes when you can just coat the foam you are already using.
 
This thread is more than 12 years old.

Your message may be considered spam for the following reasons:

  1. This thread hasn't been active in some time. A new post in this thread might not contribute constructively to this discussion after so long.
If you wish to reply despite these issues, check the box below before replying.
Be aware that malicious compliance may result in more severe penalties.
Back
Top