Flux Capacitor build. Now finished!

propmainiac

Sr Member
RPF PREMIUM MEMBER
Hi all
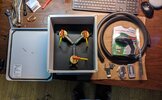
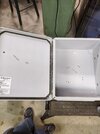
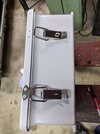
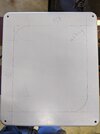
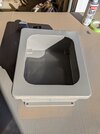
Thanks to Valor I will be adding a flux capacitor to my prop room...I bought Valors old flux capacitor parts..added a set of fairy lights that are battery operated with a timer and remote controlled. Here's a video of the lights. I have an enclosure coming this week.
 

Attachments

  • VID_20200727_214451_768x432.mp4
    89.6 MB
Hi all.....got my plug wires today...installed a nd trimmed. Also my label maker arrived with the red labels. If I have extra plug wires left if anyone needs some.
MVIMG_20210209_191820.jpg
 
This is the box I bought...same dimensions as the stahlin box
 

Attachments

  • Screenshot_20210212-080111~2.png
    Screenshot_20210212-080111~2.png
    275.5 KB · Views: 158
Sooo I now believe I have all the parts for my flux capacitor. I have the enclosure(not a Stahlin but close) hinge and latches for the enclosure, window gasket, label maker and the lights and tubes. Gonna cut the window this week
 

Attachments

  • IMG_20210215_190500~2.jpg
    IMG_20210215_190500~2.jpg
    2.3 MB · Views: 148
Picked up the enclosure for 45 and free shipping on the 'bay. Bought separate hinge and latches..latches are different from the stahlin ones but only 8 dollars.
 
Thanks! The window gasket is for trailer windows and was only 15 dollars. So hopefully this weekend I can start getting the enclosure together...as far as the window, what is the size for the hole that I cut out?
 
I'm not an expert, so I went with these measurements which I found on myfluxcapacitor.com.
 

Attachments

  • fc2-box01.jpg
    fc2-box01.jpg
    51.3 KB · Views: 261
Hi all.....sooo...trying to move along with the build and running into a problem..the lights I'm using came with a remote. The remote doesn't work with the enclosure I bought..I guess the signal can't get through it..any suggestions?
 
Hi all. Solved my problem with the flux capacitor remote lights....
I took out the circuit board extended the wires and have the board on the outside of the case...shouldn't bee seen that easily.
MVIMG_20210306_202630.jpg
 
So I'm gonna try to hide this with a pvc elbow 90 degrees.....exposed wires bug me. I'm hoping the pvc won't interfere with the remote
 
Ok all

Got some more work done on the enclosure for the flux capacitor..attached the hinge. Pain in the you know what...I ended up using screws instead of rivets..I cut the screws down so you wouldn't see them poking through the edge of the lid. I marked out the area to cut out for the window.. I also attached the latches for the box. I used Chicago screws so that I can remove them when I'm ready to paint the box
 

Attachments

  • IMG_20210313_223141.jpg
    IMG_20210313_223141.jpg
    1.5 MB · Views: 110
  • IMG_20210313_223121.jpg
    IMG_20210313_223121.jpg
    1.7 MB · Views: 181
  • IMG_20210313_134633.jpg
    IMG_20210313_134633.jpg
    1 MB · Views: 103
Ok getting closer to being finished....box is painted grey...I've had to make some really short pop rivets to fit the closing brackets. I filled the screw holes with body filler and sanded. I'm hoping to have the plexi this week so I can install the window. That's the last part then final assembly
 

Attachments

  • IMG_20210314_125546.jpg
    IMG_20210314_125546.jpg
    2.6 MB · Views: 108
  • IMG_20210314_163626.jpg
    IMG_20210314_163626.jpg
    1.3 MB · Views: 120

Your message may be considered spam for the following reasons:

If you wish to reply despite these issues, check the box below before replying.
Be aware that malicious compliance may result in more severe penalties.
Back
Top