Re: First Project: McQuarrie 1/72 X-Wing-COMPLETED (FINALLY!!)
Okay...must apologize for the 2 month delay. Things really ramped up at work and at home and I simply haven't had the time that I wanted into this, but at last it's finished. I wanted to post a wrap up of my first build, so there are a bunch of progress pics.
After finishing the X-Wing, I decided I wanted to try my hand at scratch building a display base. I wanted to be as faithful to McQuarrie's original painting, but also wanted to do a bit of kit-bashing.
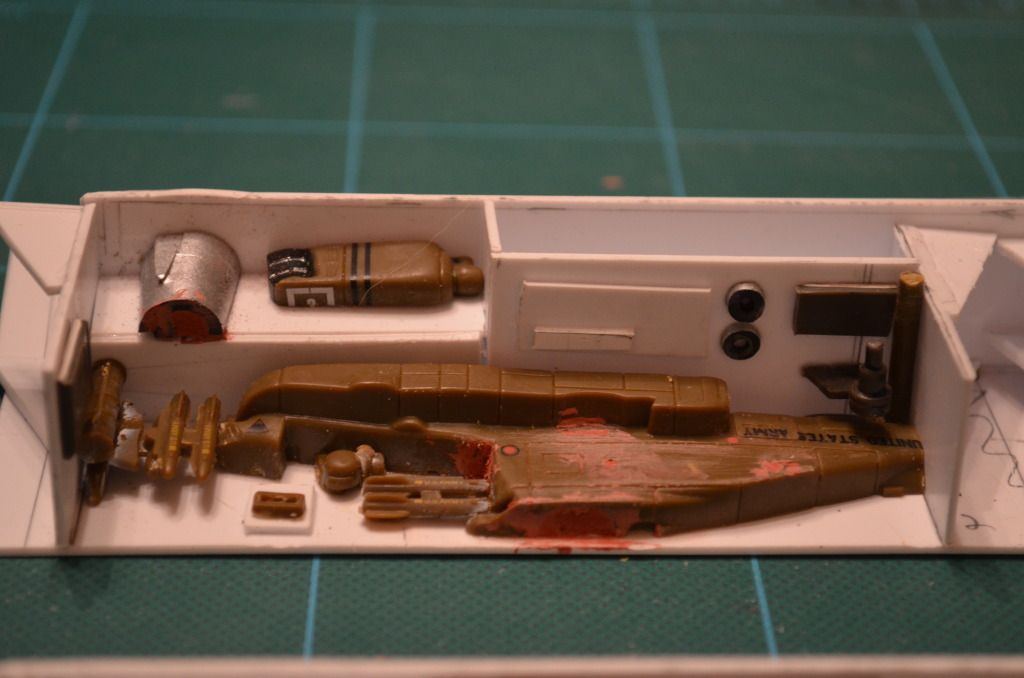
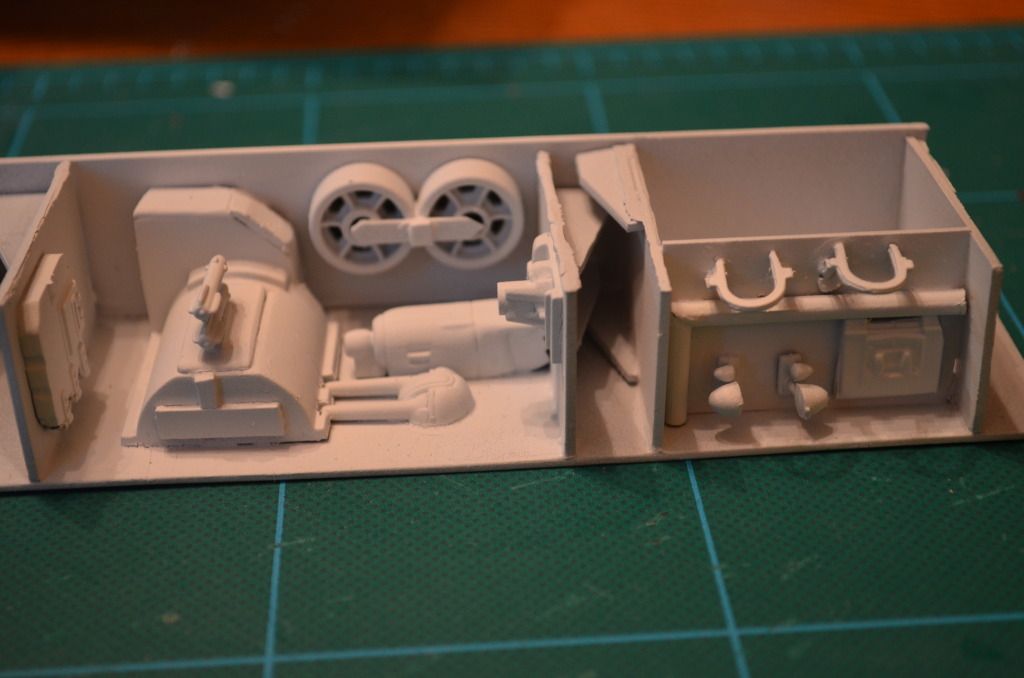
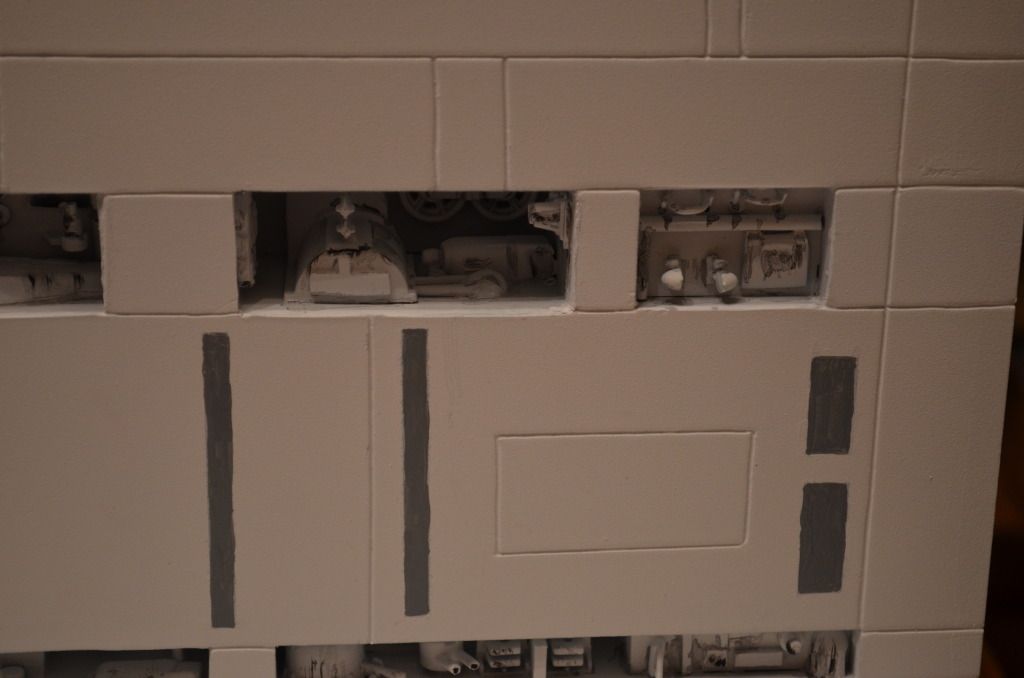
First, I made some recesses which would make up the wall. I kit bashed some models I picked up.
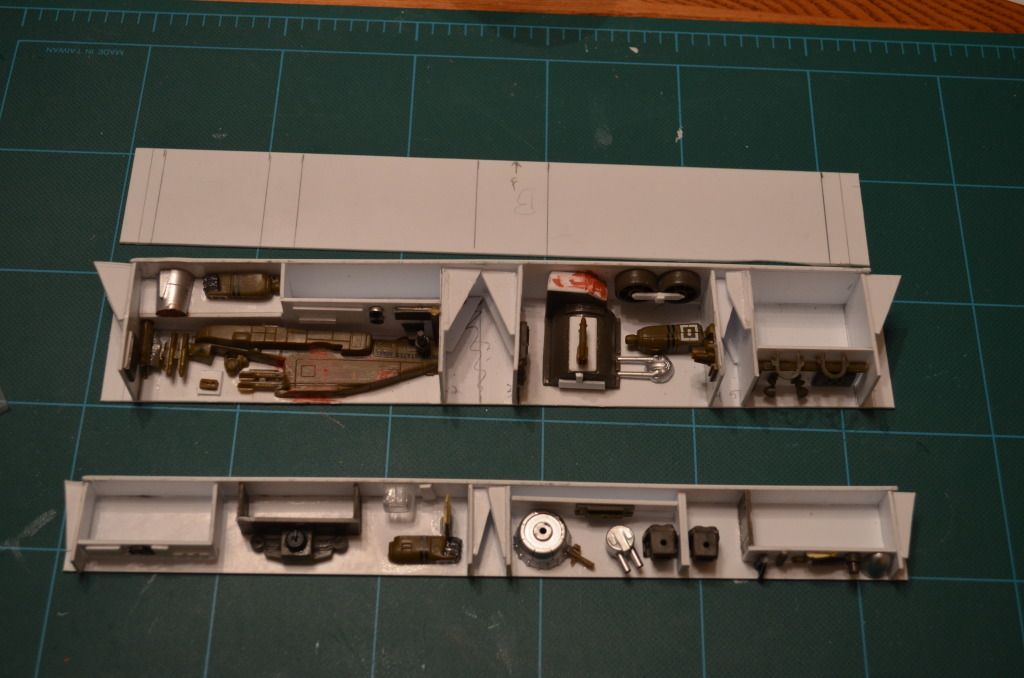
I didn't really have any designs in mind, but wanted to stick to military kits.
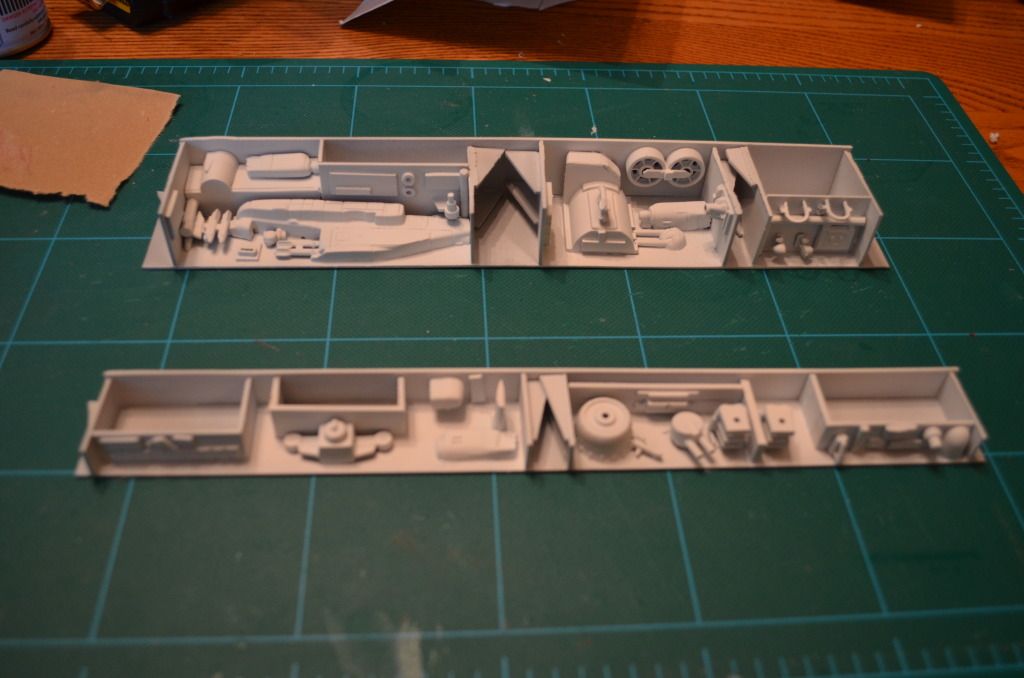
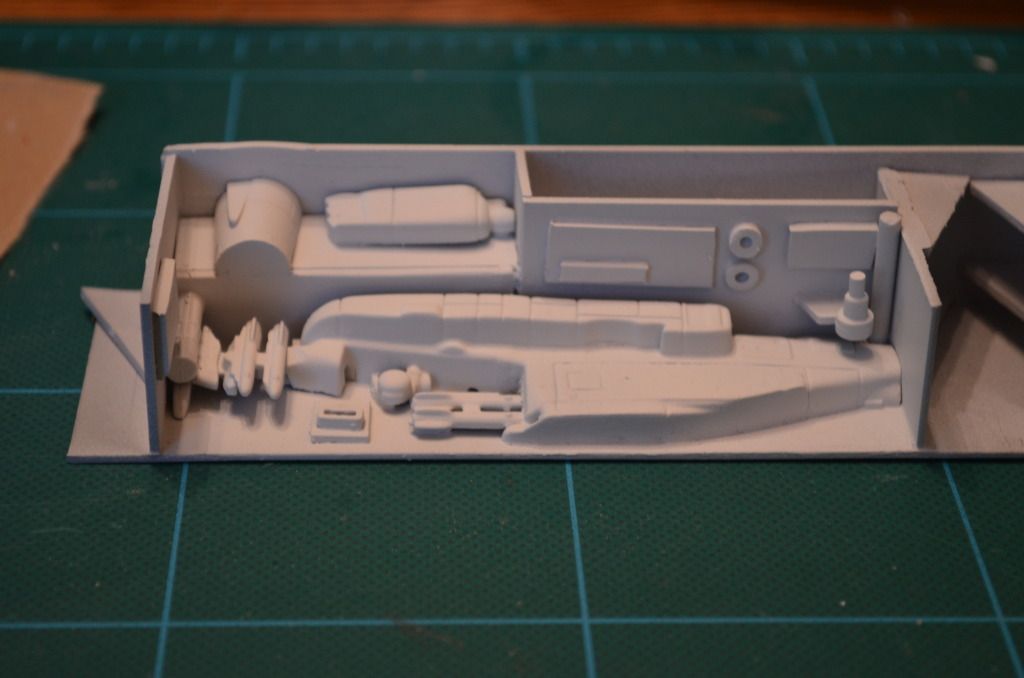
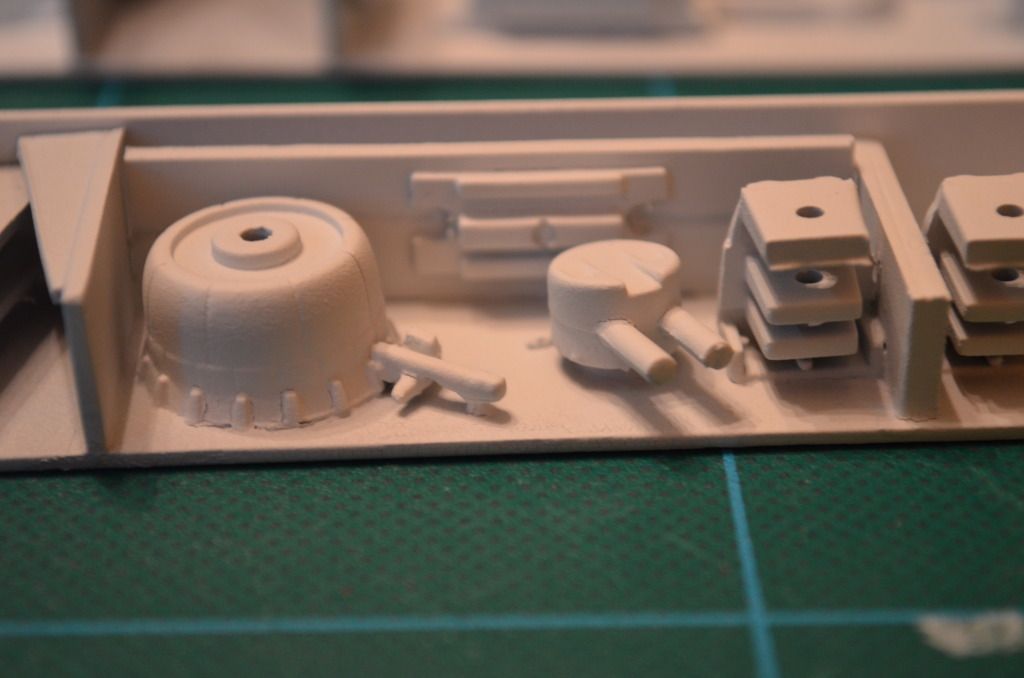
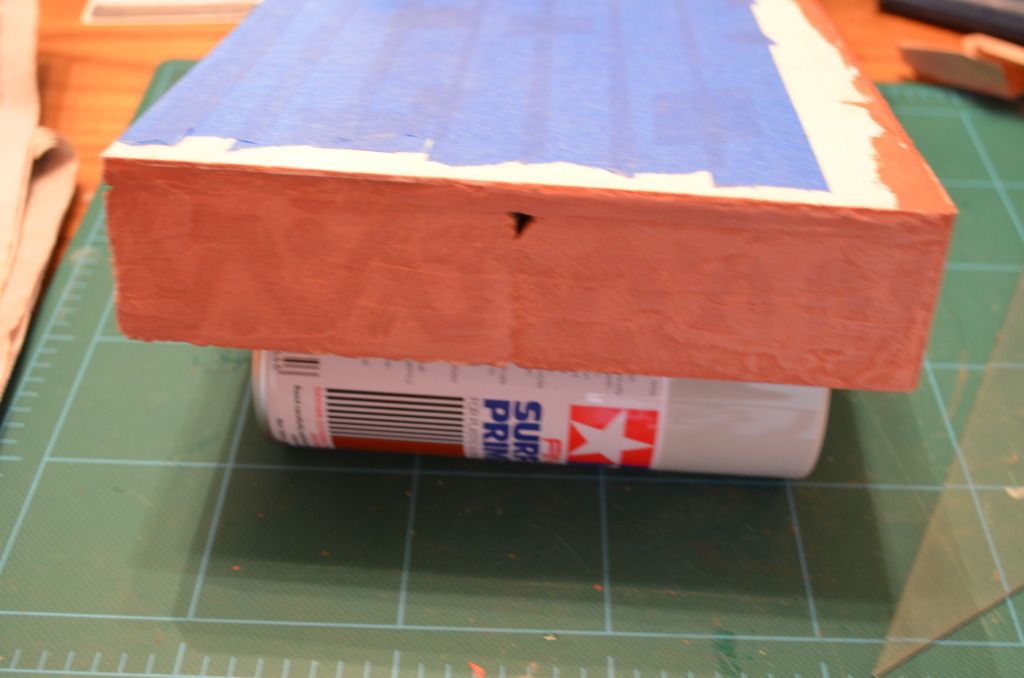
All primed and ready to build my back wall.
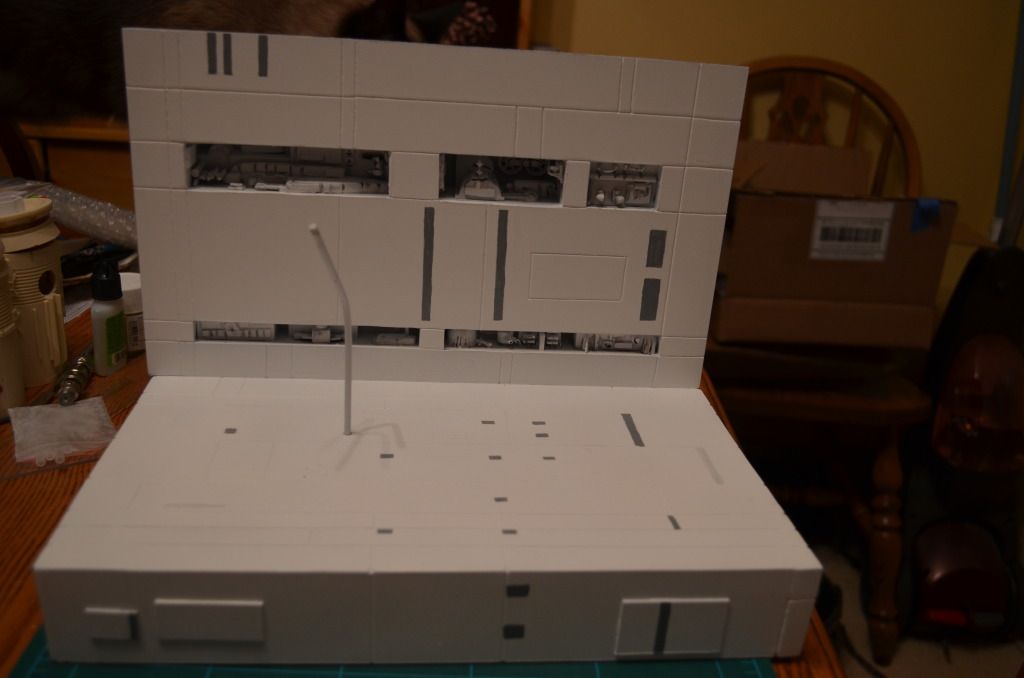
And the back wall is finished...now on to the base itself.

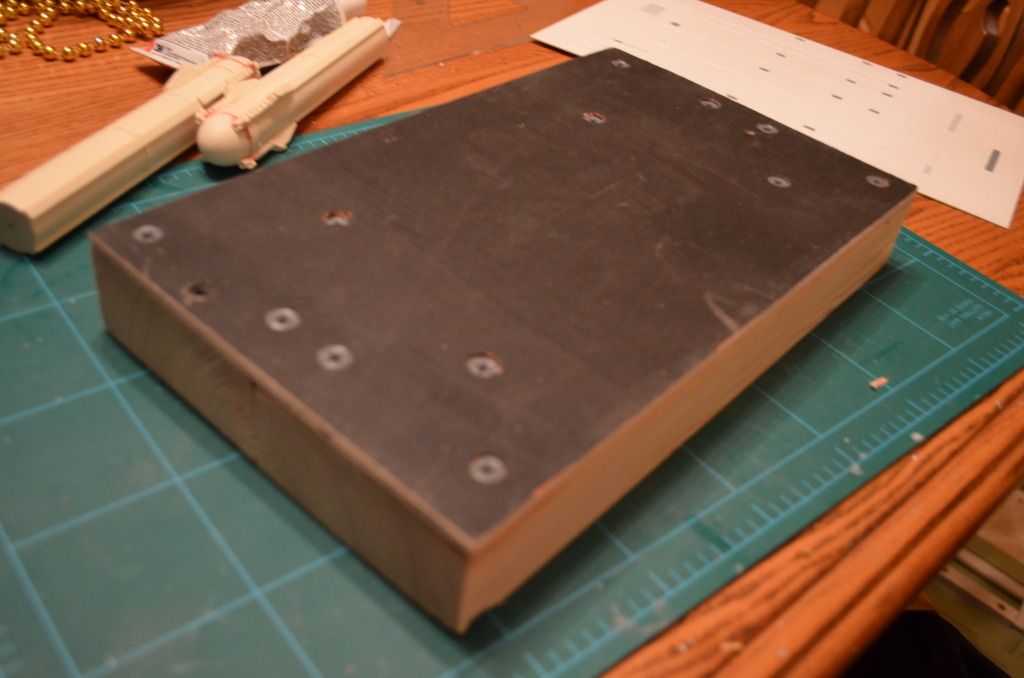
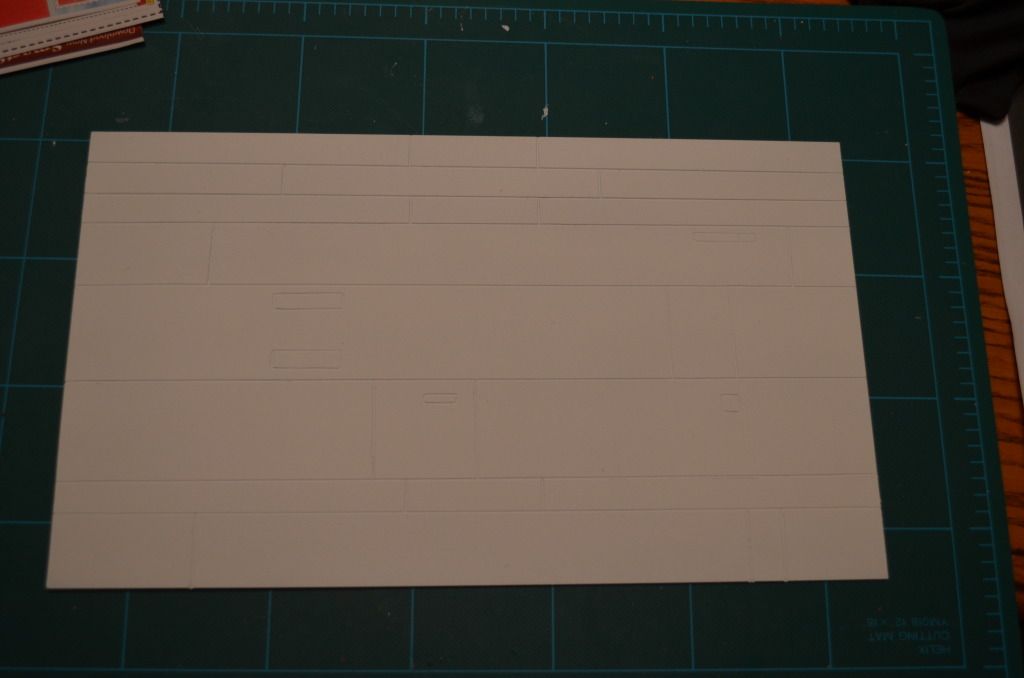
With cats in the house who like to jump up on my desk and other areas, I decided I should do something pretty solid for the base. So, I attached two 2x4s together using a sheet of lauan. I took a regular sized sheet of styrene and tried my hand at scribing some panels to resemble the bottom of the trench in the concept painting.
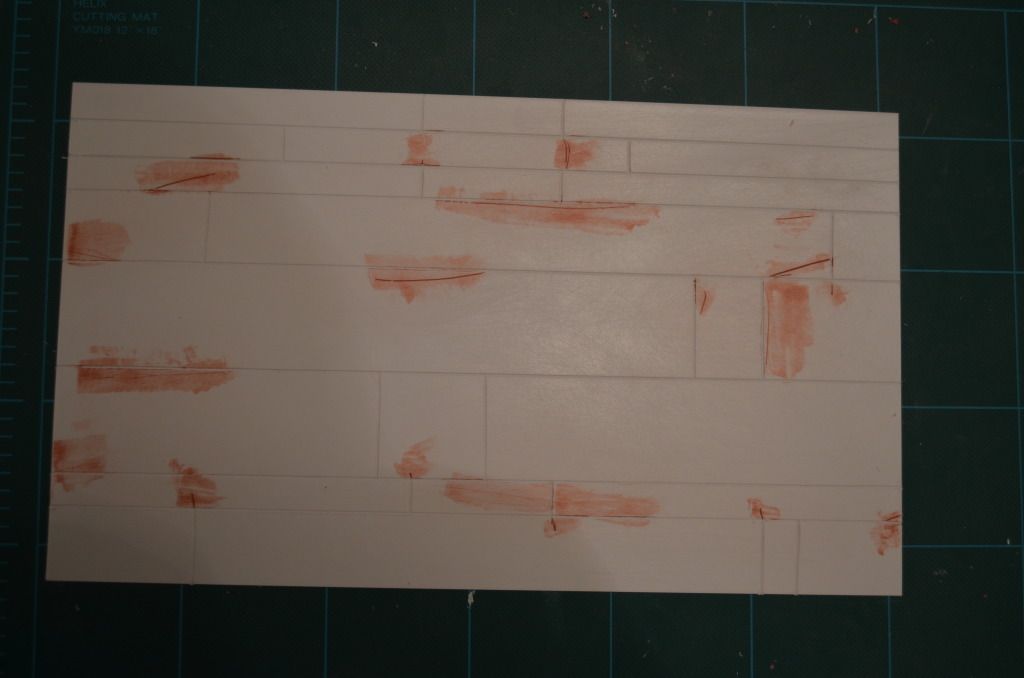
As you can see, I had some issues...Bondo and I became best of friends at this first attempt at scribing.
The bottom primed and painted. It didn't turn out too bad, I guess...could be better, though.
I attached the painted styrene to the base using CA glue. I didn't think it'd stick together too well, but I wanted to give it a try. Worked like a charm! However, I found out that when I tried to attach the styrene to the ends of the 2x4 using the CA glue, it was no go, so I Bondo'd the ends.

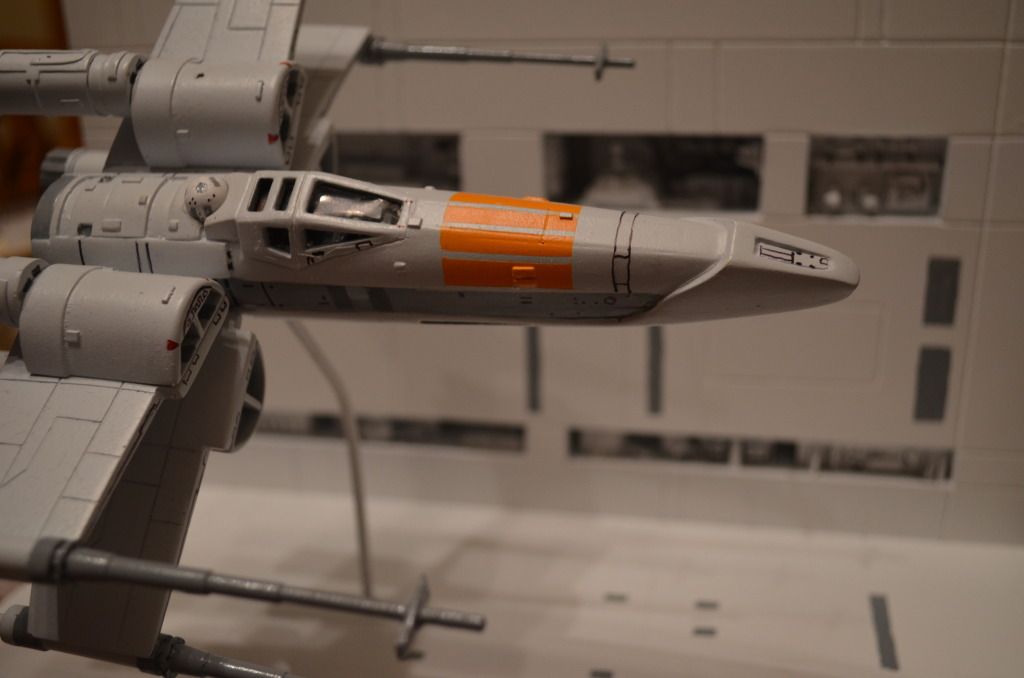
Finally, I tried my hand at a little weathering. I didn't want to do too much as it looks to me that McQuarrie didn't seem to do much of that to his trench.

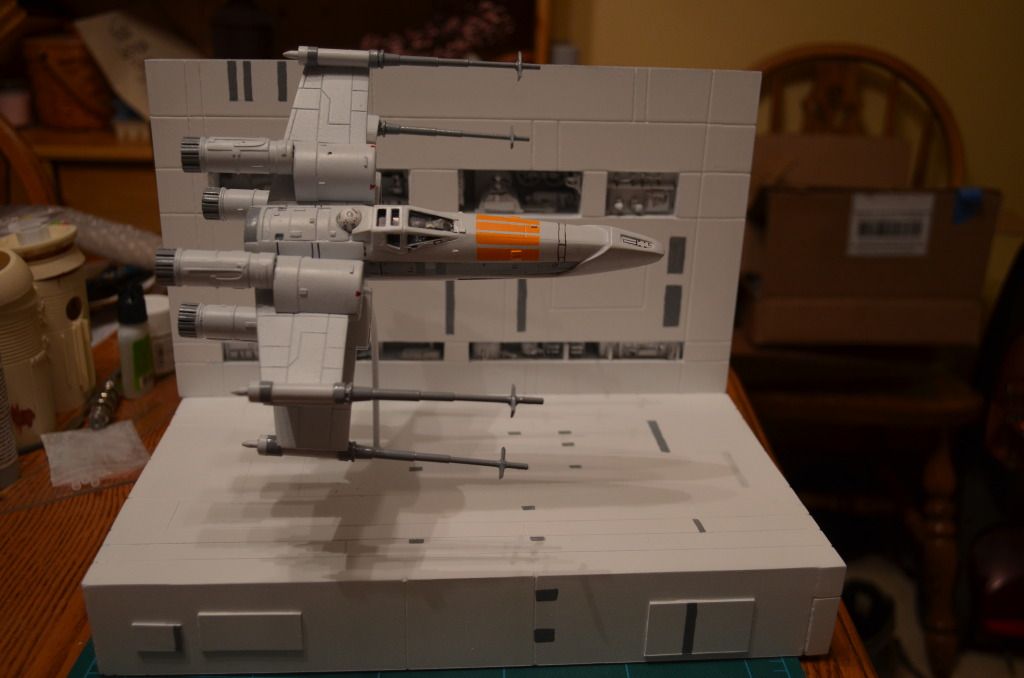
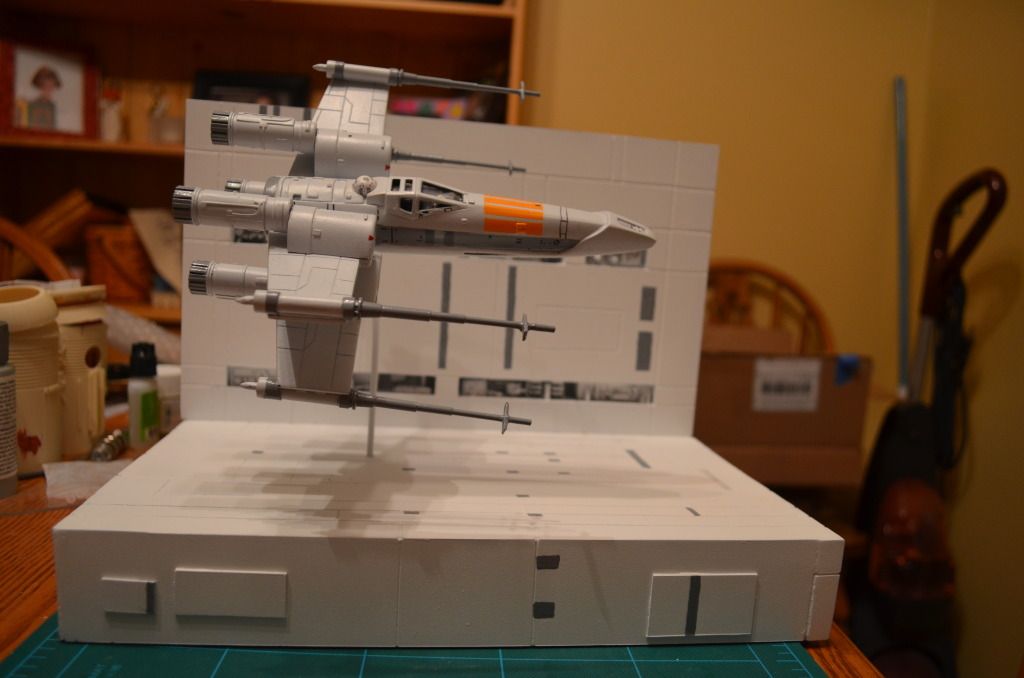
And the final product. I needed to keep the whole thing kind of small since I really don't have much display space in the house.
Finally finished! I learned a lot and hope to take that knowledge and build up some other kits. While I was piddling around with this, I acquired a bunch of other projects. I just hope that they don't take as long as this one did!
As always, thanks for looking and thanks to Ray for his help on this.") thumbsup:thumbsup I already have another project going and as soon as I get the chance, I'll be back.
thumbsup:thumbsup I already have another project going and as soon as I get the chance, I'll be back.
Dave
Okay...must apologize for the 2 month delay. Things really ramped up at work and at home and I simply haven't had the time that I wanted into this, but at last it's finished. I wanted to post a wrap up of my first build, so there are a bunch of progress pics.
After finishing the X-Wing, I decided I wanted to try my hand at scratch building a display base. I wanted to be as faithful to McQuarrie's original painting, but also wanted to do a bit of kit-bashing.
First, I made some recesses which would make up the wall. I kit bashed some models I picked up.
I didn't really have any designs in mind, but wanted to stick to military kits.
All primed and ready to build my back wall.
And the back wall is finished...now on to the base itself.
With cats in the house who like to jump up on my desk and other areas, I decided I should do something pretty solid for the base. So, I attached two 2x4s together using a sheet of lauan. I took a regular sized sheet of styrene and tried my hand at scribing some panels to resemble the bottom of the trench in the concept painting.
As you can see, I had some issues...Bondo and I became best of friends at this first attempt at scribing.
The bottom primed and painted. It didn't turn out too bad, I guess...could be better, though.
I attached the painted styrene to the base using CA glue. I didn't think it'd stick together too well, but I wanted to give it a try. Worked like a charm! However, I found out that when I tried to attach the styrene to the ends of the 2x4 using the CA glue, it was no go, so I Bondo'd the ends.
Finally, I tried my hand at a little weathering. I didn't want to do too much as it looks to me that McQuarrie didn't seem to do much of that to his trench.
And the final product. I needed to keep the whole thing kind of small since I really don't have much display space in the house.
Finally finished! I learned a lot and hope to take that knowledge and build up some other kits. While I was piddling around with this, I acquired a bunch of other projects. I just hope that they don't take as long as this one did!
As always, thanks for looking and thanks to Ray for his help on this.
thumbsup:thumbsup I already have another project going and as soon as I get the chance, I'll be back.Dave