Firefly: Jayne Cobb

Risu

Master Member
This build will also include the Boo gun, and I'm hoping someday it will include Vera as well.

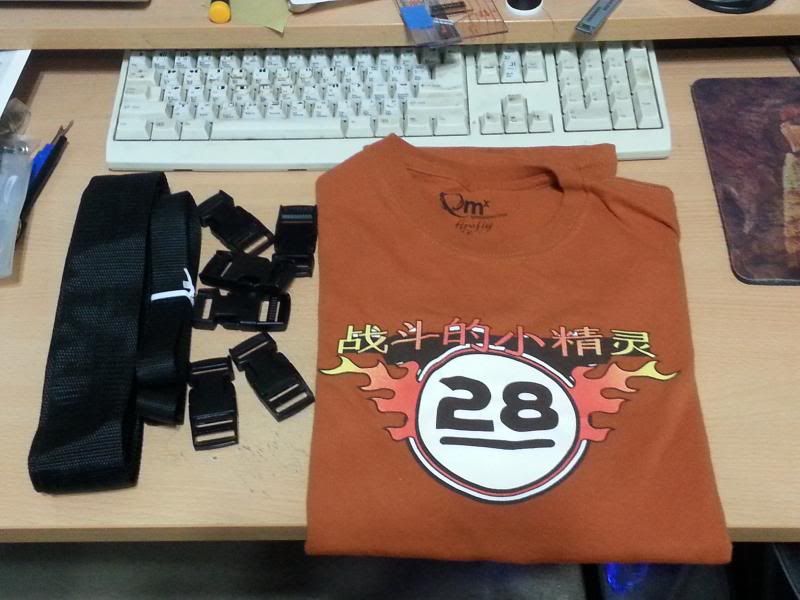
So first of all, I've been making Jayne cuffs on Etsy for a while now, so I already had one of my own. I went ahead and ordered the Fighting Elves shirt from QMx and also picked up a bunch of 1" and 2" webbing and some side release buckles for the puttees.


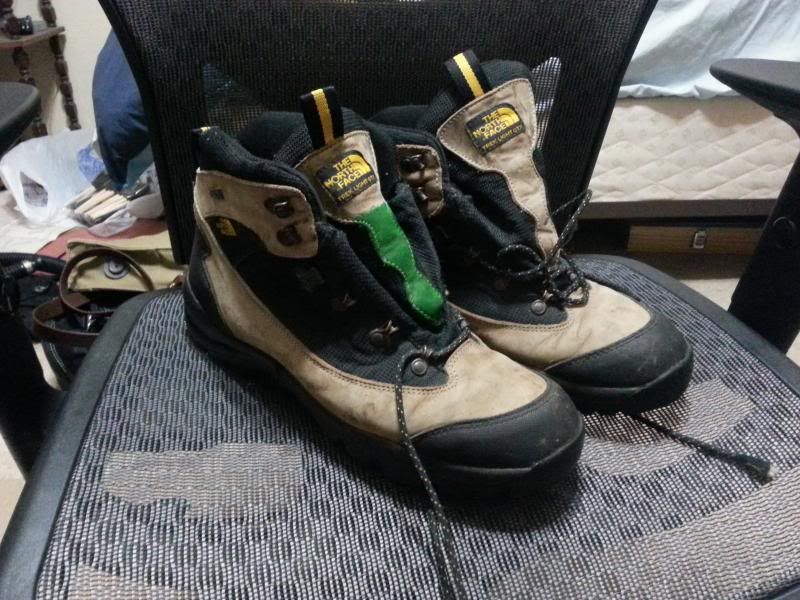
I bought a Denix Lemat on Amazon and found a pair of the North Face boots on ebay.


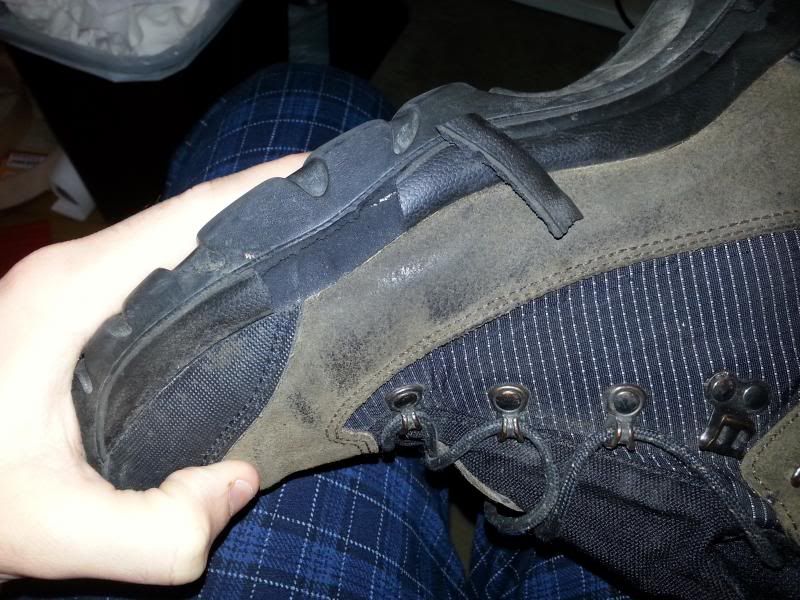
UNFORTUNATELY, which I've now learned is not only common, but almost guaranteed, the soles on just about every pair of these boots is dry rotting from age.


Since the soles are just about to fall off and there's no way to fix them, I was forced to find a replacement. I managed to find a pair in the alternate tan color that I plan to dye to the moss green color. It won't get them all the way there, but it's an improvement. The soles on these are rotting slightly, but nowhere near as bad as the others. On the tongue I did a test with green dye, it turned out way more vibrant than I expected, so I'll be mixing it with some dark brown.


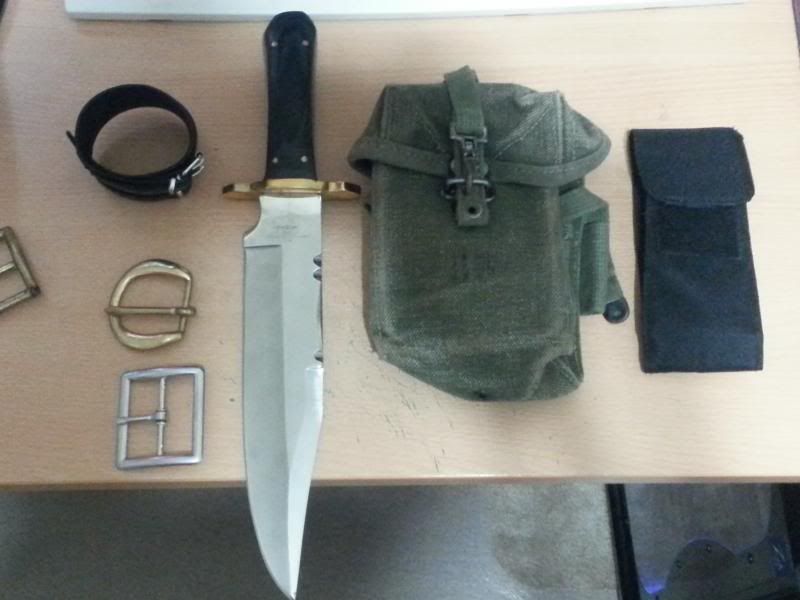
I've also picked up just about everything to make all the gear. In this picture are my cuff, the accurate buckles for both of his belts, the Binky knife, Vietnam era ammo pouch, and a makeshift placeholder for the "mystery pouch" until I get around to making an accurate one.


Not pictured are the stamping tools for Binky's sheath (one of which is discontinued and took a little digging) and all of the leather for the belts and sheath. I also have the Beretta 92F version of the Blackhawk Omega VI Elite holster on it's way to me, it should be the correct size to fit Boo.

As for Boo, I can't take any pictures because all the parts are at work, but so far I've ordered a real Lemat Cavalry trigger guard, which is going to need some shaping to fit the replica gun. I also machined my own sight rail from aluminum tooling plate and did a couple sets of pecan flour casts of the grips. The result were ok, but nothing really compares to real wood. I might eventually try to get somebody with a CNC machine to make me a set from walnut. As for the base gun, I cut off all the parts that needed removing and so far I've sanded half of the parts smooth to 2000 grit and polished them up to a reflective finish in preparation for cold bluing. For the lower barrel I plan to order from Sidewinder, but its still at least a couple months out.

Finally, for the pants I'm currently using the cargo pants I wear for work, they're fairly close to the ones he wears in the Serenity ramp photo shoot. I eventually plan to make accurate ones that match the ones from Heart of Gold, etc. I already have the fabric, just not the time.
 
I took a picture of the gun parts before leaving work, here's where it's at right now.


The holster is going to get here in about a week, and I've mostly finished the knife sheath. Pics of that one tomorrow.
 
Thanks again for those measurements, I probably would have just made the slots evenly spaced if I hadn't had exact numbers.

Knife sheath finished.


I also got the holster today unexpectedly, but it's too small for the gun. I'm going to have to stop into a gun store or two to figure out the right size for Boo, because Backhawk's customer service was not only completely unhelpful, but also pretty rude.
 
OK, so for the record, the largest size of the Omega VI holster is the one that fits the H&K USPs. I've got one on order. Anybody want to buy a really cheap Beretta holster brand new?

I also machined the walls of the octagonal barrel flat on the mill, saved a ton of time sanding and made for a much more perfectly flat surface than I could achieve with sandpaper.
 
I had some free time tonight, so I spent it well. Leather work and alcohol. The waist belt is done.


This next one is probably only a big deal to people who live in California, but I found some alcohol based dye at a shoe repair shop today, so I can finally get started on the gun belt. The water based stuff that's legal to sell here is absolutely worthless when it comes to real color saturation. Even 3-4 coats won't penetrate as deep as one quick pass with this stuff. It works fine for the pants belt, the cuff, and stuff like Mal's holster because that's all worn out and distressed, but Jayne's gun belt is a really nice, saturated black.

 
So the other day I put the Lemat barrel in the mill vice and I flattened all the sides. Today I started sanding them smooth.


I also got the USP holster and I'm relieved to say it's a perfect fit.


Once I got home I removed the extra strap and buckle you can see in the bottom right corner there, and I removed the velcro from the belt strap where it comes in contact with the belt, because that stuff would tear the leather right up. So it's now fully converted.
 
Risu
Nice job on your project. Love to see someone do they're own leatherwork.
To get a strong black color, have you ever tried putting down a base coat of dark blue, then the black dye? A little tip I was given in The Leather Shop part of the CAS(cowboy action shooting) City forums for a belt project I was working on. It worked great.

BTW, where did you get the knife? Tried doing a search on the site and couldnt find any info.
Again, good job. Cant wait to see how this turns out.

Sent from my SCH-S738C using Tapatalk
 
That could work. The Lincoln stuff actually dries to a very dark blue if you don't put the finish coat on for too long. The water based stuff just doesn't soak in to the depth of the alcohol stuff. You dye something with water based, you can use a scotch brite pad to distress it and wear the dye down. I made my Han Solo waist belt from ESB about 4 years ago and used alcohol based dye, I wear it as my regular day to day belt, and the color hasn't worn off in a single spot. It's good stuff.

The knife is a Patrick Henry bowie knife. I got mine on Wild Bill Wholesale, here:

Rough Rider Patrick Henry Liberty Bowie Knife - Rough Rider Fixed Blade Knives

A warning though, the brass plate on the handle that faces in when the knife is in the sheath on the belt is not present on the one I received. It's possible they're making them differently than they used to.
 
I do know it works with fiebings spirit dyes. I actually took a toy wwe wrestling belt, took the plastic pieces off, made a three leather strap and added some fake walmart fake snakeskin lining to the back, sewed it all together and gave it as an award where I worked. The woman gave it back when I left.
Learned two things(this was my first project, never done leatherwork before). 1). On a three piece strap, there is a left and a right piece. 2). When hand stitching for the first time, and it takes 16-20 hours, a lot of new "power words" to quote Mercedes Thompson.

Heard those rough rider knives were supposes to be real good. May have to get one now.

Sent from my SCH-S738C using Tapatalk
 
The most challenging and nerve wracking part of the gun build is done, the trigger guard is attached. It didn't go completely as planned, the drill press slipped a bit and the front hole was milled a couple millimeters off, so I had to open up the back hole and add a nut after I took this picture. But the mechanism still fits and functions properly, after cutting the trigger a little shorter.

 
It's all coming together pretty nicely. I may eventually resort to painting the original grips, there was a bit of shrinkage and the urefil cast ones have some gaps.


My next challenge is to make the brass clip that holds the ram rod thing in place on the barrel.
 
Vera is definitely a dream project. I've got access to a laser cutter, a 3D printer, a mill, and kind of a sh**ty lathe, so it's definitely possible. But for now, I'm sticking to the basics.

I really like the design of the Fighting Elves shirt, but since I have the artwork, I'm going to be making iron on replicas of the Troublemaker shirt, Water shirt, and Soldier shirt as well. I'm printing the transfers today, doing one final bleach wash on the two olive green shirts, and I'll be ordering a Canvas brand heather brown/brown ringer tee soon for the Soldier shirt. Every replica I've seen of that one uses the dark grey/black ringer, but I've done color correction on 15 different images of Jayne in that shirt and I just can't buy that it's the black one.
 
So 15 years ago, the last time I used an iron-on t-shirt transfer, they worked something like dye sublimation. You printed the image, you put it on the shirt, you steamed the hell out of it, and the color transferred over to the fabric. It only looked great on stark white shirts, but the images would still transfer to other lighter colors like bleached out olive green.

Not the case anymore apparently. Now they're paper stickers. Even the white parts of the page stick to the shirt, and if you wash it (as they recommend to do in the instructions) it fades and peels off the shirt. Used to be that only the ones made for dark shirts were crappy stickers, now it seems the white shirt transfers are as well. Hugely disappointed. Both the Troublemaker shirt and the Water shirt were complete failures. I'll undoubtedly start investing in silk screening tools in the near future, but for now I'm stuck with the Fighting Elves shirt.
 
I've got one gaiter sewn up.


I also punched most of the holes in the gun belt. I just recently replaced my stitching punches and the ones Tandy carries now are plated in some kind of black finish instead of nickel like they used to be. The result seems to be insane amounts of surface tension. Once you punch it into the leather, there's almost no force in the 'verse that can get it back out. It's turned a one day job into a week long project.

I also applied a second coat of dye to the tan boots, they're now a dark green that unfortunately don't have that brown quality of the real ones. I'm hoping once they're dry I'll be able to put some brown shoe polish on them to get that to come out.
 
So 15 years ago, the last time I used an iron-on t-shirt transfer, they worked something like dye sublimation. You printed the image, you put it on the shirt, you steamed the hell out of it, and the color transferred over to the fabric. It only looked great on stark white shirts, but the images would still transfer to other lighter colors like bleached out olive green.

Not the case anymore apparently. Now they're paper stickers. Even the white parts of the page stick to the shirt, and if you wash it (as they recommend to do in the instructions) it fades and peels off the shirt. Used to be that only the ones made for dark shirts were crappy stickers, now it seems the white shirt transfers are as well. Hugely disappointed. Both the Troublemaker shirt and the Water shirt were complete failures. I'll undoubtedly start investing in silk screening tools in the near future, but for now I'm stuck with the Fighting Elves shirt.
Ugh. That bites. I'll warn you, screenprinting for 1 or 2 colors is pretty easy on the pocketbook, but more colors get significantly more spendy on the setup.
 
Yea, I used to have runs of shirts made locally, but the guy was unreliable and had a 24 shirt minimum per design.

It's really bothering me now what kind of transfer that was that I used all those years ago. It wasn't a plastisol transfer because it was translucent on a black shirt, but it was completely soft and lasted as long as the fabric of the shirt. I need to find a local sports wear store and try to figure this out.
 
I have had good luck with a local screenprinter that has a inkjet screenprinting machine that does four/five color designs one shirt at a time. If you have a few local shops around you might want to call them and see if any have invested in this new technology. Works great for one to five shirt runs if you have the full color artwork prepped for them.

This is the kind of machine I am talking about. They are pretty cool!
http://www.brother-usa.com/lp/garmentprinters/
 
Last edited:
This thread is more than 8 years old.

Your message may be considered spam for the following reasons:

  1. This thread hasn't been active in some time. A new post in this thread might not contribute constructively to this discussion after so long.
If you wish to reply despite these issues, check the box below before replying.
Be aware that malicious compliance may result in more severe penalties.
Back
Top