bwize
Sr Member
Taking a short break from my Deagostini Falcon, I recently payed a king's ransom on EBAY for Finemold's 1/72 Boba Fett Slave 1. After gleefully opening it and checking it against the studio model. I was surprised to see some inaccuracies. I know few models are free of inaccuracies and are custom fodder, but my impression of this model was that it was very accurate. Now that said, I believe this is still the most accurate model of the ship in this scale. The inaccuracies are only a few and are easy to fix.
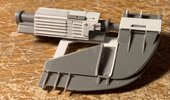
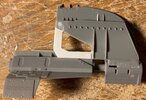
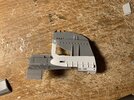
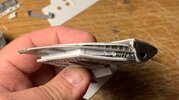
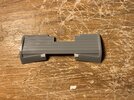
I decided to start with the wing's connecting point to the main body of the ship. The studio prop used the 8-Rad under carriage and I just so happened to have 2 1/72 Dragon kits and they scaled perfectly, so I chopped them up and replaced the Kit parts. I really like how they look now.

Next I will be adding a few missing details on the wings, nothing to extensive. After that I will turn my attention to the underside. The studio prop used the front wheel wells from the Porsche kit under the round antennae. Finemolds surprisingly left these off the kit. It looks like the 1/25 or 1/24 Porsche scales pretty good to the kit. Fingers crossed and more to come............
I decided to start with the wing's connecting point to the main body of the ship. The studio prop used the 8-Rad under carriage and I just so happened to have 2 1/72 Dragon kits and they scaled perfectly, so I chopped them up and replaced the Kit parts. I really like how they look now.
Next I will be adding a few missing details on the wings, nothing to extensive. After that I will turn my attention to the underside. The studio prop used the front wheel wells from the Porsche kit under the round antennae. Finemolds surprisingly left these off the kit. It looks like the 1/25 or 1/24 Porsche scales pretty good to the kit. Fingers crossed and more to come............

