Fine Molds 1/72 Millennium Falcon

Alaneye

Sr Member
I preordered one of these kits as soon as I found out they were going to re-release it back in October I think it was. It arrived early December but went away for Christmas. Now I finally have it in my hands and what a beauty she is. I've familiarized myself with the other builds going on and finished out there and have taken the first few tentative steps to bring this kit to life. Inspired by Dana Jan's Building the Falcon blog, I'm going to attempt to customise the kit with bits of styrene etc to give this already incredibly detailed kit that extra bit more. Although I built model kits when I was much younger I have never attempted anything like this before and I just hope it's all going to turn out well. For better or worse I'll document the build
So first things first... ta-daaaaa

box.jpg


It's an impressively dimensioned box, and heavier than you might expect from a plastic kit.

IMG_0494.jpg


The first of the colourfully printed illustration shows the FM kit plus a montage of shots of the studio model.

IMG_0495.jpg


Next we have another sheet showing the positions of the decals, should you choose the use them.

IMG_0496.jpg


First view of the kit itself.

IMG_0531.jpg


And all those 900 parts... we may be here sometime.
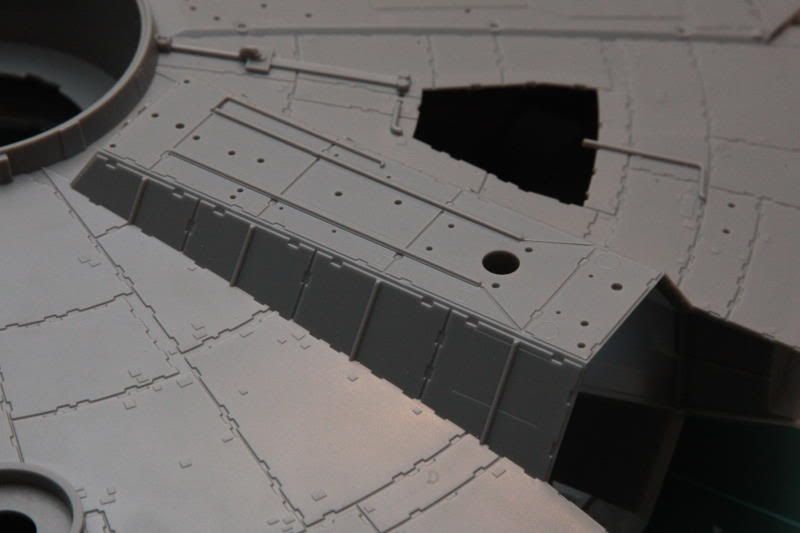
I hadn't intended to make a start on it yet, but I couldn't help myself. First thing I did was to take out all the hull notches with a square needle file.

IMG_0491.jpg


About a hour or so later it was all done.

Top.

IMG_0526.jpg


Bottom.

IMG_0528.jpg


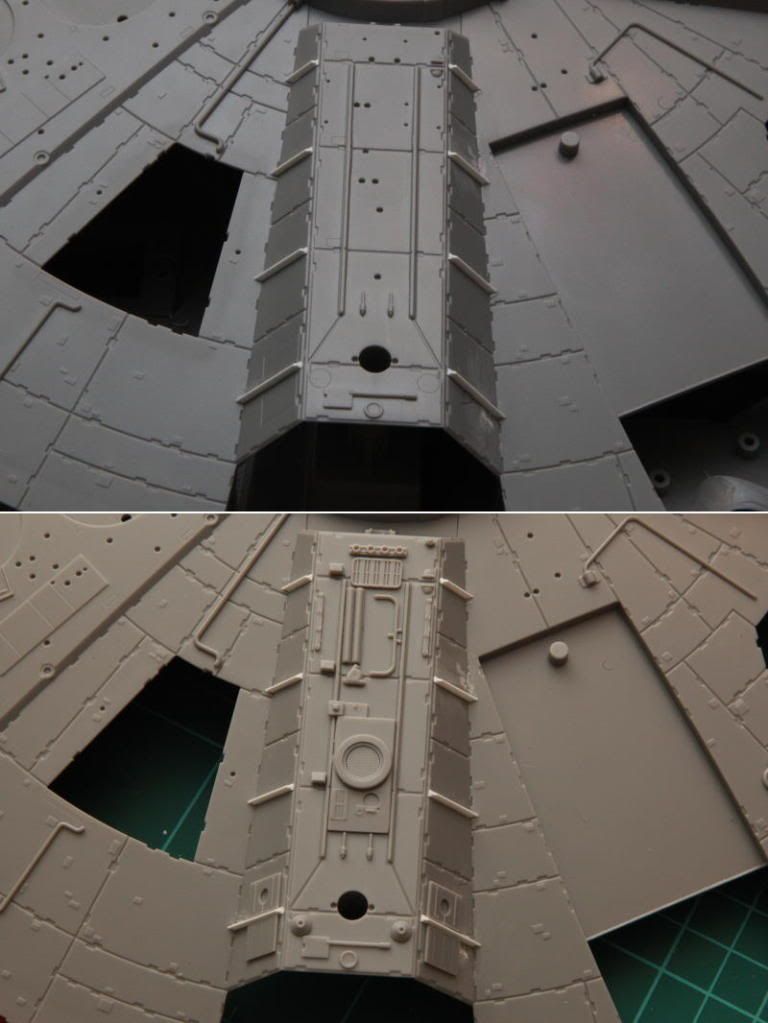
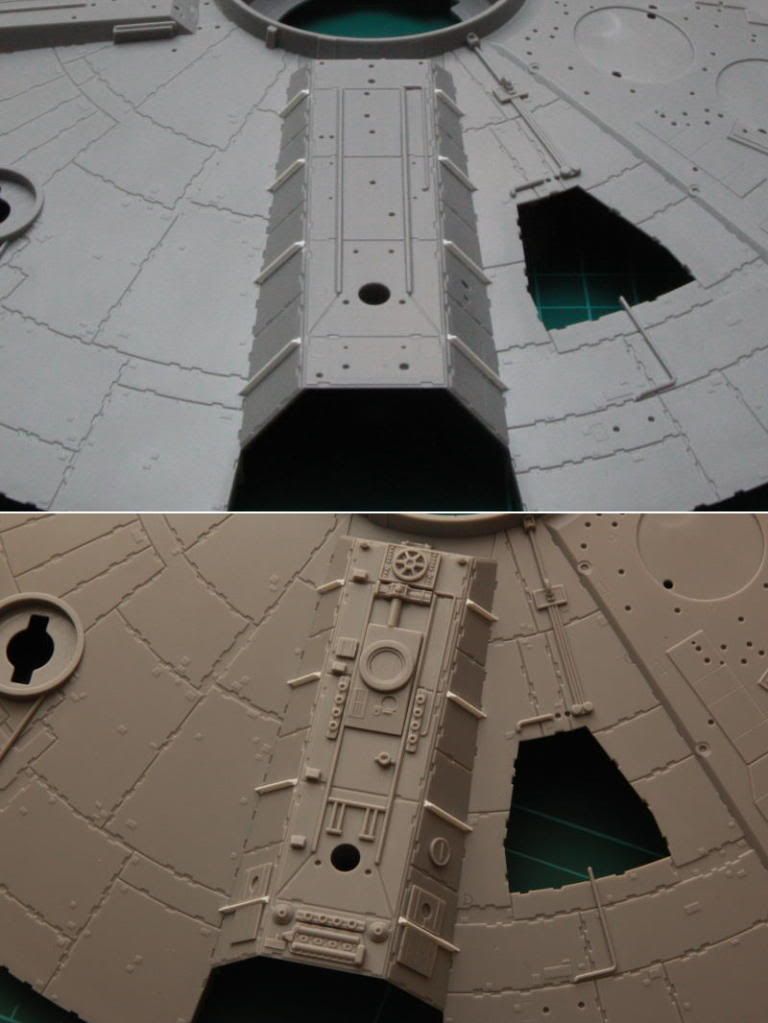
The next thing I felt like trying, was the correcting of the panel lines on the two docking/escape hatches. I'd already seen this on a blog called Building the Falcon. For some reason I can't quite fathom, FM put straight panel lines all around the outer ring when even their own reference photos shows them with differing details. I'm not going to be anal about trying to get this 100% correct as long as it looks close and good.

I began by studying the all the photo reference I had found and used Aves Apoxie putty to fill in the lines where I felt they were wrong. I left that over night and then sanded it down with 320 grit paper. Next I penciled in new lines and used a Tamiya panel scriber to scribe them in. This proved to be much more difficult than I'd imagined. Also the Aves crumbled out of the lines in places. I had some Revell plastic filler so tried that and had more success. Then I cut some small squares of sheet styrene and glued them on in various positions to match the reference as much as possible. I also scribed in a sort of 'L' shaped panel I could see in the reference.

I didn't take any pics before I started, but here it is from top and bottom with the scribed lines and the bits of styrene. I didn't get it as good as I would have liked, but it's all a learning curve for me at the moment.

IMG_0499.jpg


And then I primed it to see if it looked okay when it was all one colour. It looked much better then I thought it would and the primer really sharpens up the detail.

IMG_0511.jpg


So far I'm pleased with the tiny bit of progress I've made and if anyone out there sees me doing anything the hard way, please give me a shout and put me straight. Now, on to the other one :)
 
I completed the 2nd docking hatch. At first I was going to make them identical, but on checking the reference, it seems they aren't identical. After looking around the photos of both the 23" and the 5 foot studio models, I found a pic showing detail I liked from the cockpit side of the ship. It's probably the 5 footer, but as I'm not fussed about it being completely accurate to the 32" model (which I believe FM photographed as reference) I decided to use it. This one was more fiddley still, but it's all good fun.

IMG_0556.jpg


And here's a shot of it positioned on the model.

IMG_0532.jpg


I also realised I'd missed filing out the notches on the access areas in the top and bottom of the hull, so I did that today as well

Another thing I'd seen Dana Jan do on "Building the Falcon" was to remove the struts along the slants of the two walk ways and replace them with styrene 'T' pieces.

The struts looked pretty good as they were, but Jan's idea gives it a bit more relief.

IMG_0556-1.jpg


So I first trimmed them of with my Xacto knife. I bought some chizel type blades with this in mind but I had to be careful because I was trimming right to the flat plates and the corners of the blade could cut into the hull. It did a few time, once deep enough that I had to fill it, but I guess the beauty of this model is that the odd nick isn't really going to matter since the Falcon is meant to be so beat up.

Here it is with the moulded struts trimmed off. I've detailed one side had this is the first of the 'T' pieces on the other side.

IMG_0557.jpg


I angled the first cut so the strut sat flush with the hull, then trimmed the top, and here it is all done.

IMG_0558.jpg
 
Did the tops of both walkways. Some of these pieces are incredibly small

IMG_0563.jpg


I lost that piece 3 times... I have no idea how I managed to find it again. Here are before and after pictures of both sides. I don't think there is much to do in the way of customization with these areas, but I'll give the reference a good looking over to see if there is anything I can add.

Cockpit side:

IMG_0562-1.jpg


Other side:

IMG_0564-1.jpg
 
A little more progress. I worked on the topside mandible. Here it is untouched:

IMG_0567.jpg


Here with the standard greeblies added:

IMG_0574.jpg


And here again with details added that I could see on the 32" studio model.

IMG_0576.jpg


One of the Fine Molds' parts is far too small when looking at the reference, so I cut a piece of sprue and made a new one.

IMG_0569.jpg


Here is my new one and the one supplied by Fine Moulds still on the sprue.

IMG_0573.jpg


And here is it on the model along with some more fiddly greeblies that Dana Jan had give a heads up on. I could see them on the reference but they are not included by Fine Molds for what ever reason. I also extended the pipe on the right up the side of the mandible.

IMG_0582.jpg


I also noticed that at the far end of the mandibles, there was a difference between the FM model and the 32" studio model. So I fashioned a few little bits and pieces and matched as best I could.

IMG_0579.jpg


Finally, there are some bits and pieces on the front of the mandilbes that make it look a bit more interesting.

IMG_0584.jpg
 
Awesome work! I´ll keep an eye on this as I also have this model waiting. And I had promised myself I´d not do any corrections on it since all my other models take so long due to modifications... :lol

Could you post a link to the blog you mentioned? Thanks!
 
You have a great eye for detail! This build will be fun to follow and I am sure it will turn out amazing. I would like to read the blog you reference as well.

:thumbsup
 
Very nice detailing. I think you're going to spend a lot of worth while time on this build, just by the work you've done on the first set of pics.
 
Thanks guys, hopefully it will be a fun build. The Building the Falcon blog I talked about is at:

Building the Falcon: May 2006

It's a great inspiration to do great work. If I can get mine looking anywhere near like that I will be very pleased.

I looked at that blog yesterday. It seems to end like 5 years ago with the Falcon incomplete. Am I missing something? Also, I got a hint that the radar dish he made would be available since he mentions making a mold of it--though that could just be for his friend whom he said was going to be making one concurrently with him. Was that dish ever available?
 
For some reason I can't quite fathom, FM put straight panel lines all around the outer ring when even their own reference photos shows them with differing details.

If you look, you'll find other details and shape issues that differ with their own photos they include in the box. There are several suggested reasons for this. In the case of the "docking rings"--if for no other reason--it might just be an issue of molding. If they tried to get the panel lines right, it would have been soft detail at best because of the way the parts have to slide out of the mold--the way details on jets get soft or lost around the sides of the fuselage (or top and bottom, depending on the way the kit is engineered).
 
Thanks for all the encouragement guys :)

I looked at that blog yesterday. It seems to end like 5 years ago with the Falcon incomplete. Am I missing something? Also, I got a hint that the radar dish he made would be available since he mentions making a mold of it--though that could just be for his friend whom he said was going to be making one concurrently with him. Was that dish ever available?


As far as I know it was never made available and I still don't know why Dana never finished his build. He and PHArchivist were friends at the time, both doing builds and they had a thread going at:

http://www.therpf.com/f11/building-falcon-7548/

Unfortunately the links to PHArchivist's photos have expired.
 
Last edited:
If you look, you'll find other details and shape issues that differ with their own photos they include in the box. There are several suggested reasons for this. In the case of the "docking rings"--if for no other reason--it might just be an issue of molding. If they tried to get the panel lines right, it would have been soft detail at best because of the way the parts have to slide out of the mold--the way details on jets get soft or lost around the sides of the fuselage (or top and bottom, depending on the way the kit is engineered).


Yeah, I've been taking a look at the two areas above the docking rings to see if there were any extra bits and pieces to add as I didn't check at the time. There are quite a few differences between that and the studio model, one being the area around the vent... but they obviously did it so they could use the same part for both sides. If I'd checked the reference before hand I might have tried making it more accurate. Anyway, it's still all looking good :)

Edit: Damn it, just found the reason for the differences around the vents is that one should have gone one way and the other should have gone the other way! Ah well.
 
Last edited:
Are you also going to correct the angle of those Mandibles and the top and bottomside jawboxes? Your doing great work with all the other little details but the mandibles and jawboxes are the major undertakings.
 
Hi, Tony, nah, I'm not going to be trying to correct the mandibles or jawboxes. It's one thing adding bits of detail here and there, but as you say, the mandibles are a big undertaking and I'd likely screw it up :D
 
This thread is more than 7 years old.

Your message may be considered spam for the following reasons:

  1. This thread hasn't been active in some time. A new post in this thread might not contribute constructively to this discussion after so long.
If you wish to reply despite these issues, check the box below before replying.
Be aware that malicious compliance may result in more severe penalties.
Back
Top