elro
Active Member
Hey Guys!
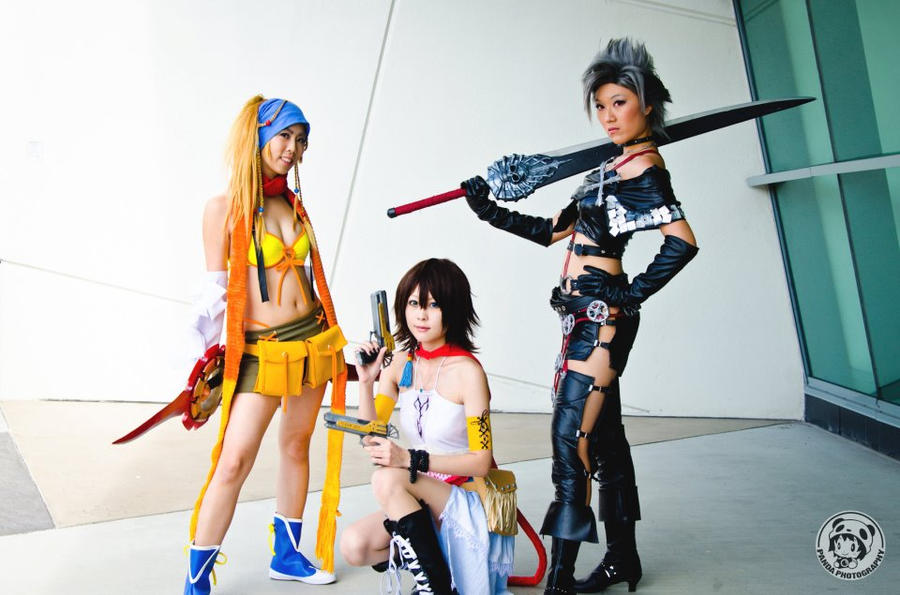
Well, My HEV suit build is on hold until I finish a Final Fantasy X-2 Weapon set commision ive received. I have to create the 2 x Tiny Bee pistols, 1 x Paine skull sword, and Rikku's Thief blades. Ill Be getting molding / casting lessons from my good friend at Dreamweaver masks (Also works out cheaper receiving materials at wholsale price VS. shopfronts).
After pulling the model from the game, I through the over to EyeOfSauron to create a simple lineart of the Blade.
THANK YOU SO MUCH EOS - Saved me incredible headaches!!!
Ok So as normal, ill throw pictures in, then talk more if needed after each pic.

OBVIOUSLY, When starting something / needing to do something... A cat will come along and sit on it ><


Went through 3 battery charges before realising my girlfriends mum had a corded hammer drill. Also learnt that holesaws + MDF like to clog quicker than a fat mans toilet.

Had an idea that taping the under side would prevent 'blow outs'. Didnt really work at all, so I just drilled in on one side, then flipped it over and finished the job. I had drilled pilot holes so it worked out AOK.


Thats my new toy the Bosch Ventaro = Literally, dustless sanding. Also doubles over as a shop vac. The sander is only power by the suction of the vacuum. Left me broke for 2 weeks, but damn its worth.

Just a dry assembly after lots of shaping.

Then I sprayed spray putty, sanded with 240 grit, then applied blade putty.


So thats where Im up to. Not bad for 1 days work Wouldve been easier if I couldve afforded to get a jigsaw instead of using my rotary tool with a dry wall bit / router base ^^;
Just sealing everything thing up before attaching the two rings. After they are attached ill be cleaning up the centre joins with builders filler and more sanding.
I know i have to seal all the MDF pores up before molding this, so what are some suggestions on what you guys do to ensure the silicone doesnt stick to the mdf? Ive thought maybe a gloss coat or two over the whole thing to seal it all off after the putties have been sanding flat???
Thanks everyone, hope you enjoy! HAVE FUN !!!
!!!
Well, My HEV suit build is on hold until I finish a Final Fantasy X-2 Weapon set commision ive received. I have to create the 2 x Tiny Bee pistols, 1 x Paine skull sword, and Rikku's Thief blades. Ill Be getting molding / casting lessons from my good friend at Dreamweaver masks (Also works out cheaper receiving materials at wholsale price VS. shopfronts).
After pulling the model from the game, I through the over to EyeOfSauron to create a simple lineart of the Blade.
THANK YOU SO MUCH EOS - Saved me incredible headaches!!!
Ok So as normal, ill throw pictures in, then talk more if needed after each pic.

OBVIOUSLY, When starting something / needing to do something... A cat will come along and sit on it ><


Went through 3 battery charges before realising my girlfriends mum had a corded hammer drill. Also learnt that holesaws + MDF like to clog quicker than a fat mans toilet.

Had an idea that taping the under side would prevent 'blow outs'. Didnt really work at all, so I just drilled in on one side, then flipped it over and finished the job. I had drilled pilot holes so it worked out AOK.


Thats my new toy

Just a dry assembly after lots of shaping.

Then I sprayed spray putty, sanded with 240 grit, then applied blade putty.


So thats where Im up to. Not bad for 1 days work
Just sealing everything thing up before attaching the two rings. After they are attached ill be cleaning up the centre joins with builders filler and more sanding.
I know i have to seal all the MDF pores up before molding this, so what are some suggestions on what you guys do to ensure the silicone doesnt stick to the mdf? Ive thought maybe a gloss coat or two over the whole thing to seal it all off after the putties have been sanding flat???
Thanks everyone, hope you enjoy! HAVE FUN
Last edited:

