Fabs homemade Indiana Jones Props

Fabilousfab - fantastic work on your mycenaean bull!

Perhaps a silly question, but could you elaborate on your use of fuller's earth? I have a Mummy scarab that I would like to age and I'm thinking fuller's earth might do the trick. I've tried pastels, but a clear coat appears to evaporate the pastels. Do you clear coat your fuller's?
 
Thank you sir. :) As always it depends :lol: I normally don't clearcoat after I applied fullers earth. So the piece always stays a bit dusty. If I'd apply clearcoat, even matt one, the effect would be gone. The fullers earh just dulls down the colors I applied before and as I said gives it a bit of a dusty look.

But for example with the tank I applied the fullers earth on wet paint to dry it with the color and then applied matt clear coat to have junks of dirt on the chains. So it really depends on the look I want to achieve.

And on other pieces I don't use fullers earth at all. Just a base color that sets the tone (pastel, black, grey) and then build up the layers of the other colors and combine them with washes. The last step mostly is then drybrushing it with white color to make the highlights pop.
 

Attachments

  • IMG_1572.JPG
    IMG_1572.JPG
    3.4 MB · Views: 53
  • IMG_1573.JPG
    IMG_1573.JPG
    1.9 MB · Views: 50
  • IMG_1574.JPG
    IMG_1574.JPG
    3 MB · Views: 52
  • EBB3153E-CADF-4384-8D60-0BE29020487B.JPG
    EBB3153E-CADF-4384-8D60-0BE29020487B.JPG
    1.1 MB · Views: 59
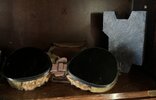
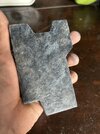
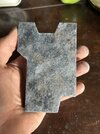
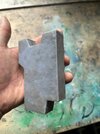
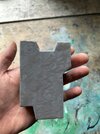
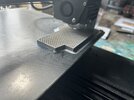
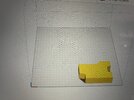
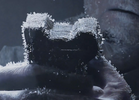
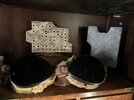
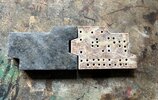
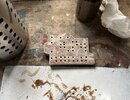
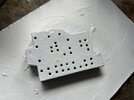
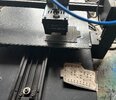
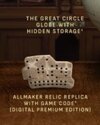
Not many pictures or references available but I tried to make the key thingi from The Great Circle Trailer. Printed in Pla and filled and covered with resin. Painted with acrylics.
 

Attachments

  • IMG_2578.JPG
    IMG_2578.JPG
    1.9 MB · Views: 38
  • IMG_2577.JPG
    IMG_2577.JPG
    2 MB · Views: 33
  • IMG_2576.JPG
    IMG_2576.JPG
    1.9 MB · Views: 36
  • IMG_2571.JPG
    IMG_2571.JPG
    1.2 MB · Views: 31
  • IMG_2570.JPG
    IMG_2570.JPG
    1.3 MB · Views: 52
  • IMG_2568.JPG
    IMG_2568.JPG
    2.7 MB · Views: 28
  • IMG_2566.JPG
    IMG_2566.JPG
    4.2 MB · Views: 30
  • Bildschirmfoto 2024-07-24 um 15.55.44.png
    Bildschirmfoto 2024-07-24 um 15.55.44.png
    2.2 MB · Views: 30
  • tgc1.jpg
    tgc1.jpg
    22 KB · Views: 56
What do you use to apply your acrylics for the stone texturing? Is it a particular sponge you prefer?
 
No it's just chaos. :lol: I do a basecoat with black spraypaint. Afterwards I put on a thick layer of gray acryclic colour which I wipe off unconsistently with a cloth before doing brown and sometimes green dots only to blend them in with my fingertips. Finally I apply the white highlights on the edges and elevated areas to get the effekt. The more bumpy the surface is the better it looks in the end. That's why I put on extra resin here to get a rough surface. And it helps not to be the most accurate guy. ;)
 
In the airship in LC is a decorative zeppelin stand on the table which is supposed to hold the menu or something similar. The used prop was sold at an auction.
I printed a modified form of the Hindenburg and glued a few printed blocks to it, which I then shaped with the Dremel and painted with acrylics.

The menu is a modified version of the "Menu: World tour of LZ 127 "Graf Zeppelin" with stop in Tokyo".
 

Attachments

  • Bildschirmfoto 2024-05-01 um 22.30.41.png
    Bildschirmfoto 2024-05-01 um 22.30.41.png
    693.2 KB · Views: 52
  • IMG_2823.JPG
    IMG_2823.JPG
    3.3 MB · Views: 44
  • IMG_2824.JPG
    IMG_2824.JPG
    1.5 MB · Views: 33
  • IMG_2826.JPG
    IMG_2826.JPG
    3.2 MB · Views: 41
  • 3BFAEC58-4C19-4F53-BEB1-DB14AE6852EA.JPG
    3BFAEC58-4C19-4F53-BEB1-DB14AE6852EA.JPG
    1.4 MB · Views: 38
  • Zeppelin Menü 1.jpg
    Zeppelin Menü 1.jpg
    1.2 MB · Views: 24
  • Zeppelin Menü 2.jpg
    Zeppelin Menü 2.jpg
    1.2 MB · Views: 36
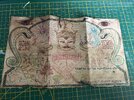
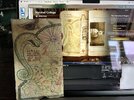
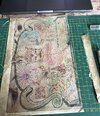
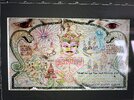
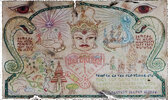
So I already designed and printed two of the keypieces from the great circle for fun (gonna modifiy them when the game comes out) and now the first paperprop for the diary, the map of mara. I think the original file is actually from here.
 

Attachments

  • IMG_3234.JPG
    IMG_3234.JPG
    4.3 MB · Views: 30
  • IMG_3233.JPG
    IMG_3233.JPG
    3.6 MB · Views: 27
  • IMG_3232.JPG
    IMG_3232.JPG
    4.2 MB · Views: 26
  • IMG_3235.JPG
    IMG_3235.JPG
    4.7 MB · Views: 22
  • Mara-2.jpg
    Mara-2.jpg
    7.6 MB · Views: 22
  • IMG_2972.JPG
    IMG_2972.JPG
    2.3 MB · Views: 24
  • IMG_2971.JPG
    IMG_2971.JPG
    4.4 MB · Views: 27
  • IMG_2970.JPG
    IMG_2970.JPG
    4.1 MB · Views: 33
  • IMG_2969.JPG
    IMG_2969.JPG
    2.5 MB · Views: 27
  • IMG_2965.JPG
    IMG_2965.JPG
    3.9 MB · Views: 29
  • 456148579_10169324189130710_77432650374521541_n.jpg
    456148579_10169324189130710_77432650374521541_n.jpg
    101.4 KB · Views: 29
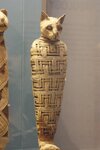
Next up the cat mummy image from the GC Diary I tried to sharpen and enchance a bit.

Printed in 15x10cm.
 

Attachments

  • IMG_3275.jpeg
    IMG_3275.jpeg
    3.4 MB · Views: 29
  • IMG_2990.jpeg
    IMG_2990.jpeg
    548.6 KB · Views: 30
  • IMG_2991.2.jpeg
    IMG_2991.2.jpeg
    288.6 KB · Views: 27
Next up the cat mummy image from the GC Diary I tried to sharpen and enchance a bit.

Printed in 15x10cm.

I think they may have used the image of the cat from wikipedia as a base to make the image in the game. there is an errant wrapping hanging on the left side in the game version, but otherwise the pose is identical. You'll notice they cut off the image before the museum mount could be seen. A stone background is a snap for them to photoshop in. You could use it to clone in lost details on your version.

Mummified_cat.jpg
 
Yes I know the foto and I thought about it. But it exceeds my photoshop skills to build it from scratch. So I chose to blow up the screenshot from the game, put the cat through AI and then worked on it in photoshop and put the original background behind it. Looks like a really old crappy foto now and does the job for me. :cry: If somebody wants to give it a try though, would be great. (y)
 
Back
Top