Eveningarwen
Well-Known Member
Gotta be house elves!
Man I need me some of those. One day....one day I'll be big enough to have minions. I can feel it! Lol!
Gotta be house elves!
Lmfao! Did you just refer to panniers as hip buckets? Hahaha :lol
What I don't understand about those shoulder pieces is when you zoom in on the high res images it's very clear that they are covered in the same fabric as her dress but I don't know how the holes are cut out because there's no seams or stitching or anything.
I thought about using foam and doing the whole sealing and painting if I'm able to find paint or mix paint the same color. But....meh....I don't know. Then I thought about leather and dyeing leather but again....I don't think that's it. I would love to know how those shoulder pieces are done or even what materials were used.
")
Gurl I'm bringing my embroidery machine home with me in January, you want to use that? I'll trade you for uh....access to your button press?? Or something.
Also I think it's group costume time because ohmygod these dresses.
As far as the big cut out shoulder pieces- I don't think they are made of fabric
it definitely looks like its either laser cut or molded from a single piece and then painted to match the dress.
The cut is easy- I can cut that in my laser in about 60 seconds (not including the computer design work).
edit
I went looking for different high res pictures and found this one
http://www.filmofilia.com/wp-content/uploads/2011/11/Mirror_Mirror_i19.jpg
if you look on her left shoulder- it looks like there is a seam on the side of the shoulder piece
so it very well could be covered in the same fabric.
Don't forget that with cgi magic and photoshop, it very well could have a seam that they remove in post production
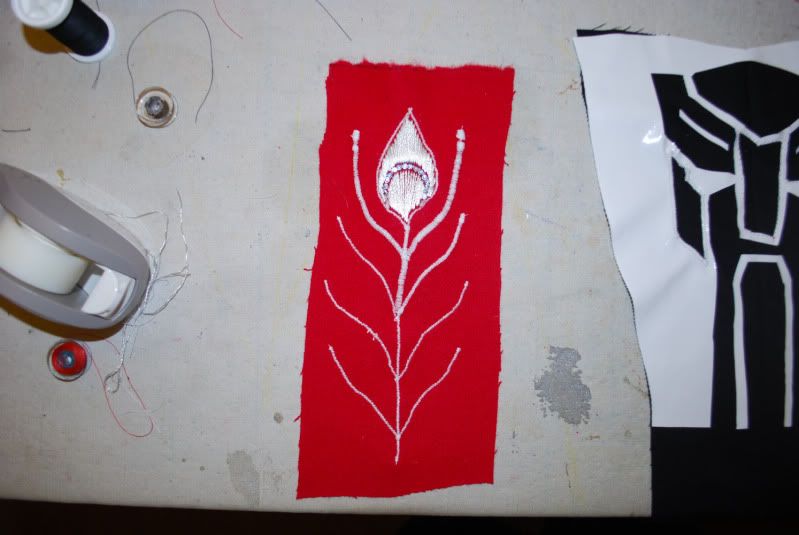
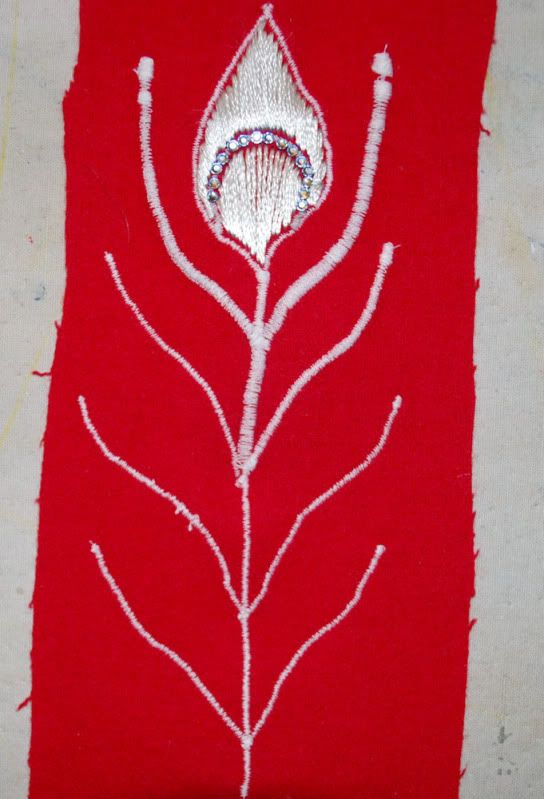
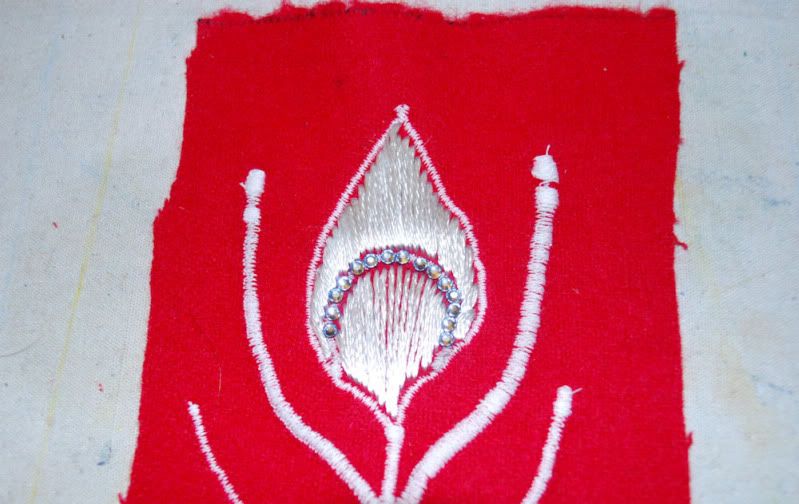
oh and I think the peacock feathers are appliques- that would be a much faster route than embroidering them individually.
What I don't understand about those shoulder pieces is when you zoom in on the high res images it's very clear that they are covered in the same fabric as her dress but I don't know how the holes are cut out because there's no seams or stitching or anything.
Any progress, ladies?? I've been far too lazy......
For the cutouts, depending on what fabric you use you can always burn them. i saw a GORGEOUS piece done by a girl for an anime costume - instead of embroidering, she simply burned the synthetic fabric with a soldering iron/wood burner to create cutouts for the collar and sleeve and skirt, then layered fabric behind it. the burning prevents fraying and you don't have to worry about seeing seams.
your only worry then, is getting the shoulders to stay upright.