Disclaimer: Let me apologize for the crappy photos. Just moved, and I'm still getting the studio back together. Until then, I'm shooting in pretty awful conditions. ")
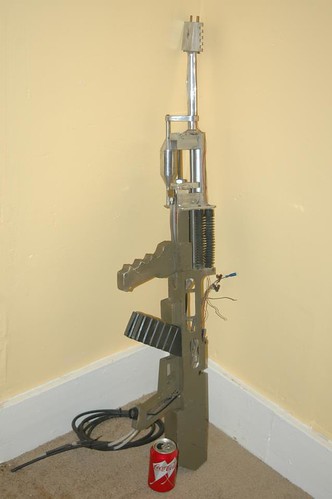
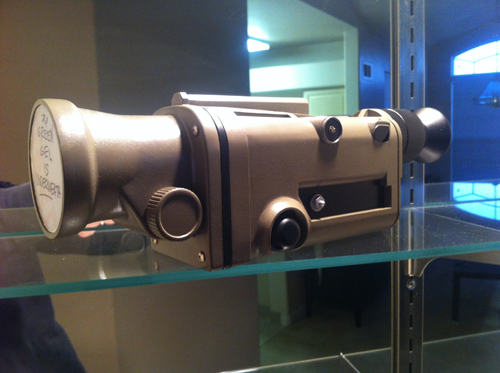
So...my current project is bringing a Eraser EM-1 Railgun back to life.
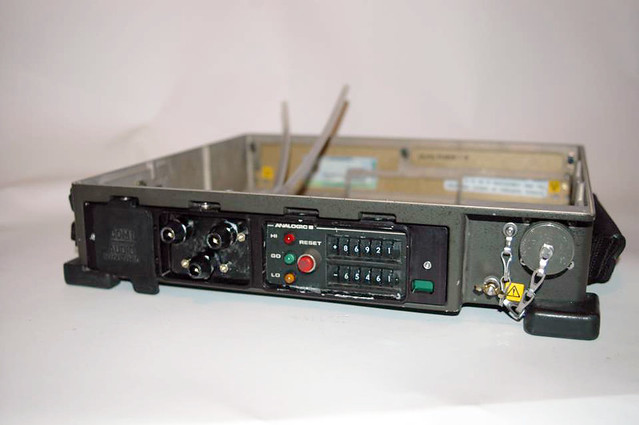
I bought this a couple of years ago from Propstore. It was listed as a prototype. As such, it was never fully built up or screen used, so I thought this would be a perfect platform for my brand of tinkering. Plus side was the C02 system looked intact. Electronics...not so much.
State as it arrived:
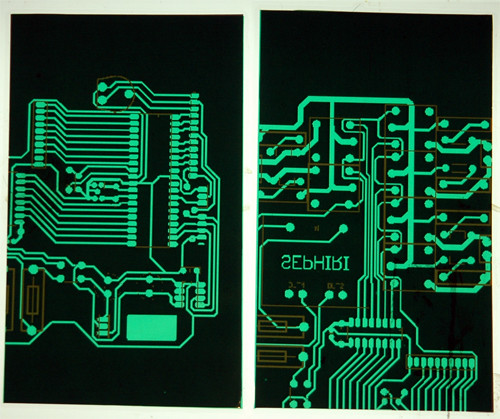
Doing this a little out of order because it's a WIP...so let me start with the PCB overlays.
Mid gun, there's a large flash bulb that goes off and backlights a set of transparent PCBs. I didn't have the originals at the time of creation (though this may have just changed) so I decided to make a personalized set.
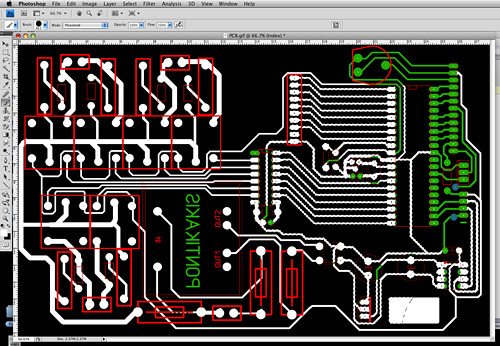
I googled PCB and looked for a decent schematic with thick lines. After that, I did a color test as it will be backlit with a green gel. I liked it, so I removed all the white/green with Photoshop's background eraser:
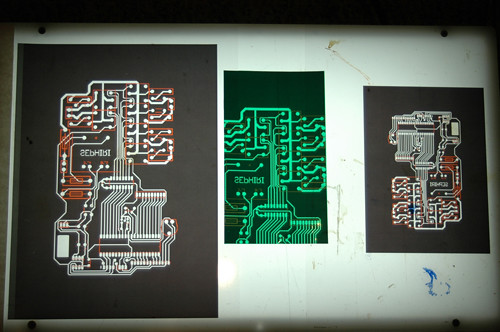
After sneaking in my studio's name using the analog-style LITT font, I printed out a few sizes, cut down the ones I liked, and cut down a green gel. Here's the light table shot:
Because I wanted the color somewhat muted, I put the sheets through my laminator and cut the sheet at the seams around the overlays on 3 sides. This made them more rigid, and allows me to adjust the final color by slipping in more gels later.
After all that, I mounted the finished items on the gun's sides got a quick reference shot:
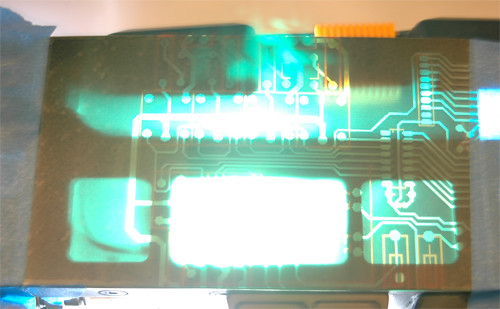
There's some bleed through, but once they're finished (adding more gels for instance) and mounted for good all that bleed should be taken care of.
--04-19-12--
Been a bit since the last update...life is busy atm.
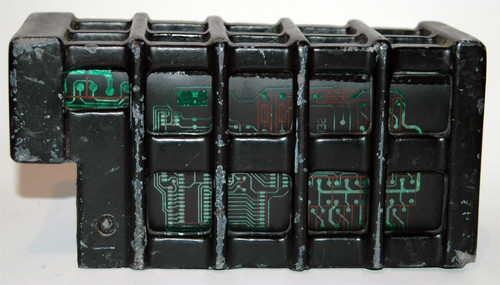
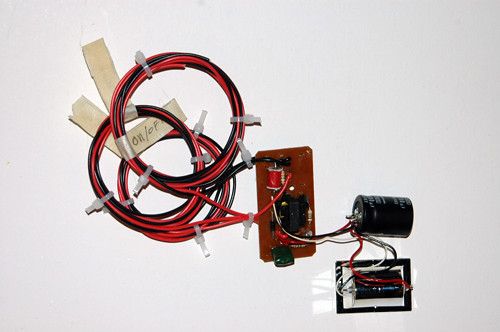
Here's the finished electronics cage. Got lucky, Propstore had it and various other spare parts I picked up during my SoCal visit. I'm still experimenting. Right now, for the overlay backer, I'm using a cut-down-and-molded overhead light defusers. More on that later.
So, when I got the railgun, the electronics were a mess. I decided I wanted to use the original high-power flash bulb, but didn't want to spend the time soldering/creating a rig to do this efficiently.
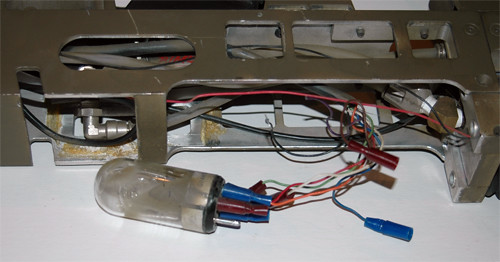
My solution? Pull the driver out of a shoe-mount camera flash, replace the wires...
...and mount it in a chepo project box.
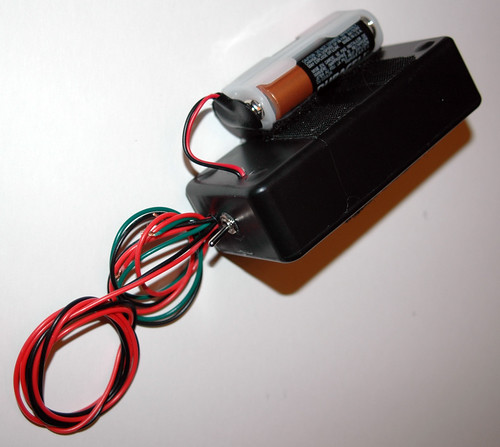
It works great! Right now, the bulb is temp mounted in place, waiting for a bracket, relays, etc.
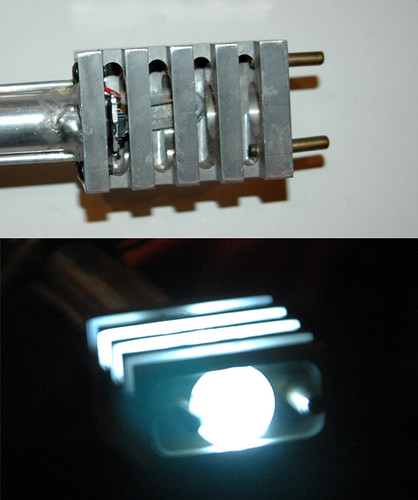
For the muzzle, I replaced the mini incandescent and wired for an Luxeon LED and driver.
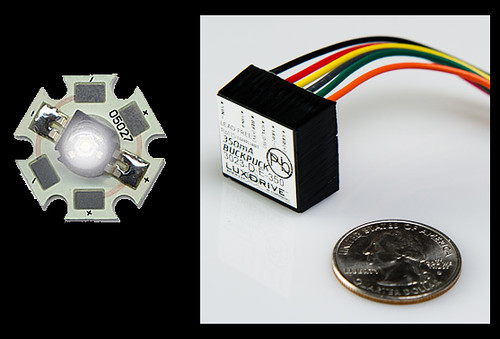
Results were much brighter and much less obvious.
Currently, the drivers are mounted in the rear of the gun (to be switched to the backpack later).

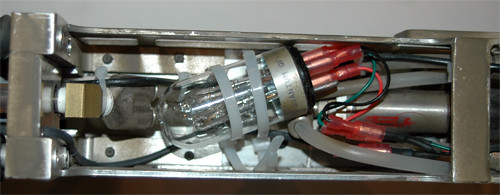
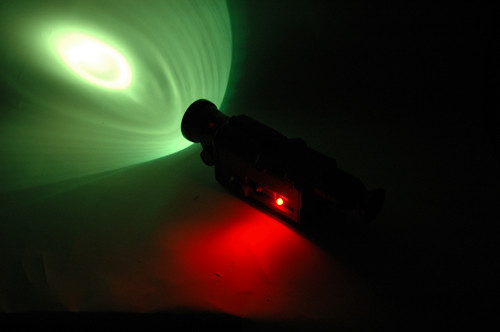
Recently, morganthirteen supplied me with one of his scopes. Quality was astounding, and the whole thing was made for easy electronics installation.
I soldered up a quick rig. Though, having forgotten to add the decals before the switch (red button), I ended up having to cut M13's emblem off the main sticker.

Amazing what a flashlight reflector—and the original bulb from the front of the gun—be used for.
--04-20-12--
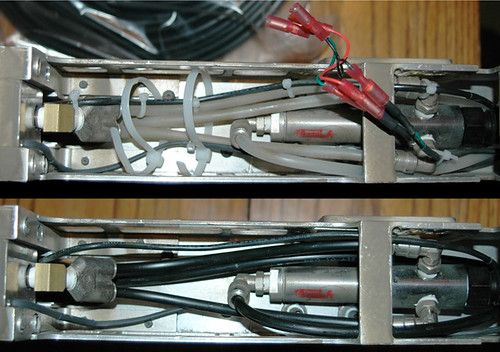
Here's my start on the C02 system. Had a few problems here: Leaks, age/condition, and looks. Original hoses that came out of the gun were 1/4 opaque covered in black heat shrink. Pretty ugly and not very flexible.
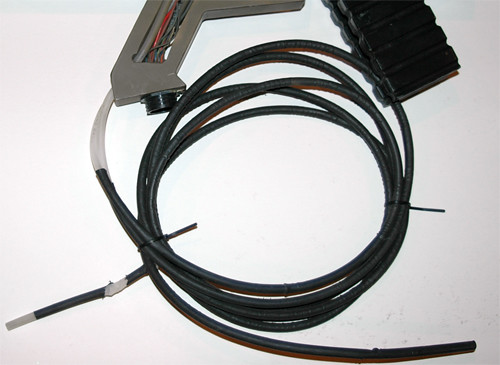
I de-sleeved the heat shrink in hopes there was a spec stamp on the hose itself. Not only did I find the right type of hose for the application, I was able to get it from the original suppliers whose name was also stamped on the hose. Ordered the original OEM opaque and some black for the rear.

I liked the black so much, I used it throughout.
Before and After:

For now, I've switched my attention to making a backpack of my own design (see comments below). I'm at a point I need to find a permanent home for the electronics and CO2 tanks before I progress any further.
More to come!
So...my current project is bringing a Eraser EM-1 Railgun back to life.
I bought this a couple of years ago from Propstore. It was listed as a prototype. As such, it was never fully built up or screen used, so I thought this would be a perfect platform for my brand of tinkering. Plus side was the C02 system looked intact. Electronics...not so much.
State as it arrived:
Doing this a little out of order because it's a WIP...so let me start with the PCB overlays.
Mid gun, there's a large flash bulb that goes off and backlights a set of transparent PCBs. I didn't have the originals at the time of creation (though this may have just changed) so I decided to make a personalized set.
I googled PCB and looked for a decent schematic with thick lines. After that, I did a color test as it will be backlit with a green gel. I liked it, so I removed all the white/green with Photoshop's background eraser:
After sneaking in my studio's name using the analog-style LITT font, I printed out a few sizes, cut down the ones I liked, and cut down a green gel. Here's the light table shot:
Because I wanted the color somewhat muted, I put the sheets through my laminator and cut the sheet at the seams around the overlays on 3 sides. This made them more rigid, and allows me to adjust the final color by slipping in more gels later.
After all that, I mounted the finished items on the gun's sides got a quick reference shot:
There's some bleed through, but once they're finished (adding more gels for instance) and mounted for good all that bleed should be taken care of.
--04-19-12--
Been a bit since the last update...life is busy atm.
Here's the finished electronics cage. Got lucky, Propstore had it and various other spare parts I picked up during my SoCal visit. I'm still experimenting. Right now, for the overlay backer, I'm using a cut-down-and-molded overhead light defusers. More on that later.
So, when I got the railgun, the electronics were a mess. I decided I wanted to use the original high-power flash bulb, but didn't want to spend the time soldering/creating a rig to do this efficiently.
My solution? Pull the driver out of a shoe-mount camera flash, replace the wires...
...and mount it in a chepo project box.
It works great! Right now, the bulb is temp mounted in place, waiting for a bracket, relays, etc.
For the muzzle, I replaced the mini incandescent and wired for an Luxeon LED and driver.
Results were much brighter and much less obvious.
Currently, the drivers are mounted in the rear of the gun (to be switched to the backpack later).
Recently, morganthirteen supplied me with one of his scopes. Quality was astounding, and the whole thing was made for easy electronics installation.
I soldered up a quick rig. Though, having forgotten to add the decals before the switch (red button), I ended up having to cut M13's emblem off the main sticker.
Amazing what a flashlight reflector—and the original bulb from the front of the gun—be used for.
--04-20-12--
Here's my start on the C02 system. Had a few problems here: Leaks, age/condition, and looks. Original hoses that came out of the gun were 1/4 opaque covered in black heat shrink. Pretty ugly and not very flexible.
I de-sleeved the heat shrink in hopes there was a spec stamp on the hose itself. Not only did I find the right type of hose for the application, I was able to get it from the original suppliers whose name was also stamped on the hose. Ordered the original OEM opaque and some black for the rear.
I liked the black so much, I used it throughout.
Before and After:
For now, I've switched my attention to making a backpack of my own design (see comments below). I'm at a point I need to find a permanent home for the electronics and CO2 tanks before I progress any further.
More to come!
Last edited: