Ember
Member
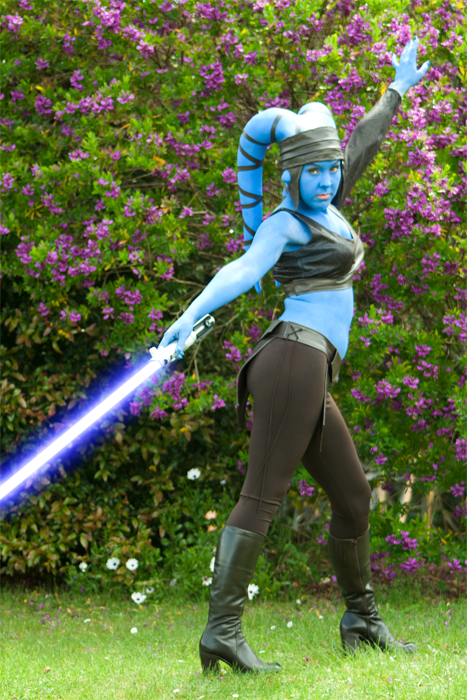
Hi all, I would like to submit my Aayla Secura costume for this year’s Halloween contest!
I love Aayla's design, she's such a cool character!
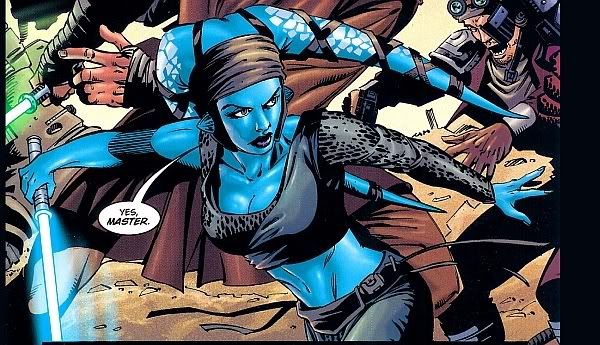
There are a few versions of Aayla out there - comic book, animated clone wars, and movie. My favourite version is the comic, I like the darker colours of her outfit and prefer this over multiple different shades of brown, and this is the version I decided to do.
Aayla has long-been a favourite Star Wars character of mine, and I’d wanted to do her costume for a number of years. I’d collected fabric over a period of time but it just sat in my fabric box waiting to be used. The thing that gave me the biggest push towards putting it all together was being given a set of Twi’lek Pam’s beautiful Lekku for my birthday last year.
It’s a very comfortable outfit to wear, and one of my favourite costumes. The paint takes a while to apply, but it is so worth it.
I posted a build thread online a while back, so I’ll cut and paste the relevant information and images into here")
The two choices of shirt fabric I had to choose from:
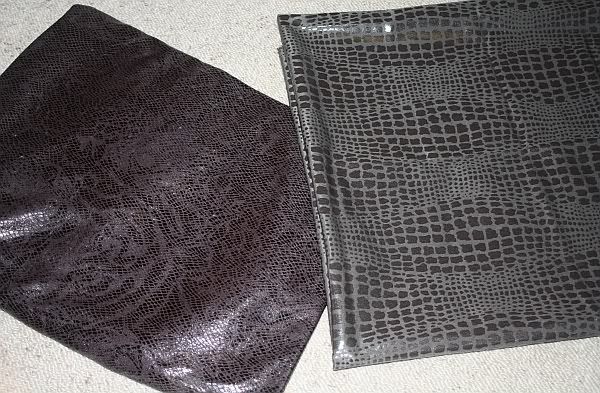
Although I really liked both, the one with the smaller print pattern has a stretch to it so I went with that one.
I drafted the pattern for the top off a top I have which has a similar stretch to the fabric, since I didn’t want to go buying a brand new pattern from the store.
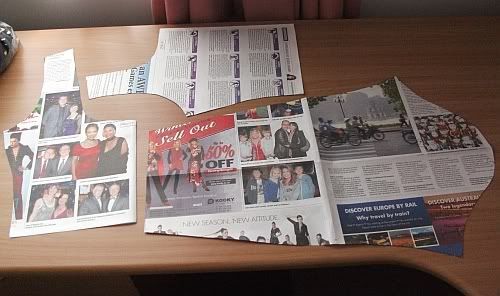
Pretty simple process really, laid the top flat over a piece of newspaper, and used a pin to poke through every inch or so of the seams, marking where the seams are.
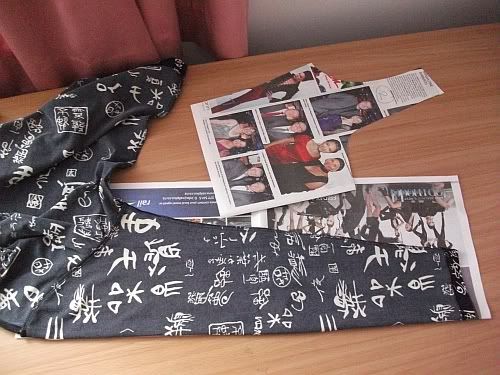
I then took the top away, and connected the pin-holes so I had a replica of the pattern, minus the seam allowances (which would be added later).
I did this for the front, back, and then each side of the sleeve (Sleeve patterns are rarely symmetrical so I patterned the front with the edge up against a fold in the newspaper, then flipped the newspaper and patterned the back on this other side. Opened out the newspaper, cut it out, and voila
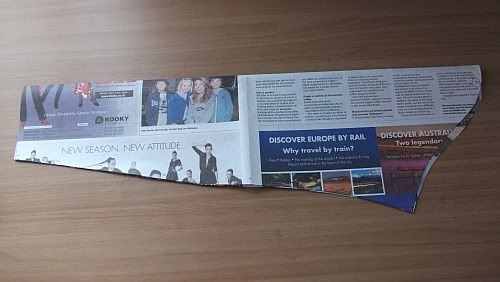
All 3 pattern pieces for the top:
I got a dark brown jersey knit fabric to use for lining the top.
I decided to just make the pants using some of the 'top lining' fabric I got from Spotlight (there was only JUST enough!). It's a lovely rich chocolate brown, and at least with making the pants, they'll match the colours on the rest of the outfit. They're all cut out, and ready for sewing up in the morning. I make the pattern for the pants using the same method as with the top, using a pair of leggings that I wear a lot.
I whipped up a draft of the top, decided it wasn't doing what it was supposed to be doing, so after a bit of pinning, dart shifting and elimination, had a design that worked nicely Had a problem with getting the sleeve to sit in the armhole properly, it’s always hard to test when you only have pins and no dress-form available to do so. So yes... I had to pull the top on a couple of times while it was held together only with pins! Not a fun way to spend an afternoon!
Boots arrived off ebay at about this point in the build
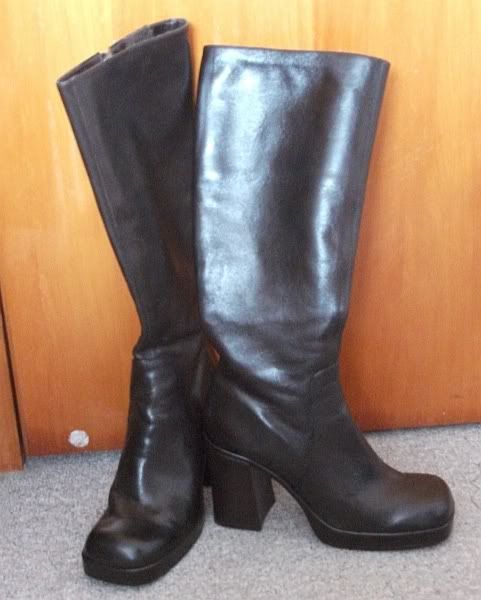
They have about a 3" heel, fit perfectly despite being labelled a size smaller than I wear, and are the perfect shade of brown to go with the rest of the costume.
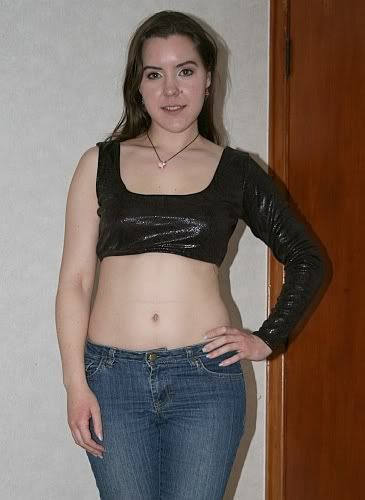
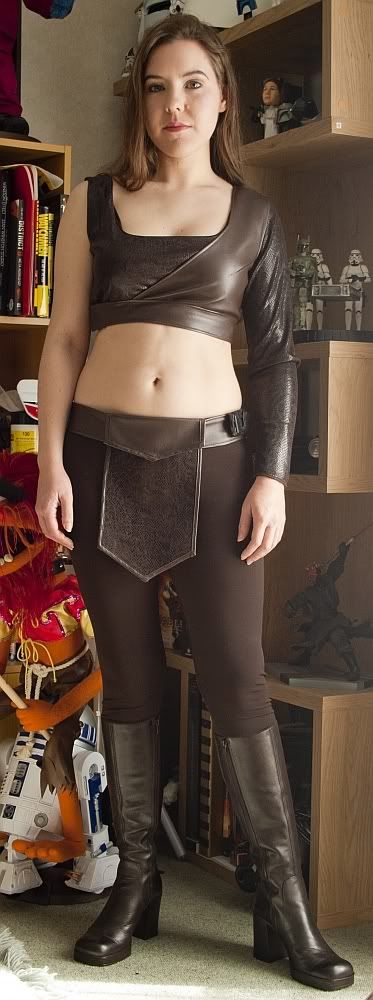
The complete top, the elastic in the bottom of it will be covered over by the leather vest.
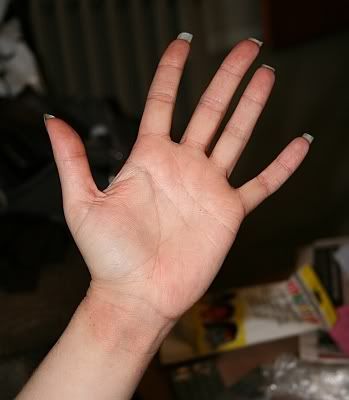
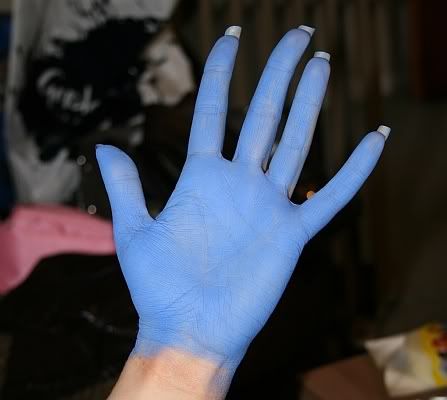
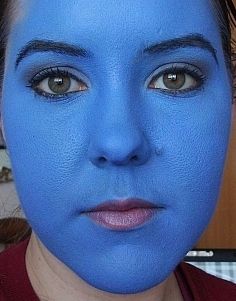
Had a first go at using the blue bodypaint on a hand, had it sponged it on with a round sponge. The colour varies quite a bit with inside and outside lighting, but it's a nice shade and will do the job, especially with 2 layers (only did 1 layer for the test here).
Before (flash):
After (flash):
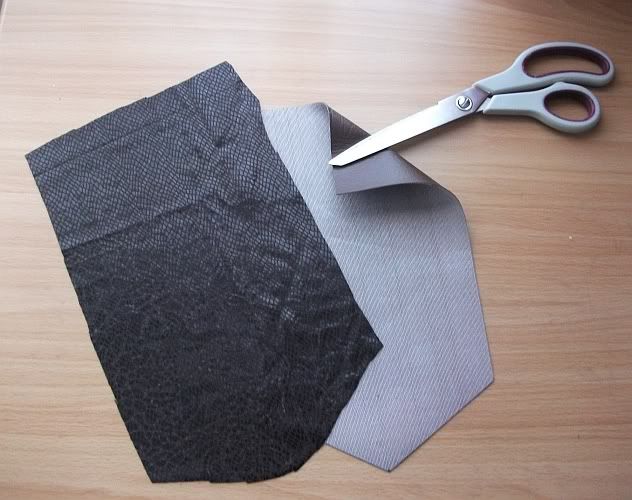
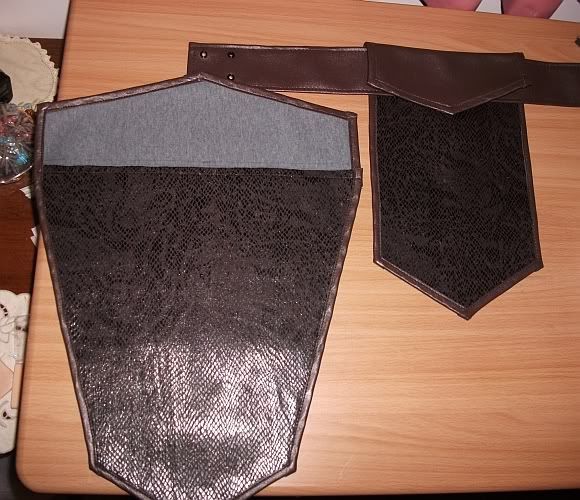
The front of the aprons are decorated with the same fabric that the top is made from. Seeing as the fabric is stretchy and not very thick, I wanted to put vinyl on the back to give it more ‘body’, and to have something that wouldn't look out of place if the underside of the aprons are seen.
Once I’d drawn out the apron patterns it was just a matter of going into some cheap vinyl (wasn’t going to waste my nice expensive vinyl on a part that wouldn’t be seen!) and cut out the patterns in it. I put the pattern pieces against the ‘top’ fabric, but cut out quite a way from the edges of the pattern so I would easily be able to stretch the fabric enough that it lays taught against the vinyl.
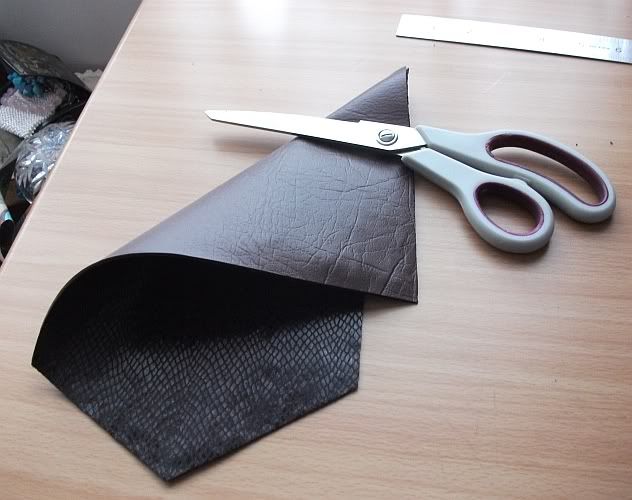
I used good old E6000 glue to stick the fabric to the vinyl, that glue is fantastic
Once the fabric was stretched in place and the glue was dry, I trimmed back the edges.
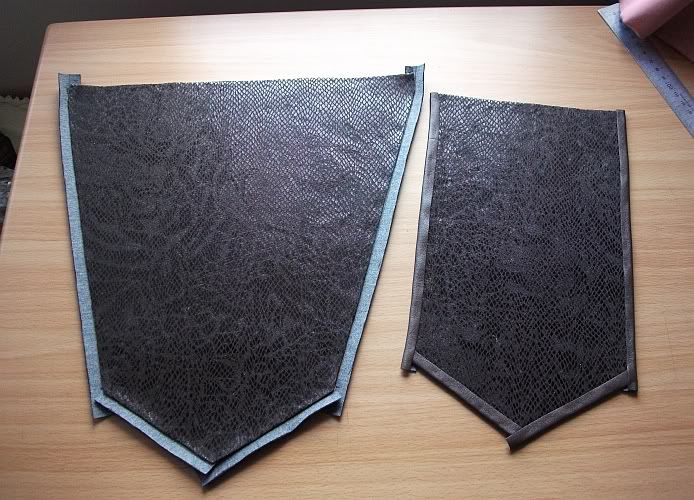
I cut out the little ‘cover flap’ pieces in both my good vinyl, and the other vinyl with the intention of having the bad vinyl as a backing. These flap pieces are folded over the top edge of the belt, and after cutting out the pieces I realised that if the flaps are too thick they won’t hang over the belt nicely, so decided to scrap the cheaper thicker vinyl and just go with the nicer one which is a fair bit thinner.
I cut out several long strips of nice vinyl to use as a binding edge on all 4 pieces.
The binding strips were all glued down in place, then stitched to help them stay in place. The glue helped everything to stay in place while I stitched it. The gluing took the longest time of the whole belt creation process, and I ended up having to wedge drying pieces in between the pages of a big heavy book to help them dry in the correct spot (kept wanting to leap out of place within a few seconds of removing my fingers from the glued edging.

After stitching the binding, I joined the flaps to the aprons.
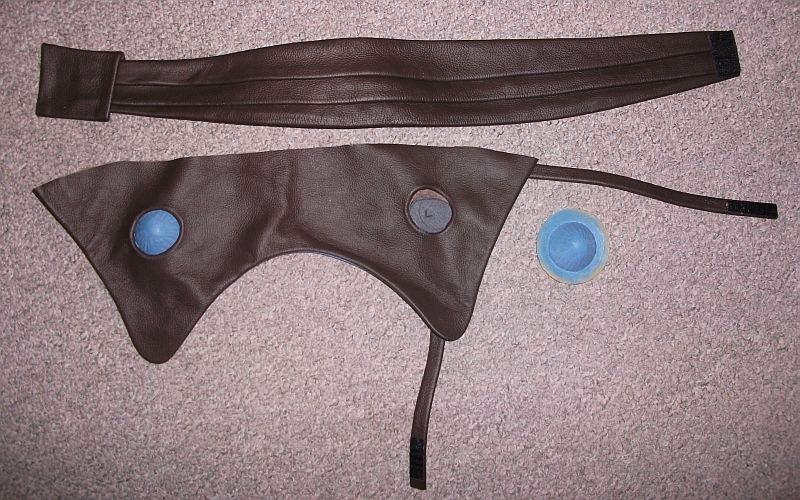
At this point I just needed is to get some velcro to hang the pieces off the belt properly!
I got some leather lacing to put in the eyelets, but it was too thick to thread through and lay nicely, so I had to wait for some softer thinner suede lacing to arrive in the post from the USA.
The finished vest I used a slightly modified version of the top as the base and adapted the pattern to go from a stretch-fabric to a limited-stretch vinyl.
I was terrified to cut it out of the vinyl since I only had half a meter of the stuff (all that was left in stock at the store!), and there was only enough to cut out one vest. Because of its unusual stretch it would have been almost impossible to create a mock-up that would fit in the same way.
So there was pretty much 1 shot to get it right. Fortunately it worked
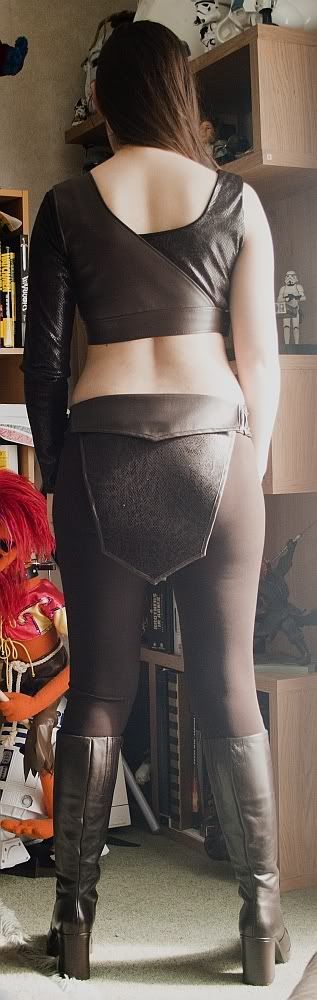
It holds the 'sleeve' in place very well. I'd been worried I'd have to use double-sided tape to keep the side of the top with the sleeve sitting on my shoulder since it wanted to slip down every time I moved my arm, but don't need to worry about that anymore!
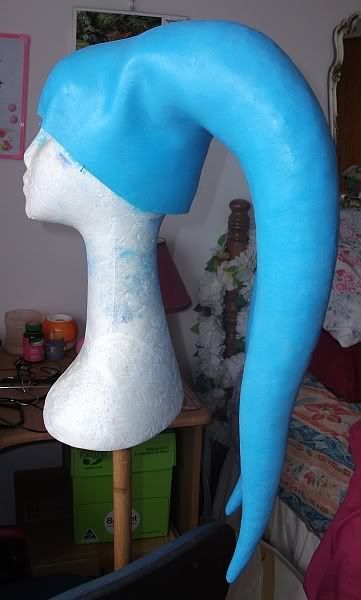
The headgear was created using a template provided online by Twi-lek Pam, which I scaled and adapted to my headsize using the same fabric as the vest.
Painting the Lekku – I used my bodypaint, and used an alcohol-based liquid to apply the paint instead of water to help the bodypaint stick. I also trimmed down the front edge of the headpiece so I could wear the lekku without the front edge showing below the bottom of the vinyl headgear.
Doing a makeup test – did my normal makeup job over the top of the blue paint base, I didn’t do any lip makeup here.
I also wanted to see how well the paint would stay on around my eyes with makeup, so I did an experiment and spent pretty much the whole day with a blue face, I was really happy with how well it stayed on.
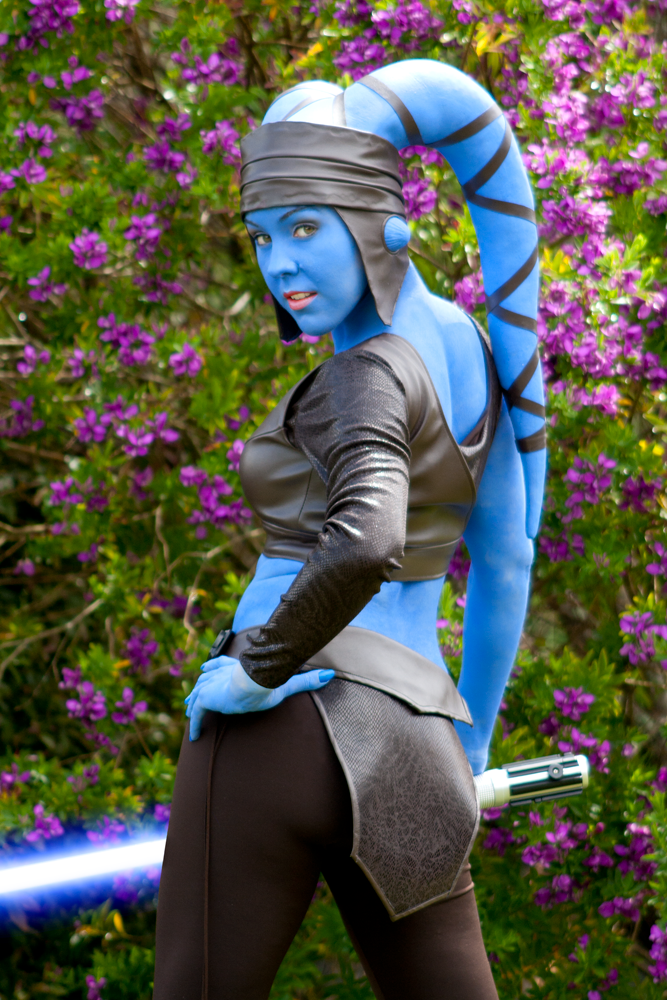
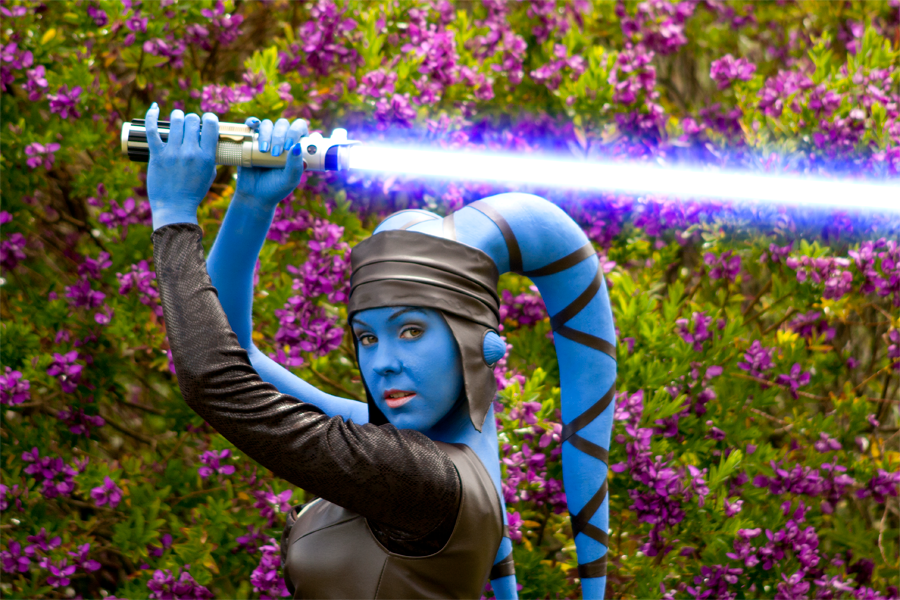
Finally – everything put together!
Just for fun - I might also add that I’m a Primary School Teacher, and was asked to show kids a series of lightsaber training motions at an Episode 1 3D launch in February 2012. This was the biggest gathering of SW costumers in NZ.
Star Wars Day at Sylvia Park
For those interested, I made all the reddish-brown padawan robes, the Imperial Officer uniform, and both of the duelling Jedi and Maul outfits. This same event also provided me with one of my biggest challenges with this costume. The event was held outside in the middle of Summer and was run over a number of hours. I’ve only used water-based paint, so needed to find a way to get protection from the sun, find a way to not sweat in the heat (which would be detrimental to the paint), and need only minimal paint touch-ups over a few hours.
I ended up putting on the paint as-per-usual (with an alcohol-based liquid in place of water), and then once the lekku were on was sprayed down with high-spf anti-perspirant spray. Overall it worked pretty well – I didn’t get sunburnt, but it made my skin feel weird, and after a few hours of my skin not being able to breathe properly I started feeling unwell. It was more than worth it for the enjoyment of the public and the experience, but I don’t think I’ll do any more outdoor mid-summer troops as Aayla!
I love costuming and the challenges each outfit presents. I’m a member of both the Rebel and 501st Legions, and most of my costumes are Star Wars themed. With each costume I do I learn new skills and techniques – for Padme’s Veranda Nightgown it was slashing a pattern apart into panels then reattaching them with spaces in-between, for my Imperial Officer it was tailoring a suit, for Slave Leia it was sculpting, for Hoth Leia it was creating an insulated quilted snow suit that could be worn in sub-zero temperatures – the list goes on and on. I’m continually learning different skills, which is one of the things I find so enjoyable about costuming and sewing – there’s always something new to learn!
I suppose one of my biggest challenges with costuming is being based in New Zealand. Fabric is not cheap here, so I’ve had to learn to order from overseas and sometimes wait weeks for a particular costume component to arrive which isn’t available or is too expensive locally.
The biggest tip that I can give to anyone learning about costuming is to not be afraid to try out new techniques or think that a costume is beyond you because of various components that look intimidating. I have learnt SO much through trial and error (seam and dart manipulation, sculpted wearable items – all things I’d never done before or thought I’d be able to do). You never know what you can do till you try, and then if at first you don’t succeed – give it another go!
When it comes to fabric costumes, I also like to think “If this character were a real person strolling down the road, would their outfit be made of this?”
Think carefully about your fabric choices. Finding the correct type and colour of fabric can be one of the most difficult aspects of creating a costume, but don’t rush out and get the first ‘close match’ you can find (unless you’re in an absolute hurry!). Sometimes it pays to spend time looking at your options, going out of your way to visit obscure shops, or comparing shades and weaves, and if you’re lucky – sometimes that perfect but far more expensive fabric just MAY be on sale when the time comes for you to purchase (hey, it’s happened to me!)
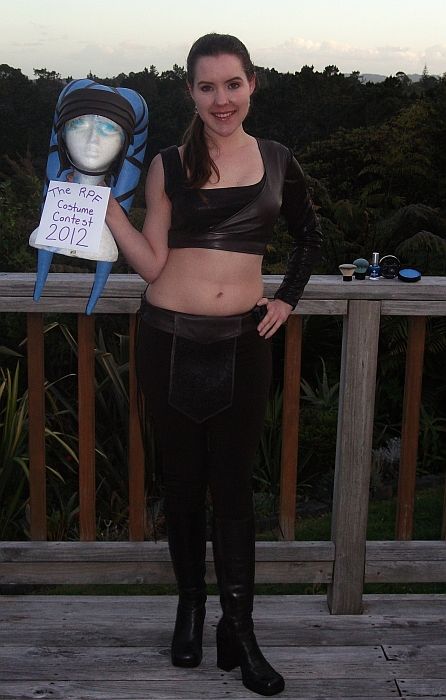
Last but most certainly not least – my proof photo! I read in the info thread that I don’t need to physically wear the entire costume (it would be a waste to apply the paint just to have the 1 shot taken), so here I am wearing the fabric components of the costume, holding the Lekku, with the bodypaint and nail polish beside me.
I love Aayla's design, she's such a cool character!
There are a few versions of Aayla out there - comic book, animated clone wars, and movie. My favourite version is the comic, I like the darker colours of her outfit and prefer this over multiple different shades of brown, and this is the version I decided to do.
Aayla has long-been a favourite Star Wars character of mine, and I’d wanted to do her costume for a number of years. I’d collected fabric over a period of time but it just sat in my fabric box waiting to be used. The thing that gave me the biggest push towards putting it all together was being given a set of Twi’lek Pam’s beautiful Lekku for my birthday last year.
It’s a very comfortable outfit to wear, and one of my favourite costumes. The paint takes a while to apply, but it is so worth it.
I posted a build thread online a while back, so I’ll cut and paste the relevant information and images into here
The two choices of shirt fabric I had to choose from:
Although I really liked both, the one with the smaller print pattern has a stretch to it so I went with that one.
I drafted the pattern for the top off a top I have which has a similar stretch to the fabric, since I didn’t want to go buying a brand new pattern from the store.
Pretty simple process really, laid the top flat over a piece of newspaper, and used a pin to poke through every inch or so of the seams, marking where the seams are.
I then took the top away, and connected the pin-holes so I had a replica of the pattern, minus the seam allowances (which would be added later).
I did this for the front, back, and then each side of the sleeve (Sleeve patterns are rarely symmetrical so I patterned the front with the edge up against a fold in the newspaper, then flipped the newspaper and patterned the back on this other side. Opened out the newspaper, cut it out, and voila
All 3 pattern pieces for the top:
I got a dark brown jersey knit fabric to use for lining the top.
I decided to just make the pants using some of the 'top lining' fabric I got from Spotlight (there was only JUST enough!). It's a lovely rich chocolate brown, and at least with making the pants, they'll match the colours on the rest of the outfit. They're all cut out, and ready for sewing up in the morning. I make the pattern for the pants using the same method as with the top, using a pair of leggings that I wear a lot.
I whipped up a draft of the top, decided it wasn't doing what it was supposed to be doing, so after a bit of pinning, dart shifting and elimination, had a design that worked nicely
Had a problem with getting the sleeve to sit in the armhole properly, it’s always hard to test when you only have pins and no dress-form available to do so. So yes... I had to pull the top on a couple of times while it was held together only with pins! Not a fun way to spend an afternoon!Boots arrived off ebay at about this point in the build
They have about a 3" heel, fit perfectly despite being labelled a size smaller than I wear, and are the perfect shade of brown to go with the rest of the costume.
The complete top, the elastic in the bottom of it will be covered over by the leather vest.
Had a first go at using the blue bodypaint on a hand, had it sponged it on with a round sponge. The colour varies quite a bit with inside and outside lighting, but it's a nice shade and will do the job, especially with 2 layers (only did 1 layer for the test here).
Before (flash):
After (flash):
The front of the aprons are decorated with the same fabric that the top is made from. Seeing as the fabric is stretchy and not very thick, I wanted to put vinyl on the back to give it more ‘body’, and to have something that wouldn't look out of place if the underside of the aprons are seen.
Once I’d drawn out the apron patterns it was just a matter of going into some cheap vinyl (wasn’t going to waste my nice expensive vinyl on a part that wouldn’t be seen!) and cut out the patterns in it. I put the pattern pieces against the ‘top’ fabric, but cut out quite a way from the edges of the pattern so I would easily be able to stretch the fabric enough that it lays taught against the vinyl.
I used good old E6000 glue to stick the fabric to the vinyl, that glue is fantastic
Once the fabric was stretched in place and the glue was dry, I trimmed back the edges.
I cut out the little ‘cover flap’ pieces in both my good vinyl, and the other vinyl with the intention of having the bad vinyl as a backing. These flap pieces are folded over the top edge of the belt, and after cutting out the pieces I realised that if the flaps are too thick they won’t hang over the belt nicely, so decided to scrap the cheaper thicker vinyl and just go with the nicer one which is a fair bit thinner.
I cut out several long strips of nice vinyl to use as a binding edge on all 4 pieces.
The binding strips were all glued down in place, then stitched to help them stay in place. The glue helped everything to stay in place while I stitched it. The gluing took the longest time of the whole belt creation process, and I ended up having to wedge drying pieces in between the pages of a big heavy book to help them dry in the correct spot (kept wanting to leap out of place within a few seconds of removing my fingers from the glued edging.
After stitching the binding, I joined the flaps to the aprons.
At this point I just needed is to get some velcro to hang the pieces off the belt properly!
I got some leather lacing to put in the eyelets, but it was too thick to thread through and lay nicely, so I had to wait for some softer thinner suede lacing to arrive in the post from the USA.
The finished vest
I used a slightly modified version of the top as the base and adapted the pattern to go from a stretch-fabric to a limited-stretch vinyl.I was terrified to cut it out of the vinyl since I only had half a meter of the stuff (all that was left in stock at the store!), and there was only enough to cut out one vest. Because of its unusual stretch it would have been almost impossible to create a mock-up that would fit in the same way.
So there was pretty much 1 shot to get it right. Fortunately it worked
It holds the 'sleeve' in place very well. I'd been worried I'd have to use double-sided tape to keep the side of the top with the sleeve sitting on my shoulder since it wanted to slip down every time I moved my arm, but don't need to worry about that anymore!
The headgear was created using a template provided online by Twi-lek Pam, which I scaled and adapted to my headsize using the same fabric as the vest.
Painting the Lekku – I used my bodypaint, and used an alcohol-based liquid to apply the paint instead of water to help the bodypaint stick. I also trimmed down the front edge of the headpiece so I could wear the lekku without the front edge showing below the bottom of the vinyl headgear.
Doing a makeup test – did my normal makeup job over the top of the blue paint base, I didn’t do any lip makeup here.
I also wanted to see how well the paint would stay on around my eyes with makeup, so I did an experiment and spent pretty much the whole day with a blue face, I was really happy with how well it stayed on.
Finally – everything put together!
Just for fun - I might also add that I’m a Primary School Teacher, and was asked to show kids a series of lightsaber training motions at an Episode 1 3D launch in February 2012. This was the biggest gathering of SW costumers in NZ.
Star Wars Day at Sylvia Park
For those interested, I made all the reddish-brown padawan robes, the Imperial Officer uniform, and both of the duelling Jedi and Maul outfits. This same event also provided me with one of my biggest challenges with this costume. The event was held outside in the middle of Summer and was run over a number of hours. I’ve only used water-based paint, so needed to find a way to get protection from the sun, find a way to not sweat in the heat (which would be detrimental to the paint), and need only minimal paint touch-ups over a few hours.
I ended up putting on the paint as-per-usual (with an alcohol-based liquid in place of water), and then once the lekku were on was sprayed down with high-spf anti-perspirant spray. Overall it worked pretty well – I didn’t get sunburnt, but it made my skin feel weird, and after a few hours of my skin not being able to breathe properly I started feeling unwell. It was more than worth it for the enjoyment of the public and the experience, but I don’t think I’ll do any more outdoor mid-summer troops as Aayla!
I love costuming and the challenges each outfit presents. I’m a member of both the Rebel and 501st Legions, and most of my costumes are Star Wars themed. With each costume I do I learn new skills and techniques – for Padme’s Veranda Nightgown it was slashing a pattern apart into panels then reattaching them with spaces in-between, for my Imperial Officer it was tailoring a suit, for Slave Leia it was sculpting, for Hoth Leia it was creating an insulated quilted snow suit that could be worn in sub-zero temperatures – the list goes on and on. I’m continually learning different skills, which is one of the things I find so enjoyable about costuming and sewing – there’s always something new to learn!
I suppose one of my biggest challenges with costuming is being based in New Zealand. Fabric is not cheap here, so I’ve had to learn to order from overseas and sometimes wait weeks for a particular costume component to arrive which isn’t available or is too expensive locally.
The biggest tip that I can give to anyone learning about costuming is to not be afraid to try out new techniques or think that a costume is beyond you because of various components that look intimidating. I have learnt SO much through trial and error (seam and dart manipulation, sculpted wearable items – all things I’d never done before or thought I’d be able to do). You never know what you can do till you try, and then if at first you don’t succeed – give it another go!
When it comes to fabric costumes, I also like to think “If this character were a real person strolling down the road, would their outfit be made of this?”
Think carefully about your fabric choices. Finding the correct type and colour of fabric can be one of the most difficult aspects of creating a costume, but don’t rush out and get the first ‘close match’ you can find (unless you’re in an absolute hurry!). Sometimes it pays to spend time looking at your options, going out of your way to visit obscure shops, or comparing shades and weaves, and if you’re lucky – sometimes that perfect but far more expensive fabric just MAY be on sale when the time comes for you to purchase (hey, it’s happened to me!)
Last but most certainly not least – my proof photo! I read in the info thread that I don’t need to physically wear the entire costume (it would be a waste to apply the paint just to have the 1 shot taken), so here I am wearing the fabric components of the costume, holding the Lekku, with the bodypaint and nail polish beside me.
Last edited: