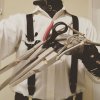
Edward Scissorhands Gauntlets Build Thread (3d Printed, Mostly)

Doctor Octoroc

Sr Member
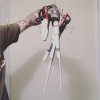
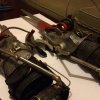
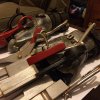
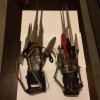
I already finished the prop(s) but I thought I'd post an account of my build process with some photos I took along the way for anyone else interested in building them similarly to my own. If enough interest is generated then I'll consider making the 3d printed parts available on Shapeways for purchase but as of now, this will just be a build thread. Also, to avoid a huge first post, I'll be posting a few steps at a time every day to space it out and allow some feedback or questions along the way as if I was currently building them.

This is a build I did a number of years back but had not gotten into 3d printing yet and was short on time so I used bass wood and craft foam to build them. Here is the original pair next to the new ones - definitely an improvement!

comparison.jpg

With a bit of weathering, the old pair would have been much better but even so, the materials weren't very durable and by the end of Halloween weekend, I would have had to rebuild the majority of the parts to use them again so I wanted to build a better pair from scratch, hence 3d printing many of the parts. Here are the Solidworks CAD models for the new pair:

wipFullRight.jpgwipFullLeft.jpg

Using the same basic shape of the blades from the first build, I recreated the blades first, including the handles (the original build used actual handles that I painstakingly separated from the blades) and all the holes for various found hardware created ahead of time to minimize drilling after the fact.

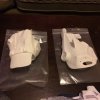
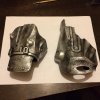
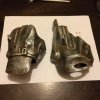
Here are the raw 3d printed parts for the blades and hand plates:

IMG_3955.JPGIMG_7446.JPG

I actually printed the blades a few years ago but just recently decided to move forward with the build. The hand plates I designed and printed more recently, based on the awesome reference material that HMS Mike provided in this thread. I opted for a simpler version of the hand plates as creating them to encase my hands completely would have required multiple test prints to ensure a proper fit while just designing them to fit over top and around the sides allowed for more flexibility during the build and a much easier way to be able to put them on and take them off.

In addition to these 3d printed parts, I used a good deal of found items including a pair of leather gloves (I actually re-used the gloves from my first build so as not to use another pair), large copper paper clips to fashion the buckles, bone party favors from Party City, and a variety of bolts, nuts, wingnuts and washers for securing everything. For the lower leather portions and straps, I used a faux-leather material, brass eyelets, snaps for fastening on the underside and a lot of thread. Luckily, my girlfriend is a fashion major and a costumer at the local theatre so she did the machine work for me and I did the hand-sewing after the fact.

The first step was painting the blades. There are a variety of paints that work on the 3d printed plastics but I've found Testor's enamel model paints to be the best quality, good coverage, and they have a lot of good colors in their library. Every 3d printed part got a base coat of flat black which seeps into the porous material to provide a good base coat of black that won't easily scratch off or reveal the original white color of the plastic with minor sanding.

The below image shows one blade (top) after the black base coat plus a coat of metallic silver and the second blade (bottom) after sanding those two coats. For each blade, I did the following: flat black base coat, metallic silver coat, sanded, metallic silver, sanded, then ended with a different brand (Liquid Leaf) of silver leaf paint I picked up to provide a better metallic look.
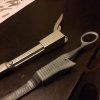
IMG_7363.JPG

In hind's sight, I wish I had done one or two more coats of the metallic silver and sanding before the silver leaf as some stepping on the 3d printed parts is still visible in the final build. However, after weathering, it's not as noticeable. Below are all of the blades on the left hand before and after weathering. Bottom line is, the more coats with sanding in between, and the better the sanding job, the less those step lines will show. I hand sanded but I really wish I had a Dremel with sanding attachments.
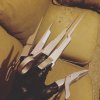
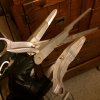
IMG_7362.JPGIMG_7376.JPG

The weathering was done with a combination of wet and dry coats of flat brown Testor's. I used more concentrated amounts in crevices and around the bolts and screws modeled into the 3d printed parts (pretty much anywhere rust would be likely to build) and less concentrated, drier coats across the rest rather randomly. I focused on edges as well to add a bit of definition, as well as any areas where two opposite blades would rub against each other if they were functional scissors, like between the pinky and ring finger, and between the middle and forefinger.

After weathering, I applied red and black gloss Testor's to the appropriate handles. Here are all the blades with their handles painted, and again a detail shot of weathering on the handles, which was basically just the silver leaf paint applied randomly around the edges - thicker on areas that would be likely to wear against things if functional - and anywhere else where other parts of the gauntlets would have likely worn down the edges.
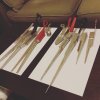
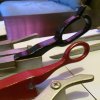
IMG_7383.JPG IMG_7391.JPG

Last up, I sprayed them all down with a few coats of clear coat to protect them from unwanted wear. I probably could have used a better finish as this one dulled the metallic effect but the props aren't exactly shiny and new so some dulling looks fine on them.

IMG_7398.JPG

And that's it for the blades. Next up, the hand plates!
 
Last edited:
As I mentioned in my previous post, I used the excellent reference material HMS Mike provided in this thread to build the hand plates. Each one is so unique that having this material was crucial to an accurate representation of each. While the material doesn't offer a view from the bottom, this didn't affect my build as mine were designed without a bottom for two reasons.

First, having an enclosed form would require a far more precise fit, one that would require multiple prints and adjustments to get just right. Second, it would make it more difficult to get the gauntlets on and take them off. I wanted the ability to do this on my own and not rely on someone else helping me in and out of them so having open bottoms allowed for this.

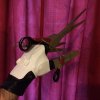
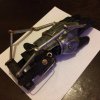
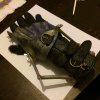
Here are the raw 3d printed hand plates test fitted over the gloves and with the blades in their approximate positions relative to them:

IMG_7443.JPG IMG_7444.JPG

For these pictures, I also attached two springs - one to connect the left forefinger and thumb and the second which connects to the right hand middle finger blade handle and to a location on the arm that I had yet to build at this point, hence it's just tucked under the glove near the wrist. These springs were removed from a dinner plate display hanger like this and cut down/stretched to be the appropriate length. While the spring on the left hand is actually more akin to a strip of metal coiled up in a spring form, finding something like this without the rigidity that comes with that type of coil spring was not a to-do list item I wanted to spend a lot of time on, so this one did the trick.

The left hand plate fits snug around the thumb and on the other side behind the pinky while the right side hand plate ends where the 'figure eight' form is on the inside and goes around the bottom on the right side. This makes it a bit more difficult to get the left hand on than the right so knowing this, I designed the rest of the elements on the right hand to be easier to get on so I could put the left hand gauntlet on first.

The plates also have all the same rivets, holes and other features modeled into them as the reference material showed, both for accuracy and for convenience as some of these holes would be used to attach other parts later, most notably the two holes on the 'figure eight' on the inside of the right hand, which both are shown in the reference material to have bolts protruding from them. These are present in the cast but were not included in my model as I would use actual hardware in place.

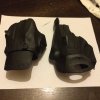
As always, I started with a coat of flat black then added one more for better coverage since these parts would receive a different treatment than the blades.

IMG_7449.JPG

I debated either modeling the hammered texture into the model or creating it after the fact, but decided instead to let this detail show through the paint job as 3d printing textures can have less than ideal results and chipping away at the parts after the fact could potentially damage them and compromise the structural integrity. So I used a sponge to apply a silver metallic paint over the flat black base coats to mimic the look, then added some rust weathering to give more character and also to make it match up better with the look of the blades. Using the same weathering technique gives some consistency between parts that would otherwise be a stark contrast. You can really see the difference that weathering makes between the two photos below!

IMG_7451.JPG IMG_7452.JPG

With that, the hand plates were finished, so I did another test fit to see how they looked.

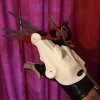
IMG_7454.JPG IMG_7456.JPG

They were a tad too shiny but after seeing how the clear coat dulled the blades, I knew that after applying that, they wouldn't stand out as much in comparison to the blades.

At this point, I already had all of the faux-leather portions patterned and ready for sewing, so I was just waiting on my girlfriend to sew them to their opposite sides since the faux-leather was one-sided with a white cotton backing. I opted for this material instead of a double-sided one so that some parts could have that white cotton backing on them where they would be on my skin - it seemed more comfortable that way but also required some clean up techniques since the edges would show the white material from certain angles.

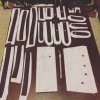
IMG_7433.JPG

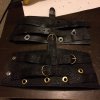
Above are all of the pieces that wrap around the wrists and attach to the leather gloves.

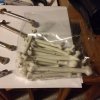
While waiting for her to finish them, I created the bone hinges. As I mentioned before, I used cheap party favors from Party City in the shape of bones to create them. They were $1.99 per bag and each bag contained 9 small and 9 large bones. I only needed the large ones but I also needed 12 of them so I bought two bags and had some spare ones in case I goofed a few up (spoiler, I did).

IMG_7440.JPG

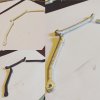
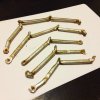
The main issue you can see from the photo above was the holes in them. I simply filled these in with hot glue then shaved/sanded the excess before painting. I also had to shape each one to match the actual bone hinges as close as possible since they all have a different shape. On some of them, I cut the 'bulge' off entirely, while on others I shaved down one or both sides with an X-Acto and sanded them. Below you can see the process of painting them and the result after linking them together. To connect them, I acquired a pen like the kind you'd find at a bank or post office (for the record, I didn't steal one, I found it at a local office supply store haha), which has a chain made up of balls linked by thin posts. For each connection, I cut off two or three links of the ball-chain and drilled holes into the ends of the bones and inserted the chain into them. This provided a nice link that wasn't readily visible and allowed for movement in multiple directions so the bone hinges could move freely while I moved any of the fingers attached to the wrists or hand plate by the bone hinges.

IMG_7369.JPG IMG_7439.JPG

The top two groups of three are for the left gauntlet while the three groups of two on the bottom are for the right one.

I also added some rust weathering (really went to town on that haha) to both add character and to cover up imperfections in the surface. The plastic these are made of is softer and doesn't sand very well so I kept it to a minimum and let the rust do the rest. I also applied a good amount between the sections to better 'hide' any portion of the ball chains that might be visible, plus this is where the most amount of rust would likely build up over time.

Next up, the leather portions of the gauntlets, plus an additional neck piece I created to stick out of the dress shirt since I'm planning to do 'fancy' Edward.
 
Last edited:
A great example of how to marry 3d printing, model making and fabrication! Your hands look great, I am really impressed with the modeling you did for the 3d prints. Will be back to check out the rest of the build log.
 
A great example of how to marry 3d printing, model making and fabrication! Your hands look great, I am really impressed with the modeling you did for the 3d prints. Will be back to check out the rest of the build log.

Thanks! I'm always looking to incorporate 3d printed parts into prop builds - it's nice to be able to get things 'perfect' in a digital build to eliminate the risk on the finishing end - the only trick is getting them right in the model before printing so there is less work in the post print process.

For the leather portions, I had mentioned I used craft foam before. I created simple models in another 3d program and printed the pattern, paper craft style, to create a template from which to cut the foam pieces, then I assembled them with hot glue and did some painting and crackle finish on them for texture. I did this for the hand plates as well in the previous build but by the end of the first night, the foam was already falling apart and had holes in them from all the times I took off/put on the gloves since it's not a very durable material. That's why I opted for a faux-leather material with a white cotton backing. This made it more comfortable up against my skin but also meant more cleanup after sewing the parts together along the edges where that white would show. Here are the old 'hand plates' and leather assemblies made from craft foam. They looked fine but as I mentioned, they didn't hold up very well. They utilized Velcro on the underside, but that eventually peeled off as well.

IMG_1952.JPG

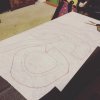
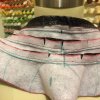
Having the white backing on the new material made it easier to make the patterns using the previous versions of those leather parts. If it was double-sided leather material then it would have been difficult to accurately trace the patterns. Here are all the parts of the neck piece traced out with seam allowances. My awesome girlfriend sewed these parts together for me on the machine and the result was perfect.

IMG_7358.JPG IMG_7426.JPG IMG_7430.JPG

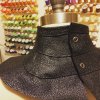
You can see how much work went into sewing it on the inside where she cut slits to allow easier bending of the fabric. After she sewed them together, I added the snaps and cleaned up the edge with a two-part process. First, I colored in the visible white edge with a black Sharpie, then I took a lighter to the edge to 'burn off' the stray cotton fibers and to lightly melt the plastic-like faux-leather so it hardened a bit. This wasn't the plan from the beginning but after trying it on a few test scraps, I was satisfied with the result.

Below, you can see the previous craft foam versions of the left and right hand leather gauntlet parts. The buckles were fashioned from large copper paper clips, cutting off the rounded portions of the paper clips and bending in the straight ends inward to complete the "D" shape, then cutting off another straight portion from the clips for the prong in the center of each. I reused these in the new build as they were a lot of work and I didn't see the need to recreate them.

IMG_7408.JPG IMG_7407.JPG

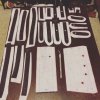
Here are all of the pieces that go into the leather portions on the left and right hands, as well as the straps that go around the neck piece. I cut the patterns for the top sides, again using pieces from the old build as the pattern, then cut a back side with a good border around the outside for my girlfriend to sew on the machine. The main 'wrap-arounds' for each hand (bottom right of the image below) didn't have a back side, but the edge was folded over to create a clean edge. As mentioned above, the exposed edges of these parts, after sewing them together, were colored in with black Sharpie then 'burnt' to give a clean edge.

IMG_7433.JPG

After my girlfriend sewed these together on the machine, I hot glued then hand sewed them together since the hot glue alone wouldn't hold well on the material surface. Below you can see the finished right hand leather portion under the old one after attaching buckles and snaps, as well as inserting the eyelets where various pieces of hardware would be affixed later.

IMG_7464.JPG

The next step was to hot glue the hand plates to the leather glove bases (they really tied everything together) and then attach each assembly to the appropriate hand behind the hand plate using, again, primarily hot glue and then sewing along the edge of the leather glove base of each to secure it to the leather assembly. Below are the finished right and left hands before attaching the blades and rest of the found hardware. There were three holes on the right hand plate, just above the large rounded opening by the wrist. The middle one was a perfect place to attach the buckle/strap that's fed through that opening from below to secure the right leather assembly to that plate, using a short bolt and nut behind to keep it in place. The left hand had no such convenience so it's attached only by the leather glove base. This serves the purpose of having the left hand be the first one I put on since I can be more careful with it having my right hand free, then the right hand gauntlet is a bit more sturdy so if I fumble around a bit trying to get it on with my left hand already 'scissor-fied' it'll hold up.

IMG_7476.JPG IMG_7470.JPG

In addition, I also used the same flat brown Testor's paint from before that was used for the rust weathering to dirty up the leathery surface. This remained tacky for a few days since the material isn't really meant for paint application, but it dried fine after that. I wanted every part of the gloves to look like it belonged together and having a shared weathering technique and color between them all did exactly that. I also attached the bone hinges to their proper locations on the leather assemblies, as well as other misc hardware like the bar on the inside of the left hand gauntlet (another section of oversized copper paper clip, and two female sides of the same button snaps I used which had holes in them the perfect size for the bar to fit under) and some screws/bolts to hold some other parts together. Each glove has a series of snaps on the underside for securing them around my wrists. As of recent tests, I can get both gloves on but the right one, I can't snap up on my own. I can, however, take them both off on my own in case of emergency haha.

Then I added straps and buckles to the neck piece, similar to those on the gloves. I didn't, however, weather the neck part as they weren't part of the gloves. This neck piece is worn under the white dress shirt to give the impression that I'm wearing the rest of his outfit beneath. Conveniently, the suspenders are worn over the sides of the bottom portion of the neck piece to hold them down so they don't bunch up and create funky bulges under the shirt.

IMG_7463.JPG

Next up, adding the blades and finishing touches!
 
Last edited:
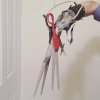
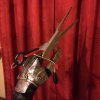
Attaching the blades was pretty much the easiest part but not the least painful as it required a good amount of hot glue poured into the blade, then being placed on each finger. This affixed the blade to each finger of the glove base but also filled in the surrounding areas to basically mold to my fingers when inside, so it was necessary to glue them in place while wearing the full glove. Below is each glove after attaching the fingers and the majority of the rest of the hardware.

IMG_7475.JPG IMG_7484.JPG

My original plan for the right hand forefinger was to line up the hole on the outside with the hole on the front part of the 'figure eight' form on the same side of the hand plate but it didn't match up quite right, plus on the previous version of the gloves, the wingnut kept falling off from all of the movement of that finger, so it remains unattached.

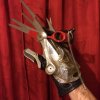
Here are some more shots of the finished gloves on their own. After affixing all of the bone hinges and hardware, I did one more pass with the flat brown Testor's to tie things together and hide a few places where paint scraped off during assembly.

IMG_7480.JPG IMG_7479.JPG IMG_7481.JPG

And again, with the full ensemble.

scissorhandsFinal01.jpg scissorhandsFinal02.jpg

My girlfriend did the makeup and helped me in and out of the gloves all night. I could hold a beer with my right hand around the neck of the bottle but I had to resort to drinking scotch through a straw just like Edward Scissorhands would haha.
 
So awesome. Please let us know if you decide to sell the bits through Shapeways!

Will do! I think the best approach to that, since I sized these for my own hands and I wear small gloves, is to get someone with size large hands to take some measurements of their own fingers and hands to gauge how the parts should be scaled up to fit them - then go halfway between those two scales for a medium and I can figure out extra large based on that as well then sell them by size with some basic measurements included in the description to help people figure out which one would be best for them.

If anyone has size large hands and a pair of leather gloves handy and is willing to take measurements for me while wearing the gloves, that would be a huge help! This is how I gauged the size for my own hands.

I wear a size L glove - I'd be happy to be the model for this size! I'll take some pics with a measuring tape so you have some numbers in context, if you'd like!
 
I wear a size L glove - I'd be happy to be the model for this size! I'll take some pics with a measuring tape so you have some numbers in context, if you'd like!

Awesome! Yeah, that will be perfect. I really only need a top down view with the fingers spread slightly apart - if you can do one with the ruler horizontally and another with it vertically, that'll help me gauge the measurements from both directions. The basic idea is that each blade should be slightly larger than each finger so with the glove on, it'll fit snug. Also let me know if the gloves fit snug or are a little loose on your hands.

I'll also need an approximate measurement of the thickest part of your hand from top to bottom (from the base of the thumb pad to the top) to gauge the size of the hand plates. Basically, just look at your hand from the side (thumb facing you) and hold a ruler in front of it so I can approximate that distance. Only the left hand plate goes around the thumb but this measurement is crucial to ensure a good fit on the left hand part since it wraps further around the hand than the right hand plate.

I actually had a few fingers on my blades that were too tight but I was able to sand out some material from the inside to allow more room, and for the ones that were too tight even after that, I cut the outside layer off of those fingers the glove leaving just the insulation layer so it wasn't as thick.

Will do! Any recommendation on glove type? Thin driving gloves, thicker leather gardening/work gloves? I'll wrap a measuring tape around my fingers as well.
 
Will do! Any recommendation on glove type? Thin driving gloves, thicker leather gardening/work gloves? I'll wrap a measuring tape around my fingers as well.

I would go with the thicker leather glove type since they're the best for the build all around. Are they a good, snug fit on your hand?
 
Here are a few more pictures of the full costume from a party last night. My girlfriend went as Eleven from Stranger Things and my buddy and his date were Pirate Joker and Cowgirl Wonder Woman.

scissorhandsFinal03.jpg scissorhandsFinal04.jpg scissorhandsFinal05.jpg
 
Hello.
I'm the father of a 12-year-old girl who fell in love with Edward and asked me to do cosplay (me Edward and her Kim), but I've never done cosplay before. I was wondering if anyone could give me the file for 3D printing of the hand plates ... it's to fulfill my daughter's dream! I beg you.
thank you
 

Your message may be considered spam for the following reasons:

If you wish to reply despite these issues, check the box below before replying.
Be aware that malicious compliance may result in more severe penalties.
Back
Top