DK's Star Wars Props and Blaster Builds

dkraude

Active Member
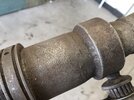
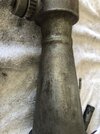
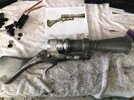
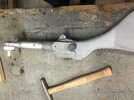
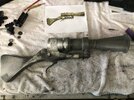
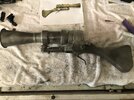
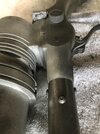
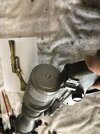
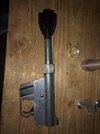
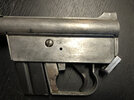
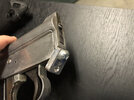
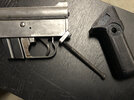
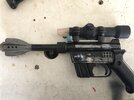
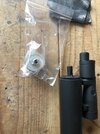
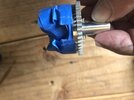
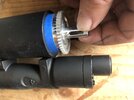
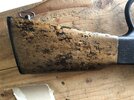
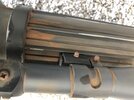
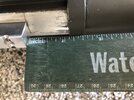
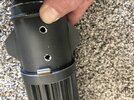
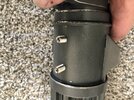
Ever since I was a kid I have loved everything Sci-Fi, especially Star Wars. I am a huge collector, in fact, my wife would say fanatic but honestly, I think she likes it too otherwise she would put her foot down and she hasn't so far. Knock on wood.

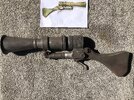
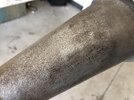
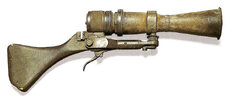
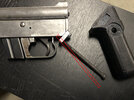
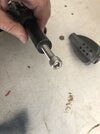
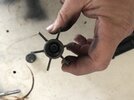
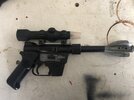
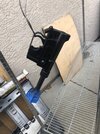
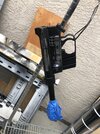
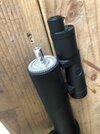
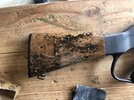
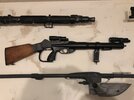
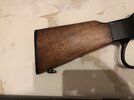
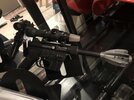
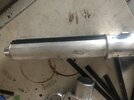
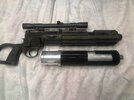
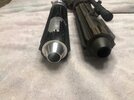
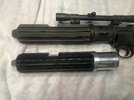
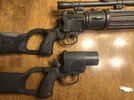
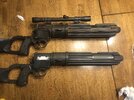
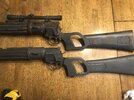
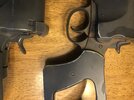
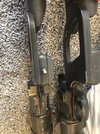
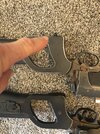
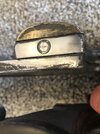
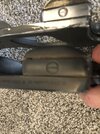
With that said, I thought I would start off by sharing some of my collection and the progress of my builds. I have appreciated all of the pointers and support from all of you here on the RPF. I especially have appreciated all of the research and hard work all of you put into your own projects. Quite frankly, it is inspiring. My hopes are that you will not shy away from offering your suggestions, critiques and expertise as I try to do my best to emulate some of your master prop builders and collectors. Wish me luck, because I am sure I am going to need it.

PS. Please keep in mind this is my very first attempt in creating a thread. I am not sure what I am doing here so please bear with me!
 
I thought I would start out by sharing my full size helmet collection. My son graciously volunteered his room as the display area. Thanks Johnathon!
IMG_0787.jpg
 
Last edited:
Most recently, I received the EE-3 kits I ordered from Chris. (ESB and ROTJ) I have finished putting together the ROTJ kit. Now, I am waiting for the barrel fins, scope block, wing pylon, and track kit which should arrive any day. The replica scope should be ready by the end of the month. Will update my progress. I have attached a photo of it next to my Master Replicas Die Cast Replica. Field Marshall does great work!View attachment 1377125
 
Last edited:
A few things I noticed when building the EE-3 kit.

First is that the receiver needed to be rounded in order for the barrel catch to spring down which releases and opens the barrel. I did it by using my bench grinder but it can be done with a dremel.


IMG_0740.jpg
IMG_0713.jpg
IMG_0747.jpg
IMG_0748.jpg
 
Last edited:
The second thing was that the brass casting of the handle was a little large. I needed to shave about 1/16th of an inch in order to allow the stock assembly to slide into the receiver. Otherwise it would not line up properly as illustrated in the photos before and after.
 

Attachments

  • IMG_0719.jpg
    IMG_0719.jpg
    1.7 MB · Views: 207
  • IMG_0718.jpg
    IMG_0718.jpg
    4 MB · Views: 213
  • IMG_0789.jpg
    IMG_0789.jpg
    1.2 MB · Views: 198
  • IMG_0791.jpg
    IMG_0791.jpg
    1.3 MB · Views: 198
Last edited:
While waiting for the parts I ordered, I decided to start tackling my DL-21 Dengar Both Pistol. I picked up a Charter Arms AR-7 to use for the base. I am still looking for greeblies, scope rings for the single point and a scope mount if anyone can point me in the right direction.

I had an hour or so to work on it and want to share my progress. I am not quite happy with the angle of the handle so I am going to make another block and drill in at a steeper angle.
IMG_0800.jpg
 

Attachments

  • IMG_0798.jpg
    IMG_0798.jpg
    1.3 MB · Views: 123
Last edited:
I started with cutting the barrel and tapping into it so I could insert the all thread. I then tapped into the resin fin so that it could screw on. I realized after that I could have unscrewed the cap and used a 1/4" hex head screw instead. I will try to keep my eyes peeled for a real fin to replace but this will have to do for now.
 

Attachments

  • IMG_0780.jpg
    IMG_0780.jpg
    3.5 MB · Views: 145
  • IMG_0782.jpg
    IMG_0782.jpg
    4.3 MB · Views: 128
  • IMG_0783.jpg
    IMG_0783.jpg
    1.7 MB · Views: 128
Last edited:
Next, I moved on the the handle. I attempted to figure out a way to attach it to the receiver so I thought about creating a block that I could screw into the existing receiver. It worked but the angle is off. I will have to make another trip back the the hardware store and try again. I think if I drill the bottom hole on a different angle and tap, it will do the trick. Any suggestions appreciated.
 

Attachments

  • IMG_0793.jpg
    IMG_0793.jpg
    3.7 MB · Views: 125
  • IMG_0794.jpg
    IMG_0794.jpg
    3.3 MB · Views: 149
  • IMG_0796.jpg
    IMG_0796.jpg
    4 MB · Views: 119
  • IMG_0796 copy.jpg
    IMG_0796 copy.jpg
    4.3 MB · Views: 120
Over the holiday I scored a real motar fin and SP scope. Thanks kurryboy. I decided to attach the fin with a 1 1/4” long 5/16 coarse thread hex key bolt. Drilled and tapped into the barrel. Also tracked down the greeblies. Now, I just need a dove tail scope Mount block and I will be able to finish my DL-21. Loads of sanding and prep work to get this to look right. My hats off to all you prop builders who make this look so easy.
 

Attachments

  • 1349B4EF-2ECC-4AE8-B202-608ABDB7E160.jpeg
    1349B4EF-2ECC-4AE8-B202-608ABDB7E160.jpeg
    2.4 MB · Views: 154
  • 77DD0E15-2206-462F-B343-E8D67CC5CD9C.jpeg
    77DD0E15-2206-462F-B343-E8D67CC5CD9C.jpeg
    791.7 KB · Views: 129
  • C67556EA-DB96-4F48-9BE2-83F8D8F05AEE.jpeg
    C67556EA-DB96-4F48-9BE2-83F8D8F05AEE.jpeg
    806.8 KB · Views: 126
  • A79C8EA0-6BB5-49D9-B388-19A40B6842F6.jpeg
    A79C8EA0-6BB5-49D9-B388-19A40B6842F6.jpeg
    2.6 MB · Views: 147
  • AA05CA9B-278C-4685-9F54-3EA4F1B9E667.jpeg
    AA05CA9B-278C-4685-9F54-3EA4F1B9E667.jpeg
    2.2 MB · Views: 131
  • 8AC66DB1-9E50-46EF-8407-9F2547DFB69E.jpeg
    8AC66DB1-9E50-46EF-8407-9F2547DFB69E.jpeg
    1.9 MB · Views: 151
  • 09BB3F2C-18DD-4B1C-AE8F-E94D30E9FBBC.jpeg
    09BB3F2C-18DD-4B1C-AE8F-E94D30E9FBBC.jpeg
    1.8 MB · Views: 185
I have a few different stands. The Darth Vader is a Master Replicas Star Wars Stand. The Range Trooper is displayed on the custom stand it came with. Most are from Kreationix. They look nice but are made from plastic. I believe they are only $20 each so they are very reasonable if you have a large collection. Hope this helps.
 
Just received my aluminum tip for my recently acquired Webley Schermuly Riot Gun. Thanks Viper / Portumac! Instead of glueing it, I wrapped some painters tape around the tip. It slides in with a snug fit.

Decided it would be a good time to refinish the stock as well. Started with a 60 grit gradually moving up to 220. then stained and finished with a satin poly.

If any of you know where I can find the off white replica strap I would appreciate it.
 

Attachments

  • 02B59FBF-1F25-4546-A031-DD638D361A1B.jpeg
    02B59FBF-1F25-4546-A031-DD638D361A1B.jpeg
    1.2 MB · Views: 193
  • 9CFB0FE1-DE72-4650-B74F-DACAEC73793F.jpeg
    9CFB0FE1-DE72-4650-B74F-DACAEC73793F.jpeg
    1.9 MB · Views: 126
  • 6E8BEFCD-5E7F-4ED3-AE20-E103735C1E9E.jpeg
    6E8BEFCD-5E7F-4ED3-AE20-E103735C1E9E.jpeg
    1.1 MB · Views: 130
  • 9BA94041-FC17-47B0-BFD2-58659F59EA33.jpeg
    9BA94041-FC17-47B0-BFD2-58659F59EA33.jpeg
    1.1 MB · Views: 122
  • EF3B0380-BFDB-4D07-B3E4-4C782CD78F42.jpeg
    EF3B0380-BFDB-4D07-B3E4-4C782CD78F42.jpeg
    1.2 MB · Views: 135
  • D7172869-8A83-46F4-9220-AF746CAFE11E.jpeg
    D7172869-8A83-46F4-9220-AF746CAFE11E.jpeg
    1.9 MB · Views: 135
  • D583338C-5A37-409B-AC39-BBEB2854D9E2.jpeg
    D583338C-5A37-409B-AC39-BBEB2854D9E2.jpeg
    2.1 MB · Views: 169
  • 9C07328E-7E33-4D2E-9384-8AD10611656B.jpeg
    9C07328E-7E33-4D2E-9384-8AD10611656B.jpeg
    2.1 MB · Views: 186
  • 517D58B0-19C5-45D5-9FD5-7649848BE436.jpeg
    517D58B0-19C5-45D5-9FD5-7649848BE436.jpeg
    2.1 MB · Views: 171
  • 17692068-01A6-4139-99FC-39458E6F1468.jpeg
    17692068-01A6-4139-99FC-39458E6F1468.jpeg
    2.4 MB · Views: 169
Spent some time working on my EE3 FM ROTJ Kit Build. Here are some photos next to my MR version. Made a few mistakes that I would avoid if I could do it again.

1. I would have installed the scope mounts first before installing the t tracks. I realized after the fact that the mount is attached to the barrel directly and not on top of the t tracks. I attempted to cut them in after (Bad Idea) and ended up cracking them anyway. Luckily, I had a few extra tracks to reinstall.
2. I would not have assumed the spacing of the T Tracks on the MR would be identical. It actually needs to be 1/32 Less. I later decided to lay them all out on the barrel before install. (Tough to do on a circle) I ended up cutting strips of double side tape to lay them out. It was easy to remove each track and install.

The Master replicas does not have any holes on the the bottom of the barrel but the kit has them. You can either glue to barrel in and fill the holes with jb weld (If you want to replicate the MR version. I decided to tap the holes at 1/4" and install some hex head inverted screws. I did this so the barrel could remain removable.

Was this not a good idea? Should I have just glued it?

- Some other details to consider. The strap bracket at the bottom of the handle needs to be adjusted on the ROTJ version. I cut it off, filed, sanded, and scored the standard screw head to match the MR.

- Hammer is shaped differently. - What are your thoughts guys? Do I emulate the MR or leave alone? Sometimes the MR versions are off. Does anyone have any photo references from screen shots?
 
ROTJ EE3 progress photos.
 

Attachments

  • 48108B77-5981-47D9-B1BB-2817C65F3B59.jpeg
    48108B77-5981-47D9-B1BB-2817C65F3B59.jpeg
    1.2 MB · Views: 134
  • FD0B5233-1D79-4592-8E3F-F0AF9BCE1FF6.jpeg
    FD0B5233-1D79-4592-8E3F-F0AF9BCE1FF6.jpeg
    2.8 MB · Views: 156
  • 06AFAD79-72FE-4BC4-A6FE-24E09C8EF714.jpeg
    06AFAD79-72FE-4BC4-A6FE-24E09C8EF714.jpeg
    2.1 MB · Views: 166
  • 18182DF1-38AA-4252-9672-D18E7432175B.jpeg
    18182DF1-38AA-4252-9672-D18E7432175B.jpeg
    2.7 MB · Views: 140
  • F4295CE4-DA61-4C9D-A92C-F1CF21024496.jpeg
    F4295CE4-DA61-4C9D-A92C-F1CF21024496.jpeg
    3.4 MB · Views: 132
  • DE8C5F4F-7A11-4DCF-ACED-407569F9E521.jpeg
    DE8C5F4F-7A11-4DCF-ACED-407569F9E521.jpeg
    4 MB · Views: 144
  • 8838C6E4-78E8-481F-B824-F2320C76DE62.jpeg
    8838C6E4-78E8-481F-B824-F2320C76DE62.jpeg
    3.9 MB · Views: 122
  • E20113C3-7299-42A9-B185-5D1AC40D9955.jpeg
    E20113C3-7299-42A9-B185-5D1AC40D9955.jpeg
    1.4 MB · Views: 129
  • 7157D851-1959-413B-8BE9-474F3C7B2363.jpeg
    7157D851-1959-413B-8BE9-474F3C7B2363.jpeg
    1.5 MB · Views: 144
  • E3CF97A6-73F1-4C44-B180-1531F439009B.jpeg
    E3CF97A6-73F1-4C44-B180-1531F439009B.jpeg
    1.4 MB · Views: 131
  • 061D4D29-20F1-47D2-8357-DC9047B6819B.jpeg
    061D4D29-20F1-47D2-8357-DC9047B6819B.jpeg
    2.1 MB · Views: 115
  • 6921C0E8-6D7E-4C2B-9C2E-027970257757.jpeg
    6921C0E8-6D7E-4C2B-9C2E-027970257757.jpeg
    3 MB · Views: 128
  • A1AB976F-5182-49C7-AF5B-0A787DC69E56.jpeg
    A1AB976F-5182-49C7-AF5B-0A787DC69E56.jpeg
    1.4 MB · Views: 113
  • 4E356C8F-0EDF-4078-9B7B-FE35626997BE.jpeg
    4E356C8F-0EDF-4078-9B7B-FE35626997BE.jpeg
    1.7 MB · Views: 119
  • 1F97D7BF-0610-48E3-BA2C-4F7E1E8BE27F.jpeg
    1F97D7BF-0610-48E3-BA2C-4F7E1E8BE27F.jpeg
    1.4 MB · Views: 123
  • B1B37508-3E2A-419F-A90E-AC004D7746C9.jpeg
    B1B37508-3E2A-419F-A90E-AC004D7746C9.jpeg
    1.4 MB · Views: 104
  • 0F5587EE-8346-4507-BED7-E46FF3A9462B.jpeg
    0F5587EE-8346-4507-BED7-E46FF3A9462B.jpeg
    1.5 MB · Views: 136
  • B7C722C0-5918-43FE-ABA0-3287598FEB72.jpeg
    B7C722C0-5918-43FE-ABA0-3287598FEB72.jpeg
    1.7 MB · Views: 126
  • 2EB8A4D9-3128-4D86-80D8-C19BC66A9C71.jpeg
    2EB8A4D9-3128-4D86-80D8-C19BC66A9C71.jpeg
    2.1 MB · Views: 111
  • AA67D4C2-172A-4E44-92DA-0157240807A1.jpeg
    AA67D4C2-172A-4E44-92DA-0157240807A1.jpeg
    2.5 MB · Views: 111
  • 7F131D84-6558-45B9-BE57-32137115DCCE.jpeg
    7F131D84-6558-45B9-BE57-32137115DCCE.jpeg
    1.6 MB · Views: 97
  • 0559C98A-3130-48E5-AC51-8B63A80580DC.jpeg
    0559C98A-3130-48E5-AC51-8B63A80580DC.jpeg
    1.7 MB · Views: 141
Just received my aluminum tip for my recently acquired Webley Schermuly Riot Gun. Thanks Viper / Portumac! Instead of glueing it, I wrapped some painters tape around the tip. It slides in with a snug fit.

Decided it would be a good time to refinish the stock as well. Started with a 60 grit gradually moving up to 220. then stained and finished with a satin poly.

If any of you know where I can find the off white replica strap I would appreciate it.
What...an aluminum tip for the Schermuly? what, where????...need this for my own blaster :)
 
you´re a machine and make good progress in a short period of time Drew...am a bit envy ;)

So happy, that USP was finally able to deliver my last package.
Already have some other parts set aside for you ;)
 
you´re a machine and make good progress in a short period of time Drew...am a bit envy ;)

So happy, that USP was finally able to deliver my last package.
Already have some other parts set aside for you ;)
Thanks for the encouraging words. I am years behind you my friend and I have a lot catch up to do.
 
Update on my most recently completed item. Alternate Jawa Blaster. Shout out to Markus (Odiwan72) who offers this wonderful kit.
IMG_1562.jpg
 

Attachments

  • IMG_1566.jpg
    IMG_1566.jpg
    2.5 MB · Views: 128
  • IMG_1567.jpg
    IMG_1567.jpg
    2.1 MB · Views: 113
  • IMG_1565.jpg
    IMG_1565.jpg
    2.7 MB · Views: 140
  • FullSizeRender.jpg
    FullSizeRender.jpg
    3.3 MB · Views: 37
  • IMG_1417.jpg
    IMG_1417.jpg
    1.8 MB · Views: 34
  • IMG_1418.jpg
    IMG_1418.jpg
    1.6 MB · Views: 31
  • IMG_1461.jpg
    IMG_1461.jpg
    631 KB · Views: 45
  • IMG_1462.jpg
    IMG_1462.jpg
    679.6 KB · Views: 31
  • IMG_1515.jpg
    IMG_1515.jpg
    117.9 KB · Views: 45
  • IMG_1516.jpg
    IMG_1516.jpg
    69.2 KB · Views: 31
  • IMG_1517.jpg
    IMG_1517.jpg
    59.9 KB · Views: 31
  • IMG_1547.jpg
    IMG_1547.jpg
    2.6 MB · Views: 30
  • IMG_1548.jpg
    IMG_1548.jpg
    2.8 MB · Views: 35
  • IMG_1549.jpg
    IMG_1549.jpg
    1.6 MB · Views: 38
  • IMG_1550.jpg
    IMG_1550.jpg
    1.8 MB · Views: 24
  • IMG_1563.jpg
    IMG_1563.jpg
    5.6 MB · Views: 27
  • IMG_1565.jpg
    IMG_1565.jpg
    2.7 MB · Views: 25
  • IMG_1566.jpg
    IMG_1566.jpg
    2.5 MB · Views: 35
  • IMG_1567.jpg
    IMG_1567.jpg
    2.1 MB · Views: 36
  • Jawa_ion_pistol.jpg
    Jawa_ion_pistol.jpg
    38.8 KB · Views: 30
Last edited:

Your message may be considered spam for the following reasons:

If you wish to reply despite these issues, check the box below before replying.
Be aware that malicious compliance may result in more severe penalties.
Back
Top