Destiny Sparrow full-size Build

QEProps

New Member
I started a personal project a few weeks ago to build a full-size Sparrow from Bungie's Destiny. I'm doing everything from in-game screen shots for reference since I wasn't able to get a response from Bungie. Full size will be about 9.5' long (3m) and will be able to be disassembled into 4 pieces including the base so it will fit through standard doorways. I have to keep it under 10' long to easily fit in my 10x10 booth space at Salt Lake Comic Con this fall.

The base is 5' by 2' plywood base with a 2x4 frame There are two fixed wheels and two casters to allow me to roll the whole thing around. I figure the completed Sparrow and base will be around 200 lbs when complete.
11217809_767650526681281_6627857744279823211_n.jpg

The basic frame of the Sparrow is assembled with more 2x4's. This gives it the support to hold a rider and the basic shape of the Sparrow. Reinforced with metal framing plates where available. I was standing and climbing all over this thing and it didn't budge.
11220873_768246659955001_6485553650677924110_n.jpg

I used some cast iron pipe and a few flanges to make the supports for the frame. There are holes drilled in the bottom of a couple smaller pieces to keep the Sparrow from sliding around.
10410836_768741043238896_4605078786743164007_n.jpg

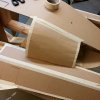
I added in a couple 2x4's for the front forks and then started skinning the forks with cardboard and masking tape. This is only the temporary skin, as soon as all of the cardboard is in place I'll be putting fiberglass over all of the surfaces to make it more durable.The cardboard will only be the basic surface of the Sparrow, more detail layers will be added later with MDF or PVC as necessary after the fiberglass.
11148506_774490279330639_709466386987012313_n.jpg

Completed forks.
10404394_774847539294913_2462026503038805743_n.jpg

Lots more to come, I have a few months to finish this up but I hope to be done before August.
 
I'm not the biggest fan of Destiny's gaming model, but their art direction is stellar. I'm really looking forward to seeing your completed sparrow. Good luck! You're off to a great start!
 
It's been a couple weeks and I've made some decent progress! Working on the body was tricky. I ended up reverting to my aircraft design background. I added a few formers to the main body and tweaked the shapes until they were just the way I wanted them.
11393173_775537359225931_2233736862292160364_n.jpg

Body panels were cut and formed over the formers and taped in place. It took about 30 minutes per panel because they had to be crushed and curved in a direction that was easy for the cardboard.
1480659_776089965837337_7180722100432361682_n.jpg

I had to test fit the forks a couple times to make sure there was no interference with the body panels too.
11400979_776443149135352_6858244117423764004_n.jpg

Nearly completed with the body. The underside was tricky. I probably should have removed the body from the base and done that first before working on the upper body. Oh well.
1391856_777225699057097_3160257776031897356_n.jpg

And a completed cardboard body! It looks a little funny without the engine right now.
11536100_777599609019706_5713129341005461492_n.jpg

Next step was fiberglass and resin all over to give it some strength.
1524909_777938145652519_8726295893207560754_n.jpg

And a nearly complete Sparrow body. There were a few areas that had to be reinforced, overall it took about a week to do the fiberglass.
10390019_779431002169900_895217340580591155_n.jpg

Now I'm moving on to Bondo to smooth the surface! I have the electrical channels cut for the wiring, I'll start adding some of that once the Bondo is done and then I can start adding other panels and fiddlybits.
10361412_781616835284650_4108302379050653707_n.jpg
 
Your sparrow build is so good. I can't wait to see it painted up. I don't like how limited the color selection of in-game sparrows is, but it's a vehicle in a video game, so, I guess I'll live.
 
This is a good start, I love it, I have subscribed and if I had the space would love to do one.
 
Long time since an update! I'm getting very close to being ready for paint. Only a few more bits to build and add to the body and the lighting is nearly complete!

When I last updated I had started with Bondo. There was a lot of Bondo to put on there. I've used about two and a half of those 7 pound buckets of Bondo at this point.
View attachment 510236

I took a bit of a vacation and went to visit family at the beginning of July and came back to start paneling the Sparrow. I started with the forks since they're relatively flat. The insides of the forks were paneled with 1/8" MDF using multiple layers. More Bondo to fill the gaps.
1512859_788805197899147_3693925822149184566_n.jpg

I used some aircraft nutplates to cover the wing attachment bolt access panels. Back drilled and riveted in place, they allow me to screw the access panels in place and easily remove them to disconnect the wings for transport and fitting through doorways.
150710_194849_COLLAGE-1.jpg

Started wiring up all the lights in the wings at that point. The whole thing is powered by a 12V 7Ah battery that is tucked into the right wing with a toggle switch. The wiring is connected using coaxial RCA connectors between the wings and the body to avoid cross wiring. Approximately 50' of speaker wire is run up and down the inside of the Sparrow to get to all the lights.
0713151849.jpg

Continuing with the wings, I decided to add a 1/8" layer of MDF to the upper surface. It makes the wing nice and smooth and gives me something to carve the panel lines into without digging into the Bondo and fiberglass. The extra thickness also increases the bending strength of the wing. I used a hand gouge and a metal straight edge to carve each line.
0713151927.jpg

I added some more styrene bits to the wing panels and then put a 3/4" PVC pipe through the wing to use as a control stick. The MDF plates are mounted on top and bottom of the wing again to increase bending strength and everything is epoxied into place. A few more pieces of MDF were added (not pictured) to detail out the rest of the grip and that pretty much finished the wings!
11745558_791365447643122_5811015837104023670_n.jpg

Moving on to the center of the Sparrow I started on the top side with the HUD. I built a box from MDF and added a piece of 1/2" acrylic with some lines etched on there for the display. LEDs mounted at the bottom will edge light these etched lines and make it glow really nicely. Also, you can see part of my battery in the top half of this picture.
0722151726.jpg

More gauges for the display. I used PVC for the housing and added LEDs behind some printed gauge faces that I made. The gauge face is glued behind a piece of acrylic to protect the face and then some tissue paper is added between the LEDs and the gauge face to diffuse the light a bit. More basic wiring, just done 6 more times.
150726_211148_COLLAGE-1.jpg

And all lit up!
11753281_796933817086285_6889758316938919713_n.jpg

I'm using an 8" concrete post form for the basic size and shape of the main engine. It took a while to get the front edge trimmed just right to fit the contour of the body.
11700900_794836643962669_8999059178794871511_n.jpg

The back end was cut and tapered down to a smaller diameter. I decided that covering the engine with foam was going to be the easiest way to get the layers and designs I needed. I also added some 2" PVC pipes to the sides to make the smaller engines in the back.
0731151923.jpg

Lighting is done with strip lights since they're 12V lights that have resistors pre-wired in. That means less work for me to get a ton of LEDs in a tight space. Total, the engines have about 100 LEDs.
11813299_798488023597531_1079295184662413654_n.jpg

I just finished off the engine by adding the inner cone. Made with ABS and more foam, it's held in place by a trio of foam rectangles and friction right now. I'll make it more permanent later but I need to remove it for painting.
11811354_800049843441349_3381510809717140804_n.jpg

More to come later! I hope to finish up building in about a week and be on to painting after that!
 
And the final update! I finished the Sparrow this weekend and took a few photos. More to come on my page but here's the final piece of the build puzzle!

I had to flip the sparrow and finish up the front engine pods. ABS pipe made the main body and then I filled the rest of the blend area with expanding foam and Bondo. I also fit the center fin (not pictured) on a plate that can be easily attached to the body. It's removable so that the main body can be set down on the ground without having to lay on its side.
11831665_800447590068241_745501953625947574_n.jpg

I moved on to the back end and finishing up the lighting. The light housings were tricky because I wanted to get a nice even transition between the red and green. They're inset about an inch from the body and there are a few layers of tissue paper to diffuse the light. It works out pretty well, though I may try a few other things in the future.
11846679_804344719678528_1142304171280300150_n.jpg

From there I went on to the rear bumper, or the butt rail, whatever it's supposed to be. More PVC meticulously cut and sanded at the right angles to make it all fit just right. The whole thing is filled with more resin to give it some strength. The brackets are made from 1/2" MDF and fit over the rail.
11896004_806488876130779_2669275060150655739_n.jpg

Starting the work on the foot pegs was a bit tricky. I drilled a 3/4" hole through the main support post and then welded a smaller pipe in place for the actual foot brace. The pedals are fit over this pipe so they don't take very much of the load when your foot is on them.
11219039_807343216045345_5844879192296560710_n.jpg

I decided to try my hand at HVLP painting for this project. Rattle cans would have destroyed my finger with the surface area of this. It was my first time using an HVLP spray gun so it was a learning process for me.
11895940_810016699111330_3189889255604325172_n.jpg

The base colors completed. The "Sierra Tan" that I picked up doesn't really look tan to me. I'm not sure if they mixed it wrong or if the color chip just looked different in the store (I'm inclined to think it's mixed wrong since it doesn't look tan at all) but the paint was too expensive for me to try again. I made do with it and managed to tone it down a bit with the weathering and other paints that went along with it.
11885195_811265522319781_6655085268149802110_n.jpg

More paint added to some of the details and I added some exterior carpet to the base.
11232070_813019978811002_991782381967556255_n.jpg

More Fiddly Bits! The seat was done with EVA foam that was covered with suede.
11202088_813780188734981_3700952527250283093_n.jpg

I spent 3 days weathering it. There's a lot of surface there to paint. Mostly silver dry-brushing and dark wash, but there's a few spots that got some specific weathering along the underside and the engines.
10592868_814875928625407_3877067054347158899_n.jpg

And there she is! More pictures to come as I get to editing them. Also if anyone is going to be at SLCC '15 I'll have the Sparrow at booth #3463 available for posing and pictures! Stop by and say hello!
11950408_815808748532125_902035572060693028_o.jpg
 
This thread is more than 8 years old.

Your message may be considered spam for the following reasons:

  1. This thread hasn't been active in some time. A new post in this thread might not contribute constructively to this discussion after so long.
If you wish to reply despite these issues, check the box below before replying.
Be aware that malicious compliance may result in more severe penalties.
Back
Top