daltman1967
Active Member
I decided I'd go ahead and order this kit. I don't have the budget (or the space) to put the equipment necessary to build a full-scale astromech, nor do I have the know-how of how to use those tools. And, building the full-scale R2 is at least a $5,000 project.
Anyway, I ordered the kit - and the first four magazines came all at once today. So as I build this, I will post pictures and my comments. So, here are the pictures from Week #1:


- - - Updated - - -
Now, here are the pictures from Week #2:


- - - Updated - - -
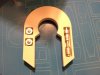
And Week #3:

- - - Updated - - -
And Week #4:


Anyway, I ordered the kit - and the first four magazines came all at once today. So as I build this, I will post pictures and my comments. So, here are the pictures from Week #1:
- - - Updated - - -
Now, here are the pictures from Week #2:
- - - Updated - - -
And Week #3:
- - - Updated - - -
And Week #4:


")