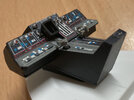
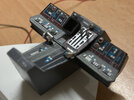
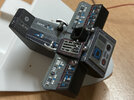
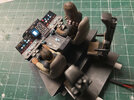
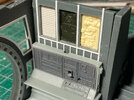
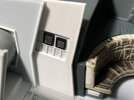
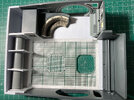
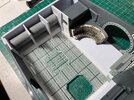
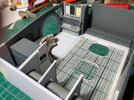
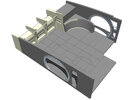
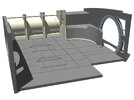
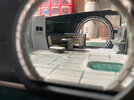
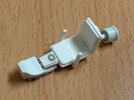
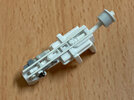
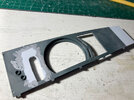
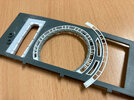
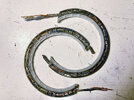
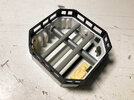
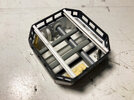
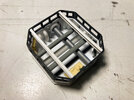
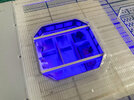
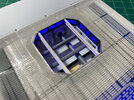
DeAgostini Millennium Falcon By Moska, 2022

Moska

Sr Member
Hello fellow modellers.
After several years carefully keeping all the deliveries of the DeAgostini Millennium Falcon collection, the time has finally come to start the work.

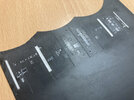
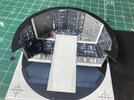
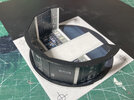
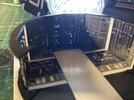
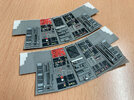
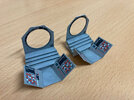
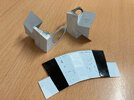
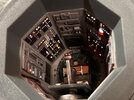
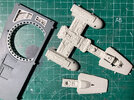
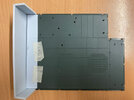
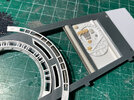
The first thing that I did not like about the model is the cockpit and the wells of the guns. For a model of this price, those parts are very poor. And I want a booth cockpit and wells that look like the real sets used in the movies.

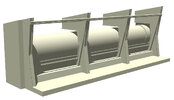
I know that there are several solutions for sale in the aftermarket, but they are really expensive and, besides, I have always liked to find my own solutions. So I designed all the necessary parts using a 3D application and also designed the decals to recreate the interior of the cockpit and the gun wells.


0000-Moska-Deagostini-Falcon-cockpit-01.jpg
0000-Moska-Deagostini-Falcon-cockpit-02.jpg


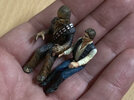
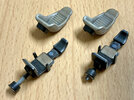
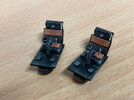
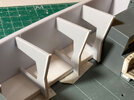
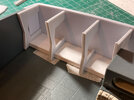
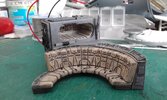
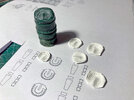
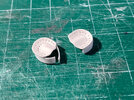
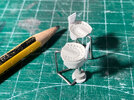
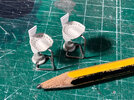
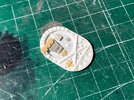
Today I leave you some samples of the work I done to model the figures of Han and Chewie and the rear seats.

0001-Moska-Deagostini-Falcon-figures-01.jpg0002-Moska-Deagostini-Falcon-figures-02.jpg0003-Moska-Deagostini-Falcon-seats-01.jpg0004-Moska-Deagostini-Falcon-seats-02.jpg0005-Moska-Deagostini-Falcon-seats-03.jpg

Thanks for looking
Rafa
 
Last edited:
Beautiful - that's a great start to the build! I've got two models to finish off and then my Deago Falcon is on the list to begin. I'll be watching your thread here for progress...

Dan
 
Hi friends.


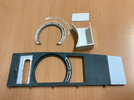
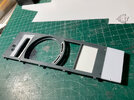
To build and light the interior of the cockpit and gun wells I used Evergreen black polystyrene and clear styrene, both 0.5mm thick. Applying a technique that I had never used, but that has worked quite well IMO.

I have prepared a small tutorial on how I made the rear wall of the cockpit in case you find this technique useful for your own projects:


1- The first thing I did was design the interior of the cockpit in 3D and thus extract all the pieces that I was going to need for its construction.
0000-Moska-Deagostini-Tutorial.jpg


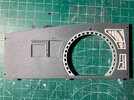
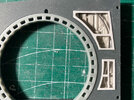
2- Once I had designed it in 3D and checked the measurements, I went on to design the decals, adapted to the measurements of my pieces.

VERY IMPORTANT!! Some reference points and guidelines must be incorporated into the design that will help us to perfectly align the successive layers necessary to use this technique.
101-Moska-Deagostini-Decal.jpg


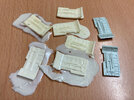
3- Over that design of the decals, I decided which buttons or controls were going to be illuminated and which ones were not. In this way, I got a template that will be cut out with a black self-adhesive vinyl plotter. (This work is done by signage and labeling companies and, as they are very small pieces, the price is very low). ATTENTION! The vinyl will act as a mask only for the elements that will be directly backlit. The small fiber optic holes are not included in this mask because they are too small and cannot be cut properly with a plotter.

To "peel" the cut parts of the vinyl I use a very fine point awl. Once all the cutouts have been removed, it is necessary to sand the entire surface with fine sandpaper to remove any relief in the cut areas of the vinyl.
102-Moska-Deagostini-Vinyl.jpg


4- Once the elements to be illuminated have been decided, on the design of the decals, I draw a template of the parts that I am going to make in clear styrene to insert them later in the black polystyrene pieces. The reason for using black polystyrene with clear inserts instead of making the entire piece clear is to avoid light leaks. It is an extra job that is worth it because later it saves a lot of time and work trying to eliminate those leaks on the sides of the pieces and the joint areas.
103-Moska-Deagostini-Clear.jpg


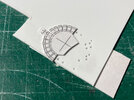
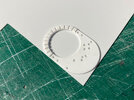
5- Again on the design of the decals, I now decide in which of the small lights I am going to put fiber optics so that they illuminate and I draw a template with small circles of Ø 0.6 mm. These circles will help me accurately pierce those lights. Remember, always put the reference guidelines in all the templates.
104-Moska-Deagostini-Optic.jpg


Now we turn to the assembly of all the elements.


6- Using the clear parts template, I cut the black piece and the clear ones and insert them into place, gluing them with cyanoacrylate. Once the glue is dry, it is necessary to sand the entire surface well so that it is perfectly smooth and remove any relief. Finish this job with fine sandpaper. It is necessary to drill the reference points with a 0.7 mm drill bit.
0001-Moska-Deagostini-Tutorial.jpg
0002-Moska-Deagostini-Tutorial.jpg


7- I drill the reference points and insert sewing pins in them and, very carefully, I stick the black vinyl on the base piece. Use the vinyl's protective paper to leave only a small part of the adhesive exposed on one side. This way it is much easier to pass it through the pins to place it correctly. Once that side is glued, we remove the protective paper and stick the rest of the vinyl.
0003-Moska-Deagostini-Tutorial.jpg


8- Then we glue the fiber optic template with removable 3M spray adhesive, mark the points where the lights are going to go with a punch and make the Ø 0.3 mm holes for the fiber. Once the holes have been made, we remove the template and clean the surface with alcohol.

It is advisable to pass a fine sandpaper again to eliminate the reliefs that the bit may have created.
0004-Moska-Deagostini-Tutorial.jpg


9- It is time to paste the decal. I print it with a laser printer on white sheet for decals. It is helpful to use a rear light to properly align all buttons and instruments. ATTENTION!, the white decal does not adhere very well to the vinyl. I recommend using a decal fixing product.
0005-Moska-Deagostini-Tutorial.jpg


10- Once the decal is dry, we use the Ø 0.3 mm drill bit again to perforate the decal paper and we can cut the piece definitively.


11- We insert small pieces of optical fiber of Ø 0.25 mm in the holes and stick them on the back of the piece. I use white glue so as not to damage the fiber and because, once dry, it allows me to move the fiber if necessary. On the front, the fiber must be at the same level as the piece or protrude from it just not at all.
0006-Moska-Deagostini-Tutorial.jpg
0007-Moska-Deagostini-Tutorial.jpg


12- Finally, I use Tamiya transparent colors to color the fibers on the back. Insist on this coloring until you see that the result is good.


I hope you find it useful.

These are some images of the work done to build and light the cockpit.
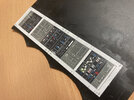
0006-Moska-Deagostini-Falcon-cockpitwalls-01.jpg0007-Moska-Deagostini-Falcon-cockpitwalls-02.jpg0008-Moska-Deagostini-Falcon-cockpit-03.jpg0009-Moska-Deagostini-Falcon-cockpit-04.jpg0010-Moska-Deagostini-Falcon-cockpit-05.jpg0011-Moska-Deagostini-Falcon-cockpitwalls-03.jpg0012-Moska-Deagostini-Falcon-cockpitwalls-04.jpg0013-Moska-Deagostini-Falcon-cockpitwalls-05.jpg0014-Moska-Deagostini-Falcon-console-01.jpg0015-Moska-Deagostini-Falcon-console-02.jpg0016-Moska-Deagostini-Falcon-console-03.jpg0017-Moska-Deagostini-Falcon-console-04.jpg0018-Moska-Deagostini-Falcon-console-05.jpg

Greetings.
Rafa
 
I also noticed you added the toggle switches and others onto the top of the decals as well to give it that much more detail. Just awesome!
 
Hello fellas.

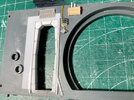
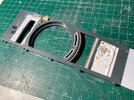
The frames of the cockpit that comes with the kit are not very good, really. I have reduced the thickness of the transverse frames so that it seems a little more to the original.
0019-Moska-Deagostini-Falcon-cockpit-frames-01.jpg
0020-Moska-Deagostini-Falcon-cockpit-frames-02.jpg


I've also added some details to the inside of the frames and to the top.
0021-Moska-Deagostini-Falcon-cockpit-frames-03.jpg


The front piece frames were very thick and required thinning.
Although this is not the case in the original model, I decided to add some detail to the lower front part of the cabin because it seemed very empty to me. I used a part taken from an old X-Wing model. Once painted, I think it doesn't look bad.
0022-Moska-Deagostini-Falcon-cockpit-frames-04.jpg
0023-Moska-Deagostini-Falcon-cockpit-frames-05.jpg


Greetings.
Rafa
 
Hi friends.

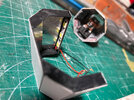
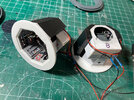
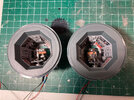
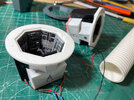
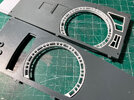
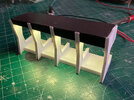
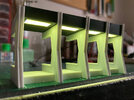
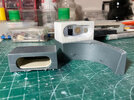
I have scratch built the gun wells. They are made from 0.4mm Evergreen Styrene and detailed with various scratch built parts and decals printed on white decal sheet. I have used black self-adhesive vinyl to opaque the pieces and eliminate light leaks.
0024-Moska-Deagostini-Falcon-gun-wells-01.jpg 0025-Moska-Deagostini-Falcon-gun-wells-02.jpg 0026-Moska-Deagostini-Falcon-gun-wells-03.jpg

The details of the upper part are pieces made from scratch and some others from the box of leftover pieces. For the side details I made some quick resin copies of some pieces from the Revell Razor Crest kit (great kit).
0027-Moska-Deagostini-Falcon-gun-wells-04.jpg

The only parts that I have used from the kit are the seats.
0028-Moska-Deagostini-Falcon-gun-wells-05.jpg

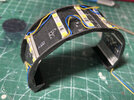
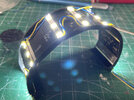
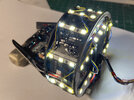
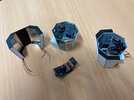
I built some light boxes with black polystyrene and glued self-adhesive metal foil inside to distribute the light well. To illuminate the instruments, I used the same technique that I used in the cockpit and inserted small pieces of fiber optics of different thicknesses into the walls, which I colored with Tamiya transparent paints. The light boxes have 3 leds on each side.
0029-Moska-Deagostini-Falcon-gun-wells-06.jpg 0030-Moska-Deagostini-Falcon-gun-wells-07.jpg

To add some extra detail over the decals, I inserted a few pieces of Ø1mm and Ø1.5mm tin wire to simulate some of the instruments on the real set. The lighting is very realistic and I am very happy with the result.
0031-Moska-Deagostini-Falcon-gun-wells-08.jpg 0032-Moska-Deagostini-Falcon-gun-wells-09.jpg 0033-Moska-Deagostini-Falcon-gun-wells-10.jpg 0034-Moska-Deagostini-Falcon-gun-wells-11.jpg

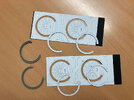
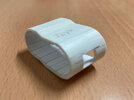
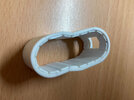
Finally, I added some rings that allow me to perfectly fit my wells to the kit pieces. I plan to use the white corrugated pipe that you see in the last image as a central piece to join both wells and simulate the access corridor.
0035-Moska-Deagostini-Falcon-gun-wells-12.jpg 0037-Moska-Deagostini-Falcon-gun-wells-14.jpg 0036-Moska-Deagostini-Falcon-gun-wells-13.jpg

Thanks for watching.
Rafa
 
Hi friends.
I'm currently working on the interior of the model. At first, I was even annoyed that the kit included these internal parts. I didn't quite like the idea of the model opening up to show its guts, and was considering leaving it out and leaving the model closed.
But the devil that all modelers have inside has done his job well. When I begin to think, almost inadvertently, about the possibilities of improving the parts that the kit brings and how I could carry them out, I'm already defeated. So here I am to show you my progress.

At the moment, the improvements that I'm making in the main hold are:


Add details on all walls.
On the starboard wall, I have opened the holes on the right side, placed some frames and added the rear details that you can see through those holes.
The rear details are parts of the old MPC Y-Wing Snap-Fast kit. And they will be completed with cables and pieces of electric guitar string.
I'm also adding details on other walls. The work is process.

0038-Moska-Deagostini-Falcon-walls-details-01.jpg 0039-Moska-Deagostini-Falcon-walls-details-02.jpg 0040-Moska-Deagostini-Falcon-walls-details-03.jpg 0041-Moska-Deagostini-Falcon-walls-details-04.jpg 0042-Moska-Deagostini-Falcon-walls-details-05.jpg


Change and/or improve the pipes.
For the pipes, I have tried to cover the ones that come in the kit with decals of my own design. But I am not very happy with the result.
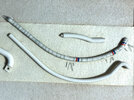
I have also tried to make them with aluminum wire (the kind that comes on some skewers) that I have textured on my mini lathe. They don't look bad (sorry, no pics at the moment), but I have to check what the result is when I paint them.
And finally, today I received a batch of Ø2 and Ø3 mm x 1 m springs made with various gauge wire. They look like a promising solution, but I'm afraid they'll be too "neat" and I need to see how I can "smash" them up a bit so they have the jagged look we see in the real set.

0043-Moska-Deagostini-Falcon-pipes-decals-01.jpg 0044-Moska-Deagostini-Falcon-pipes-decals-02.jpg


Extend the bow wall and add the pillars and other details.
I have added 2 cm of depth to the bow wall to be able to install the pillars and the large pipe that we see in the real set. Everything has been pre-designed in a 3D application and is made with styrene of various thicknesses.

0045-Moska-Deagostini-Falcon-added-depth-01.jpg 0046-Moska-Deagostini-Falcon-added-depth-02.jpg 0047-Moska-Deagostini-Falcon-added-depth-03.jpg 0048-Moska-Deagostini-Falcon-bow-wall-3d-01.jpg


Change the floor of the kit for another laser engraved.
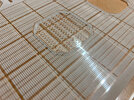
The floor grating is a piece of laser-engraved methacrylate —it's a new favor my friend from the sign shop has done for me—. The rest of the floor is made with styrene.

0049-Moska-Deagostini-Falcon-floor-grid-01.jpg


Barrels, boxes, etc.
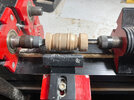
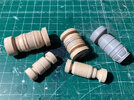
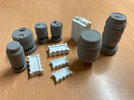
The barrels in the hold have been made from wood using my mini-lathe. Then I applied a good coat of Vallejo gray spray primer.
I'm making the different boxes with styrene. And I have also collected different pieces of old kits and toys that will help me to add more junk scattered around the hold.
I intend to make silicone molds to have several copies of these elements in polyurethane resin.

0050-Moska-Deagostini-Falcon-barrels-boxes-01.jpg 0051-Moska-Deagostini-Falcon-barrels-boxes-02.jpg 0052-Moska-Deagostini-Falcon-barrels-boxes-03.jpg


Modify seats, maintenance pit.
I've separated the seats into two sections and am going to raise the back piece by 3.5mm so I can incorporate the instruments that appear on the actual set.
I'm currently designing the maintenance pit.


This is the current state of the main hold. I'm using a 3D build where I'm planning all these improvements.

0053-Moska-Deagostini-Falcon-hold-progress-01.jpg 0054-Moska-Deagostini-Falcon-hold-progress-02.jpg 0055-Moska-Deagostini-Falcon-hold-progress-03.jpg 0056-Moska-Deagostini-Falcon-hold-3d-01.jpg 0057-Moska-Deagostini-Falcon-hold-3d-02.jpg


Take care and thanks for watching.
Rafa
 
Last edited:
A quick update.
Last night I did a test to see how the pipes made with springs could be. This is the result.

0058-Moska-Deagostini-Falcon-pipes-test-01.jpg

Left: spring - Center: kit plastic pipe with decal - Right: Aluminum wire.
I think I'm going to decide to use the springs.

Greetings.
Rafa
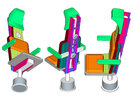
 
A quick update.
Last night I did a test to see how the pipes made with springs could be. This is the result.

View attachment 1559049

Left: spring - Center: kit plastic pipe with decal - Right: Aluminum wire.
I think I'm going to decide to use the springs.

Greetings.
Rafa
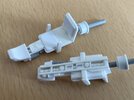
This is looking terrific Rafa. Don’t forget that the ‘rings’ that lead into the corridors need their ‘openings’ altered too, if your basing the hold-area on the film sets....,
and the grating/s on the floor (ref; the maintenance pit covers) should be facing the same direction too - referring to the ‘grille’ covers.
Can’t wait to see more !

Ged
 
Fantastic work so far, I’ve been collecting some of the parts from time to time, slowly building the collection together, as you have been doing I will be altering and adding better details to my build and your giving me some marvellous ideas, I will be starting on the cockpit chairs using s3d and new better looking laser cannons

You’ve got me hooked now
 
This is looking terrific Rafa. Don’t forget that the ‘rings’ that lead into the corridors need their ‘openings’ altered too, if your basing the hold-area on the film sets....,
and the grating/s on the floor (ref; the maintenance pit covers) should be facing the same direction too - referring to the ‘grille’ covers.
Can’t wait to see more !

Ged
Hi gedmac66. Thank you for your comment. Yes, the rings that give access to the corridors need to be changed. The parts that come in the kit are…
And thanks for the tip about grill orientation on maintenance pit covers. There are so many details that sometimes I gets confused.

Fantastic work so far, I’ve been collecting some of the parts from time to time, slowly building the collection together, as you have been doing I will be altering and adding better details to my build and your giving me some marvellous ideas, I will be starting on the cockpit chairs using s3d and new better looking laser cannons

You’ve got me hooked now
Hello Bengrim09. Thanks for your kind words. The truth is that, for such an expensive kit, it has too many details that can and/or should be corrected.
I'm glad that my construction will serve you for your project. Good luck with your model.


And now to work.


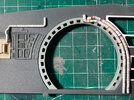
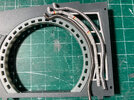
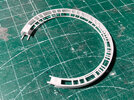
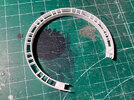
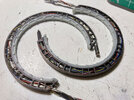
As pointed out by gedmac66, it's necessary to change the rings of the main doors of the corridors. The kit parts are very basic and the detail does not correspond to the real set.
I had to think what could be the most effective way to make those rings and finally I settled on a process that has been successful at the first attempt.
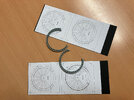
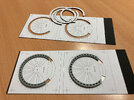
First I drew some templates on my computer with the exact measurements of each ring and with some lines that would serve as a guide for gluing the spokes. The rings are different on each of the two doors.
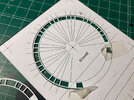
I then glued those printed templates onto black cardstock and used a circle cutter to cut out the outer and inner sides of each ring.
In this way I got some templates that allowed me to build the rings quite easily. To ensure the uniformity of the plastic parts, I bought strips of Evergreen 0.5x0.75 mm for the outer part and 0.5x0.5 mm for the inner part and for the spokes.
It was easy to bend those thin plastic strips by hand, and once placed inside my templates, it was also easy to glue each of the spokes into place.
0059-Moska-Deagostini-Falcon-main-hold-rings-01.jpg 0060-Moska-Deagostini-Falcon-main-hold-rings-02.jpg 0061-Moska-Deagostini-Falcon-main-hold-rings-03.jpg

To cut all the spokes to the same size, I made a small template with a piece of leftover plastic.
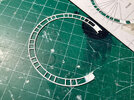
The resulting structures were very fragile and had to be handled very carefully.
0062-Moska-Deagostini-Falcon-main-hold-rings-04.jpg 0063-Moska-Deagostini-Falcon-main-hold-rings-05.jpg

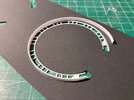
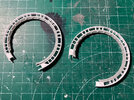
I made two rings for each door and, again using my templates, I glued on some 0.5 x 3mm strips joining the two rings. The resulting structure was now considerably stronger. Even so, I reinforced all the joints with cyanoacrylate on the inside.
0064-Moska-Deagostini-Falcon-main-hold-rings-06.jpg 0065-Moska-Deagostini-Falcon-main-hold-rings-07.jpg 0066-Moska-Deagostini-Falcon-main-hold-rings-08.jpg 0067-Moska-Deagostini-Falcon-main-hold-rings-09.jpg

Lastly, I put a bit of cyanoacrylate on both sides of the junction points of each spoke. In this way I managed to give a slightly rounded appearance to those joints so that they would be even more faithful to the original. That rounding effect will be seen more clearly when they are painted.
0068-Moska-Deagostini-Falcon-main-hold-rings-10.jpg 0069-Moska-Deagostini-Falcon-main-hold-rings-11.jpg

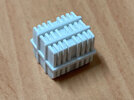
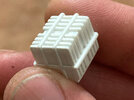
I've also built a new type of “box” to detail the main hold. This nonsense is made with 74 pieces of plastic glued one by one.
0070-Moska-Deagostini-Falcon-barrels-boxes-04.jpg 0071-Moska-Deagostini-Falcon-barrels-boxes-05.jpg

For the corridors and lights, I think I'll have to buy some brass sheet and ask my friend at the sign shop for a new favor.

This is all for now. Thanks so much for looking.
Rafa
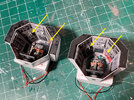
 
Fantastic attention to detail, and brilliant scratch-building skills sir !.
Are you planning to do anything about the ‘supplied’ bunk ?
I used and modified, or totally scratched components/features for the Hold area too...., I agree with you, that for the price of the ‘kit’, (and depending on what you want to achieve), there are areas that are sorely lacking in detail.
However, I found it to be one of the more enjoyable processes, the scratch/modifying - to my satisfaction, of the build.
Hope you don’t mind me sharing this on your post Rafa. :unsure:(y)
 

Attachments

  • 6E8CFAE1-B021-4D99-A091-F711AC9D7064.jpeg
    6E8CFAE1-B021-4D99-A091-F711AC9D7064.jpeg
    360.7 KB · Views: 165
Fantastic attention to detail, and brilliant scratch-building skills sir !.
Are you planning to do anything about the ‘supplied’ bunk ?
I used and modified, or totally scratched components/features for the Hold area too...., I agree with you, that for the price of the ‘kit’, (and depending on what you want to achieve), there are areas that are sorely lacking in detail.
However, I found it to be one of the more enjoyable processes, the scratch/modifying - to my satisfaction, of the build.
Hope you don’t mind me sharing this on your post Rafa. :unsure:(y)
Hey gedmac66, I don't mind at all if you share your work in this thread. It's good to see what other modellers have done with the same problems I'm having. Thanks for your contribution.
I'm hesitating whether to do something with the bunk bed or I'm going to leave it as it is, but I know myself and I know that in the end I'll do what I can to improve it. :rolleyes:
 
Hello friends.

Since at first I wasn't sure if I was going to detail the interior or not, I've been working quite chaotically. Trying to do everything at once without realizing that there are a lot of details that need to be improved or made from scratch.
From now on I already have a plan to be able to carry out all those improvements in an orderly manner. I will be doing all the work divided into walls. Starting with the port wall until it is completely finished and then continuing with all the others in a clockwise direction.
I show you now the work that I have been doing these last days in the main hold.

I have built a couple of stools. First I made a wax template with the relief of the seats. Next I made a thin sheet of Milliput putty and glued some computer-made paper templates onto it. I used an awl to mark the spots where the seat holes go and cut out the piece very basically. I then removed the paper and let the putty cure for 1-1.5 hours. After this time the Milliput loses almost all its adhesion and reaches a state in which the sheet is stable but flexible. I pressed the putty into the wax template to capture the relief and let the putty overnight to fully cure. I drilled the holes with a Ø0.5mm drill bit and the legs are made from the wire of a clip. I also made a third jet seat for the console.

0072-Moska-Deagostini-Falcon-stools-01.jpg 0073-Moska-Deagostini-Falcon-stools-02.jpg 0074-Moska-Deagostini-Falcon-stools-03.jpg 0075-Moska-Deagostini-Falcon-stools-04.jpg 0076-Moska-Deagostini-Falcon-seats-04.jpg 0077-Moska-Deagostini-Falcon-seats-05.jpg

I started work on the port wall by cutting openings in the kit piece so I could add all of its details. The door is considerably larger than the one that comes in the kit, but noticeably smaller than the door that gives access to the Falcon cockpit. Scale issues.
As you can see, I have included the light fixture next to the door and it will be illuminated with an LED. The details on the right part of the wall are made from scratch.

0078-Moska-Deagostini-port-wall-01.jpg 0079-Moska-Deagostini-port-wall-02.jpg 0080-Moska-Deagostini-port-wall-03.jpg 0081-Moska-Deagostini-port-wall-04.jpg 0082-Moska-Deagostini-port-wall-05.jpg 0083-Moska-Deagostini-port-wall-06.jpg 0084-Moska-Deagostini-port-wall-07.jpg 0085-Moska-Deagostini-port-wall-08.jpg 0086-Moska-Deagostini-port-wall-09.jpg 0087-Moska-Deagostini-port-wall-10.jpg

I used a black solvent based dye to darken the door rings in the hallways. I didn't want the white color of the plastic to show through on the inside and this seemed like the quickest way to get inside those rings. I'll paint the outside when the time comes.
I took various types of wire and fine cables to make the inner wiring of the rings. I also darkened them a bit with black tint to dull the color intensity of the wires.

0088-Moska-Deagostini-Falcon-main-hold-rings-12.jpg 0089-Moska-Deagostini-Falcon-main-hold-rings-13.jpg

Thanks for watching.
Rafa
 
Hello colleagues.

I've been pretty busy lately and haven't been able to make much progress on my model.
I look forward to spending more time on it over the summer.

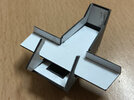
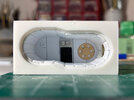
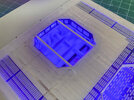
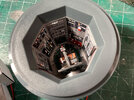
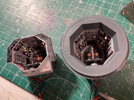
I'm almost done with the maintenance pit. I've gotten a good fit in his position and now I'm testing the lighting.
At the moment, I think too much blue light is getting into the well. I want the light to be more confined to the upper perimeter openings.

0096-Moska-Deagostini-Falcon-maintenance-pit-01.jpg 0097-Moska-Deagostini-Falcon-maintenance-pit-02.jpg 0098-Moska-Deagostini-Falcon-maintenance-pit-03.jpg 0099-Moska-Deagostini-Falcon-maintenance-pit-04.jpg 0100-Moska-Deagostini-Falcon-maintenance-pit-05.jpg

Thanks for watching.
Rafa
 

Your message may be considered spam for the following reasons:

If you wish to reply despite these issues, check the box below before replying.
Be aware that malicious compliance may result in more severe penalties.
Back
Top