DeAgostini 32" Falcon (Rescue Project)

Dude - I LOVE that Highlighter pen thing! It may not be 100000% accurate but who cares its cool as all get out!

Jedi Dade


Thanks JD.....It's just an attempt to make something with a bit of beef,....Hopefully it will look OK with lights, & will still look good when they are off


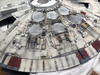
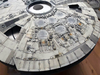
So this is how it looks now..

50444272_2292012611020760_7037961310780260352_n.jpg
50673342_2292012594354095_8009549648337305600_n.jpg


Thanks for looking

J
 
So cool !!! Really like the slight , discernible ridged details on the interior’s of each of the cutout/housing’s in pic #2 - byproduct of the markers ?
Please , could you share what type of lighting setup you’re using to achieve that beautifully diffused intensity , also , was the curvature of the pieces difficult to assemble/maintain in that area ? :eek:(y)

Ged
 
Last edited:
Hi Ged, yes those ridges were there to keep the felt tip marker inside the pen holder.....I just yanked the part out of the holder with pliers, i t gives it a bit of machine detail

Because the shape of the pen tapered down, when lined up next to each other they formed a natural curve

The lights are 2 COB inserts from an Eveready inspection lamp (image below shows Rolson, but exact same product badged), the power will be 5v from a USB phone charger

The diffused filter was from a ring binder folder picked up from a stationary shop

61676-1_1.jpg


shopping.jpeg


Thanks Ged for the interest

John
 
Hi guys I've started painting,....decided to go with Archive X Reefer White instead of the Grime LT that I had intended doing....although totally accurate to the 32" filming model, to me it looked a bit too dark,...so Reefer White looks better for me

Various stages, top images most recent

Thanks for looking

John

54520845_2326060860949268_8134573629473030144_n.jpg
53811029_2324848821070472_6019947490604744704_n.jpg

53684083_2324848781070476_341829497831555072_n.jpg
53565206_2324848761070478_895705211853602816_n.jpg
54412555_2324848774403810_1139839974821068800_n.jpg
54419101_2326060867615934_5518622574054998016_n.jpg
 

Attachments

  • image.png
    image.png
    906.8 KB · Views: 222
  • image.png
    image.png
    906.8 KB · Views: 227
  • image.png
    image.png
    906.8 KB · Views: 210
  • image.png
    image.png
    906.8 KB · Views: 241
  • image.png
    image.png
    818.5 KB · Views: 221
Really looks good. Could you let me know how many bottles of the Archive X Reefer White you use to cover the whole thing? I want to order their paint when it comes time to paint mine and would like to know how much to get.
 
Beautiful weathering mate, absolutely stunning work when seen (zoomed in) close up pics on my tablet - the detail especially on those actuator panels/flaps on the upper hull ...:love: !
Please forgive my ignorance, if it’s already been asked and explained, but why did you replace (?) the circular vents on the escape/docking pod corridors ?
Just curious.

Cheers, Ged
Wow, thanks for the comments Ged

Yes...thats my goal,....to try & make a 32" paint job,...everything as it should be at a glance,...including signatures, but on closer inspection there's a lot more going on,..more detail, hopefully a more precise job,...we all know the pressures that were on the ILM guys when they painted the 32",...& because the model wasn't intended to be studied, you can see all the overspray & loosely masked areas....splatter, hand drawn decals etc..

Adding PE grilles is a step away from the studio model, but it adds more functionality like the 5 footer, more to look at
Theres PE on the set from Nico Möbius for the vents on the docking corridors.....here's one just set in,...no paint yet

IMG_9913.jpeg
IMG_9914.jpeg


Thanks Ged,...yours is looking cracker by the way

John
 
Cheers for the detailed reply John, much appreciated.
Thanks also for your kind comments re; my build.
I finally understand the situation regarding the smaller vents...,WOW ! :eek:, had no idea that’s how they went together on the 5ft version ? Brilliant.
Seriously Awesome Detailing & Details..., The bar you’ve set, is pretty much in orbit now mate!

(y) Ged
 
Last edited:
I did some refinements to the finer pipework.....noticed some were the wrong angle (& one still needs fixed)

IMG_9982.jpeg
IMG_9983.jpeg


A lot happier,....apart from one

& some more shots of the engine deck, some parts aren't glued down yet, thats why the actuators move about:

IMG_9987.jpeg
IMG_9985.jpeg
IMG_9986.jpeg


Thanks for looking

John
 

Your message may be considered spam for the following reasons:

If you wish to reply despite these issues, check the box below before replying.
Be aware that malicious compliance may result in more severe penalties.
Back
Top