Darth Vader
New Member
In this post, I'll explain you how I've made my Darth Vader costume ... And I'll add updates, because I'm still working on my favorite's character's costume while it will be perfect at my eyes (in other words, I'll still work for a long time... ) ! 
The first things I did is to sew my bodysuit from black nylon fabric (at the moment I bought it, I didn't knew that Vader's bodysuit was made with leather :$).
Then I sewed the inner cape and the outer cape with black linnen fabric. And for outer cape, I've used a satin tape at the bottom and a faux leather to make a collar. I've used a pattern for a 3/4 of a circle for my cape. It's available at Sith Training Temple website. For that and lot of other informations, this website is very very interesting!
Then, I've made my codpiece. To do it I've cutted a mouse pad in the form of codpiece pattern (from Sith Training Temple one more time!). And I wrapped it with leather.
At this moment, my costume was like that :

So, the next step after sewing was completed was to sculpt armour pieces.
But just before begginning with sculpting, I've realised a bust, scaled on me with plaster strips (when my molds were ready, I filled my mold with expanding foam) :

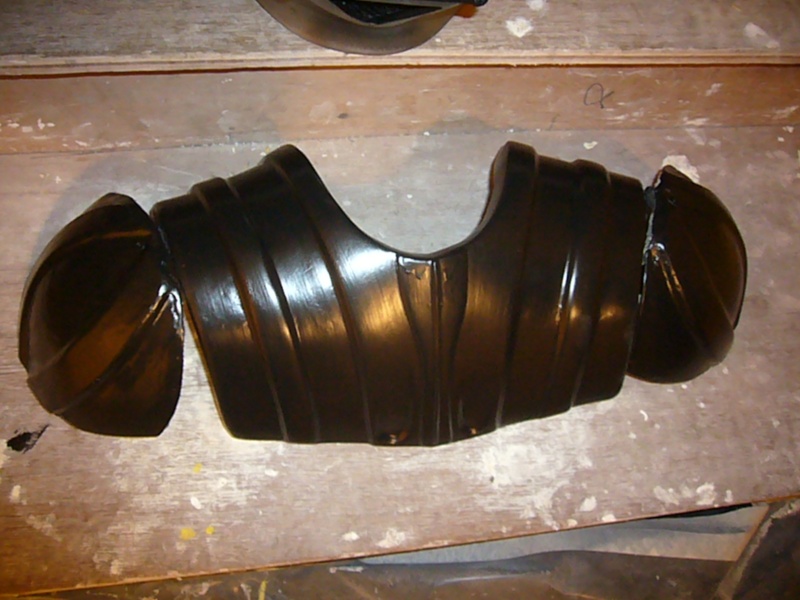
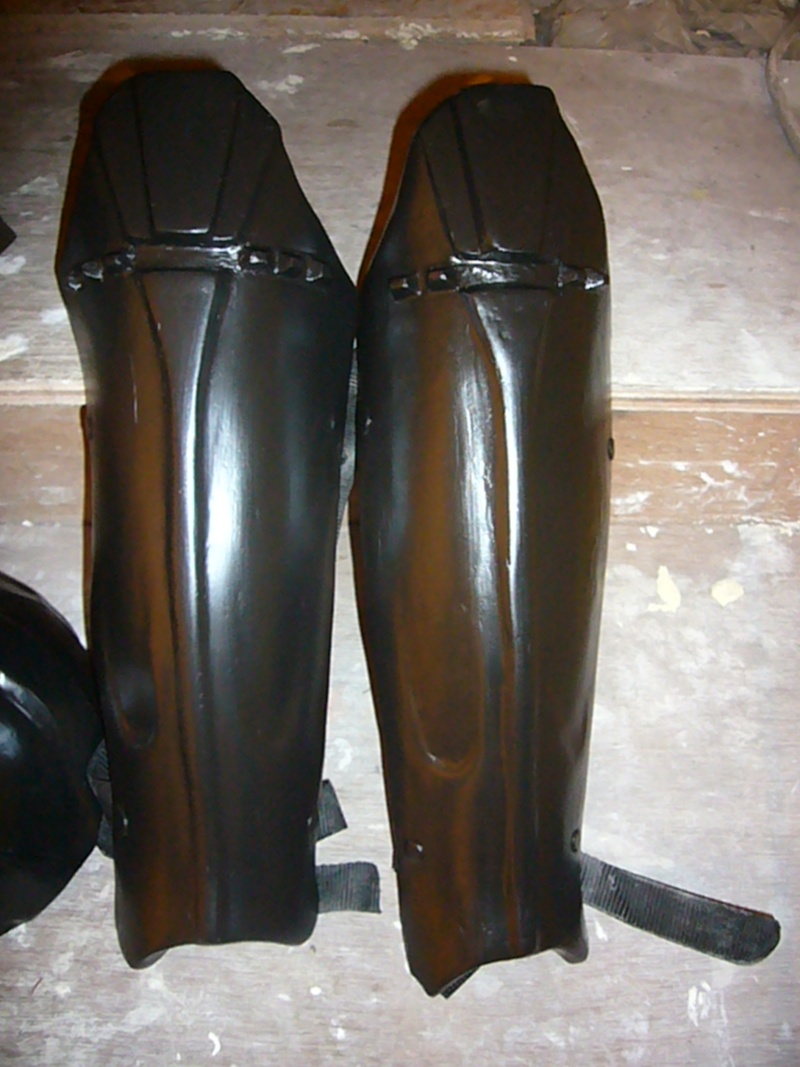
After that, I've began to sculpt my scaled armour pieces with clay. I've printed patterns for shoulder armour, chestbox and shinguards and began to sculpt...


When I was satisfied of the result, I've made plaster molds (advice : do not use plaster if you want to make more than one piece from the mold! Even if you use vaseline and unmold very carefully, plaster breaks very easily!)


For my chestbox, I did it on another way : first, I've made a wooden piece, then, I've molded it in a plaster.

For little parts, I've bought coinslots from fenixprops, made buttons with fiberglass, but not satisfyed of the result (so I'll redo it better with aluminium, including little switches as the ESB model). For rods, I've cutted a long inox rod, added pieces of an aluminium tube on it. Little pieces to attach rods are made from fiberglass too (to redo in aluminium ...).

And I've made a blink sequencer for my chestbox too ( but I need to integrate it on the chestbox yet ) :

After this step, I've putted vaseline in my molds and made final pieces with polyester resin and fiberglass. I've putted 3 layers of fiberglass for each piece.
The most frustrating with fiberglass was the fact that sometimes the finition wasn't nice. So I've used a lot of mastic to repair all the imperfections.... (and I'm still working on it to get it perfect.....)
I've heard (when my pieces were already done :devil) that gelcoat putted in the mold before polyester resin and fiberglass allows to have a good finition. Could somebody confirm me that information !? And what sort of resin it is ?
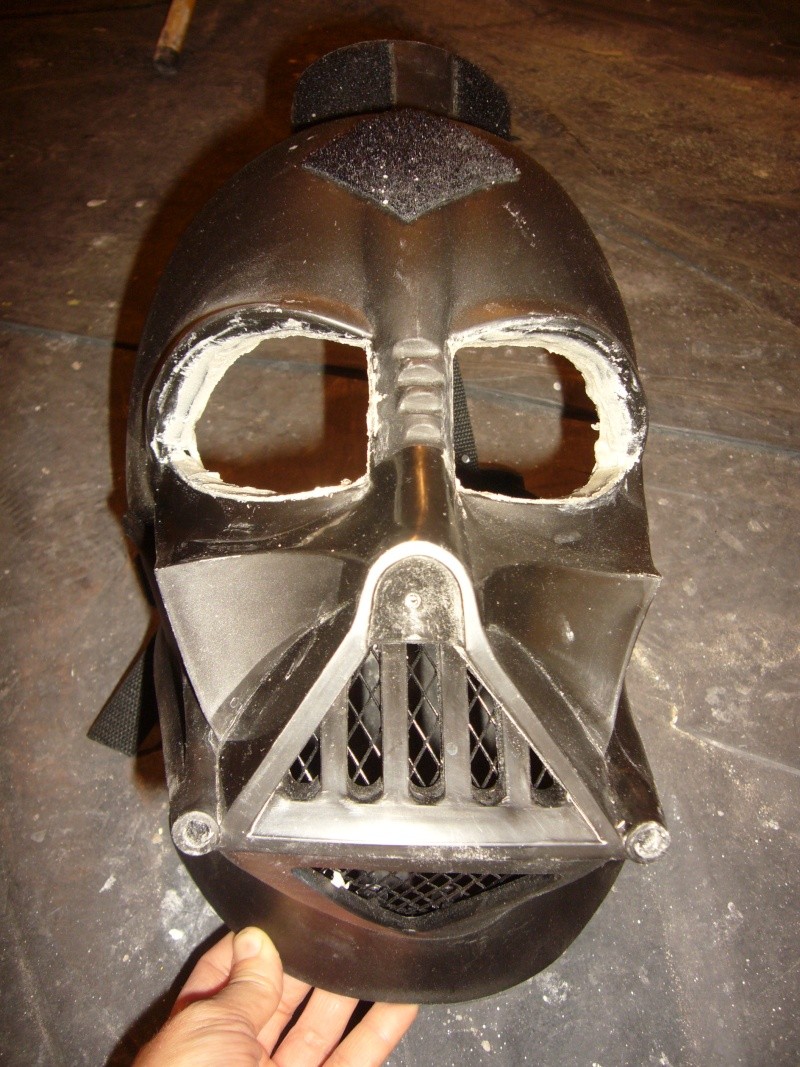
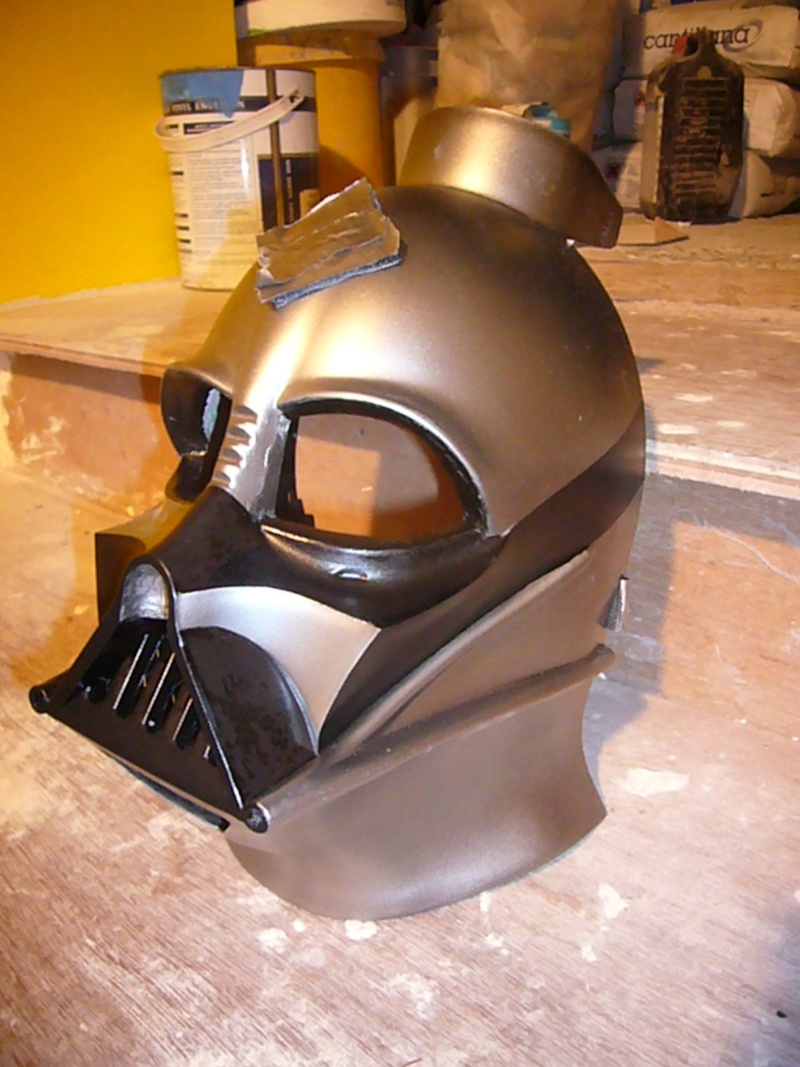
For gloves and helmet I hadn't enough time to be ready for star wars celebration, so I bought Rubies articles (and when I'll do these pieces myself, I'm sure that it will be better!!! :lol).
Did I forgot something ? Of course, the belt. So, for belt boxes, I've bought Hammond Electronics black boxes, green transparent boxes, in which I've inserted leds, red leds, knurled screws and I've rolled a little metallic grid for the last part of the belt box!

For the belt buckle, I've made it all from aluminium.

And to end, I bought my boots in a sports shop (horse riding boots).
As my list to do is big enough, updates of upgrading will come soon....
The first things I did is to sew my bodysuit from black nylon fabric (at the moment I bought it, I didn't knew that Vader's bodysuit was made with leather :$).
Then I sewed the inner cape and the outer cape with black linnen fabric. And for outer cape, I've used a satin tape at the bottom and a faux leather to make a collar. I've used a pattern for a 3/4 of a circle for my cape. It's available at Sith Training Temple website. For that and lot of other informations, this website is very very interesting!
Then, I've made my codpiece. To do it I've cutted a mouse pad in the form of codpiece pattern (from Sith Training Temple one more time!). And I wrapped it with leather.
At this moment, my costume was like that :
So, the next step after sewing was completed was to sculpt armour pieces.
But just before begginning with sculpting, I've realised a bust, scaled on me with plaster strips (when my molds were ready, I filled my mold with expanding foam) :
After that, I've began to sculpt my scaled armour pieces with clay. I've printed patterns for shoulder armour, chestbox and shinguards and began to sculpt...
When I was satisfied of the result, I've made plaster molds (advice : do not use plaster if you want to make more than one piece from the mold! Even if you use vaseline and unmold very carefully, plaster breaks very easily!)
For my chestbox, I did it on another way : first, I've made a wooden piece, then, I've molded it in a plaster.
For little parts, I've bought coinslots from fenixprops, made buttons with fiberglass, but not satisfyed of the result (so I'll redo it better with aluminium, including little switches as the ESB model). For rods, I've cutted a long inox rod, added pieces of an aluminium tube on it. Little pieces to attach rods are made from fiberglass too (to redo in aluminium ...).
And I've made a blink sequencer for my chestbox too ( but I need to integrate it on the chestbox yet ) :
After this step, I've putted vaseline in my molds and made final pieces with polyester resin and fiberglass. I've putted 3 layers of fiberglass for each piece.
The most frustrating with fiberglass was the fact that sometimes the finition wasn't nice.
So I've used a lot of mastic to repair all the imperfections.... (and I'm still working on it to get it perfect.....)I've heard (when my pieces were already done :devil) that gelcoat putted in the mold before polyester resin and fiberglass allows to have a good finition. Could somebody confirm me that information !?
And what sort of resin it is ?For gloves and helmet I hadn't enough time to be ready for star wars celebration, so I bought Rubies articles (and when I'll do these pieces myself, I'm sure that it will be better!!! :lol).
Did I forgot something ? Of course, the belt. So, for belt boxes, I've bought Hammond Electronics black boxes, green transparent boxes, in which I've inserted leds, red leds, knurled screws and I've rolled a little metallic grid for the last part of the belt box!
For the belt buckle, I've made it all from aluminium.
And to end, I bought my boots in a sports shop (horse riding boots).
As my list to do is big enough, updates of upgrading will come soon....
Last edited: