Cylon Centurion (Moebius)

niart17

Active Member
Hi all. This my first post here and I'm a bit overwhelmed by the incredible work going on over here. I hope to learn from some of the masters. I've been building mostly aircraft and spacecraft for the last couple of decades and started venturing a little into Sci-Fi and a little bit of trying to sculpt.

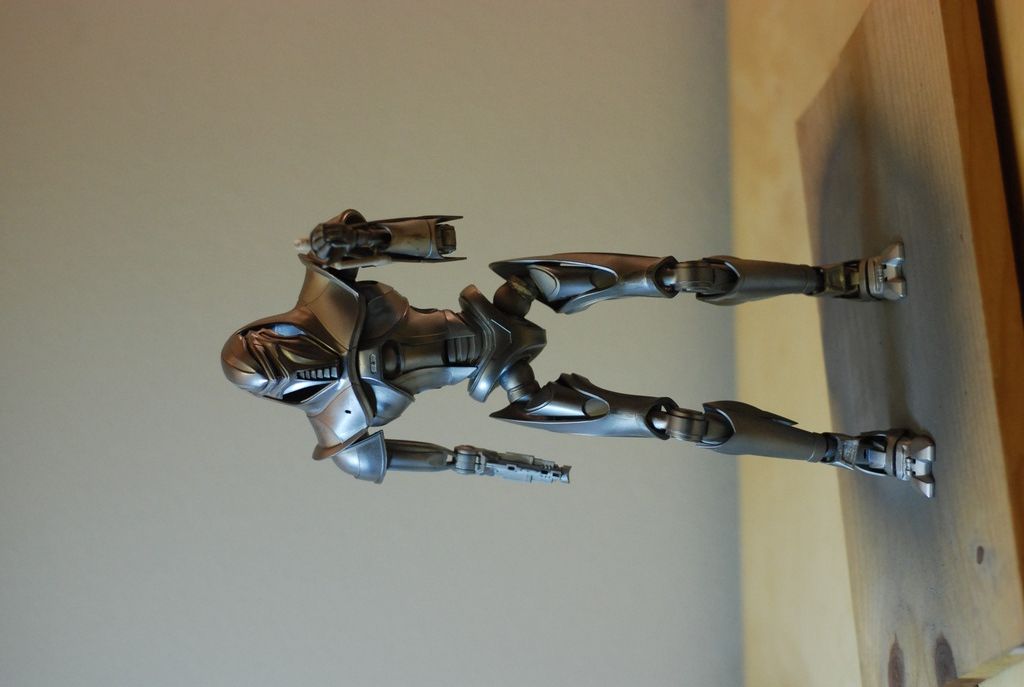
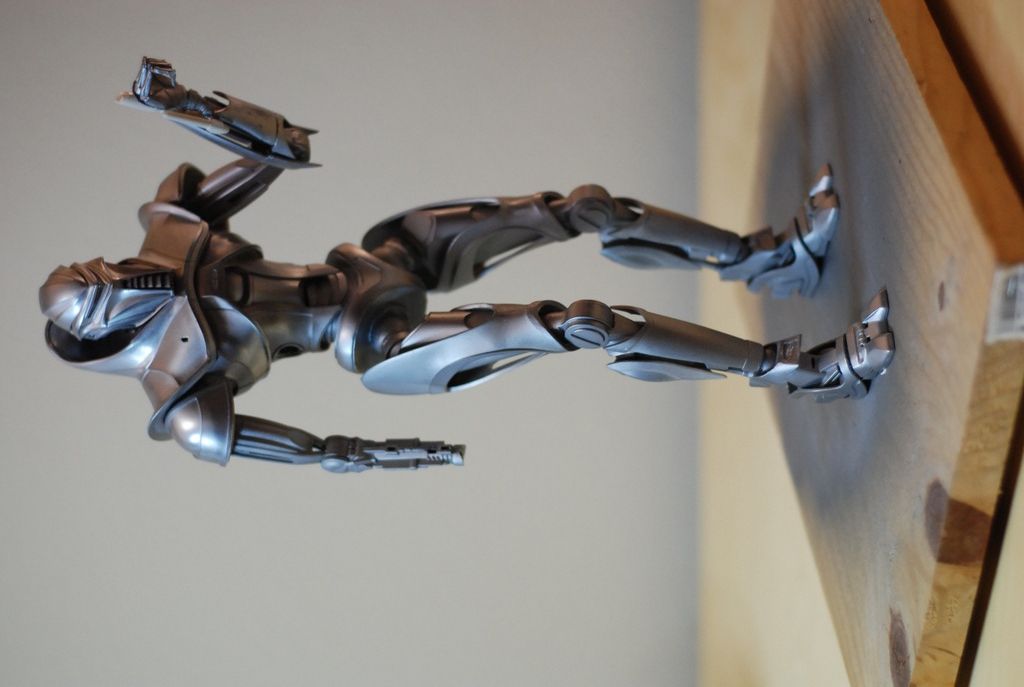
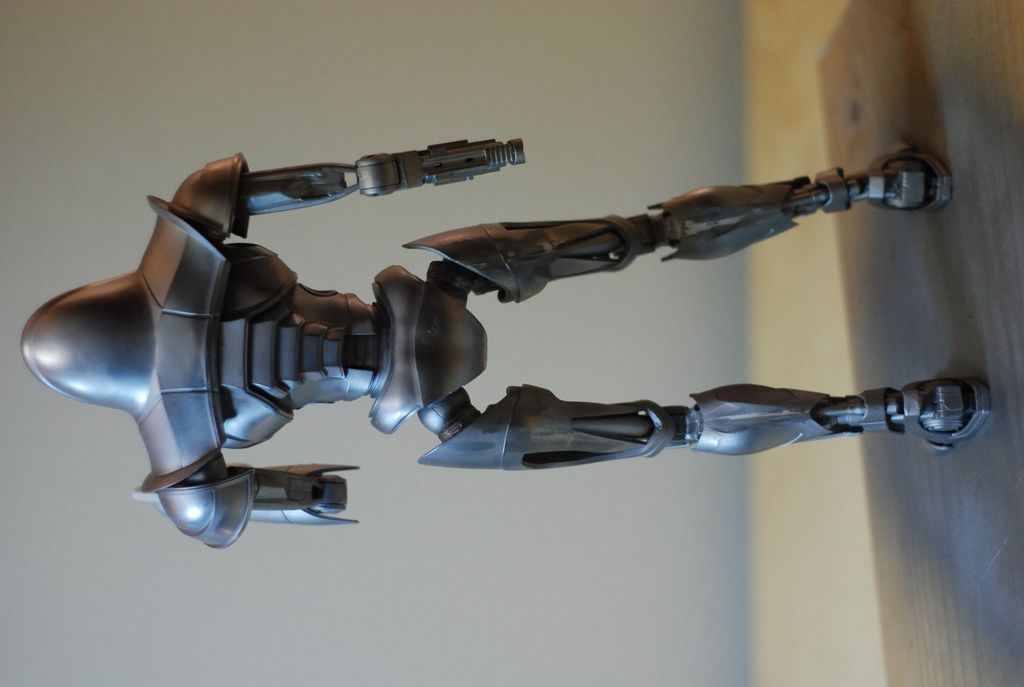
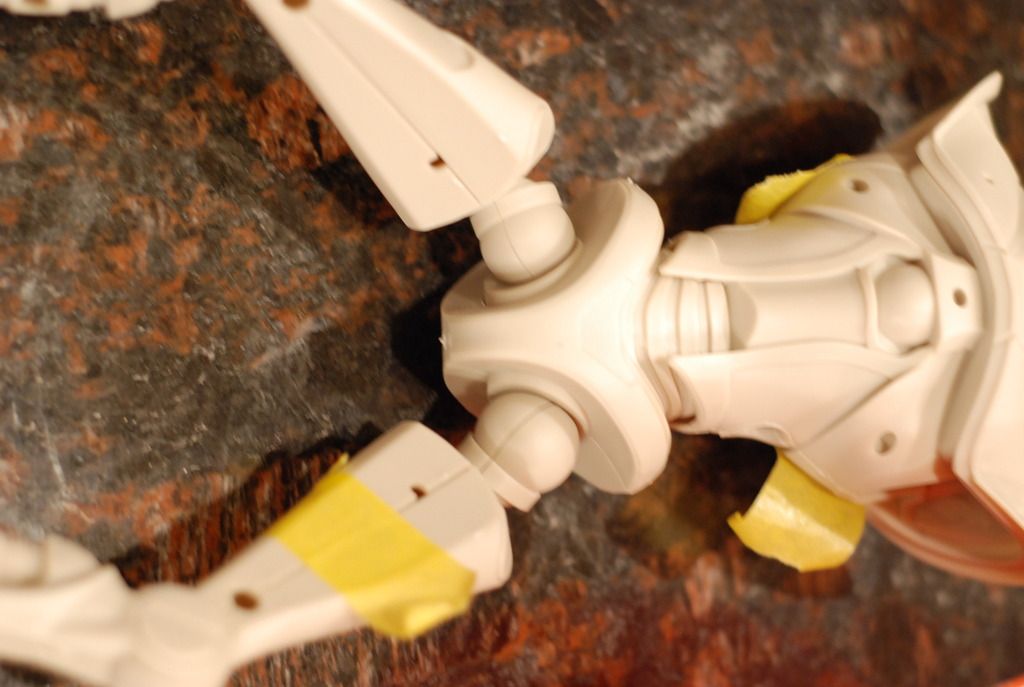
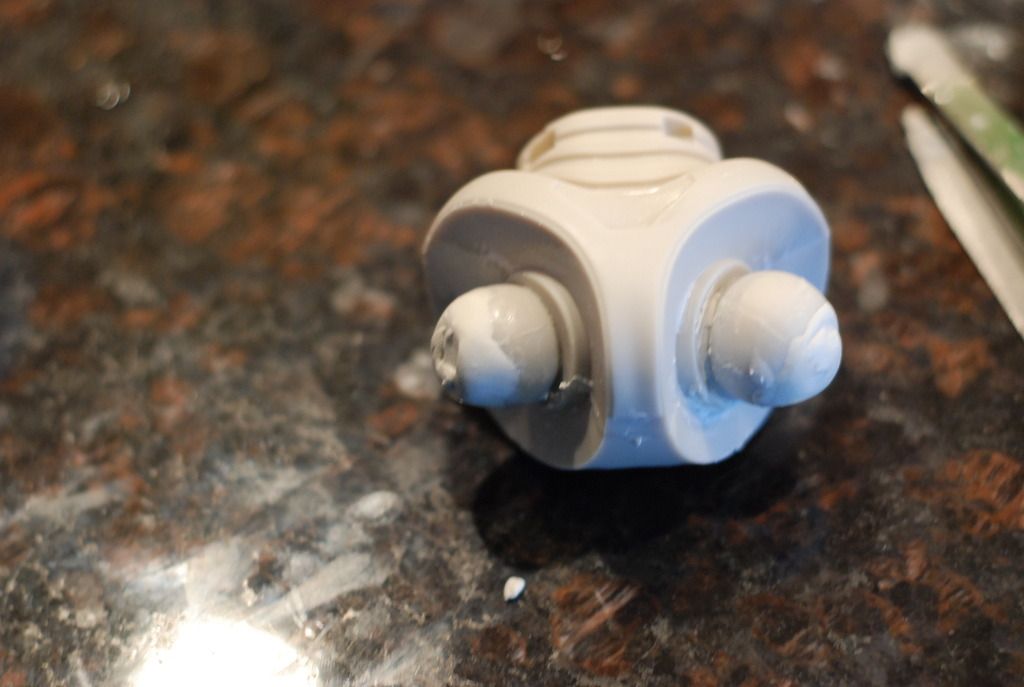
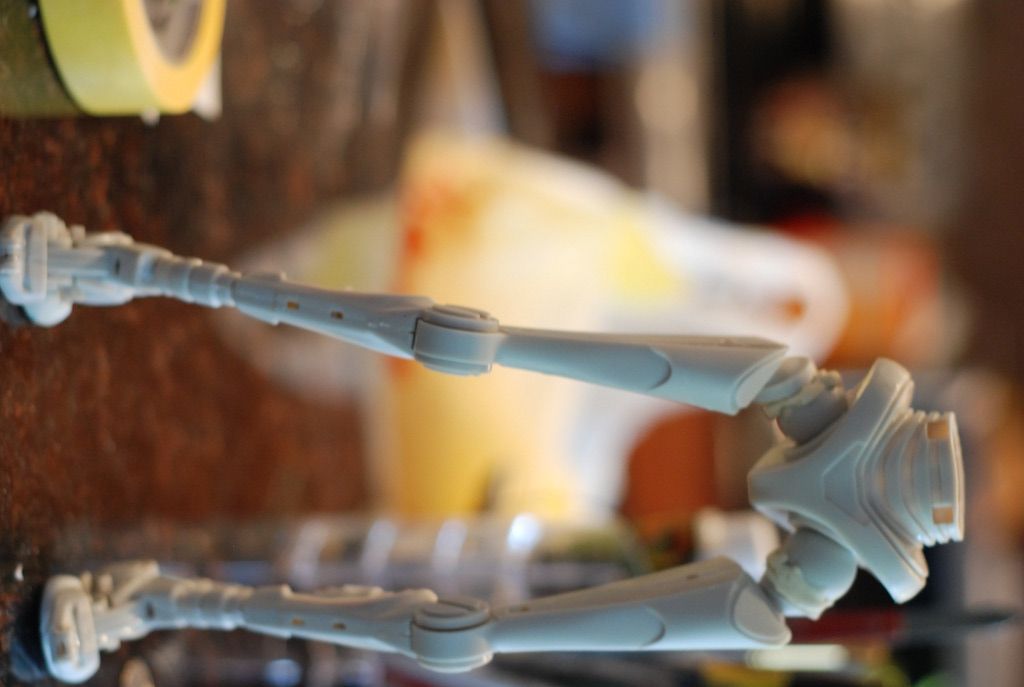
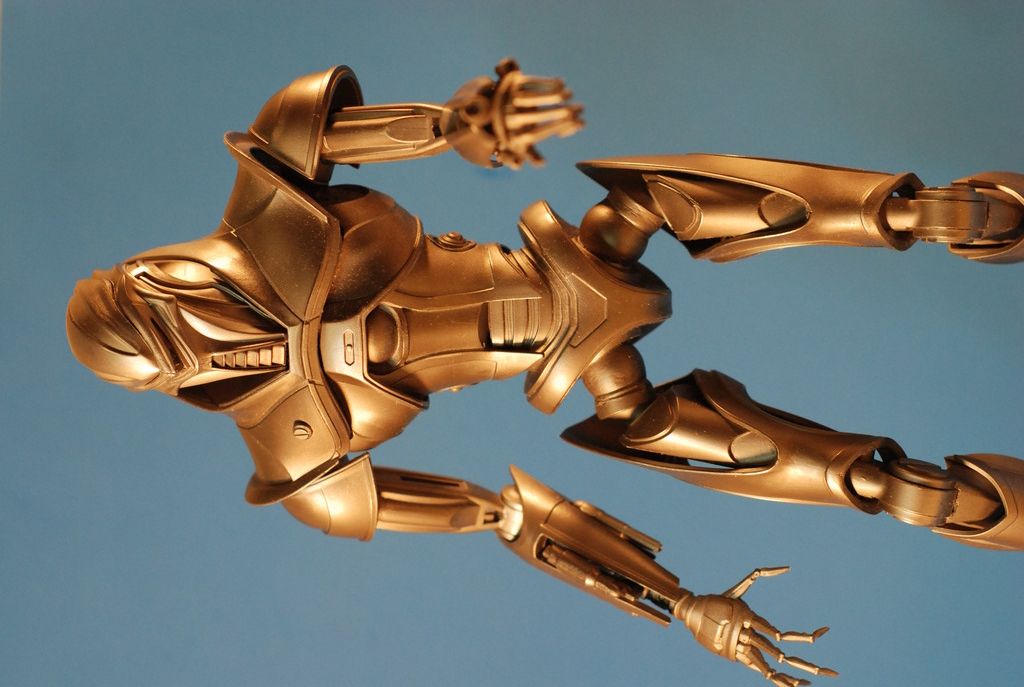
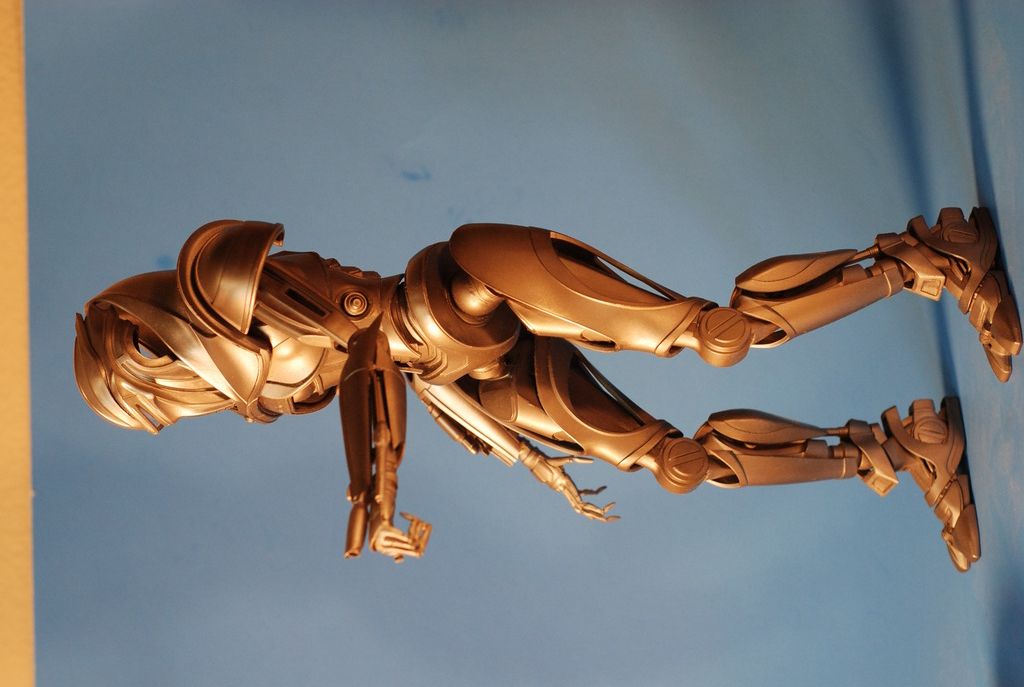
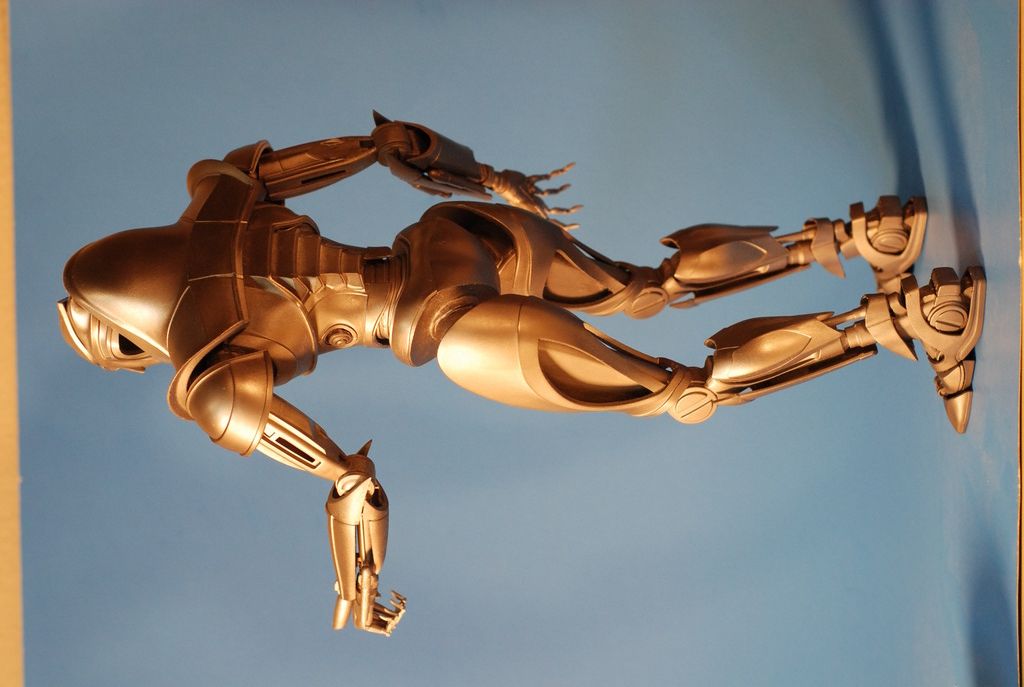
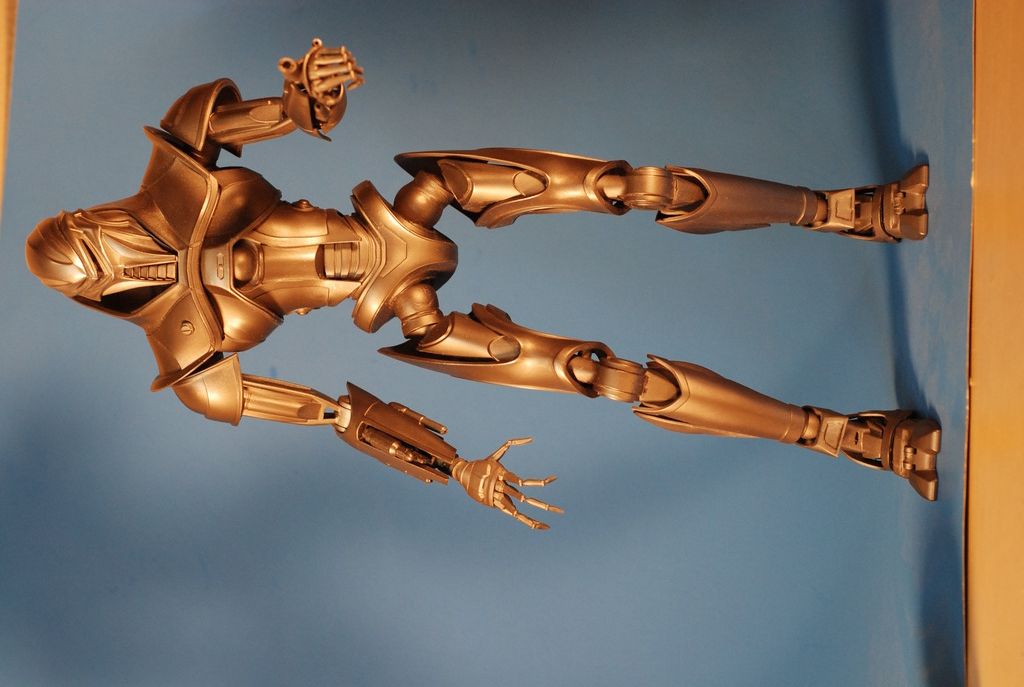
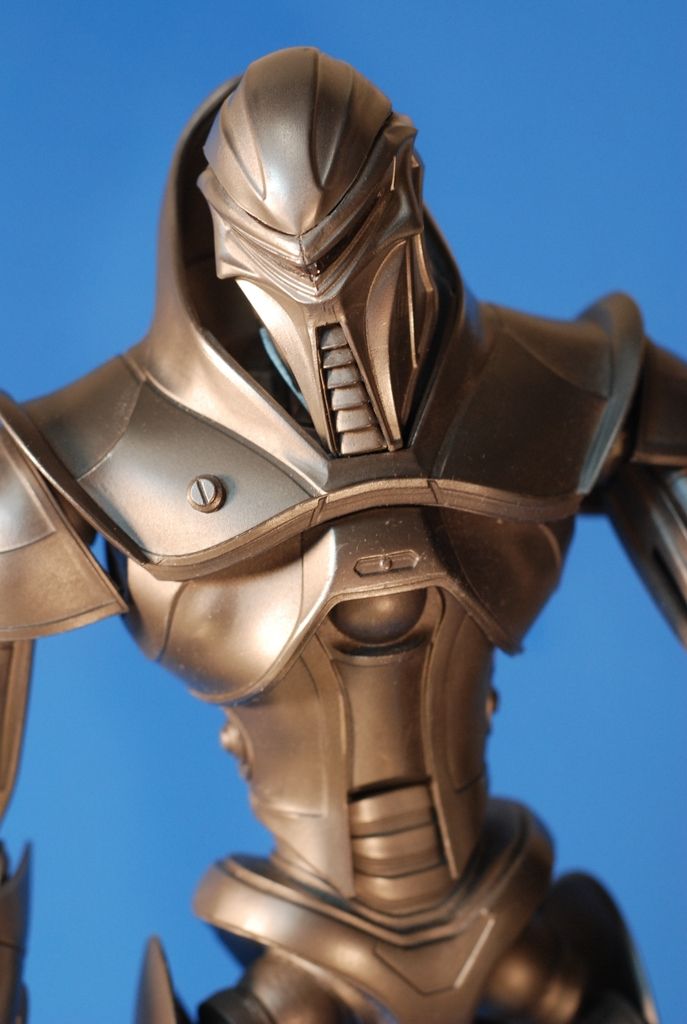
But for my first post I wanted to show you my work on a quick and somewhat easy built. I've been working on this Moebius Cylon. I didn't care the squatty chicken pose that it came with so I did some modifications to reposition the legs and limp wristed hand closer to how the hand retracts like in the pilot episode. I know it's not totally accurate but it's coming along I think. I've opted not to go for lighting the eye and will try to figure a way to paint it to look lit. I've never tackled lighting so for this I kept it simple. I'll post some more in progress shots soon.


DSC_0741_zpsubjcslkv.jpg


DSC_0740_zpsri0tdvsl.jpg


DSC_0738_zpsmmuovkpe.jpg


Thanks for checking it out. More later.
Bill
 
Ok, to back up a bit. I'm sure most of you are somewhat familiar with this kit so I won't go into too many details of it's build. Here is the leg position as it comes in the kit.


DSC_0443_zpss4hcj5fg.jpg


Not sure why they chose the spread leg awkward pose, but it's not too difficult to fix. Had I wanted to get into more detail and accuracy I might have replaced the ball joints totally, but I wanted a quick build so I worked with what was there.


So I assembled the legs per the instructions and then removed the leg portion at the ball and cup joint. Then used milliput to fill in the hole that was left and after it dried a little shaped into a full spherical shape. I also had to thin out the plastic along the edges of the cup joint pieces to help minimize the seam.


DSC_0449_zps8cnfpaob.jpg


Then I re-positioned the legs held in place with some artist clay to get the position I wanted. Once I was satisfied, I could superglue the cup on to the ball joint and voila, no more squatty dance moves. I did have to have his right leg posed outward some because of the way the foot was designed. It would have been a lot more major surgery to get it in a straight up and down position so I just got as close to a believable pose as I could.


DSC_0446_zpshew8tmw4.jpg
 
And here it is mostly complete. I need to work out putting the cabling behind his head so right now it's just sitting on top lose. And after looking at these pics I see I need to clean up the upper seam around his eye. I also will probably weather it some with some oils. Nothing drastic just enough to give it a war used Cylon feel. I had originally painted it with model master spray can buffing magnesium but decided to darken it a bit and went over that with their titanium with a few touches here and there of aluminum plate for the highlights. My camera's white balance was a bit off so it's not quite so reddish looking like it shows here. Overall I'm happy with it though.

DSC_0788_zpsmgn8vvxf.jpg


DSC_0792_zpszryyttsc.jpg


DSC_0793_zpsok2napt2.jpg


DSC_0790_zpsdgjvv9ez.jpg


A face only a mother could love.


DSC_0799_zpsyvsx1vxy.jpg


Thanks for checking it out.


Bill
 
Thanks guys. This was a very fun kit to build. A lot of potential for great reposes and/or vignettes, although it's pretty big for a dio or anything. I saw Adam Savage's One Day build with Aaron Douglas and that inspired me to break down and get it. I hopefully will get some oils on it soon and can post a fully completed model on a base. Thanks again.

Bill
 
This thread is more than 8 years old.

Your message may be considered spam for the following reasons:

  1. This thread hasn't been active in some time. A new post in this thread might not contribute constructively to this discussion after so long.
If you wish to reply despite these issues, check the box below before replying.
Be aware that malicious compliance may result in more severe penalties.
Back
Top