CW Arrow Build (Hybrid)

harmfulAdam

Well-Known Member
I've decided to start an Arrow build, however, I'm not going Season 1 or 2 specific. I'm picking things I like better from the two seasons, not 100% accurate, just 100% fun! :D

For example, choosing Season 1 bow because 1) I like the way it looks better, 2) there's no way I'd pay $1200 for a Kestrel bow that I wouldn't use that much. And using the mask from Season 2 because it's a little more "disguised" as opposed to a smear of grease paint.

Here's a link the cheapest items (based on shipping to Canada): https://docs.google.com/spreadsheets/d/1nFbDsa5vB4mWukKPZHWuErPAKZM71D6RAltpOSXRkKw/edit?usp=sharing

<------- COSTUME ------->

I found a custom fit one on eBay which was at $120 USD

13429649573_4f706efd65_b_d.jpg

13429531885_07b7697194_b_d.jpg

It fits okay. Too baggy in some areas and a couple other modifications that I'll be doing to it later.


<------- SEASON 1 BOW ------->

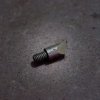
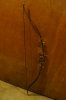
Pre-sanding etc w/ help from Boomer
13429558935_acedd4513c_b_d.jpg

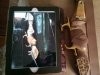
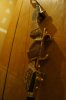
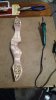
Used a Dremel to sand off the finish and onto the woodburning (something I've never done before). The iPad helped for scaling and drawing the markings on with pen first.
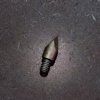
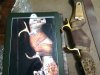
13429563125_5c3d016855_b_d.jpg

Woodburing


Both sides finished burning. The brass straps just arrived so I'll be getting that together next. Hopefully the chock comes in a couple days.

13429927554_e3053459b5_b_d.jpg 13429550975_19cf3ef224_b_d.jpg
 

Attachments

  • 13429927554_001f11a61b_b_d.jpg
    13429927554_001f11a61b_b_d.jpg
    362.6 KB · Views: 322
Last edited:
Always nice to see another vigilante pop up :D

Great work so far.

I look forward to seeing the rest of the build!

Thanks! I've been watching yours! The super glue on the sinew is going to help a bunch so thanks!

- - - Updated - - -

Also, thought I'd add that I got my mask from RPF member TheKingaSwing :thumbsup
13430499743_3c5c88a204_b_d.jpg
 
I may not be far behind on the mask.

Naturally the first thing Stephen did when he saw my eye makeup was tell me to get an eye-mask.

I'm pretty sure if the Arrow tells you to get a mask, you basically have to.

Curious to see what elements from each costume you combine :D
 
Staining Riser / Painting Limbs

Used the Minwax Early American stain tonight and the riser looks much better. Also got the limbs painted flat black.
13595656044_aa11a7a732_o_d.jpg

Tomorrow once the paint is dry I'll be able to stick the other hinges on the limbs and I'll use some gold nail polish for the tips.


:thumbsup
 
Last edited:
Got the limb tips painted and attached the hinges / sinew on the limbs. I still have to go to a couple of places in town to go find the brass cap nuts and washers.

13652543594_19f7731108_h.jpg13652538614_fbf55c75f0_h.jpg
 
Oooops
 

Attachments

  • 13812269294_35d8edf5bb_o_d.jpg
    13812269294_35d8edf5bb_o_d.jpg
    3.2 MB · Views: 289
  • 13811940585_38a1395600_o_d.jpg
    13811940585_38a1395600_o_d.jpg
    3.4 MB · Views: 298
  • 13810556744_c9c1686d08_o_d.jpg
    13810556744_c9c1686d08_o_d.jpg
    990.2 KB · Views: 304
  • 13809696045_337b630533_o_d.jpg
    13809696045_337b630533_o_d.jpg
    1.9 MB · Views: 429
  • 13810434864_6bca023ba2_o_d.jpg
    13810434864_6bca023ba2_o_d.jpg
    1.9 MB · Views: 338
Last edited:
Small FYI, I saw someone else asking about which wood burning tip to use. I tried all the ones that came with my cheap(er) $20 kit and this one worked best for me:
View attachment 311111View attachment 311112

Affixing The Chock

I couldn't find any of the brown bar tape in my city and I didn't feel like waiting for stuff to come in from Amazon/eBay nor did I want to pay $80 for the Brooks stuff, so I got creative with that part.
I went to Fabricland and bought a brown vinyl to make my own bar tape. I only had to buy about 5" of it which came out to ~$9.
View attachment 311114

I made a 1 1/4" wide template and cut the strip then used that.
For the chock I used the same nail polish I used on the tips since it wasn't an issue if it was streaky/rough looking.
As I wrapped the vinyl I put super glue down to keep it all secure, same thing with the sinew after.
View attachment 311115

But what about the holes you ask??

Woodburning torch and a template...

View attachment 311120

If you go this route too you'll quickly find out you only need to touch it a fraction of a second on the vinyl to get the impression.

Acorn nuts should be arriving this next week so I should be able to do a full assembly soon :thumbsup
 
Final Assembly

13887915294_ed01e22322_b_d.jpg13887511673_b5b3abe1bd_b_d.jpg

13887498725_0c44f72070_b_d.jpg13887891524_f9c1025baa_b_d.jpg

13887880204_f1a2c15f25_b_d.jpg13887870324_7613c5d17d_b_d.jpg

13887523763_90b20cc8a8_b_d.jpg


When I went to put the string on the very first time after construction there was a lot of cracking noises coming from the bow. I'm guessing it ended up just being a combination of the glue and the new paint.
I'm extremely happy with how it turned out in the end. Painting the tips, the chock and the acorn nuts and washer all worked very well for colour matching for what I was looking for in it.
 

Attachments

  • 08 - I1avotd.jpg
    08 - I1avotd.jpg
    931.3 KB · Views: 193
  • 13887511673_2af396acb3_o_d.jpg
    13887511673_2af396acb3_o_d.jpg
    1.5 MB · Views: 193
  • 13887915294_19f40c41df_o_d.jpg
    13887915294_19f40c41df_o_d.jpg
    1.7 MB · Views: 166
This thread is more than 8 years old.

Your message may be considered spam for the following reasons:

  1. This thread hasn't been active in some time. A new post in this thread might not contribute constructively to this discussion after so long.
If you wish to reply despite these issues, check the box below before replying.
Be aware that malicious compliance may result in more severe penalties.
Back
Top