Customer build 1/350 NX-01

Status
Not open for further replies.
That looks fantastic - almost makes me want to unpack and finish assembling mine (I've already decalled most of it but got hung up on lighting)... I was experimenting with EL wire rather than LEDs - e.g

PL 1/350 NX-01

Watch out for the E shaped details on the bottom of the pylons - if I recall correctly the decals didn't seem to line up as well as the top.
 
Jon thanks and I'm glad you confirmed that I did run into that exactly. What I did was cut those up into little sections and readjust them. It worked pretty well.

I thought it was just me at first or they were numbered wrong. Thanks for the input. I like those lights.

Steve

P.S. thanks Fraley
 
The decal work is amazing! It looks like a painted Aztek pattern in the pictures. Well done Steve! :thumbsup
I concur. I'm not a big fan of Aztek decals because most of them are too "obvious" for the scale and make the finished build look too "busy". In this case, however, IMO Steve has found the perfect paint color/shade so that the paint and decals blend seamlessly to create a faithful representation of what I saw on screen in Enterprise.
 
Looking pretty dang amazing. Both Jon's and Steve's! Do the kit instructions specify an exact color for the hull? Steve's looks more gray and Jon's more silver. But it could just be the lighting of course. Both look good.
 
Thanks Zombie.

I didn't even look at the instructions for paint. I asked Doug if it was flight Aluminum and he said yes. I know like me he loves WW2 airplanes like I do and the design has many such influences.

Steve
 
Steve-- thank you for taking the time to document and share all of your builds with us. Your progress threads area a joy to read and I always look forward to your updates, they never come soon enough for my lack of patience! I know that we all appreciate your friendliness and willing to answer questions, offer advice, share insight, and give tips based on your experience. We all benefit from your knowledge!

Another outstanding build on this one, and I can't wait to see what you share with us next! Thank you, you rock!!!!
 
I was lucky enough to get the 1/350 NX-01 kit recently, and I was so excited, part of me now just thinks I'll never get it to look even half as good as this build.

iHaving said that, It's been fascinating reading this build thread, I'll definetly be using all the tips and tricks you've talked about here when the time comes for me to get the kit out and start work.

Thanks for all the information, and thanks to Doug Drexler for designing such a wonderful ship, that sadly didn't make it to 7 seasons. But let's not forget how great those 4 were that we did get.
 
4 seasons - haha - yea... except for the last episode.. :lol If they were going to make it all a "dream" they should have just had Scott Bakula quantum leap it out of there. :lol

Thanks so much for posting pics of your build. I LOVE star trek and watching this build really showcases the beauty of the ship (which is a testament to your building skills and the design itself).
 
I'm sure you'll get it to look as good. Just take your time and do the steps I did. Thanks so much.

Thomas I've only watched a few shows to be honest. I'll have to watch some more when I can.

Thanks Thomas.

Steve
 
So at this point I have all the nerve racking hard decals on the bottom. What's left is the smooth area's for the saucer section. Like the outsides of the pylons I found a miss match or two along the way. A bit of cutting and readjustment fixed the problem.

Considering how much work had to be put into making these decals it's a miracle really there weren't more.

One of the decals had damage out of the bag as you can see on the saucer. The customer wants this ship weathered so that and a few pen re-markings should fix it.

The smooth areas will go fast tomorrow and then they have to dry over night before I can clear coat them.

I have to say I'll be glad to see this past me! What a task.

Steve

IMG_6499.jpg


IMG_6500.jpg


Everyone of the above decals had to be cut into small sections to be placed over all this relief.
 
I was just pointed to this thread. The build looks fantastic. As much time as you've spent applying them I spent 3x or more switching back and forth from Illustrator to the CGI scans.

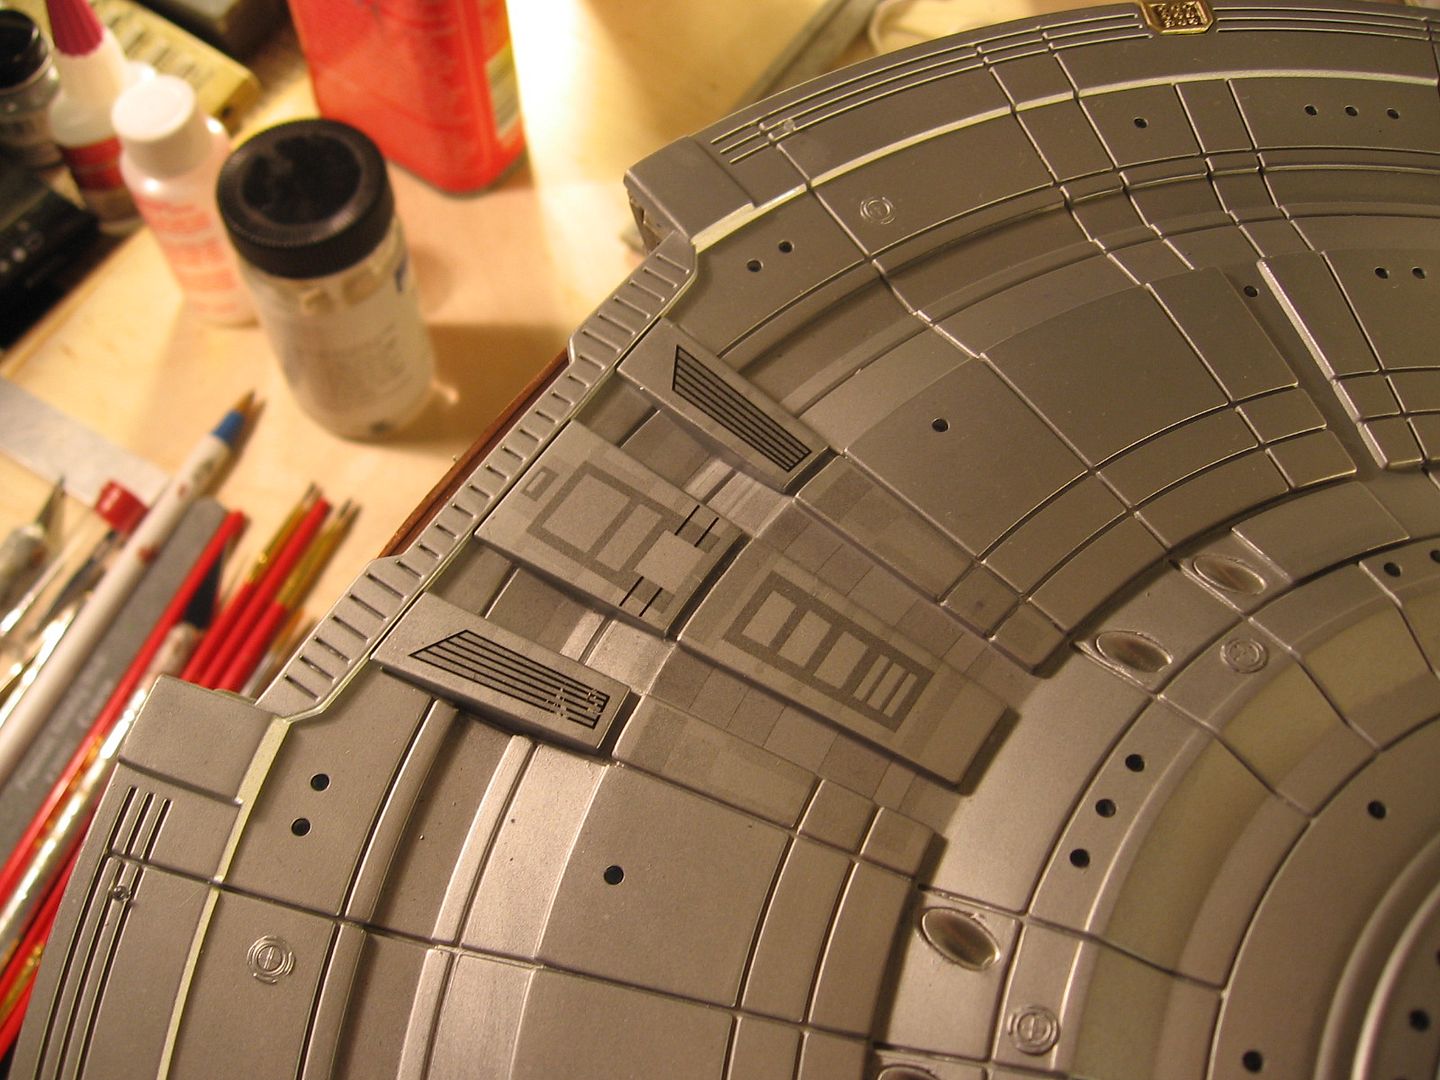
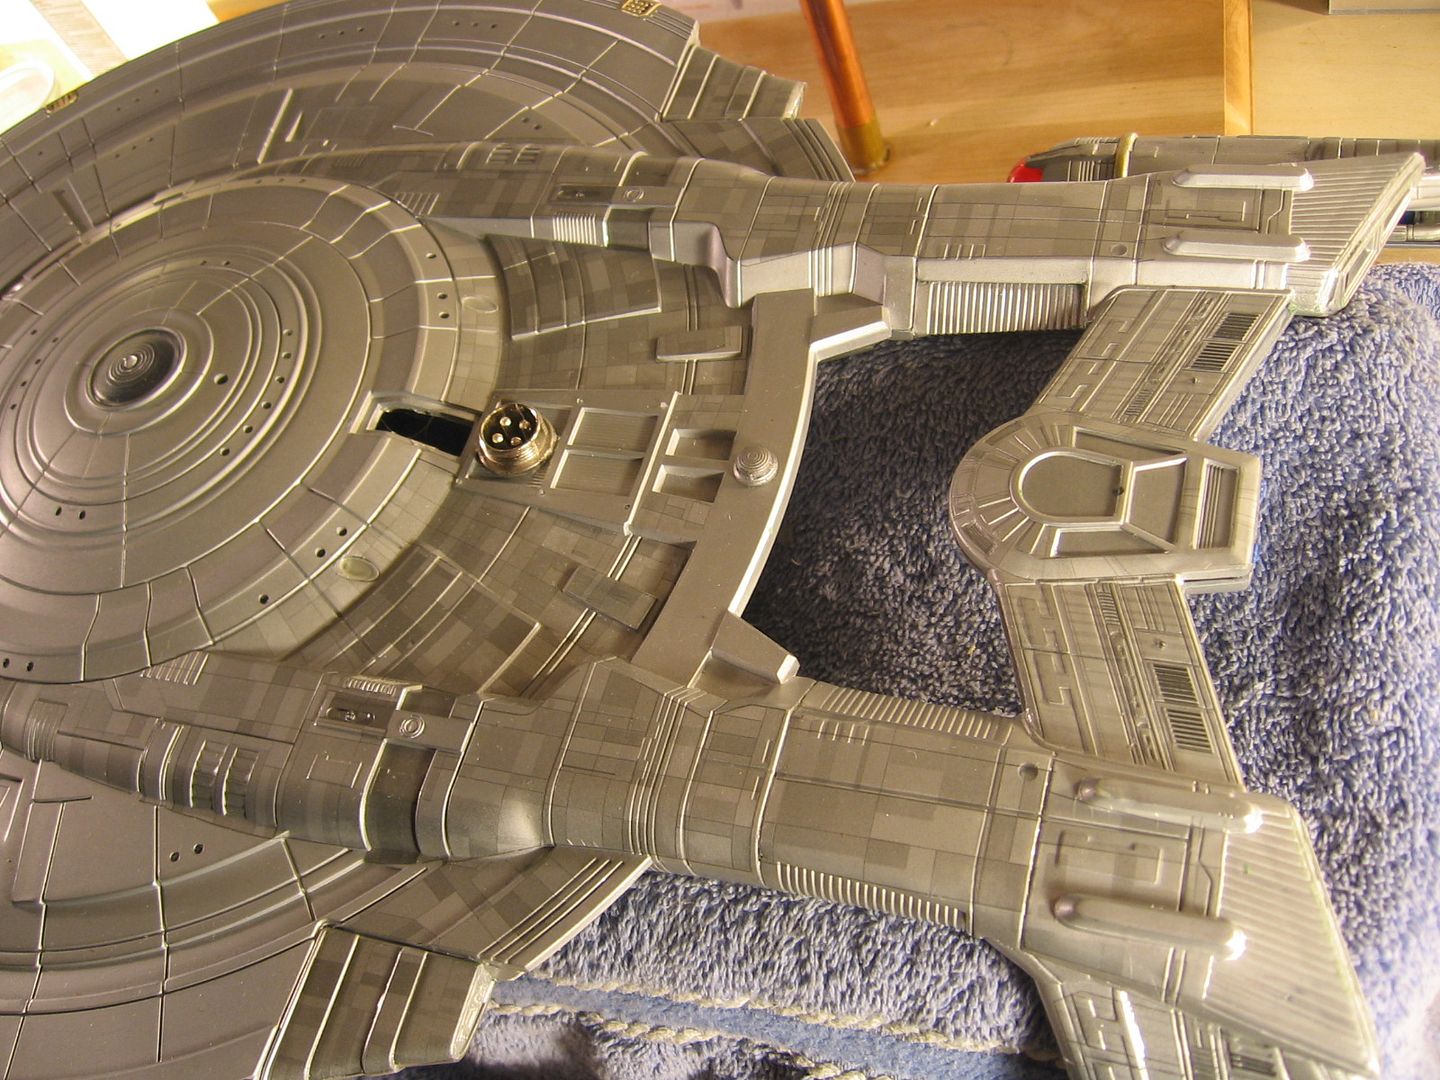
Yes, the decals are intended to be cut up into pretty much each individual section of paneling. Essentially where there is a scribe on the kit, you should probably reduce the decals to that section. At the time (years ago now) I thought it was best to keep general areas of the hull together to make them recognizable for where they went. Some people took that to mean they should be applied as one whole section which ends up having fit issues.

I use Testors Decal Bonder Spray to coat the decals. I found it to be the best coating for decals in general, its easy for me to apply in the paint booth compared to brushing on Microscale Liquid Decal Film which doesn't atomize in an airbrush well.

I have only seen a few of these put together, but I can say I made the decals for me first of all, because I loved most of the show, love the design Doug came up with and the metallic finish instead of the painted finish of the other ships of the line, and thats what kept me pushing through. The NX is the most complicated aztecing I've made simply because I was trying to be as accurate to the CGI as I could. The rest of the sets are about 75% what is visible in reference and 25% fabricated with the "feel" of what you can see in the other 75%.
 
Thanks for your input. Doug just sent me all the original surface maps for the CGI model today and I have to tell you that they are just about dead on. Really I don't think they could be much better.

With the right base color to start these match the CGI model exactly in every way. My hat is off to you.

I like these better than the refit Aztecs that came with the kit. I built that too for myself.

I also really like how though they are. I beat the crap out of them. Even Solvaset doesn't break them up. Roll unders were easy to fix with no tearing. I don't know what you made them out of but they beat the hell out the model kit companies transfers. I would have killed myself by now beating my head on the wall if they were not.

Her is the line drawing for the plague to be signed by both Doug and I for the client. The client made this up. I am flatterers to say the least.

Steve
 
You should get that laser cut in acrylic by Laserfire Creations. I think that would look sharp for the build.

I appreciate the comments on the decals. I guess how tough they are depends on how experienced the builder is with decals. So its all variable. I've had complaints and I've had compliments, so the way I see it is they balance out. Besides I dont know what else could be done about it except that the end user apply more Testors Decal Bonder. I'm pretty sure they make that with magic.
 
I'll have to try it. It's a bit late now but I still have a few to go. And the kit supplied decals.

Sorry you've had complaints. I'm very happy with them. I bought a set for the kit Doug got me as a gift.

The customer has them being made another company. The Plague Maker. They should be here late next week. Not sure how they are made I'm going to check their sight out now.

Thanks again for the great decals they have made me look good! ;)

Steve
 
My decal paper has a thinner film than kit decals like Round 2's which when applied are thick enough to cause gray and black washes to create lines on the edges of the decal after application. Some people have issues with that because they're more used to those massively thick decals. Other times it has to do with their prep, applying onto a dullcoat instead of a gloss coat, or in one case an individual heard about applying a clear gloss coat onto the decal sheet itself, and proceeded to spray a $50 set of decals with automotive clear lacquer. Word of caution to other readers, dont do that. Automotive lacquer is extremely corrosive and will utterly destroy the decals.

I think you've done a spectacular build here. You also changed my mind about aluminum vs steel for the base coat. I have 2 1:350 kits and half a dozen 1:1000 kits and from now on I'm going to build with the aluminum as the base coat. I'm also glad you caught all those sensor lights like those under the cowl overhang on the saucer top where the registry spotlight is, and I didn't look close enough on your build but almost every sensor platform on the ship has a couple of dim blue and or red lights on the CGI.
 
Thanks a bunch. I didn't get the smaller sensors. I would have needed some very fine fiber optics for that.

Like I said before Doug is a B-17 lover and a WW2 buff like me. It just had to be flight Aluminum.

Thanks again,

Steve
 
Status
Not open for further replies.
Back
Top