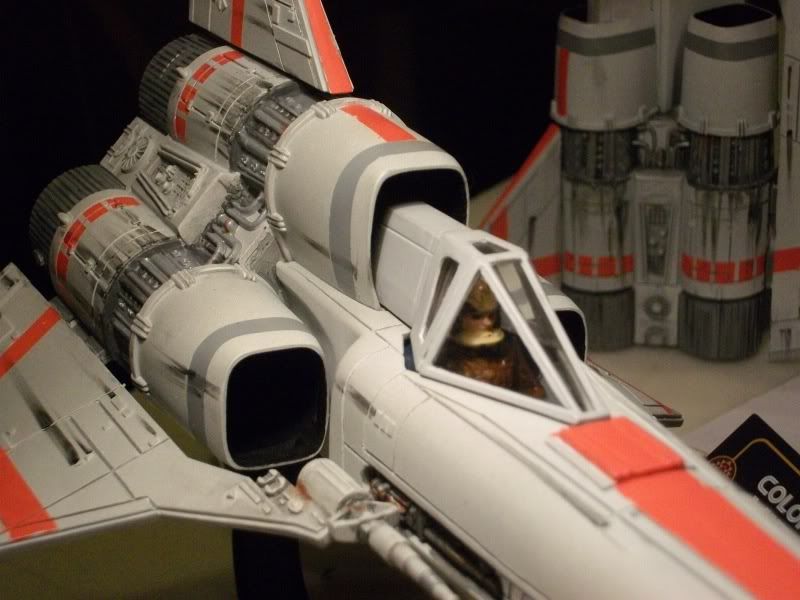
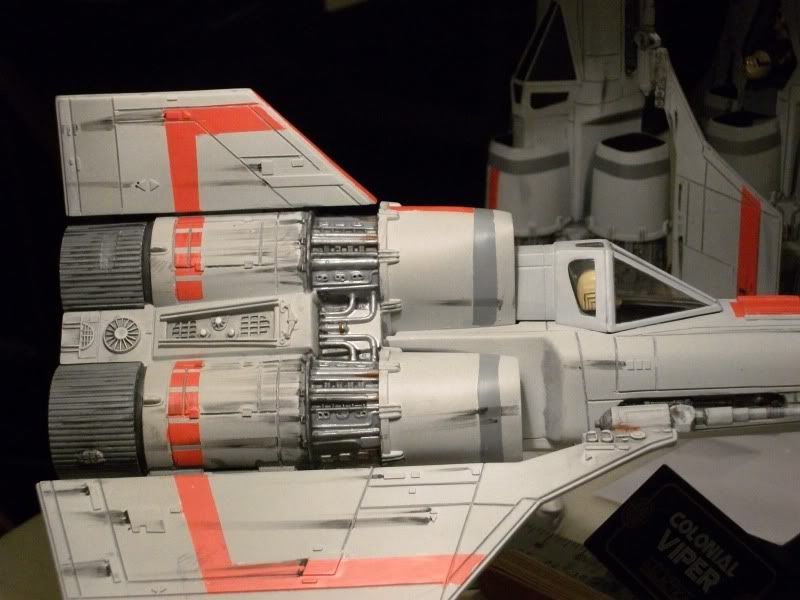
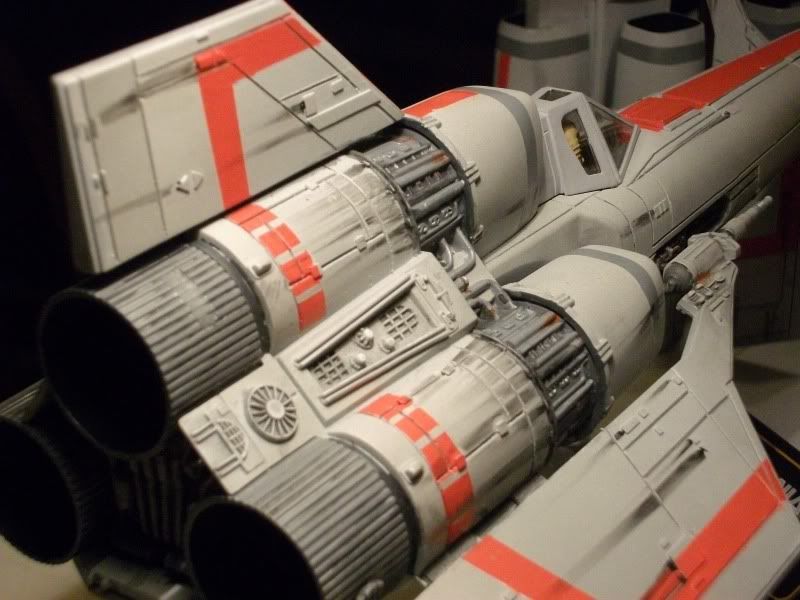
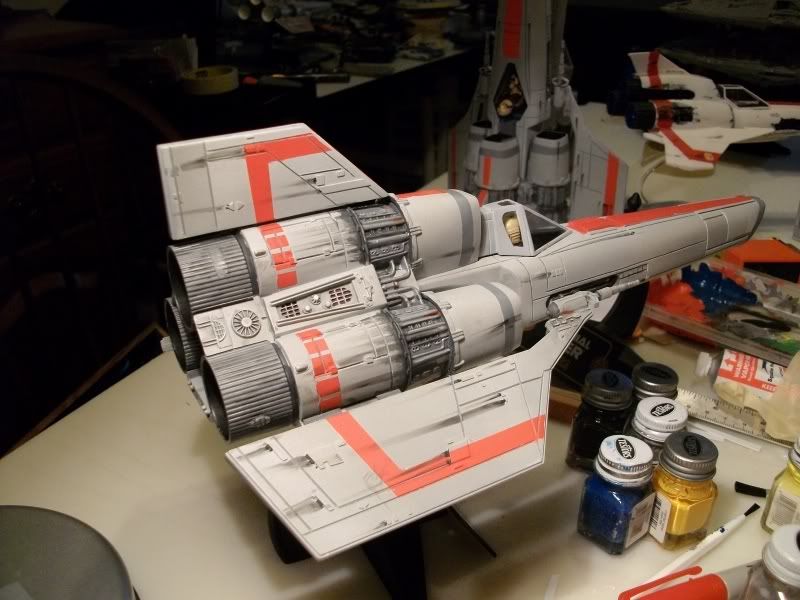
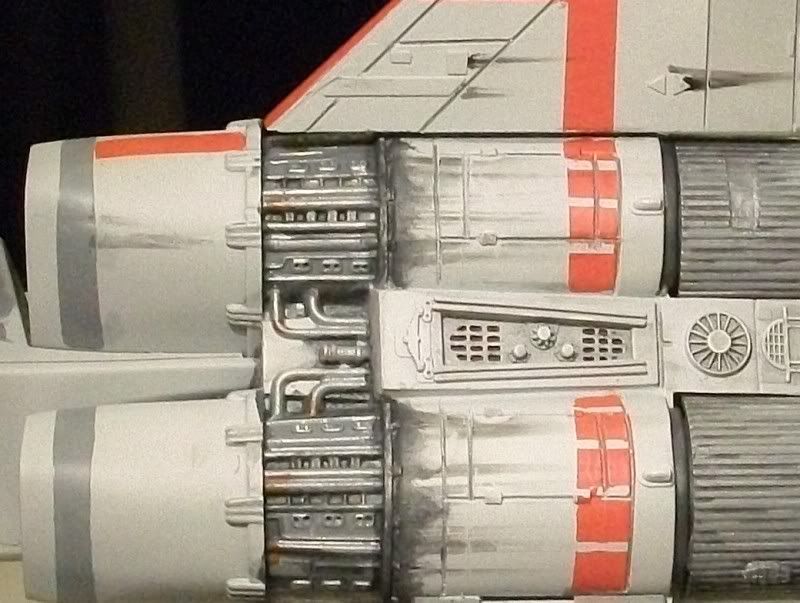
Constructive criticism on my latest Colonial Viper please?

Chrisisall

Master Member
I *just* finished it:
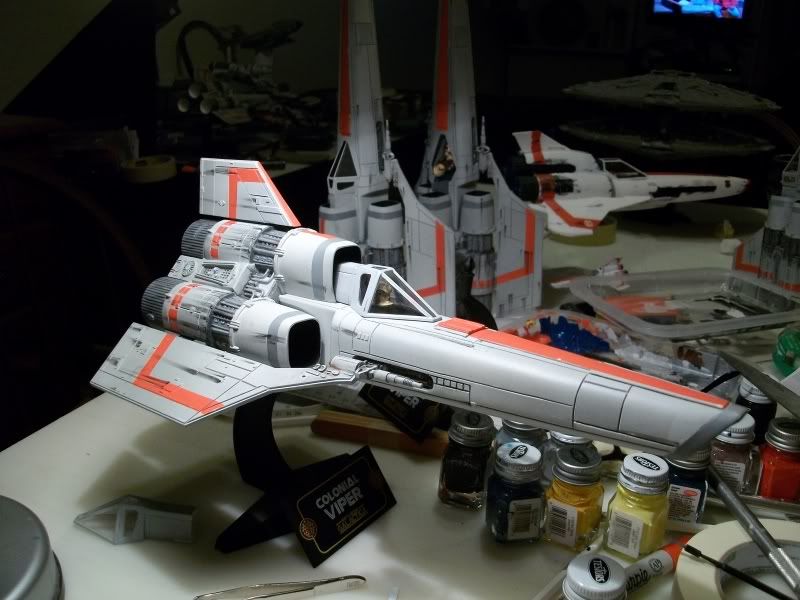
Viperassembleyline010.jpg

Viperassembleyline012.jpg

Viperassembleyline011.jpg

Viperassembleyline013.jpg


This is one I'm gonna be putting up for sale, so please, be ruthless! I can still change stuff on it- no clear coat has been applied yet & the canopy has not been glued down.
Thanks.
 
Last edited:
Remember - you asked ;)

First, I'm more of a consumer than maker and my modeling skills are especially bad. With that said, from a buyer's perspective, I don't think the weathering looks natural. Try to avoid the hard strokes of a brush or pastel. I'm sure the pros can give you better weathering advice but I would try some light shots of various paints with an airbrush or if nothing else, smudge pastels on with your finger.

There are lots of great weathering jobs out there (look up Dymerski) and probably tutorials as well. Check out the Viper Boba Flint made earlier this year - the weathering is very subtle and thus more believable. Battle damage itself is another game altogether though...
 
Nice job.

The additional detailing on the top and side engine cans are nice.

If you do the viper again, I would move the carved out section on the top engine can a little lower. Also, I would move the additional piece on the side of the cans a little higher.

The piece right in front on the canopy is great. It is a piece even the ICONS Replicas version is missing.

I also like the additional detailing on top of the front fuselage.

Might I suggest putting some rivets on the canopy and using a pin vise to drill out the two vents between the top/side engine cans.
 
The build and the base paint job are just about perfect.

The weathering needs adjusting. At least to the camera, it appears to be weathered ONLY where the distinct streaks are. Weathering is comprehensive. Stronger in certain areas (like where your streaks are), but should cover most of the ship.

Blend in your streaks a bit more, and add more lighter weathering overall.

Good job so far - keep it up!
 
Last edited:
I'm not a viper expert, but looking at the weathering, as PH says, I think it could use some more depth of grime. Maybe some dark washes of thinned paint to make it look a little dirtier. To not over do it, you could build it subtly.

There's some good talk of this over in this thread:

http://www.therpf.com/f10/x-wing-primered-what-next-113039/

You can check out the Grant McCune video link to see some of what I'm thinking. You don't need an airbrush to smear the paint like that - a normal brush would do.
 
Might I suggest putting some rivets on the canopy and using a pin vise to drill out the two vents between the top/side engine cans.
I thought about rivets, but they aren't on any filming models, at least visibly. But- what vents? Frack- did I miss something???:confused
EDIT: Oh, THOSE! Hmmm, never thought of that. Have to do some more research!
 
Last edited:
I'm not a viper expert, but looking at the weathering, as PH says, I think it could use some more depth of grime. Maybe some dark washes of thinned paint to make it look a little dirtier.
Will do. And thanks for the link, it was fascinating.:thumbsup

Thanks everyone! You've all been a BIG help!!!!!
 
The camera has indeed washed out some of the subtleties, but I think I can do more on that anyway. Thanks!

And therein lies a challenge we all face.

--Do we build for the camera (as a true filming miniature would be), or for the eye (as it ultimately will be an in-person display piece)?--

On my own SS Viper, while within three feet, I think my panel lines are too dark. But more than three feet away, or on camera, it looks just about perfect.
 
--Do we build for the camera (as a true filming miniature would be), or for the eye (as it ultimately will be an in-person display piece)?--
Reproduce the studio piece & damn the eye!
:lol
Not really. I'm trying to walk a fine line with this- accurate to the studio model AND what it looked like in the show.:cool
 
I'm not up on what level of Viper weathering is appropriate. Looks very good.
But as others have said, perhaps just a little more softer is needed, I think it's almost there, Probably a case of keeping the mantra less is more in your head when doing it.

I'm going to be stumbling through this process myself for an FM X-wing soon enough.

Found these videos and think they are pretty helpful......

YouTube - Fine Molds X-Wing 1/48th Build Log Part 1
 
Sometimes, the strangest things can be perfect. I just started using watercolors on an X-Wing to try to recreate what happened organically when ILM sprayed thinner over the enamel. As a friend said, it looks like a coffee stain, so it's not going to be possible to "nail" that paint work any other way.
x2_594b5ec


For the Vipers, I dust the whole thing with powdered pigments!
 
You've added studio model details but you didn't remove the raised band on the back of the intakes.

A real pain to do and keep the area smooth but well worth it.
Something to keep in mind for your next build.;)
 
OK this is a serious nit pick... it looks great. two things I noticed and they're related. The panel likes are a little deep. This has the effect of making the shading in them stick out too much. The fact they stick out too much makes it look a bit artificial. the weathering instead of making it look real world draws attention to the fact its a model.

Honestly I would not have even said it except you asked - I'd proudly display it my collection in a second... butif you're looking for what could be a bitof improvement that's where I'd go. If you did not scribe the panel lines and the master came that way I'd go with a much lighter color wash something clser to the base color so the contrast is not quite as much.
 
The panel likes are a little deep.
That was intentional. One day recently I noticed the panel lines in my Saturn- they're deep & pitch black, even though the paint job is white!

This model doesn't look quite the same in person, especially when I stick the camera right up against it under my halogen lamp, heh heh.

I'm hoping this pic will look better, and I worked the oil drift-back some more...

Viperassembleyline014.jpg
 
Last edited:
I'm not a viper expert, but looking at the weathering, as PH says, I think it could use some more depth of grime. Maybe some dark washes of thinned paint to make it look a little dirtier. To not over do it, you could build it subtly.
Not over do it? LOL, you've clearly never seen pictures of the original studio models! I think "Never too grimy" was their work motto!:lol

Anyway, better grime: (Extreme Close Up)
Viperassembleyline015.jpg
 
Back
Top