That first row you did certainly needs to be redone though, as none of the panels had a darker base coat. All were applied directly over the original base coat. The panels that appear darker do so because they just have a more concentrated speckle pattern with just a touch more black.
You're throwing me off here - the first row has been re-done almost entirely, with the exception of one panel (which I'm going to come back to later). Are you referring to just this one panel?
Second, you should very lightly mist the entire DS with the original base coat after the panels are finished (but before applying pencils and silver tape), and I mean just a dusting. It will help scale the speckling down even more and marry the panels into the surface.
Still on the fence on this. I understand the principal in question, and respect the suggestions of others whom have suggested this. But I'm really quite fine with the degree of contrast as it is. And contrast on this model is a devil. Lighting effects contrast considerably, where it seems extreme in some shots, and not quite so in others.
Also, by using a rattle-can, there's no going back. Seems to me a decent opportunity to mess things up. We did a test with this, and I wasn't totally happy with the results. The test panel looked dusty, dry, and once around the curve it virtually "fell off". I'll wait and see how the model looks when all done, then revisit this concept. What would be ideal is if I had the base coat in bottled form (not rattle-can) so I could mist the exact base coat color in with the tooth-brush (with which I have more control).
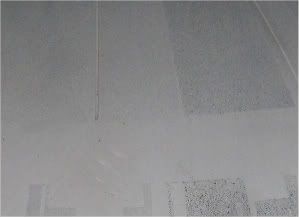
Third, the northern pole is not a straigh darker grey. It's the plain base coat with a very very faint and sparce black or dark grey speckling on it, most likely achieved with a spray bomb or airbrush, as the speckles are much finer than on the city scapes.
I agree. I'd commented on this a few posts back, and Brad recognized this as well. Same thing about contrast. While I agree mine seems a little rich in color, contrast and color tones vary wildly on this model based on lighting and other photographic dynamics. While mine looks too dark in most shots (or comparisons) there are shots of the original where it shows darker, and shots of mine where it show lighter. Tough to judge. Also, in terms of color values, I am still - and always will be - suspect of using the original, due to fading, accumulation of occluding elements such as dust and grime, etcetera.
But with all that being said, I have a light grey that will mist over the top area with the toothbrush, using the least amount of paint possible, with the finest mist I can achieve.
Fourth, the windows were definitely scraped in, and not drilled. Almost all of them have a square or rectangular shape to them, probably made from a good ole #11 X-Acto blade. It looks as though they took their time with a good portion of them and kept the chips small, and almost roundish, but I'm guessing as time went on, they got faster and a little more sloppy, and ended up scraping away just half a hair more than what they started with. Honestly, try painting a scap piece of acrylic and doing a row of drilling and a row of chipping. You'll find the chipping much easier on the hand, faster, and maching the shape of the windows on the original DS model.
Scraped or not, I'm drilling. Just to clarify, I don't mean drilling through the acrylic. What I mean by drilling is using the correctly sized micro-drill bit in a chuck that I spin with my fingers, just enough to go through the paint. This is fast and easy. I've done it a lot before going all the way through on the styrene ERTL model, and its not that bad. Frankly, I see it as easier (or no more difficult) than using a #11 blade tip. In fact, this process will ensure same-sized and shaped holes all across, with no (as mentioned above) slop. Folks have said this model may look "better" than the original - perhaps to some degree idealized. Drilling (as I've described) versus scraping will cater towards this.
Finally, that funkier colored section on the rear of the DS before you reach the unpainted areas definitely appears to be repainted. Not only do the colors not match, but the style and technique is completely different as well. I have no idea if this was done pre or post production, so whether or not you want to add that feature onto yours is entirely up to your tastes.
My strongly-held-yet-unproven theory is the additional blocks were added on the shooting stage by different folks with different techniques. I'm not duplicating this look, as I agree it doesn't match. And this also "idealizes" the model. On the other hand, I'm following a similar philosophy in that I'm "sweating" this last 10% or so less than the rest, as its not seen much.
I realize my post here indirectly counters some of your points Aaron. Not meaning to contend, or be defensive, by any means. I appreciate all feedback, and everyting you've mentioned is accurate. Thanks!
")