Building and improving three Galactica models: Colonial Viper, Cylon Raider and Viper MkII

Very inspirational images. One question though, and a general one that applies to many Viper builds on this board: why did you give the Viper's exhausts grills? I have seen no other images of the TOS-Viper than just a thick walled hollow tube without any interior detail.

Hi RKS.
Well, I know that in the original model there are no grids, but I take this license for purely aesthetic reasons. When the lights of the thrusters are lit it's not very important that there are grilles or not, but when they are off ... I just don't like to see that empty tube. :whistle:
 
I am speechless. The lightbox solution is fantastic. I don't remember seeing this before on a Viper cockpit; many other builders use fibre optics for that.
 
Hi guys. Some updates:

COLONIAL VIPER:

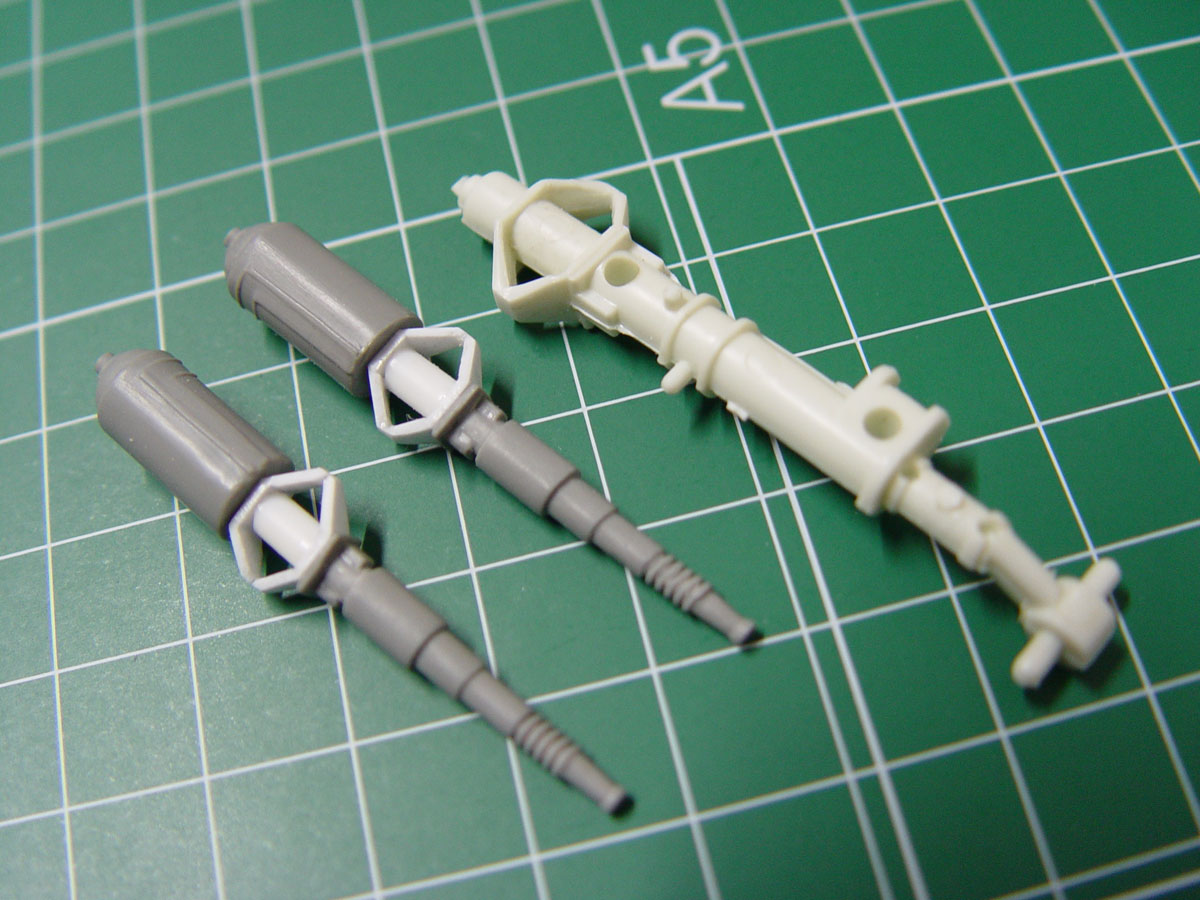
The Viper cannons have been modified taking as reference the piece of the Phantom that was used in the original models.

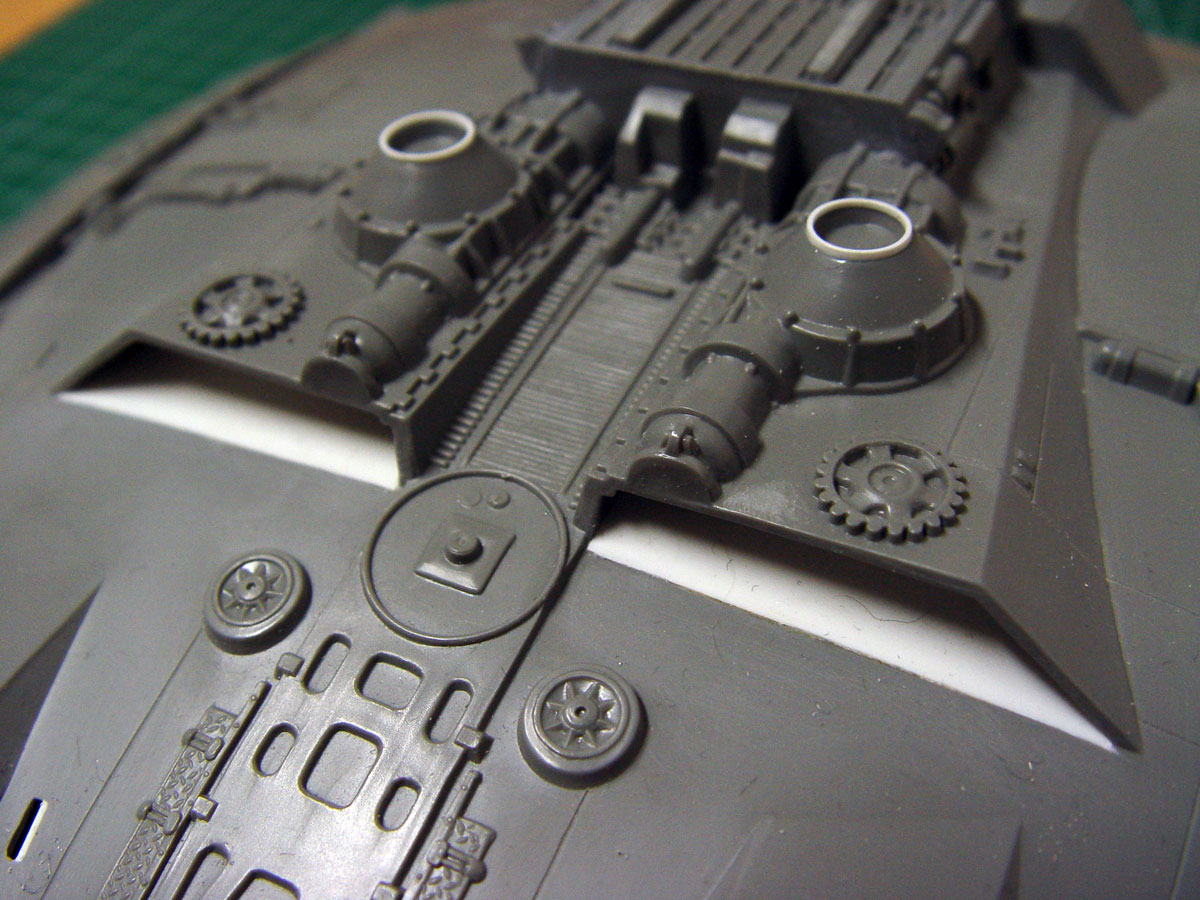
The model has large gaps that it has been necessary to cover. Being so big, I decided to cover them using pieces of styrene. The putty will leave it for when the time of the final assembly arrives. I also made all the small round perforations in the detailing that surrounds the engines. (blue Arrow).

I painted the cockpit and tried to give it a dirty look. I've also placed some decals at random.

First tests of the cockpit's final lighting. On the larger screens, as well as on the circular indicators, I have simulated some graphics on my computer and printed them on plain paper. They are printed on both sides so that the color is more intense and the design more defined. The tricky part was getting the impression of both sides of the paper to match perfectly.


CYLON RAIDER:

The Cylon Raider model also has important gaps that I have had to cover with styrene.

Lighting tests of the cockpit.

The supports to hold the models to their bases already placed inside both models.

Thank you so much for your attention.
Rafa
 
I am speechless. The lightbox solution is fantastic. I don't remember seeing this before on a Viper cockpit; many other builders use fibre optics for that.

Hi Galactican, The light box only serves to avoid having to use large fiber optic bunches. But optical fiber is still necessary to bring light to the outer surface. If you don't use optical fiber, the light of the small buttons would only be visible depending on the angle from which you observe it. In those small buttons with white light I have inserted small pieces of fiber optic about 3 or 4 mm long. That is enough for light to be seen from any angle. If you look at the new photograph of the light test, the most illuminated buttons are the ones that already have their fiber optic bit. In the lower part of the image you can see that only three illuminated buttons are visible. The others on that side don't yet have the fiber and, as you can see, the light doesn't reach the surface and isn't visible from that angle.
 
Hello people.

I have already painted my Viper pilot and I have completed the fiber optic installation.
This is the result, with some small retouching pending.

Thanks for watching.
Rafa

Galactica-Viper-pilot03-Moska.jpg Galactica-Viper-pilot01-Moska.jpg Galactica-Viper-pilot05-Moska.jpg Galactica-Viper-pilot06-Moska.jpg Galactica-Cylon-cockpit-paint-Moska.jpg Galactica-Cylon-cockpit-lights3-Moska.jpg Galactica-Cylon-cockpit-lights4-Moska.jpg
 
Beautiful job, Rafa! I've never been a fan of BSG, but your work is always amazing and inspirational!

Hi korben44.

I'm not a big fan of the BSG saga either, but I like the Viper and Cylon Raider design. During a lot of years dedicating myself exclusively to the starships of Star Wars, but I decided that it was time to change and have fun with other interesting designs of other sagas.

Thanks for your kind words.
Rafa
 
Simply stunning work Rafa.
Your attention to detail is fantastic, I especially appreciate the lit up helmet on the Viper pilot (all the figures are beautifully finished), and the Red cylon Eye(s)! .
Did you use single fibre optic strands for the Cylons(?), and a sidewall illuminated strand for the Viper helmet - how did you achieve that ‘dimpled’ effect ?
Thank you for sharing !

Ged

Hi Ged.

Each Cylon has a single 0.25mm fiber optic thread to illuminate its red eye.

The helmet of the pilot of Viper takes two threads of fiber (superior and inferior) that leave by the back side of the helmet and, crossing the seat, they enter in a independent light box located under the seat.
To achieve the "dimples", my first intention was to make small scratches on the optical fiber with a very thin triangular file, but when I folded the fiber to adapt it to the contour of the helmet, it broke very easily.
Finally I did the process in reverse; first I glued the fiber to the helmet with cyanoacrylate glue and, once I was sure that it was well glued on its entire length, I made those small scratches that are the ones that simulate the dimples.

Galactica-Viper-helmet-lightbox-Moska.jpg
Galactica-Viper-pilot07-Moska.jpg


Thanks for looking at my thread.
Rafa
 
Really beautiful work! The lighting brings it all to life.
The Cylon cockpit canopy looks like a difficult piece to scratch build. What technique did you use to keep all the angles and corners aligned?
 
Really beautiful work! The lighting brings it all to life.
The Cylon cockpit canopy looks like a difficult piece to scratch build. What technique did you use to keep all the angles and corners aligned?

Hi, Duncanator.

The base piece of the canopy is the one that gets all the sheets to stay in place and at the correct angles. I attach the template that I used.

Galactica-Cylon-canopy-04-Moska.jpg Galactica-Cylon-canopy-template-Moska.jpg

Thanks for looking.
Rafa
 
Hello people.

During the last three months I have finished the construction of the Colonial Viper and the Cylon Raider. Both models already have their primer coats and are ready to start painting.

Galactica-Viper&cylon-primer-Moska.jpg


I have also built the showcases where they will be exposed once finished.

One of the parts that has delayed my work is the cockpit of the Viper. I was not very happy with the fit of my first cockpit, especially when it came to placing the windshields, and I had to do several tests until I found the solution. The problem was that I had taken as reference the cockpit that comes with the model. And that cockpit is wrong.

Galactica-Viper-canopy-04-Moska.jpg


The two rear sides are not flat. They have a slight curvature that makes the windows can not be flat. The cause is that they close backwards at an excessive angle. That rear part has to be wider to be able to place the windows well. In addition, in this way it is more similar to the cockpit of the original models of the series.

Galactica-Viper-canopy-05-Moska.jpg


I also made the interior frames of the cockpit to cover the joints of the transparent plastic and get a better look.

Galactica-Viper-canopy-06-Moska.jpg Galactica-Viper-canopy-07-Moska.jpg


Once I had both models ready to start the painting work, I decided to be faithful to my first intention and started the construction of the Viper MK-II.

The first step was to provide illumination to the ends of the wings. For this I placed four red rectangular leds inside. Some pieces of optical fiber will take care of bringing the light to the outside. The interior space of the wings is very narrow, which forced me to sand the LEDs to reduce their thickness.

Galactica-ViperMKII-wing-lights-Moska.jpg


Next I detailed the areas where the engines are seen using electric guitar string, fishing line and stretched plastic. I also drilled all the RCS (Reaction Control Systems) points of the fuselage. Later those holes will be covered by pasting small pieces of plastic on the inside of the pieces. I don't like the proposal of the kit to simulate those holes with decals.

Galactica-ViperMKII-engines-01-Moska.jpg


The next part to work was the cockpit. The first thing I did was to detail it a bit more with photoetches and pieces of my own construction.

The next thing was to give it lighting. To do this, I drilled all the screens and covered their holes again with pieces of transparent plastic on which to place the decals. I also made some holes to illuminate different buttons with fiber optics.
To illuminate the screens I placed white leds behind the front console. And to illuminate the buttons I built a small structure attached to the cockpit in which I placed a red led, another green and one that alternates the colors red and blue.

Once equipped with lighting I painted the cockpit in gray with different instruments in black and white and red buttons. I painted the seat in black without further complications because, once the figure of the pilot is placed, it will hardly be visible. Then I put the decals and gave a few layers of matt varnish spray to homogenize the finishes.

Galactica-ViperMKII-cockpit-01-Moska.jpg Galactica-ViperMKII-cockpit-03-Moska.jpg


For the pilot, the kit gives you the option to choose between Apollo and Starbuck. The only thing to do to choose between them is to choose between the two frontal pieces of the torso: one is "masculine" and the other "feminine" because it has more bulging breasts.
I chose Starbuck because for the other Viper I had already placed a male figure.

The figure has very broad and square shoulders, and a very narrow head. I reduced the width of the shoulders with sandpaper and also made them less squares by sanding them until I gave them a slight downward inclination.
To enlarge the part of the head a little, I placed two small circles of plastic on both sides, thus giving a little more volume to the head.

I painted the flight suit in dark green and the reliefs where clarified in successive layers or rises of tone. When I was satisfied with the result, I applied GreenStuff gold paint very diluted in water in several brush strokes and insisting more on the most outstanding areas. The result seems to me quite convincing and simulates the metallic effect of the costumes used in the television series.
I painted the helmet with a mixture of gold and silver colors with details in silver and bronze. The face shield is painted in silver and shaded with Tamiya smoke color.

Galactica-ViperMKII-pilot-Moska.jpg Galactica-ViperMKII-cockpit-04-Moska.jpg Galactica-ViperMKII-cockpit-05-Moska.jpg Galactica-ViperMKII-cockpit-06-Moska.jpg


Next step: illuminate the thrusters.
 

Attachments

  • Galactica-Viperm_kII-box.jpg
    Galactica-Viperm_kII-box.jpg
    19.5 KB · Views: 330
  • Galactica-ViperMKII-cockpit-02-Moska.jpg
    Galactica-ViperMKII-cockpit-02-Moska.jpg
    174.8 KB · Views: 381
This thread is more than 3 years old.

Your message may be considered spam for the following reasons:

  1. This thread hasn't been active in some time. A new post in this thread might not contribute constructively to this discussion after so long.
If you wish to reply despite these issues, check the box below before replying.
Be aware that malicious compliance may result in more severe penalties.
Back
Top