Build Thread- BladeRunner Spinner w/Lights

Thanks, yeah I am really looking forward to soldering up 39 SMT LEDs myself! What fun that is going to be!
 
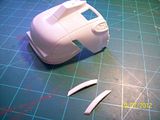
More mods to show. The strips on the sides were cut out. These will be replaced with a clear box section and lit with SMT LEDs.


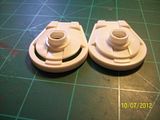
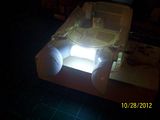
Front wheel pods modded for lighting, SMT LEDs as well.


Short video of colored SMT LEDs. Looking pretty good. Love the program Donnie put into this Fusion Core board. Looks great!


Sorry, just realized it was out of focus.
 
Thanks Guy. As soon as the rest of my SMTs come in I think I will be able to really start building this model! I have to mod the doors one last time tonight to house a 3mm LED and fiber optics for the door panels.

I might have this done in time for Wonderfest next year!!!
 
Bubbles, bubbles, my bubbles!
Thanks for the comments guys!

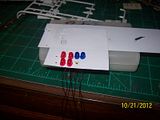
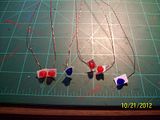
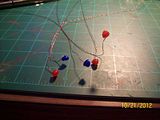
O.K. SMTs came in (100) and started soldering these up. What a pain these are! I did get into a pretty good swing on soldering these. Just time consuming compared to 3mm and 5mm LEDs.

O.K. made bases for the bubbles on the roof. The bubbles had no bottoms and I needed one so to mount the SMT inside and then attach to the new standoffs. Here is a series of pics on how I did it.


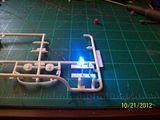
Lighting test on a bubble and the center "headlight". On the headlight I made new tubes from stretched clear sprue to simulate the neon tubes. But after lighting it up I realized the outer clear cover needed to be frosted to diffuse the light. So after a quick sanding the lights look great, but now you can't see the neon tube detail. Oh well, looks cool anyway!


The aluminum standoffs on the light bar will be replaced by plastic tubing. This will be to prevent chaffing and shorting out of the enamel coated mag. wire.
 
Hey there, I was wondering how this superb build is proceeding. I hope things are going smoothly and we can enjoy another interesting update soon.

Cheers,
Vesa
 
Thanks Avanaut, some other things got in the way, holidays, working on a Freddy glove, Darth Real Life, 1/350 TOS Enterprise, etc. Plus, I needed a break from wiring up 43 SMT LEDs! But don't worry, I'll be back on this project very soon. Keep checking back, I'll have another update soon. The lightbars on the roof will soon be assembled and tested.

I wonder if I can add another "soon" in here somewhere!
 
I hope I wasn't pushing you, I'm just really curious to see how the Spinner turns out, looks fantastic so far. I'm glad updates are coming someday.

Happy holidays!
 
Thanks for the compliments! This is a grail kit of mine and a lot of mods are being done to it. Sometimes when you get into such a complicated build you need to step back and take a break. That keeps you sharp, interested and less stressful than continually working on something. A fresh mind after a break keeps the juices flowing. I promise it will be done before Wonderfest next year!
 
I wish I had your knowledge on model building....I have several vipers and raiders I would love to build , but not that great with models , as I am props.....lol....
Great job so far ,looking forward to seeing more detailed info and pics from you , on this model....awesome work
 
Thanks Guy. I need to finish my Freddy Glove. Hopefully this weekend. Then I need to clean the modeling desk :)wacko), and then I can get back to the Spinner.
 
Awesome! So you're bringing this to Wonderfest? I was looking at my Spinner kits yesterday, thinking about when I could sneak the time to build one... love what you are doing with this. It's just not a Blade Runner model unless it has lots of blinking lights!
 
Thanks Jason. Yes, this will be at Wonderfest next year. As soon as I finish my Freddy glove I'm working on I'll get back on the Spinner. Soldering up forty three + blinking SMTs can try ones nerves.
 
The hardest part of lighting this model is the roof lights. Those square ones on the lightbar are a pain in the arse. Only the smallest SMTs will fit in there. I have all of those done, as well as all the bubbles on the roof. The headlight is done as well. I need to wire up the front wheel pods and then tackle those yellow stripes on the sides. That will be a pain, and not looking forward to it!
 
The hardest part of lighting this model is the roof lights. Those square ones on the lightbar are a pain in the arse. Only the smallest SMTs will fit in there. I have all of those done, as well as all the bubbles on the roof. The headlight is done as well. I need to wire up the front wheel pods and then tackle those yellow stripes on the sides. That will be a pain, and not looking forward to it!
I can only imagine how rough that will be, but with your talent and vision for the model, I know this will turn out to be phenominal , plus you, also have talented people like Moffeaton , who will be watching you.....:lol.....:thumbsup
 
Update time-
I got the resin figures from Culttvman and the PE from Paul. Both are excellent products. I did not use the back wall in the PE choosing instead to build my own. I started by tracing the body opening onto sheet plastic. I cut this out and trimmed it to fit. Details from the original kit part were glued to this.


Greeblies added.


After a trip to HobbyLobby I came home with some cheap bracelets for the duct work. A shot of Tamiya Extra Fine primer ties it all together for now.


And a shot of the figures in primer as well. I still need to add some stretched sprue chopstricks.

 
Back
Top