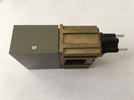
Build Log - Fieldmarshall E11 Blaster

Hengstler Button Prep

So as it comes, the white 3D printed part would simply not slide into the frame channel by more that an inch or so....no where close to where it needed to be. Additionally, there was a slight ridge length-wise and inline with the holes of the channel that raised the left side of the printed part so this needed some attention as well.

Ridge in the channel frame. Using needle files and sandpaper, I was able to get the ridge sanded down to this photo which was enough.
43 Hengstler 02.JPG


Then I needed to "open" up the channels themselves using a variety of needle files and emory boards.
43 Hengstler 01.JPG


Moving onto the 3D printed part, I sanded the backside and the rails to remove enough "fat" to allow the printed part to slide in the channel. Very hard to see in the photo but it's the typical...sand, fit, sand, fit, until it is right.
42 Hengstler 01.JPG


Taped off the rails, and started with some Vallejo Black Gray paint but quickly realized it was not dark enough. I ended up using Vallejo Black Primer which was much better and some Future/Pledge gloss floor wax to finish off this piece.
42 Hengstler 04.JPG


42 Hengstler 07.JPG
 
Hengstler Case Screw Addition, Part 1 of 2

Not sure if this is the most appropriate title for this section but not sure what else to call it. On some vintage Hengstler counters, I've seen this screw on the top and bottom of the case that attaches the back cover to the hengstler frame. See below.

Hengstler 400.png

Since the FM replica counter doesn't have this included, I've been toying with the idea of adding it. Worst case, I can always cut the threads off and just include the screw head or ditch it altogether and fill the hole with some putty and hide it under some paint. So that said, let's jump in...

The idea here is find a reference line so I can pull some measurements relative to those two small holes. I'm not sure if those were included in the replica counter for this exact purpose but decided to use them as they were in the "ballpark" of where the vintage screw would be. I did considering drilling new holes but the potential proximity to these two holes cause me to shy away from pursuing this further.

First, with the front metal cover fully seated, I applied some tape as a reference.
46 Hengstler 01, brass screws mod.JPG


Then with the front metal cover off and the rear plastic cover, I made a pencil line as a reference where I would be basing my measurements off to create the new holes in the plastic cover.
46 Hengstler 02.JPG


46 Hengstler 04.JPG


Dead center, first hole is 14mm and the second hole is 17mm from my reference line.
46 Hengstler 05, 14mm and 17mm.JPG


Applied a piece of tape to the plastic cover and transferred the measurements. Looking good so far, but why the two horizontal lines?
46 Hengstler 07.JPG


Had a total brain fart but when measuring the distance of the holes from the side edge of the metal cage (2.5mm), I forgot to account for the wall thickness of the plastic cover (1mm). Luckily I caught this when I was doing a test fit and noticed the lines did not line up with the holes. So before getting too far ahead, I was able to correct this....whew!
46 Hengstler 09, 2.5mm + 1mm wall thickness.JPG
 
Hengstler Case Screw Addition, Part 2 of 2

Thanks to Snaggletooth, he was able to measure the distance of the screw on a vintage counter to the back /closed edge of the cover to be 18mm. This roughly corresponded to the furthest hole from my reference line (17mm) and proceeded to drill out the hole. Unfortunately, I did not have the proper #43 drill bit so the closest I had was a 3/32" bit.
46 Hengstler 13, 3-32 drill bit.JPG


4-40 threads tapped
46 Hengstler 14, 4-40 tap.JPG


It was close but the wall between the two holes stayed intact. :)
46 Hengstler 19.JPG


46 Hengstler 20.JPG


Moving back to the cover, I gotta say, I wasn't so sure everything was going to line up so I started drilling the plastic cover with my smallest drill bit in a pin vise, 0.8mm, with the thought that if it was misaligned I could correct it later.
46 Hengstler 21.JPG


After opening up the hole incrementally (1.2mm, 1.8mm, 2.2mm, 2.5mm, 2.8mm, 3.0mm) - yes, I was being overly cautious...success!
I used a toothpick the check alignment and wouldn't you know it, it went straight through all four holes (2 on the plastic cover, 2 on the frame).....perfectly straight and aligned. Whew!!
46 Hengstler 25.JPG


Using a countersink bit, I made some room for the screw to sit flush to the cover.
46 Hengstler 30, countersink bit.JPG


:D
46 Hengstler 32.JPG


Voila.....the finished product (this was not tightened down fully so it wasn't sitting flush).
46 Hengstler 34.JPG


Final measurements for reference. This may or may not correspond to your replica so please check but the overall concept and methodology is sound.
46 Hengstler 26.JPG


Closing thoughts....
I'm super happy that this worked out and mechanically everything went to plan. The brass screw was the smallest I could find at my local Ace but it does look "bigger" than it needs to be vs the reference photos of the vintage counter. I know McMaster Carr has smaller screws but this was good enough for me...plus the idea of ordering 100 screws to get 2 and to track down smaller taps was really not interesting to me.

At the end, the purpose was two-fold....the first for practical reasons - to secure the cover, but the other was for aesthetics and the appearance of a screw. I think to these two points, it was success.
 
Hengstler Mount Prep, Part 1 of 2

Moving onto the modifications necessary to mount the counter to the scope rail, I found these square nuts (8-32 thread, 8mm square) at Ace that I thought would be useful. Trying to keep things as simple as possible, using square nuts in particular allows me to position then better than hex nuts....let's see.
47 Hengstler 01, Mount.JPG


Taking some measurements and locating the hole locations on the front metal cover and base cage for drilling.
47 Hengstler 02.JPG

47 Hengstler 03.JPG


So the idea here was to drill the metal cover first (I used pieces of wood to give some rigidity while drilling). Once I have those holes drilled, I would assemble the cover and the cage using the previous holes drilled as a guide to drill the holes in the cage.
* Note, "x" does NOT mark the spot in this case. Had another brain fart..... when I initially marked the locations the cover was not fully seated over the cage. :oops: Double and triple checking this before cutting or drilling really comes into play here.
47 Hengstler 04.JPG


47 Hengstler 10.JPG


As you can see in the image above, once the 2 pieces were attached and the initial holes drilled, all further holes were performed this way until the appropriate sized hole was reached. Those are black oxide 8-32 thread, 3/8" length philips bolts.
47 Hengstler 12.JPG
 
Hengstler Mount Prep, Part 2 of 2

Now that the counter box mods are done, time to move onto the scope rail. I knew from the onset that I wanted two holes, not just one as it comes from FM. Not that it would be a big deal, but I didn't want to deal with any potential rotation of the counter in the future once everything was assembled. Once I'm done, I'm done you know?

Took some measurements from the previously drilled holes, transferred them to the scope rail, and double checked with the nuts. Being square nuts, it really helps with the alignment.
48 Hengstler 01, rail mount.JPG


48 Hengstler 02.JPG


48 Hengstler 03.JPG


After drilling the hole, I used my mini needle files to slot the hole vertically just a bit to allow some adjustments should they be needed during final assembly.
48 Hengstler 05.JPG


Fits perfectly.
48 Hengstler 07.JPG


Those square nuts are awesome. First, no adhesive is necessary to hold the nuts in place. Second, with them being square, they become self-locking as you secure the screw. Third, I can remove and replace the nuts even with the counter assembled as they are thin enough to remove and replace as needed.
48 Hengstler 08.JPG


And the bolt heads do not interfere with the receiver tube.
48 Hengstler 09.JPG
 
Got a side tracked over the past few days with the recent arrival of the MoM Luke ROTJ Hero from Veracity Labs / 7Chambers. If you're interested you can find out more here.

But back to the topic at hand....moving onto painting and bluing. What I would like to do is to finish the E11 with a variety of textures and patinas to give the E11 some interesting details that will hopefully give it a "real world" used look. Let's see how this goes...

That said, I started on some small scale bluing with aluminum black. Ideally I would love to have started with all of the aluminum parts blued from the start but that's not how these parts came and I'm not sure I'll be able to tackle it all myself so starting small seemed to be the right call. Plus I only had a 3oz bottle of AB....lol.

Here's the process I used:
  • Parts were scuffed with some gray 3M scotch brite pads to even out the finished, and then cleaned / degreased
  • Prepared a 1:1 solution of Birchwood Casey Aluminum Black and Distilled Water
  • Heat part with a heat gun for 5-20sec depending on the size of the part and thickness.
  • Submerged part into the blackening solution for 60-90sec
  • Remove from the solution for 60sec
  • Rinse with cold water
  • Dry
  • Rub with 0000 steel wool.
  • Repeat
Here's what the various parts ended up looking like.
81 AB 01.JPG


I was happy with all of them except for the rear sight....specifically the main semi-circle and the L-shaped pieces. The 2 circular details blued just fine. Because of the texture on these parts (best I can describe was that it was grainy), it wouldn't blue properly IMO and afterwards, I was able to still remove the patina rather easily. I'm actually not too concerned about this piece since it will be painted so this was more of a test.

The front sight actually held up well to the bluing but will get painted.
 
Next, I decided to move onto a larger piece....the end cap.

Here I prepped the part a bit differently. I took a rather aggressive approach by using a 400grit dremel sanding pads to remove the grainy texture. I was pleasantly surprised that the end cap smoothed out quite well.

Using the same process above (except that I left this in the solution for about 2min and repeated the process 3x total), I was able to achieve the following patina. I'm not sure I would recommend this aggressive process on smaller or more delicate parts. There were some areas of the end cap that started to pit a little.

In any case, I am extremely happy with how this turned out. The variety of tones and the darker spots gives it so much character and an overall used, authentic look. I think will just leave this as is and forgo the painting.

17 End Cap 04.JPG


17 End Cap 05.JPG


17 End Cap 06.JPG


17 End Cap 07.JPG
 
A couple of questions that have been weighing on my mind that I’d like to get some opinions on.

First, re: stock hinge

I really would like to shorten the hinge bolts since they protrude into the barrel and prevents the bolt from sliding back. Plus it would make assembly and disassembly a whole lot easier.

However, I’m afraid by shortening these screws the over hinge assembly would be weaker. So I’m contemplating strengthening the hinge by using some adhesive or epoxy to attach the hinge to the receiver.

Is this a good idea? Anyone else contemplating this? If so, what the appropriate adhesive? I have E6000, JB weld original, JB Weld SteelStick, CA glue/baking soda.

I wish this would have come brazed from FM similar to the front and ejector guards.

Second, re: inner receiver darkening

I’d like the inner part of the receiver to be dark/black but what is the best way?

Paint? Not sure if I can get a thin enough layer and get access to all the surfaces?

Aluminum black? Given my current experience, not sure if it will darken enough nor will I be able to access all area to adequately darken and burnish the finish down? Plus that’s a lot of AB....and I don’t have anything where I can submerge the entire receiver (my preferred method)?

What have you guys done or what are you planning to do?

Thanks.
 
Grip: Prep Work Completed

Relatively minor update but I was able to finished up the grip. Painted the covers (not sure what those are called) a satin black, darkened/weathered the ends of the center bolt and trigger. I ended up leaving the guard the same finish as received from FM as I liked the factory/vintage black look. As for the grip, I know folks have painted them gloss black / cleared but I think they look fine as it is in the raw plastic so I'll leave them alone for now. I also left the selector switch untouched.

I'll work on the final weathering once I have the rest of the blaster painted and assembled.

07 Grip 10.JPG


07 Grip 11.JPG
 
Looks great! I aluma blued my selector switch and sanded the casting seams on the grip and then ran it over the polish wheel and got it looking shiny but it still looks beat up a bit too. Really appreciate your build videos too, they’ve helped me with the counter & front sight, thank you!
 
Looks great! I aluma blued my selector switch and sanded the casting seams on the grip and then ran it over the polish wheel and got it looking shiny but it still looks beat up a bit too. Really appreciate your build videos too, they’ve helped me with the counter & front sight, thank you!
Awesome. Glad it helps and there’s value in these build logs. You don’t see many these days.
 
Some issues with the hengstler clear plastic cover....circular cast marks at the ends, the two bubbles on the right side and the cloudy section on the left.

How do you fix this?
BAD158AA-B0D0-4681-B2D8-AAEF49BA4E14.jpeg
 
Some miscellaneous updates....

Painted the hengstler with flat black. Satin was too glossy for me. I just need to finish the counter cover...and weathering will come later.
12 Hengstler 06, flat black.JPG


12 Hengstler 07, flat black.JPG


Finished darkening the magwell. For the larger pieces I utilized a different process. Plus I found my Barricade so I was able to use this now.
  • Sanded everything down with 120grit dremel sanding pad (yes, more aggressive than the 400grit used previously)
  • Work one section at a time....apply heat with heat gun (a bit longer now since there's more metal to heat up)
  • Instead of submerging the piece, I used a foam craft brush from Hobby Lobby and brushed on the AB
  • Let it soak while working it in with the brush (1-2min)
  • Let it sit undisturbed for ~2min
  • Reapply while working it (another 1-2min)
  • Sit for ~2min
  • Rinse with cold water and dry
  • Repeat above 2-3x depending on how well the metal took the AB
  • Using a paper towel, lightly rub the surface to remove any surface slag (there should be minimal transfer to the paper towel)
  • With Barricade on a paper towel and a drop on each surface of the magwell gently rub into the metal.
  • Dry and let sit overnight
  • Another round of Barricade (lighter coat) and pat dry with paper towel
Starting from top left and going clockwise:
  1. Post sanding with 120grit
  2. First pass of AB, rinse, dry
  3. Second pass of AB
  4. Final, after Barricade and drying
Capture.JPG


The remaining large parts (minus the receiver - haven't figured out how to tackle that yet) will use this process.
 
Last edited:
Finished up darkening some more parts. The bolt and one of the spring retainer pieces are WIP.
P1280010.JPG


I also put together a DIY on how I darkened the larger aluminum parts using Birchwood Casey Aluminum Black (1:1 to distilled water) and Barricade gun oil.

 
Painting the Scope

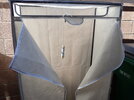
Since I do not have a dedicated spray booth and wanted to avoid painting indoors, I found a portable closet from Walmart that has been quite useful. It was cheap ($5 vs $16 due to an advertisement error), had a rail to hang stuff from, is enclosed to minimize wind spray and debris during drying, and can be easily broken down for storage afterwards. A win all around...
200 Paint Booth 01.JPG

I approached this paint scheme via a series of layers as follows (numbers align with the photos). This was the only way I knew that could created the contrasting textured look vs the scope ends and allow for weathering with the gold showing through in varous places. More on this in a bit...
  1. Scope as it comes from FM
  2. Krylon Flat Black Primer - 3 coats
  3. Kryon Silver Hammered - 2 coats (but I dabbed with a paint brush after each coat to introduce additional texture / variation)
  4. Rustoleum Textured - 1 coat (this gave some additional texture but only 1 light coat as I didn't want the full textured / sandy look)
  5. Krylon ShortCuts Gold Leaf - 3 coats (lots of metal flake, sprays incredibly well, first time using this and was super impressed)
  6. Krylon Satin Black - 2 light coats
Overall I'm quite satisfied how this turned out.
112 M38 Replica Scope 15.JPG


Paint used
202 Paint Test 10.JPG


Before weathering, I filled in the details with a white crayon. Same technique as with the hengstler counter but this time I wasn't as detailed or precise with getting everything filled in perfectly as the variation and uneveness contributes to the weathered look. I did use a hair dryer to melt the crayon to let it settle into the letters/numbers a bit better.
113 M38 Replica Scope 02.JPG


I started the weathering process and still have a ways to go but this should give you an idea of the look I'm after. I created these scratches using the edge of a xacto blade for example. With the light satin top coat and the heavy 3 layer gold undercoat, it was easy to get the gold to show through. I'll continue this process and will likely use some other techniques to complete the weathering a bit later. But for now, I'm quite satisfied how this turned out.
114 M38 Replica Scope 01, weathering.JPG
 
zjunlimited - fantastic update! Thanks for your detailed explanation here. I have at least two kits on my "to-do" list, but I may just be adding this one as a third. Your build log is as inspiring as it is informative.
 
That scope looks great! It looks just like the finish on my larger scope. Great idea using the textured paint.

Are you going to do the wrinkle paint that's applied to the real Sterlings?
 

Your message may be considered spam for the following reasons:

If you wish to reply despite these issues, check the box below before replying.
Be aware that malicious compliance may result in more severe penalties.
Back
Top