Build Log - Death Star Surface Tile Wall Display

zjunlimited

Sr Member
Edit:
Completed project and video


================
Not-so-recently ago, I acquired a set of Archive-X acrylic paints for my Bandai PG 1/72 ANH Falcon build but I wanted to practice spraying these paints on something other than spoons....lol.

Well I was able to acquire a set of death star tiles and decided it would be cool to create a wall display of sorts....a win-win in my mind. The idea here would be to create a grid of tiles that‘s manageable is size and didn't require too much effort.

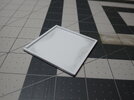
But first here's a quick look at the tiles...sorted into A-grade (right), B-grade (top left), C-grade (left middle), D-grade (left bottom).
P4020004.JPG


Initially I figured I would pick up a picture photo frame and mount the tiles on that. But I quickly realized the frame was neither strong enough or large enough for what I envisioned.
P3130001.JPG


So the next idea was to cut up a scrape piece of wood I had and make a larger frame....
 
Last edited:
Creating the base / mock up

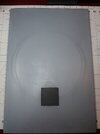
I started with a piece of plywood and cut it down to a rough opening of 12" x 18". I decided to go with this size since it allowed me to use the Grade-A tiles and I was able to center the exhaust port tile (I did have to split a tile in half to fit the tiles). Each tile is about 3" x 3" so that will give me 4 tiles wide by 6 tiles deep.

This is how the rough layout looks like.

P4020012.JPG
 
Frame Build Out

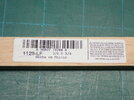
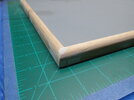
Now that the base is cut, I wanted to use some trim to finish off the edges. Headed over to HD and picked up some 3/8" x 3/4" trim. The higher profile of the trim will create an edge that will capture the tiles. More on this later.
P4020014.JPG P4020015.JPG

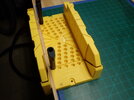
Made a few 45° angled cuts with my miter box
P4020013.JPG

While I was test fitting the trim to the base, in my rush to move this project forward, I failed to notice a slight warp in the plywood I cut earlier. So back to the garage and found a piece of MDF that was true. Heavier than the plywood but straight and true.

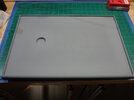
I cut down the MDF, bored a hole in the base for the exhaust port using a 1.5" forstner bit, cleaned up the edges using a dremel sanding wheel and some wood filler.
P4110018.JPG

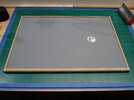
I then sealed the MDF with some Krylon grey primer and attached the trim using some brads and wood glue.
P4150019.JPG

Cleaned up the brad holes and seam lines with wood filler....and yes, including the back :)
P4150020.JPG P4150021.JPG

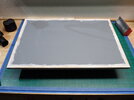
Primer'd the trim.
P4150023.JPG

And then finished the trim using Krylon Flat Black and Matte Clear.
P4160027.JPG

P4160028.JPG
 
Onto the tiles and some administrative details around the purchase experience.

Seller: OWModels on Etsy (based in Nevada)
Purchase price: $57 before tax, free shipping (it's over $72 now as of this post)
  • Tiles are cast from Bandai model kits as I'm told. Roughly 3" x 3" in size.
  • Seller has good communication and replaced several tiles without any hesitation and without any extra cost to me.
  • Very little cleanup needed though I still had to file down the sides to address some rough edges and such but no flashing or excess resin needed to be removed. Tiles were packed well and tight but the tiles did sit on each other...but no damage to the tiles from the way it was packed.
  • I left a 5 star review almost immediately upon receipt but now I wished I could change it to 3 maybe 4 stars. Doh!
So now onto the tiles....there's the good, the bad, and the ugly.

First...this is my second experience with resin cast parts. My first was with some Jurassic Park items (raptor claw, Isla Nublar island claw display, etc..) and those turn out perfect. Honestly I was a bit spoiled with that experience since looking back, those were very good casts with no clean up needed.

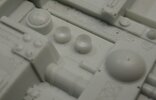
As you will see in the pictures below, there are a crap ton of very small pits and holes what I can assume to be from air in the resin and not using a degassing chamber. I was focused more on the features of each of the individual tiles which had it's own issues but here we go....

The Ugly - pits and holes (these were evident across all of the tiles)
A1.jpg

Not much I could do to fix this aside from sending the entire batch back. But for $60, it wasn't worth it IMO.

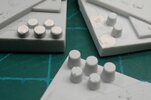
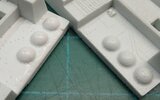
The Bad - My Grade C & D (missing features/details)
A2.jpg A4.jpg A3.jpg
I tried to fix some of those issues with Tamiya putty but it just wasn't working for me. Seller did replace these for me and luckily there were only about 4-5 of these out of 30. That said, those should have been caught and replaced before sending them out.

The Good
  • First, the major features are all there and they are generally very clean and crisp.
  • There's a good variety of tiles in design and quantity for the price I paid.
  • Once you get some paint and stand more than 2 feet away, you can't see the pits and holes very much or at all.
  • The vast majority were Grade As and Bs so having a few Cs and Ds were not a big deal.
  • And for what I had planned for the project the quality of the tiles were ultimately acceptable.
  • That said, once this is done I would like to take another stab at this with better quality casts and a bit larger display where I can integrate some lights and turrets.
 
Priming the Tiles

After some minor sanding of the edges and underside of the tiles, I washed them in some warm soapy water to remove any mold release agents that may have lingered.

I then setup my spray booth and primed the tiles using Tamiya Gray Surface Primer....I love this stuff but not the price $12/can. Ouch.

I also used a lazy susan and made the process so much easier.
P4160024.JPG

P4160025.JPG

P4160026.JPG
 
Back to the Frame...

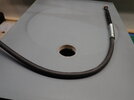
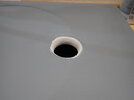
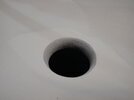
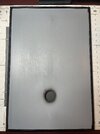
So I thought more about the exhaust port and I wasn't happy with the cut out in the frame. I wanted to create depth and it just wasn't working for me so I decided to drill out the hole and "extend" the hole to help sell that illusion of depth as much as possible.

Used the same 1.5" forstner bit and simply drilled through the MDF and beveled the edges on the backside of the hole with a dremel sanding drum. Doing this I think it helps create the illusion of depth by not seeing the edges of the exhaust port interior.
P4170029.JPG P4170030.JPG

Wood filler to seal the MDF and a layer of primer
P4170032.JPG P4180035.JPG

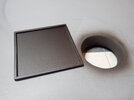
Fab'd up a piece of styrene, primed, painted with flat black and attached it to the backside of the frame with E6000 after I sprayed the port with Archive-X Engine Black
P5020042.JPG P5050043.JPG

Back and Front
P5060046.JPG IMG_4816.JPG
 
Home Stretch

When I bought my Archive-X paints, it was the ANH Millenium Falcon 15 bottle set. Unfortunately, this did not include the DS Surface Grey or Olive Oxide colors (as I wouldn't expect it to). So after priming the tiles with Tamiya Gray Primer, I decided to press on with the philosophy that the colors that I had were "close enough" and applied a base coat of Light Reefer Grey.

P5270008.JPG


The start prior to base coat
P5150047.JPG


After base coat of Light Reefer Gray; Depot Buff accents; Reefer White highlights
P5150048.JPG


A dusting of Light Reefer Gray over Depot Buff to tone down the intensity and followed by Drak Grime shading and Engine Black accents.
P5210001.JPG


Ready for Final Assembly
P5230002.JPG
 
Wrapping this Up

Attaching the cast resin tiles to the MDF base, I decided to go with a combination of regular wood glue and medium CA glue. Given how smooth the back of the tiles are as well as the base, this combo yields a very strong bond.
P5250005.JPG


I spread wood glue on the MDF base where the center of the tile would be and applied a drop of CA glue in each corner of the tile. And repeated this 24 times.
P5250003.JPG


I held down the tiles for ~5secs and then used a 1-2-3 block to hold the tile down while I made my way through the assembly process.
P5250004.JPG


Finished Project.
P5250006.JPG


Really happy how this turn out. The piece of plywood that I initially cut was actually put to some good use for this project so what was a bit of setback initially turn out to be a benefit.
 

Your message may be considered spam for the following reasons:

If you wish to reply despite these issues, check the box below before replying.
Be aware that malicious compliance may result in more severe penalties.
Back
Top