Here is my budget Boba Fett ESB sidearm build. I'm posting it simultaneously on TheDentedHelmet.com and TheRPF.com, so apologies if anyone has to suffer through it twice.
So earlier this summer, I had been geeking out pretty hard on Boba Fett's sidearm blaster, as barely seen in The Empire Strikes Back, as well as some sweet-looking fanmade replicas on TDH that are based on found items. I'd really like to buy either one of those, but neither version is currently in my budget.
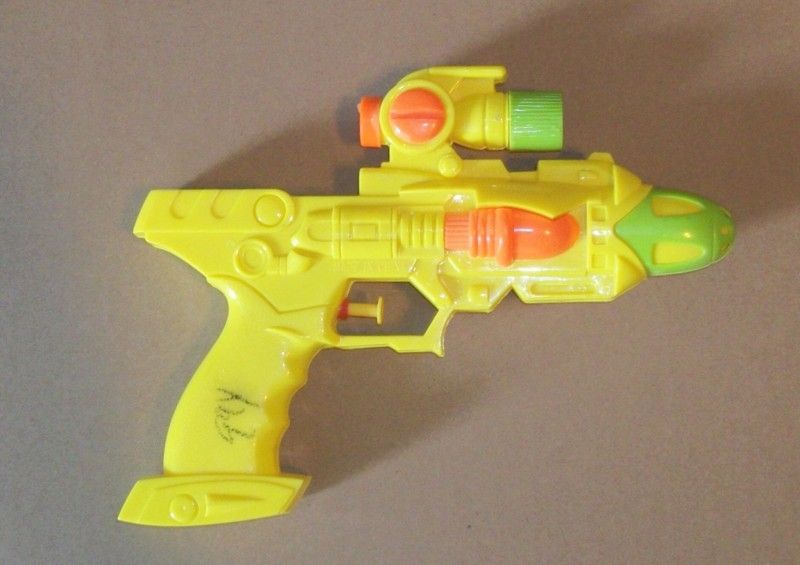
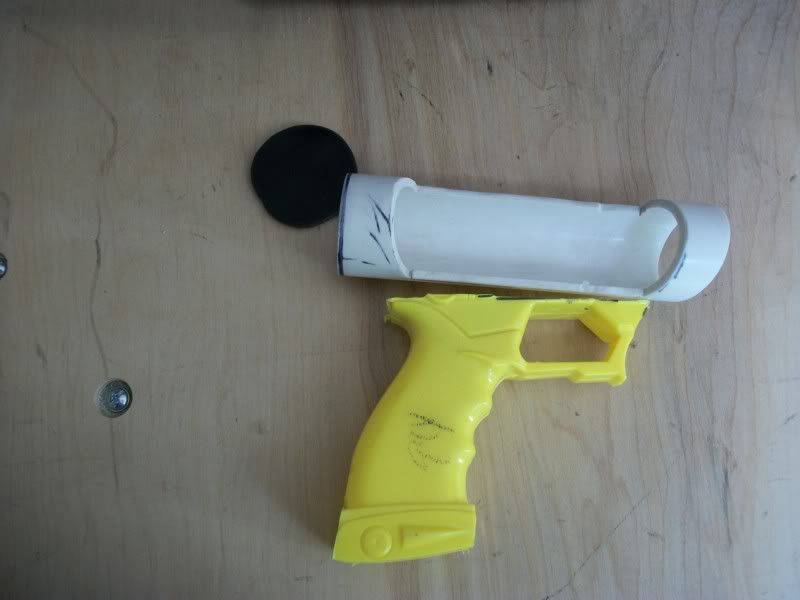
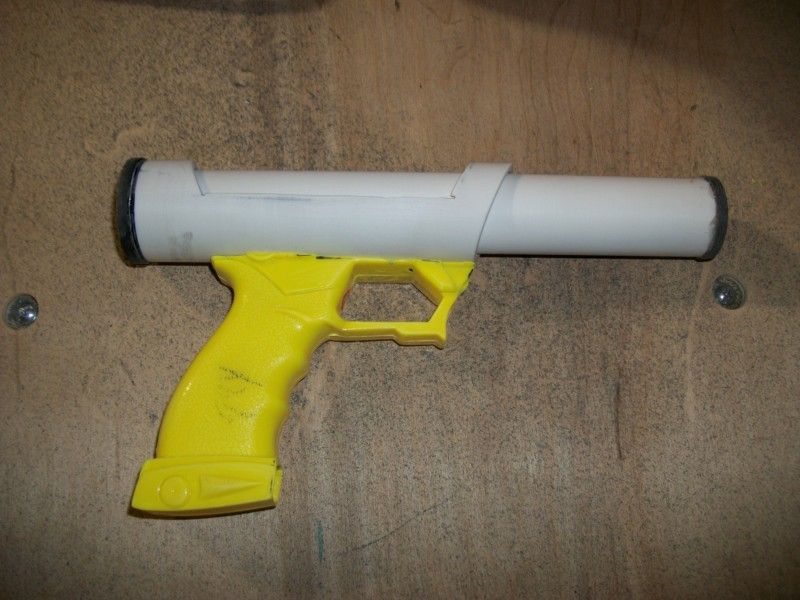
One day, I was at a thrift store, and saw a watergun with handgrip kind of sort of somewhat similar to the one on the sidearm/found item. I got the wacky idea that it would be fun to try and build a budget homemade Boba Fett ESB sidearm from the watergun. So, I invested the 99 cents into the gun.
I cannot measure, draw, cut, sand, or paint in a straight line to save my life. But I try a lot. I absolutely know that if I touch a project, I am going to screw it up by over-doing one of the above actions, or something else. That's just how it goes. Despite knowing that each time, I begin each new project certain that it will be the first one that goes right, the gates of Heaven will open with trumpets blaring and The Knowledge of Building will be given to me with the touch of a heavenly finger on my forehead or something. It's crazy. ("Oh, I'll just bend this hard-to-find key component a little and it will fit perfectly..." *breaks* "Noooooo! Not again!!!")
So, with my new 99-cent Goodwill watergun, I decided to set the rules of a build challenge for myself. Basically: In addition to the watergun, to use only materials that I already had, don't buy anything else. I knew I had a fair amount of odds and ends from various other projects that could work for certain parts, and maybe I could learn/figure the rest out along the way? I printed a small couple of reference photos from TDH threads and reference library, eBay listings, and Google - all either real found items or fanmade replicas. I believe the fanmade ones were MojoFett and Spideyfett's (man, both of theirs were sweeeet!!).
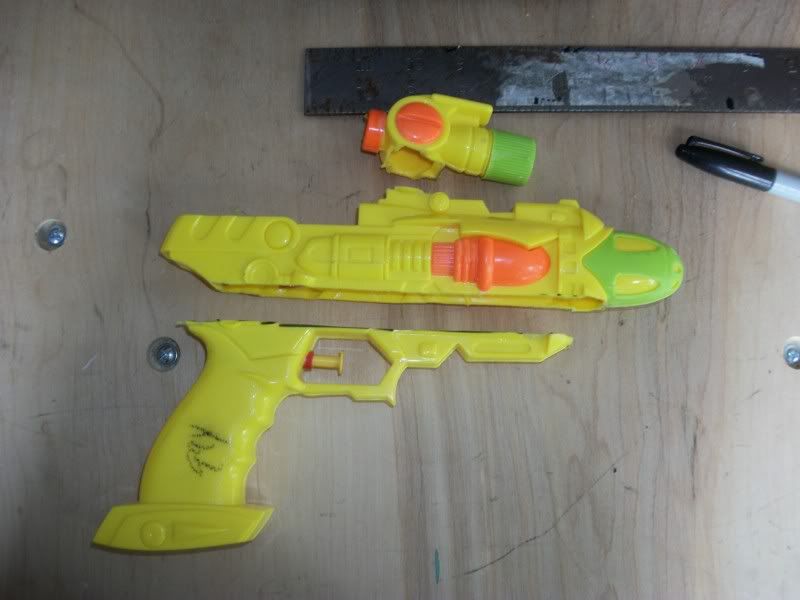
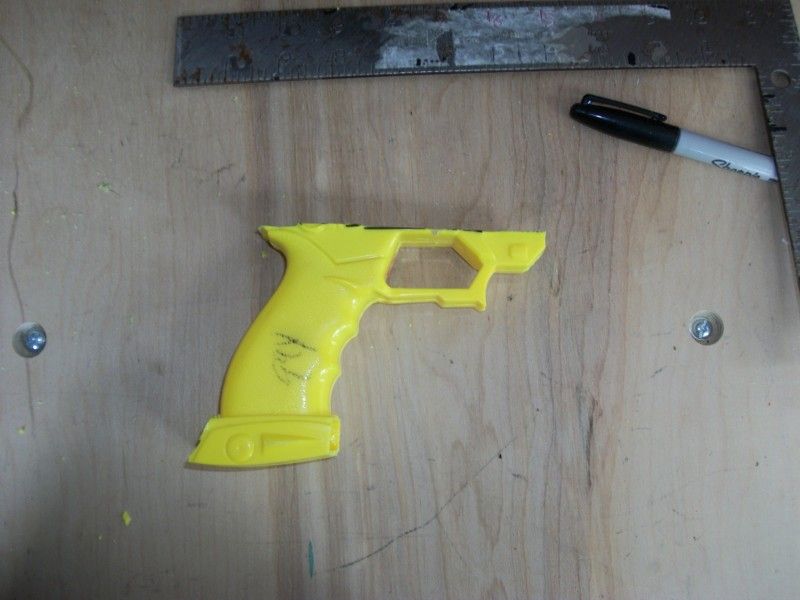
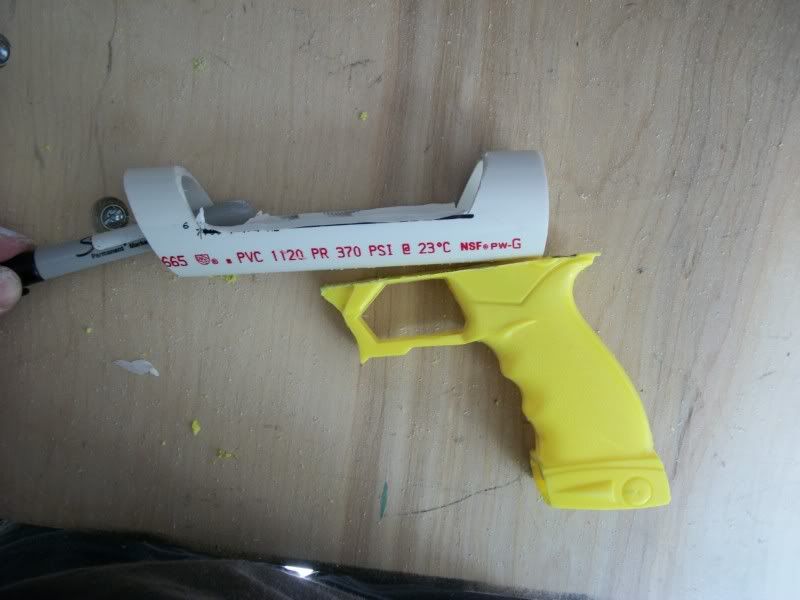
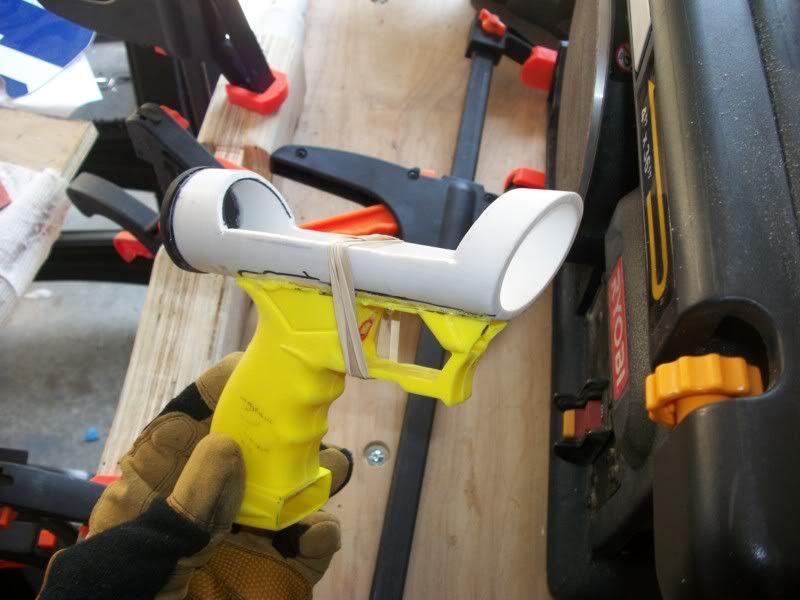
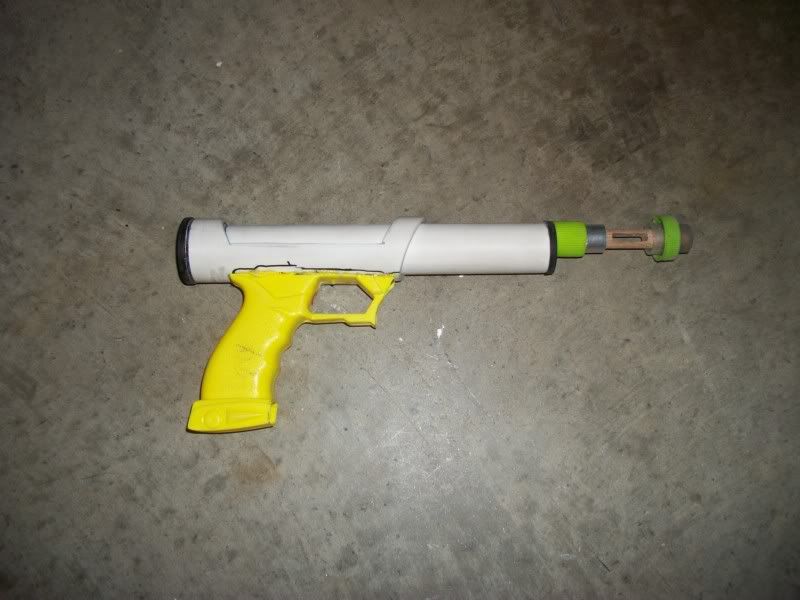
Okay, let's get started. First step, cut the grip off of watergun. I also trimmed the base of the handgrip. Still not sure as I post this how I am going to finalize that part.
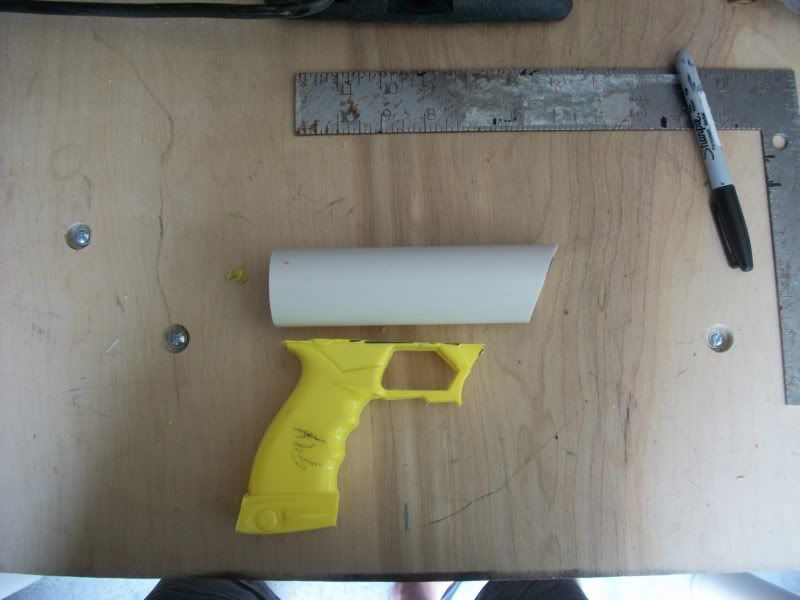
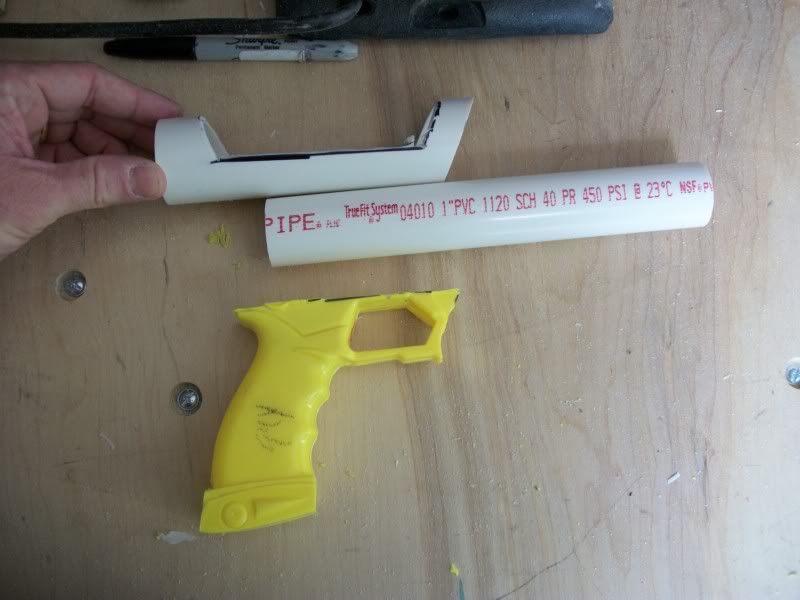
Next, cut a piece of PVC pipe for the back half
Then cut out the open area. I didn't know how to measure this, so I winged it and made the cuts on a bandsaw by eyeballing it. I think I nicked a corner, which was so disappointing, but will fit in with that Star Wars "used universe" beat-up weathering I love so much.
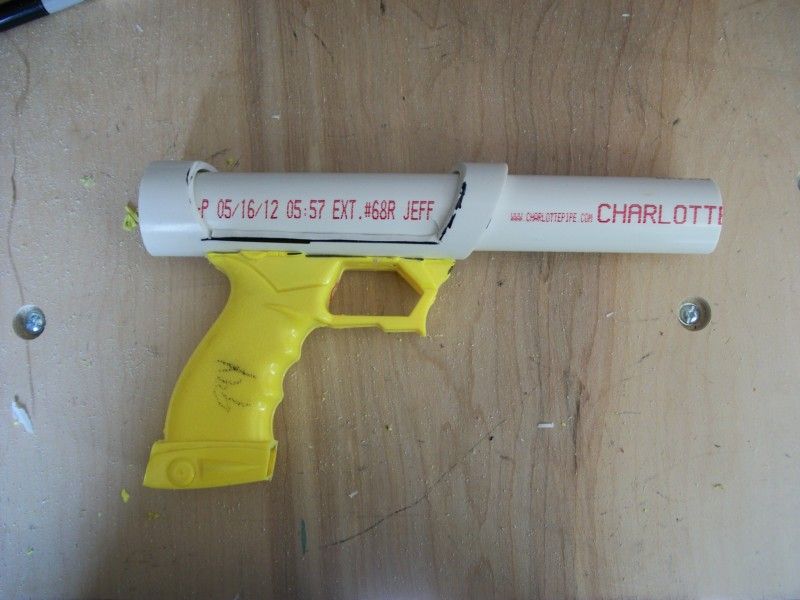
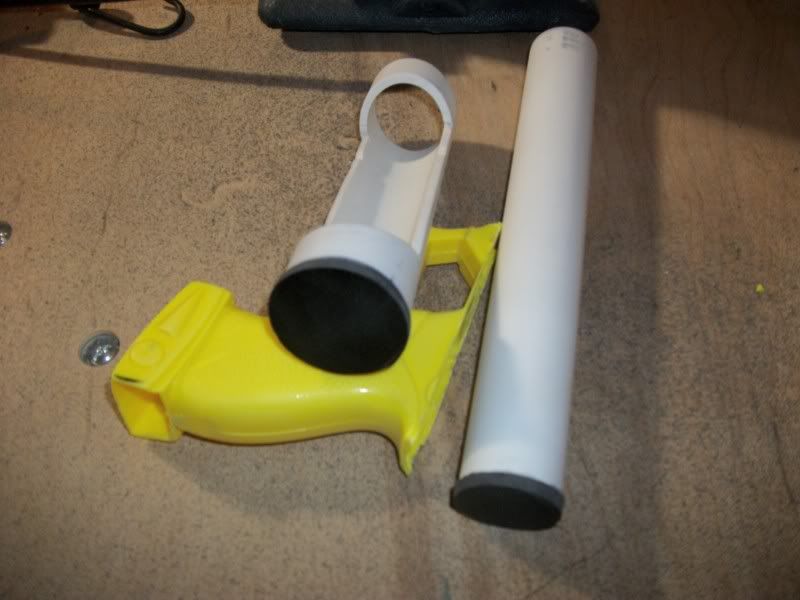
Here's the direction it's headed, slide a smaller piece of PVC pipe cut to guessed barrel length inside the larger-diameter cutout piece.
And placed inside to see how it will look. Because things that look like guns are cool. Fezzes are cool, too.
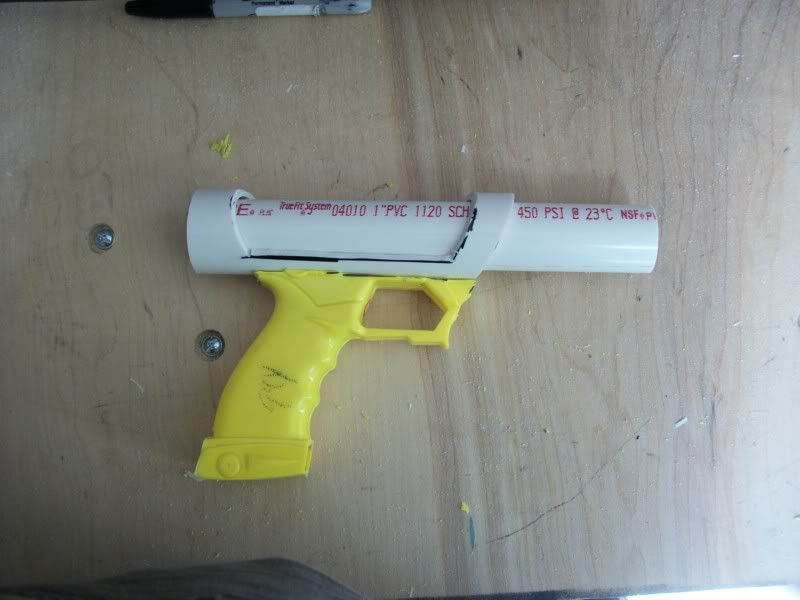
Thought the barrel was a little bit too long, so cut it down just a bit
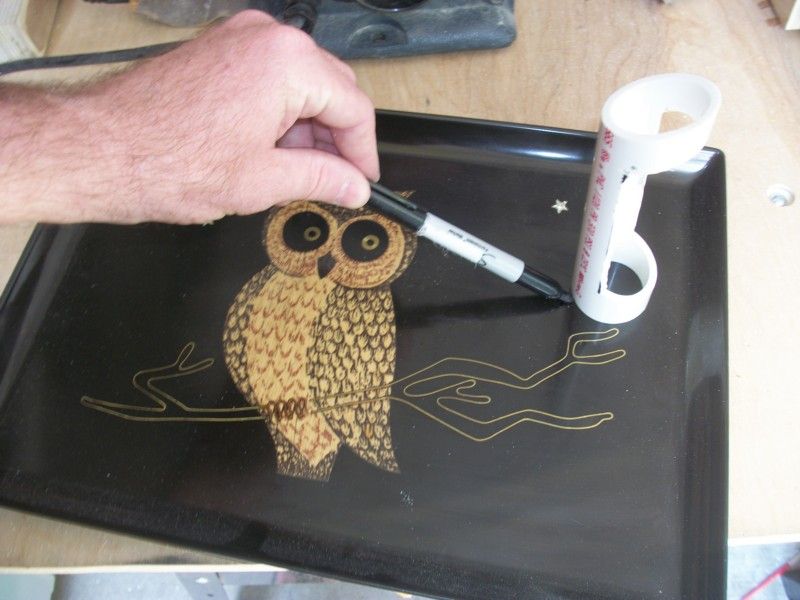
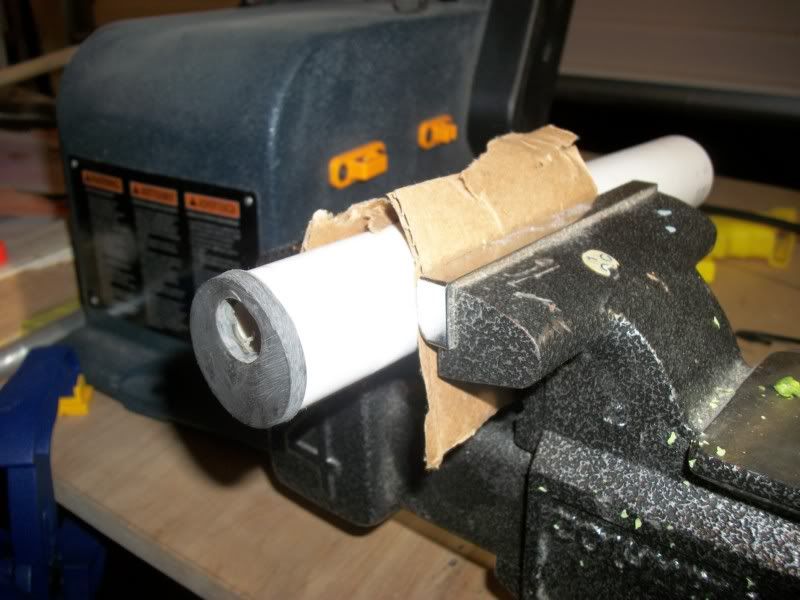
Needed a thick round end cap for the butt end of the cut-out piece. Stood the PVC cut-out piece on a old thick plastic tray I'd bought at the thrift store a long time ago as a flat surface to make molds on or something. Traced a circle around the cut-out piece.
I cut out a piece much larger and rougher than what I traced around the PVC. I think it was almost square, actually. Then I just shaped it by holding it and running it over the belt sander until I got a circle shape along the traced marker line.
Repeated the process for the front end of the smaller PVC piece, which will make up the main barrel.
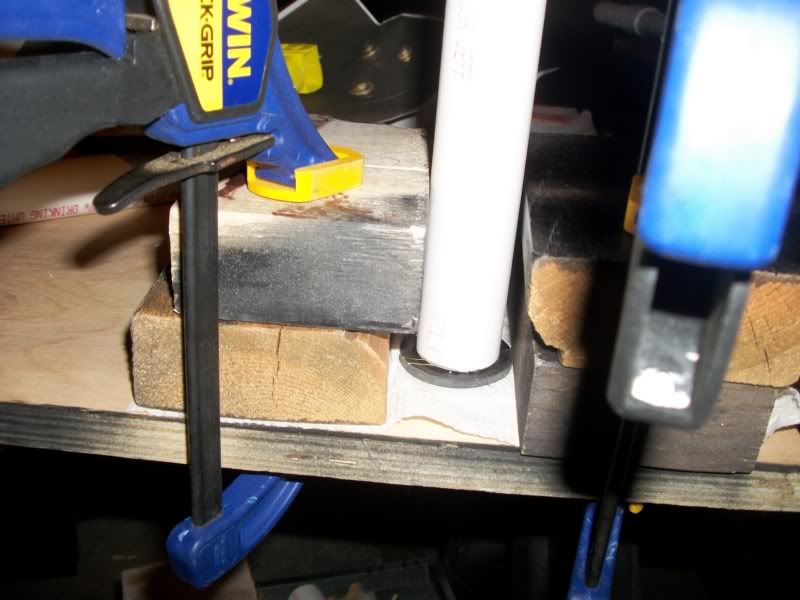
Glued them on with E6000. The dark dust is from sanding the cut piece from the tray down to a circle.
Another test fit just for fun
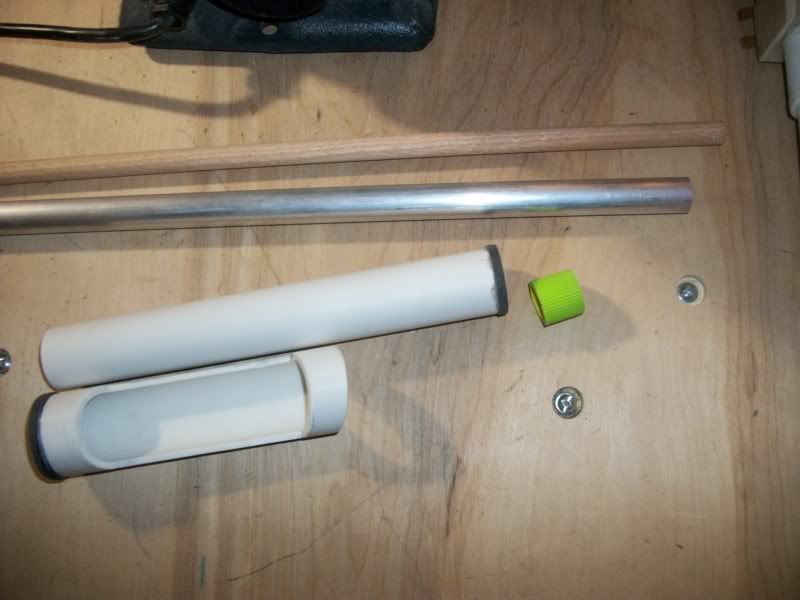
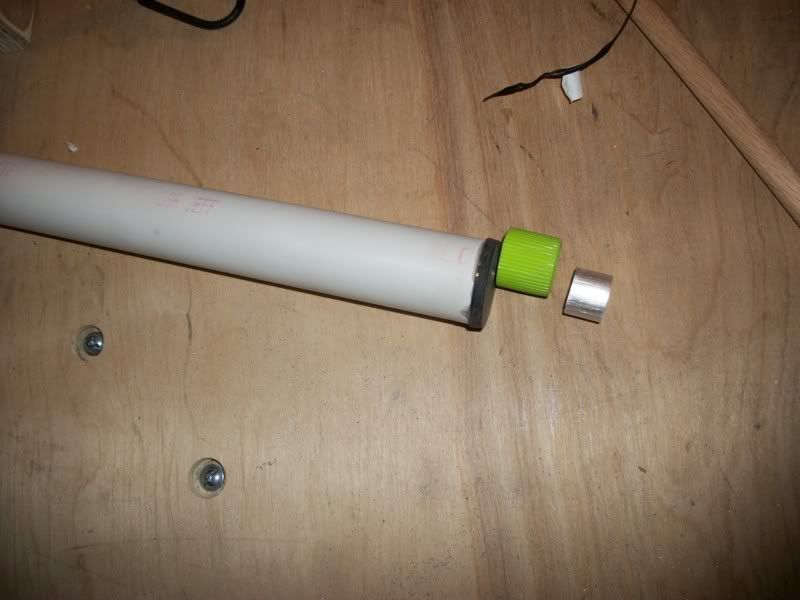
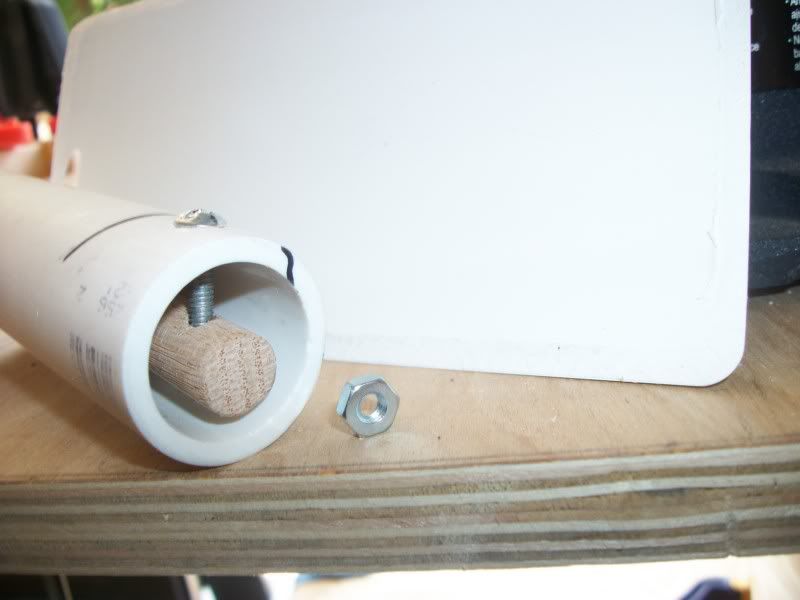
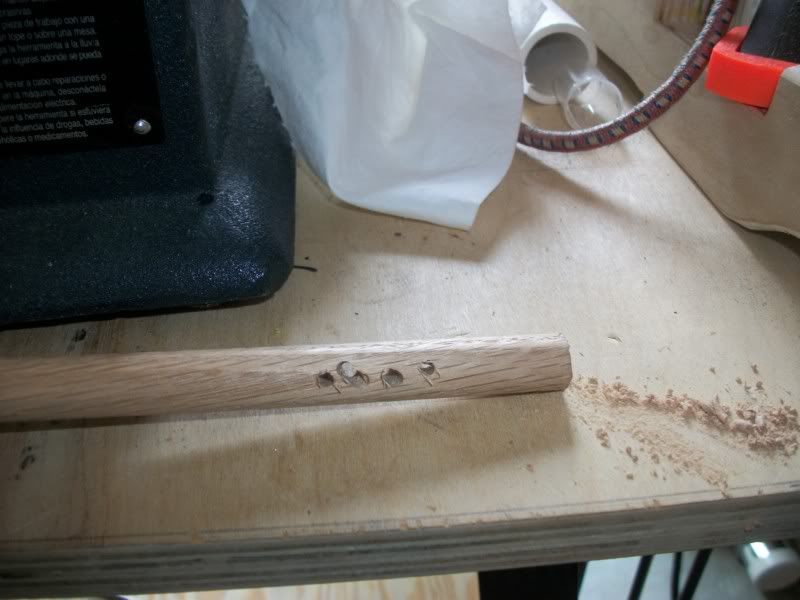
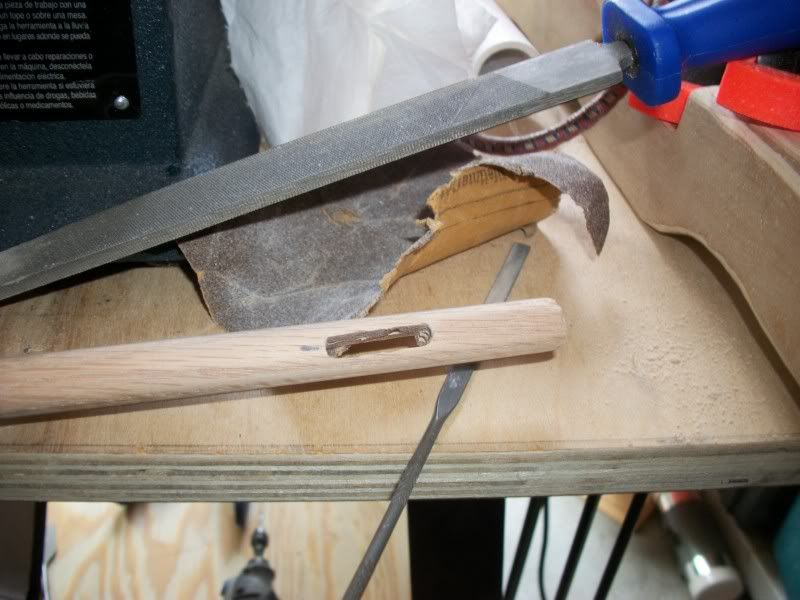
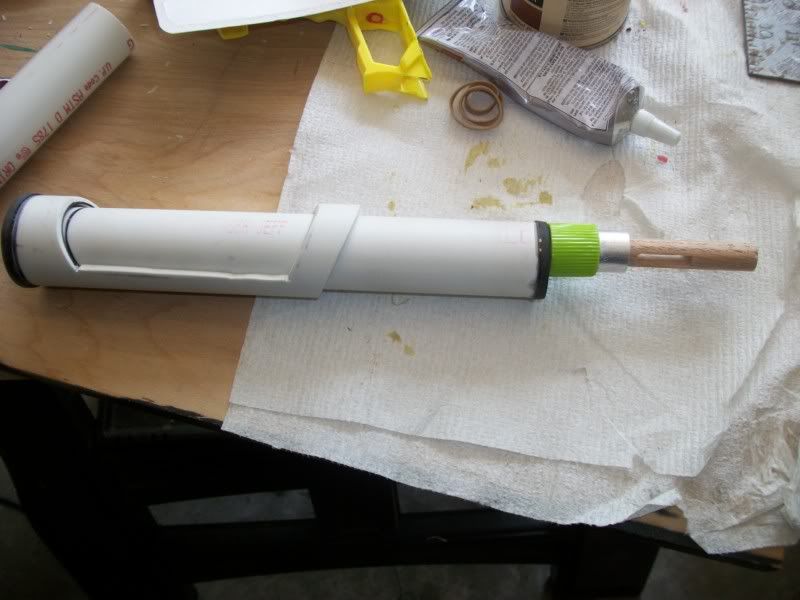
Hmmm, what did I have around that could make the smaller tip which comes out of the main barrel? Decided to nip a piece of an aluminum tube that was destined for a Tusken Rifle, along with a smaller dowel rod.
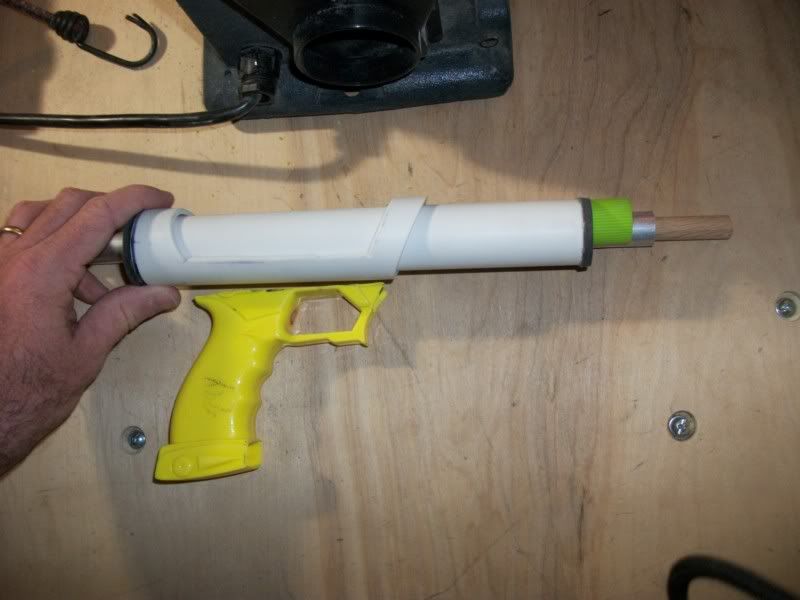
Here I'm just holding the pieces stacked on top of each other, to see what a profile view would look like. The little green piece is cut from the scope thingy that I cut off of the watergun. I got a big kick out of being able to use another piece of the 99-cent watergun in the build.
more to come, just breaking up the posts...
So earlier this summer, I had been geeking out pretty hard on Boba Fett's sidearm blaster, as barely seen in The Empire Strikes Back, as well as some sweet-looking fanmade replicas on TDH that are based on found items. I'd really like to buy either one of those, but neither version is currently in my budget.
One day, I was at a thrift store, and saw a watergun with handgrip kind of sort of somewhat similar to the one on the sidearm/found item. I got the wacky idea that it would be fun to try and build a budget homemade Boba Fett ESB sidearm from the watergun. So, I invested the 99 cents into the gun.
I cannot measure, draw, cut, sand, or paint in a straight line to save my life. But I try a lot. I absolutely know that if I touch a project, I am going to screw it up by over-doing one of the above actions, or something else. That's just how it goes. Despite knowing that each time, I begin each new project certain that it will be the first one that goes right, the gates of Heaven will open with trumpets blaring and The Knowledge of Building will be given to me with the touch of a heavenly finger on my forehead or something. It's crazy. ("Oh, I'll just bend this hard-to-find key component a little and it will fit perfectly..." *breaks* "Noooooo! Not again!!!")
So, with my new 99-cent Goodwill watergun, I decided to set the rules of a build challenge for myself. Basically: In addition to the watergun, to use only materials that I already had, don't buy anything else. I knew I had a fair amount of odds and ends from various other projects that could work for certain parts, and maybe I could learn/figure the rest out along the way? I printed a small couple of reference photos from TDH threads and reference library, eBay listings, and Google - all either real found items or fanmade replicas. I believe the fanmade ones were MojoFett and Spideyfett's (man, both of theirs were sweeeet!!).
Okay, let's get started. First step, cut the grip off of watergun. I also trimmed the base of the handgrip. Still not sure as I post this how I am going to finalize that part.
Next, cut a piece of PVC pipe for the back half
Then cut out the open area. I didn't know how to measure this, so I winged it and made the cuts on a bandsaw by eyeballing it. I think I nicked a corner, which was so disappointing, but will fit in with that Star Wars "used universe" beat-up weathering I love so much.
Here's the direction it's headed, slide a smaller piece of PVC pipe cut to guessed barrel length inside the larger-diameter cutout piece.
And placed inside to see how it will look. Because things that look like guns are cool. Fezzes are cool, too.
Thought the barrel was a little bit too long, so cut it down just a bit
Needed a thick round end cap for the butt end of the cut-out piece. Stood the PVC cut-out piece on a old thick plastic tray I'd bought at the thrift store a long time ago as a flat surface to make molds on or something. Traced a circle around the cut-out piece.
I cut out a piece much larger and rougher than what I traced around the PVC. I think it was almost square, actually. Then I just shaped it by holding it and running it over the belt sander until I got a circle shape along the traced marker line.
Repeated the process for the front end of the smaller PVC piece, which will make up the main barrel.
Glued them on with E6000. The dark dust is from sanding the cut piece from the tray down to a circle.
Another test fit just for fun
Hmmm, what did I have around that could make the smaller tip which comes out of the main barrel? Decided to nip a piece of an aluminum tube that was destined for a Tusken Rifle, along with a smaller dowel rod.
Here I'm just holding the pieces stacked on top of each other, to see what a profile view would look like. The little green piece is cut from the scope thingy that I cut off of the watergun. I got a big kick out of being able to use another piece of the 99-cent watergun in the build.
more to come, just breaking up the posts...
Last edited:


")