Bret Build: MaK 44 Type MK44 Ammoknights - Now With Rivets!

Boxcar Bret

Sr Member
RPF PREMIUM MEMBER
I'm new to the world of MaK and I'm totally fascinated with the armor/vehicles. As some of you know I've just recently gotten back into this obsession we call a hobby and I'm still honing my chops and my intention was to ease into by building something familiar. The plan was The Easy Eight Sherman from "Fury" since a lot of the painting and weathering techniques would crossover. I was also hoping to have purchased an airbrush by then. Well all that went out the window!

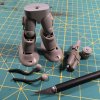
Happy Father's Day to me! After work today I went to the local independent hobby store that was having a 15% off sale. Much to my surprise they had a lone Hasegawa MaK MK44 Ammoknights Smarten Equipment Type kit.

I got home, opened the box, looked at the sprues, looked at the instructions and put the lid back on the box. I might have to stick the previous plan. Of course I could begin sub-assemblies, filling gaps. Regardless, I anticipate this being a slow build and any suggestions are welcome.

IMG_1643.jpg
 
Last edited:
Re: Bret Build: MaK 44 Type MK44 Ammoknights Smartgun Equipment Type

I think you've got the right idea. MaK kits and similar modern mecha kits can easily be built in subassemblies, puttied and even painted before final assembly thanks to the polycaps for the joints. That's the small, rubbery gray sprue, likely labeled PC. Most of them are press fit.

Yeah, they have a lot of parts, but so do a lot of Lego kits or model cars. You'll see the instructions treat it as a series of sub-assemblies, as well. That one appears to be larger than the usual suit kits, and it likely has more pieces, and a lot of non-obvious, lumpy armor parts, unlike recognizing the parts on a tank kit (barrel, road wheel, etc.) or the simpler parts of a MaK suit (foot, body half, hand).


-MJ
 
Re: Bret Build: MaK 44 Type MK44 Ammoknights Smartgun Equipment Type

I figured out why this kit seems so intimitating to me; I don't have any point of reference. All the kits I've built in the past have either been armor, aviation or based off a movie. There's no real world reference (pictures, articles, footage) to subconsciously draw from and put it in context.
In a lot of ways it can be daunting but in others its exciting and challenging. Today I started doing sub-assemblies (like you had mentioned) and finished the feet and part of the gun.

I was surprised by the visible mold seams and some wicked ejection pin marks. That took some work to remove but I've discovered about build now versus when I was a kid. I found myself cutting, filing, sanding, feeling and sanding some more on each part. It used to be a race to the finish. Now it's all about the journey.
 
Last edited by a moderator:
Re: Bret Build: MaK 44 Type MK44 Ammoknights Smartgun Equipment Type

A quick Google image search can show you some 'references,' though this particular model I'm not familiar with enough to say what's original, and what's a recent kit build-up.

https://www.google.com/search?q=rob...ved=0ahUKEwiHgvet5bXNAhWEKyYKHfLYCGsQ_AUIBygC

I think the older we get, the more we strive to make each model more skillfully than the one before. "Yeah, it looks OK, but the next one will be better." Whereas, when you're a kid, you wanna slap that thing together as fast as you can and then play with it :)
 
Re: Bret Build: MaK 44 Type MK44 Ammoknights Smartgun Equipment Type

I figured out why this kit seems so intimitating to me; I don't have any point of reference. All the kits I've built in the past have either been armor, aviation or based off a movie. There's no real world reference (pictures, articles, footage) to subconsciously draw from and put it in context.
In a lot of ways it can be daunting but in others its exciting and challenging. Today I started doing sub-assemblies (like you had mentioned) and finished the feet and part of the gun.

I was surprised by the visible mold seams and some wicked ejection pin marks. That took some work to remove but I've discovered about build now versus when I was a kid. I found myself cutting, filing, sanding, feeling and sanding some more on each part. It used to be a race to the finish. Now it's all about the journey.

Welcome Brother to the amazing world of SF3D/MaK 3000 !!! Here is a web site that can help with knowing what is and isn't 'right out of the box'. Enjoy.

http://www.q-net.net.au/~nipngnwm/index.html
 
Last edited by a moderator:
Re: Bret Build: MaK 44 Type MK44 Ammoknights Smartgun Equipment Type

I jumped in hip deep last night and continued with the sub-assemblies. I'm really losing myself building this kit. Last night I sat down but my entire iTunes library on shuffle and had about an hour and a half of Bret-time.

My gripe about mold marks was limited to the aforementioned parts and assembly was a dream. The idea of assembling as you go and then tearing it down for paint and reassembling is still a new concept to me for model until I realized it's what you do with custom motorcycles.

I discovered two powerful new tools. One is taking pictures to discover seams or other areas that aren't quite as nice as you think and need some more love.That said, I don't think I've given a project so much attention in the sanding department.

The other discovery I'll put in a separate post. Oh, and Tamiya Extra Thin Cement rocks. Cheers!

IMG_1658.jpg
 
Re: Bret Build: MaK 44 Type MK44 Ammoknights Smartgun Equipment Type

I jumped in hip deep last night and continued with the sub-assemblies. I'm really losing myself building this kit. Last night I sat down but my entire iTunes library on shuffle and had about an hour and a half of Bret-time.

My gripe about mold marks was limited to the aforementioned parts and assembly was a dream. The idea of assembling as you go and then tearing it down for paint and reassembling is still a new concept to me for model until I realized it's what you do with custom motorcycles.

Anyhoo, enjoy your build. This suit wasn't as pristine as the other suits with a 'raw' unfinshed surface to it

I discovered two powerful new tools. One is taking pictures to discover seams or other areas that aren't quite as nice as you think and need some more love.That said, I don't think I've given a project so much attention in the sanding department.

The other discovery I'll put in a separate post. Oh, and Tamiya Extra Thin Cement rocks. Cheers!

View attachment 637218

Trust me friend, I have a much older WAVE resin version called Belchmann which is virtually identical to your kit. Be happy you only have to deal with mold marks and seams.The pilot alone looks like his flight suit was made of Pug faces and the suit needed a ton of clean-up to get it looking proper. I have tried to redetail the weapon as well. I had thought of chucking the resin one once this kit became available but figured I'd invested this much time in it, it seems a shame to toss it.

Anyhoo, enjoy your build, looking forward to seeing what you are going to choose for the paint scheme.
 
Re: Bret Build: MaK 44 Type MK44 Ammoknights Smartgun Equipment Type

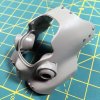
Glued those little rivets on tonight. You know what's fun? Trying to trim those little bastards without sending them flying into oblivion.

IMG_1665.jpg
 
Re: Bret Build: MaK 44 Type MK44 Ammoknights Smartgun Equipment Type

Glued those little rivets on tonight. You know what's fun? Trying to trim those little bastards without sending them flying into oblivion.

View attachment 637436

Been there, done that and have the rugburn to prove it. I keep a high intensity multi bulb LED light beside my hobby desk for just those little emergencies. I had started to draw up plans for a 'hobby bubble' based on those portable "clean rooms" you see on sci-fi shows. :D
 
Re: Bret Build: MaK 44 Type MK44 Ammoknights Smartgun Equipment Type

For something as small and unwieldy as that, you may want to substitute pins heads or stretched sprue.
 
Re: Bret Build: MaK 44 Type MK44 Ammoknights Smartgun Equipment Type

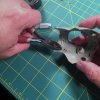
Taking a suggestion from Mike J. Rather than suffering from an emotional breakdown cutting, trimming, sanding and gluing the tiny rivets that came with the kit I opted to use pinheads. This idea was fairly simple and for having never done it before the process I came up with seemed pretty intuitive. Here's how I did it...

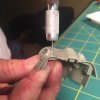
1. Using a pin vise I drilled a hole slightly smaller than the straight pin itself.

IMG_1676.jpg


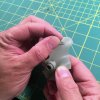
2. Carefully pushed the pin though the plastic.

IMG_1680.jpg


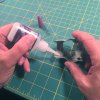
3. A drop of Insta-Cure+ CA and shot of kicker to glue it in place.

IMG_1683.jpg


4. Once the glue was set I snipped of the extra length of pin. BE CAREFUL with this step! The excess will fly off. Hindsight being 20/20 next time I do this I'll put a little blob of Blu-Tac on the end of the pin to prevent it from flying.

IMG_1686 12.35.03 PM.jpg

IMG_1688.jpg

It looks really cool and I think the varying shapes of the heads give it some visual interest and texture to the surface. I can't wait to see it primed. Thanks Mike J. for the suggestion!
 
Last edited:
I'm glad that worked well! They seem a little large to me, versus the scale, but what do I know?

There are also aftermarket rivets & hex bolts made in styrene, and subtler rub-down dry-transfer 'rivets' and welds designed for armor & aircraft.


-MJ
 
I'm glad that worked well! They seem a little large to me, versus the scale, but what do I know?

There are also aftermarket rivets & hex bolts made in styrene, and subtler rub-down dry-transfer 'rivets' and welds designed for armor & aircraft.


-MJ

Maybe. Let's just say the rivets were from from a cobbled repair job. What we do if we couldn't hide our crimes behind a good back story.
 
Back
Top