Black Widow - Age of Ultron

Belleb08

Active Member
I am working on my Age of Ultron Black Widow costume that fully lights up with light up batons too. I finally got most of the supplies needed so look for updates and progress pics very soon.

Below are all the images that I am using to help get the details for this progect since I will be wearing it for a con the Weekend of May 8th and need it done before the movie even comes out.

Hot Toys - Avengers - Age of Ultron - Black Widow Collectible Figure_PR1__scaled_600.jpg Hot-Toys-2015-Black-Widow-Age-of-Ultron-Sixth-Scale-Figure-e1426607630557-640x451.jpg MMS288-Hot-Toys-Black-Widow-Widows-Bite-Bracelets-with-Energy-Effects-Pieces-e1426607125512.jpg IMG_3781.JPG IMG_3775.JPG Black-Widow-Hot-Toys-Age-of-Ultron-Avengers-Figure-Back-e1419363621599-420x1024.jpg IMG_3805.JPG IMG_3774.JPG IMG_3776.JPG IMG_3778.PNG Black widow movie batons.png
 
Hi anyone that has checed this thread out and knows about smooth-on products I need some advice.. I am looking to use one of their liquid plastics for the widow bites, belt details and such and would like to see what advice you can give me on using this product and what works best.

Thanks
 
Okay got the pattern pretty much done. Had my mother draw it on me so the lines of the suit worked with my body type. Now onto finalizing the lines and cutting it out.

FullSizeRender.jpg FullSizeRender1.jpg FullSizeRender2.jpg
 
So I have been busy since I only have less then a week to get this done now. Have most of the items drawn out for building besides the boxes on the belt. I got half of the sculpts done and cast in silicone molds and the plastic poured,, I drafted the suit pattern and cut it all out. below are the progress pics. This weekend is going to be very busy building everything :)

Engineering sketches:
BWIP8.jpgBWIP10.jpgBWIP13.jpgBWIP14.jpg
 
The first set of sculpts using monster clay:
BWIP12.jpg

I sculpted on plexi glass and then built a plexi glass box for the molding phase. used tape to hold the sides together and then hot glue to seal the cracks

BWIP11.jpgBWIP9.jpg

Using OOMOO 30 from Smooth-On to cast the mold and let it cure for 6 hours

BWIP1.jpgBWPI3.jpg

Then I demolded to start the casting of the plastic
BWIP5.jpg

Then using smooth-cast 300 from Smooth-On I poured the liquid plastic into the mold and waited 15 mins till it cured
BWIP4.jpgBWIP6.jpg

Still have one more sculpt and mold to make and then will start casting those pieces using Shell-Shock by Smooth-On

- - - Updated - - -

Okay this is the drafted pattern and all the fabric is cut out so now to put it all back together and add the lights :)

BWIP7.jpg

- - - Updated - - -

This weekend I am making a vacuum form to cover the widow bites with transparent worbla tinted with car window tint and to form the knee and elbow pads. Also I will start work on building her batons. Wish me luck that nothing goes wrong
 
Thanks for the info. Some of the pieces I actually might recast out of pewter to make them metallic. The boxes I am looking at carving the details into craft foam and covering them in Worbla.
 
I love the pewter idea. Instead of carving the details into craft foam, I would actually just create the details by layering craft foam on top of the box (made of whatever). Worbla or even just black plastidip should give a nice surface finish.
 
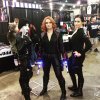
Okay so I have been crazy busy actually wearing this costume. I still have a few things to finish up before dragon con on it like the gloves, shoulder lights, knee and elbow pads. Also need to get better pictures of it all light up. But here are some of the progress pics and then pics from a photo shoot.

Molding the other parts of the widow bites:

bw06.jpgbw08.jpgbw010.jpg

Making the vacuum form:

I followed a youtube video on using scraps around the garage and it worked really well to form the knee and elbow pads. It really isn't that great for small items.

BW01.jpg bw03.jpg bw02.jpg
 

Attachments

  • bw05.jpg
    bw05.jpg
    1.4 MB · Views: 161
Then I made wooden forms of the elbow and knee pads to use with the vacuum form:

bw07.jpgbw09.jpg

Then it was time to use the vacuum form. will I tried using the car window tint on it but that did not go well at all you have to get all the water and bubbles out for it to work and this was not happening. So decided to go with the clear plastic and then paint it later on a transparent black or then try using the widow tint.

bw04.jpg bw011.jpg IMG_4292.JPG
 
Last edited:
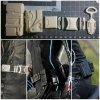
Attempted to make the battery packs on her belt but did not like how they came out so used the pouches on my tactical belt.

bw012.jpgbw013.jpgbw014.jpgbw015.jpg

A friend of mine had a 3D printer and made me a better dagger from a free file we found online:

IMG_4363.JPG
 
Here are photos of doing the electrical work for the batons. I used spray widow frost inside the tubes and used a mirror and worbla to cap off the top. I also used worbla to cover the tube with all the electronics and the details on it.

IMG_4287.JPGIMG_4289.JPGIMG_4290.JPG

here are images for the wiring of the EL wire in the main part of the widow bites. The other parts were wired with EL wire like my previous ones were : http://www.therpf.com/showthread.php?t=211147

IMG_4282.JPGIMG_4280.JPGIMG_4284.JPGIMG_4279.JPG

I will post more pics of the shoes and the full widow bites when I redo them; I found issues when wearing them.

- - - Updated - - -

here are some of the photos for this iteration of the costume. The final iteration will be at Dragon Con :)

IMG_4326.JPGIMG_4350.JPGIMG_4351.JPGIMG_4352.JPGIMG_4357.JPG
 
This thread is more than 8 years old.

Your message may be considered spam for the following reasons:

  1. This thread hasn't been active in some time. A new post in this thread might not contribute constructively to this discussion after so long.
If you wish to reply despite these issues, check the box below before replying.
Be aware that malicious compliance may result in more severe penalties.
Back
Top