Subject Delta- Bioshock 2

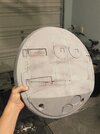
So, small update, details added like the vent piece and rope holders made by my friend CobbatronProps and then some real barnacles added:
But with this update comes some sad news too.... I don’t think there is any way I can get this dude done the way I want in time for dragoncon.
REMOVED BY AUTHOR, PROJECT HAS GONE IN DIFFERENT DIRECTION, SEE PAGE 2
I have so much planned that if I try to rush it, it’s going to look not so hot. So for now, I’m not gonna put a timeline on this guy, and I’ll enjoy being Mando, Kylo, and Batman at the con.
 
Last edited:
Apologies for my terrible photo skills and my terrible quality camera... however, here's the camera all finished up. Yes, I realize that this may in fact be the slowest moving project in the world LOL.
REMOVED BY AUTHOR, PROJECT HAS GONE IN DIFFERENT DIRECTION, SEE PAGE 2
 
Last edited:
I'm not even a fan of the game, and generally I pass by threads that model such subjects, but I really like the job you did on texturing and weathering. It definitely looks like a big heavy piece of bronze.

TazMan2000
 
Good morning everyone (or evening, depending on where you are I suppose!)

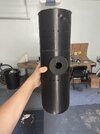
So this project has kinda gone in a different direction. I wasn't happy with the accuracy of my last helmet, so I decided to contact my modeler who was able to go ahead and pop out probably one of the (if not THE) coolest projects I've ever worked on. I'm currently printing the small resin pieces on my Saturn, and about to start printing the tanks on my Chiron. The "main" portions of the helmet are being printed by my friend Maxi and my modeler who are both helping me to try to accomplish this thing before this years Dragoncon.

The plan is to print it, finish it, mold it, and cast it in lightweight fiberglass to conserve on weight. I might have some pieces printed and ready for molding later tonight, so the quicker that's completed, the better.

Here's a sneak peek!

deltasmall.png

deltatanks.png

deltahand.png


The plan is to get this guy completed before this years con... however, with how long I take on things, at this point, who knows. What I do know is that I'm much happier in the direction it is currently heading than I was.
 
3C186592-45DF-44F7-965A-CE35FE498301.jpeg

300A1AE3-F641-4BFC-B84C-149567E145D8.jpeg


Just finished resin printing the small portholes and they fit my acrylic pieces perfectly. Going to continue to let them cure a bit and then start working on getting them textured.
 
706D2376-F685-4032-9BA7-9C6F03A4525C.jpeg


So I’ve commissioned some friends to help me print this guy while I’m printing pieces as well (it’s just huge so there’s no way to do it all by myself in a timely manner). My friend sent me this today, so we’re officially getting somewhere.
 
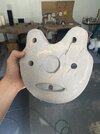
Couple of the smaller pieces printed while I'm waiting for the larger pieces to arrive from my friends, and waiting to fix my Anycubic Chiron since it's been broken now for a couple weeks (bed should be here this week though). Got the inner part of the visor printed, the tube holders, the hand plate, and one of the finger tips. I have some other pieces printing as well, so should be nice once they're all done.

The visor needs some working, as it was printed in a weird way with really heavy supports. Just some sanding and filling and it should be good to go. I'll need to drill out the holes where the rivets will attach as well.

visor.jpg

tubeholder.jpg

fingertip.jpg

handplate.jpg


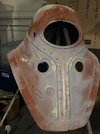
Also got another picture from my friend who is printing the front of the helmet for me... looking really crisp. Will have to glue it all together, fill the seams, smooth everything out, sharpen some details where the helmet is supposed to "separate" with a file, and then create the biggest mold I've ever created LOL.
bottom part of helmet front.jpg
 
Very cool project, I love it. If you accidentally make an extra cast from your helmet mold let me know haha.
 
Very cool project, I love it. If you accidentally make an extra cast from your helmet mold let me know haha.
I have plans, no accidents here, but a couple of them might slip out for sure ;) however, admittedly, I’m still debating what pieces exactly I’m going to mold. Some of them make more sense to just keep as resin prints. The helmet, since it has to be sliced up, will probably be the only piece molded, whereas the tanks, lights, tube holders, etc. I might keep as prints. But, we’ll see, who knows. Once I get it all sanded down I might change my mind and want a mold of everything haha.
 
Last edited:
Nothing too crazy yet, but I went ahead and did a quick brass test to see if I could pull off a really authentic looking aged brass.

I was semi-happy with my paint on my previous helmet, however I’ve improved a lot since then. Next I’ll be testing the copper.
35B117F7-F6A5-4043-B85F-FC510ADACB92.jpeg
009F69EC-25AD-4163-B181-D8000695826E.jpeg
 
735E633A-C27B-4857-9B69-E8702E1F7555.jpeg
EC42CB7F-F3A1-40CF-AE13-79D8572C6A4C.jpeg
0D71C6BF-F266-480C-A895-C18622BC7E26.jpeg
7612FB1E-C764-46DB-A8CC-627A3DCB808B.jpeg
Another dragoncon about to go by without this guy, but I’d much rather keep spending the time perfecting him, yaknow? Either way, a little more progress. As you can see, I’m using a dremel and some apoxy sculpt to widen the “indention” lines that go all the way from the front to the back of the helmet. Once I’m happy with those, all of it will be smoothed so you can’t see any seams or print lines, then the texturing and pitting will begin on the copper.

Faceplate and greeblies fit like a glove but will be painted seperate before being attached. I know I had mentioned getting this guy molded, but I’m still contemplating rather that’s a good idea or not. I dont think anyone knows how actually massive this thing is, so what I MIGHT do is start an interest thread as I’m getting closer, and if there’s interest I’ll mold everything. It would be an insane mold, close to 3 feet high and no telling what it would weigh. Plus with all the accessories it would get expensive quick. Calculations would have it somewhere pretty pricy, maybe more than most would be willing to pay.

Anywho, diving weight is also printed and ready for smoothing. Camera is being printed on my Saturn currently and then once it’s done I’ll get it attached as well.
 
Bioshockdelta1.jpg


15 years today since the first game came out...

Used some double sided tape just to temporarily attach the lights on the front, tube holders, etc just to get a general idea (other than the wingnuts, rivets, and rope holders). Still so much to do, but I did more sanding today after this picture, and not I've touched up a couple more areas with the epoxy clay and just waiting for it to dry before working more on it tomorrow.
 
Been a long time since I updated. Still working off and on and this guy, just when I'm not working. Getting closer every day. Really trying to get those hand sculpted lines/valleys carved in appropriately and looking correct. Also noticed that the character model in-game had a visor that had "cylinder" style bars instead of the flat rectangles that matched more of the Blur model used in the cinematic trailer. I had my buddy Cobbatron model up a second visor so I can mold both, since the plan is to mold the helmet as of now.

Character model by Johnny Xiao:
johnny-xiao-player.jpg


Visor comparison (just pulled off the printer so it still needs to be cleaned):
Comparison.jpg

New Visor:
New visor.jpg

Helmet with visor temporarily attached:
Newvisor on model.jpg
 
Last edited:
C0EE1DE1-0116-4440-8B8B-8D6A3FC338FA.jpeg
C30E326D-0839-4005-90E4-67FC6D39B6B0.jpeg


Going to be redoing my wingnut mold soon. Picked up the proper wingnut that was meant to be used with this helmet, so will cast it with a bolt attached.
 
3C8725D4-AFEB-46EA-9554-61E70277F14D.jpeg

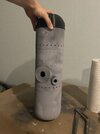
Small tank body is printed but cap still needs to be printed off, along with the gears and such.
D1F9DC18-6F29-414E-AC2B-C1A3FC139664.jpeg
Diving weight has begun being textured, but still needs a bit more work before it’s molded.
 
F6216248-8EAF-484A-BC27-F21F6DAC55CA.jpeg
Chest lines getting a bit more streamlined and the correct size
AADE6BAC-0309-480A-8D05-A734649C8272.jpeg
Full small tank printed and cleanup has begun
5F8D4918-69A5-4729-9710-7895FEB1A690.jpeg
REALLY early stages of the back plate that attaches all the tanks and such. As you can see, lots of cleanup needed there.


But we’re moving forward slowly but surely. Large tank is printing now.
 

Your message may be considered spam for the following reasons:

If you wish to reply despite these issues, check the box below before replying.
Be aware that malicious compliance may result in more severe penalties.
Back
Top