Bib Fortuna blaster

superjedi

Sr Member
Hmmm. . . seem to be having some board issues. Well, 3rd time's the charm, right? :)
OK, lemme try a link instead of posting individual pics.

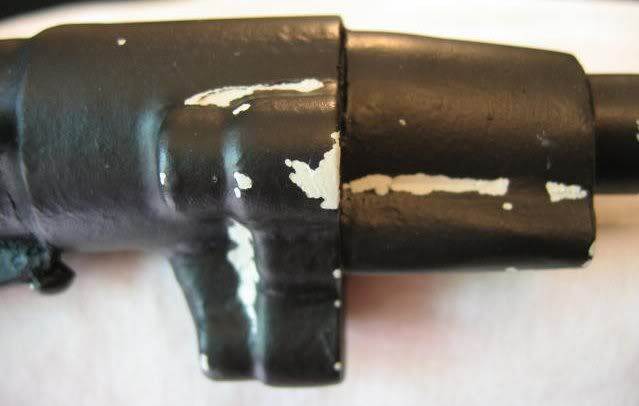
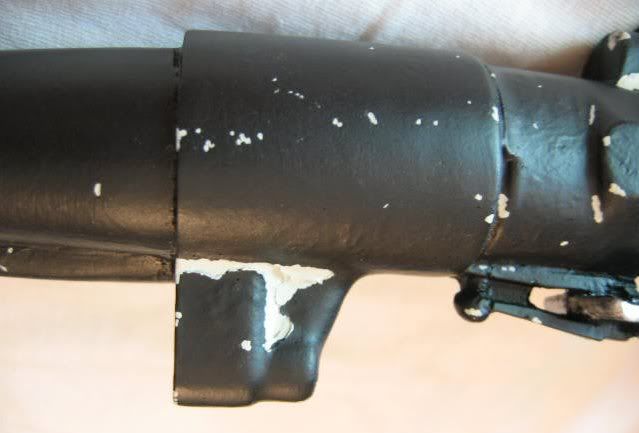
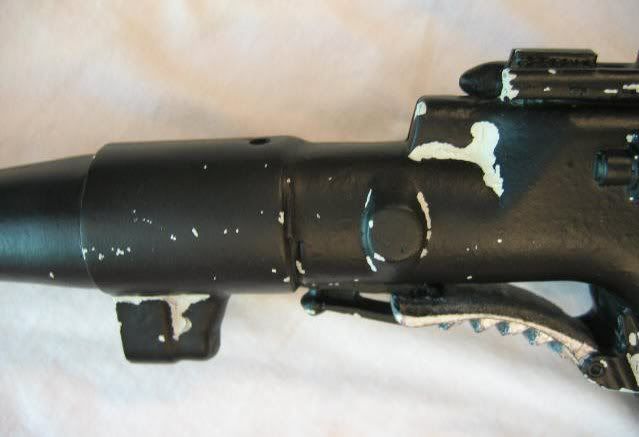
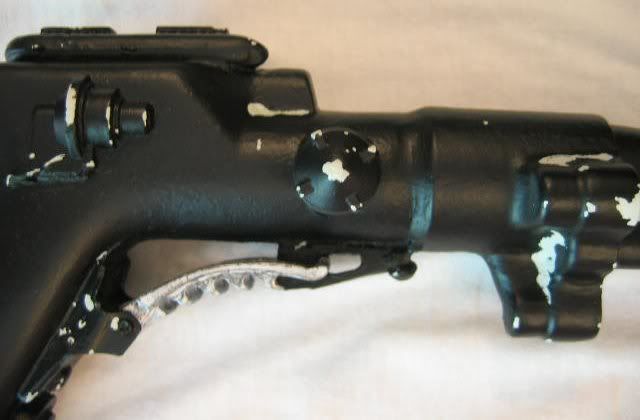
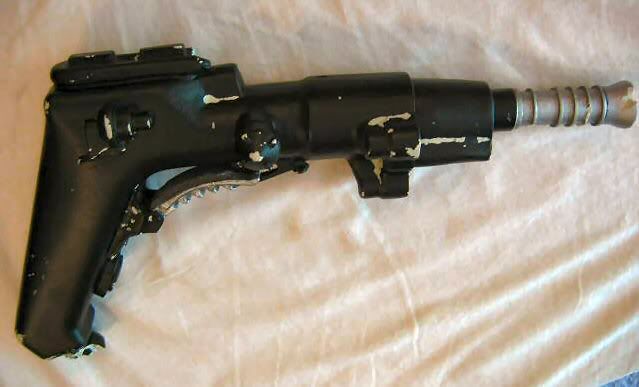
This was a cast I got from Coinprop of the Bib Fortuna blaster. I painted it up to look like the filming prop, with all of its missing chunks, dings, and scratches. I have some pics up on my photobucket site.

Enjoy (I hope).
Eric

http://s16.photobucket.com/albums/b20/supe.../Bib%20blaster/
 
Hmmm... an odd looking contraption. Very interesting. I don't think I've ever seen a reproduction of it before. Congratulations on an unusual addition to your collection. :thumbsup Very nice.

I wonder what the base components of the original prop were?
 
bib20.jpg

bib13.jpg

bib10.jpg

bib7.jpg

bib1.jpg


Here you go Eric.

I took the liberty of posting them for you.

You have a PM.

-Paul.
 
Yay.. Someone got to see the pics. I dunno what was up with the board last nite. . . :unsure

Thanks guys. This is a pretty unusual looking piece. I wanted to get one for the rarity factor as much as anything else.

Markus,
No masking done on this one. :) All the chips were done freehand with Testors Acryl Camo. Gray. I felt that against the pure black base coat it gave that nice "off white" color I was looking for.
I used the reference pics that were provided to get the location of all the chips (I think), and the mold was actually good enough to see the actual depressions in the surface of the blaster. All I had to do was look at the pic, and then find the mark on the blaster. I used a very fine detail brush for the smaller chips. It took a while, but it was fun to do.

Eric
 
WOW Eric...

At first I thought You posted pictures of my original blaster.. B)
Really man.... fantastic work.

I'm really looking forward seing all the others....You work fast Eric.

Tobe
 
Tobe,
Actually it IS your original prop. You must have sent it to me by mistake. :D

It was fun to work on. . . I didn't have to spend a lot of time on clean up since it was supposed to look the way it did. :thumbsup
 
I didn't want my beat up blaster getting all dirty (can't have that now) so I built a custom case for it. Actually, casesforcollectibles.com built the case. I just added the clear acrylic supports inside. :)
I cut them to fit, and used some tiny little finishing screws to secure them through the base.
How's it look?
Eric

IMG_0002.JPG


P.S. Thanks Wackychimp.

P.P.S. Tobe. . . a plaque would sure look nice in there. Any updates from your new supplier?
 
UPDATE: June 8th.
Well, I finally received the 'limited editon' plaque to go along with the Henchman blaster (as I guess it's called). Really nice quality. It has a brushed aluminum look, with fine laser engraved lettering. As you can see, mine is #4 of 10.
So now my display of this rare and unusual piece is complete. :)
Thanks, Tobias.

IMG_0037.JPG


IMG_0038.JPG
 
WOW :eek
I love it, how did You do those acrylic rods, how are they secured to the blaster? It looks like it's floating. :)
And I'm SO happy that You are happy...so thank You Eric. And thanks for sharing Youre work.
 
<div class='quotetop'>(Coinprop @ Jun 8 2006, 10:26 PM) [snapback]1258852[/snapback]</div>
WOW :eek
I love it, how did You do those acrylic rods, how are they secured to the blaster? It looks like it's floating. :)
And I'm SO happy that You are happy...so thank You Eric. And thanks for sharing Youre work.
[/b]

For the supports, I bought a long piece of 3/8" acrylic rod, and cut each piece individually so they would keep the blaster level. Then I got some "stick-on" round vinyl bumper pads, which happen to be 3/8" in diameter and stuck one on the end of each rod. This gives it a 'domed' appearance, and also gives it a little bit of grip, so the blaster doesn't slide around on the cut end of the acrylic rod.
I drilled some tiny holes in the other end of each rod to fit small machine screws, and then drilled holes thru the black acrylic base. Screw the rods in thru the bottom of the base, and that's it. :thumbsup
So basically, the blaster is just sitting there, supported at 3 points.
I did pretty much the exact same thing for my resin E-11 blaster when I built a display case for it a year or so ago.
 
This thread is more than 17 years old.

Your message may be considered spam for the following reasons:

  1. This thread hasn't been active in some time. A new post in this thread might not contribute constructively to this discussion after so long.
If you wish to reply despite these issues, check the box below before replying.
Be aware that malicious compliance may result in more severe penalties.
Back
Top