BD-1 from Jedi: Fallen Order build

TheForgeProps

New Member
Hi everybody,

First time posting here, throwing myself into a pretty ambitious build so thought I'd document my journey!

I'm making a full scale BD-1 from Jedi: Fallen Order, hopefully with working lit back panel and articulated joints.

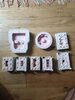
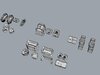
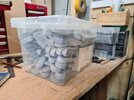
I'll start by posting up my 3d model - this has been drawn mostly from in game references, taken while I was playing. I've started printing and cleaning the pieces up, and testing the joints!
Forge_BD-1_SCREENSHOT.jpg
 
This is about 70% of the pieces done so far- I've started testing joints and how pieces fit together, and its mostly looking nice! I've had to redraw a couple of the joins, and I'm trying to work out a hidden fixing system for the neck to telescope, but not had any luck so far (so may end up just making it a subtle screw on the back of the neck).
20200520_123136.jpg
 
Not much to see with the actual droid- I have 90% of the parts now, and I'm working through cleaning it all up (but nobody wants to see 50 hours of me filling and sanding... right?)

So, here is a video of the electronics. I'm using arduino digital leds, wired with a powerboost and a trinket for the coding, and I've also attached a switch. I'm hoping to conceal the push switch for the lights in his right eye, and a little usb slot somewhere in his head to recharge the lithium ion battery. Watch the video to around 35 seconds to see the lights transition from green to blue!

EDIT: Sorry about the crappy video - for some reason it doesn't recognise me uploading video straight from my phone, and when I upload from my computer it automatically crops it. No idea how to fix it :/
 
Last edited:
Where you at now? we need more!!

I know, I'm sorry - there hasn't been much to report for a while! The pieces are (mostly) ready for moulding/casting, and I don't want to start putting him together until I have done that step. There are a lot of pieces that will have threaded rod/push pins inserted in once it is cast, and if I put them in now, I can't get them back out again! But I have been on hiatus for 6 months with no income now, so I can't afford the silicone to actually mould him. Hopefully funds will come back in soon so I can get the ball rolling!

One part I have been struggling a lot with is his neck, where it joins the body. I really want it to be poseable in at least a few positions, but getting a fitting that holds the weight of the head in place has been very tricky, short of putting a bolt through the whole body and making a massive hole in him that I need to fill and clean up, but I'm trying to cut down post-moulding work as much as possible. I've worked through a few prototypes though, and may have finally found a solution - I'll post up a few pictures of the joint once I have it all fleshed out a bit more.
 
Finally, something of an update- the moulding process has begun! I've been trying to keep pieces a bit seperate for ease of painting, and of course some parts have to be seperate for articulation, so there are going to be *at least* 40 parts to mould and cast!

I'm using my 3d model to design and print the mould jackets, which should help keep the costs down, both with the jacket materials and the silicone. It's my first major project doing this, so hopefully they all go smoothly - I'm looking forward to seeing how the body mould turns out, because it's a 5 part matrix mould! If it works well it will definitely help me with moulding smaller, more complicated parts in the future - I hate messing with fibreglass.

Anyway, here's a couple of pictures- some of the moulds in their printed jackets (the 2 part moulds are the feet components), and a screenshot of most of the moulds in Rhino- you can see the bigger body matrix mould in it.

Anyway, fingers crossed it all goes smoothly - I probably won't have any huge updates for a month or two while I don't have funds for more silicone, but might post up some feet casts, and once work starts back up in a couple of weeks the ball should get rolling again!
 

Attachments

  • 117383287_653569395367221_780468141706382818_n.jpg
    117383287_653569395367221_780468141706382818_n.jpg
    281.4 KB · Views: 210
  • Moulds.jpg
    Moulds.jpg
    673.1 KB · Views: 247
Again, not a huge update, but have some cute little droid feet as something to see!

I'm starting work again on Monday, so once the pay starts coming in in two weeks I'm going to do a big silicone order and hopefully finish finish moulding him!

IMG_20200818_102225_560.jpg
 
It has been a long time since posting, so just putting up an update to assure people the project hasn't fizzled out! Big thanks to a work mate, who has remotivated me and helped me out with moulding/casting, its started rolling again! I'd say about 4/5ths of the small parts have been moulded, and then I just need to do his head and body.

Have some pictures of moulds/casts-

20201128_093724.jpg
20201128_093730.jpg
 
I just completed this game and BD-1 is probably my favorite droid right now! I'm so excited to see this project completed! I found a really nice-looking BD-1 on Thingiverse which I downloaded, and am going to print so I can cast a lightweight resin version (I want to motorize the whole thing and mount him to a jacket so I can wear him at cons). Your project is really inspiring me in that direction! :D
 
I just completed this game and BD-1 is probably my favorite droid right now! I'm so excited to see this project completed! I found a really nice-looking BD-1 on Thingiverse which I downloaded, and am going to print so I can cast a lightweight resin version (I want to motorize the whole thing and mount him to a jacket so I can wear him at cons). Your project is really inspiring me in that direction! :D
Nice! Yeah he's a very cool droid, definitely up there with R2 for my favourite! I would say that 3d printing will probably be more lightweight than casting it in resin - my 3d printed master was way lighter than the resin is turning out.
 
Finally moulding up the head piece - 2nd time attempting it, hopefully it works this time because failing chews up a big amount of silicone/funds! The first time around, I tried to use a core inside the head silicone, which I think made it too rigid to be removed. This time around I've changed where the split line will be, and removed any plug, so fingers crossed its successful! I'm also moulding up the eye pieces - I should have a few eyes out sometime in the next few weeks to showcase.
20210119_152004.jpg
 
Good luck! BD-1's a great droid, and your work so far looks really good. I'm afraid I won't be able to offer any molding and casting advice, but I'm interested to see your progress.
 
Just finished the game, so I'll be watching this thread.
Thanks- it's a good time to start watching, because it should hopefully start to take shape soon!


Good luck! BD-1's a great droid, and your work so far looks really good. I'm afraid I won't be able to offer any molding and casting advice, but I'm interested to see your progress.
No worries- I have a few friends who are expert mouldmakers, it's just not my cup of tea! But the good news is, the head mould was successful, so it's mostly just the body and a few other pieces left to do.
 
I decided to add a scomp drive to BD-1 - I missed the details on this side of his head when I initially modelled him, so figured I'd add it all while I was here! I'll have to rout the hole out of the casts, which will unfortunately be a bit messy and a fair bit of work, but on the plus side I have a nice place to conceal the charging port for the LEDs in his head, so nothing has to be removable. When the head mould eventually burns out, I'll be able to remould it with the hole cut out.​

SCOMP DRIVE.png
 
I've also hopefully worked out how to make it so the neck can be positioned upright, at 45, or resting on the body as well! This was pretty important for me to have working in the BD-1s, but making this sort of join replicatable through moulding proved fairly difficult. It had to be able to lock in place with a chunk of weight resting on it from the head, but also be able to pivot. I've gone through several ideas for this - pins with rubber gaskets for tension, 'click lock' mechanisms which allowed the neck to be moved, but nothing really gave me confidence of being strong enough, and lasting over time.

The newest iteration consists of pins pushed directly into the body by an internal spring in the neck, which is then concealed inside a locking pin, which has another spring to pop it back into the lock when at the right angles. The locking pin has a rod in the back of the neck to unlock the mechanism.

It's a bit hard to explain, but here's a screenshot to give an idea -


NECK SPRINGS.png
 
Another small post to say this project hasn't died! I'm working my way through sanding 5 lots of parts, which has been pretty arduous- I've been doing it before work/at lunch, so it's been fairly slow going. But I've got most of it done now - just a few more heads/bodies to cast out, and a few more small pieces to mould and cast, and I'll be ready to start the priming stage!
 

Attachments

  • 210750387_534412831072900_1144907319196552367_n.jpg
    210750387_534412831072900_1144907319196552367_n.jpg
    154.5 KB · Views: 153

Your message may be considered spam for the following reasons:

If you wish to reply despite these issues, check the box below before replying.
Be aware that malicious compliance may result in more severe penalties.
Back
Top