Bandai release schedule

Got any tips on how to DIY or purchase a PG lighting system ?

Etchings I guess from the usual sources. But they can be expensive.

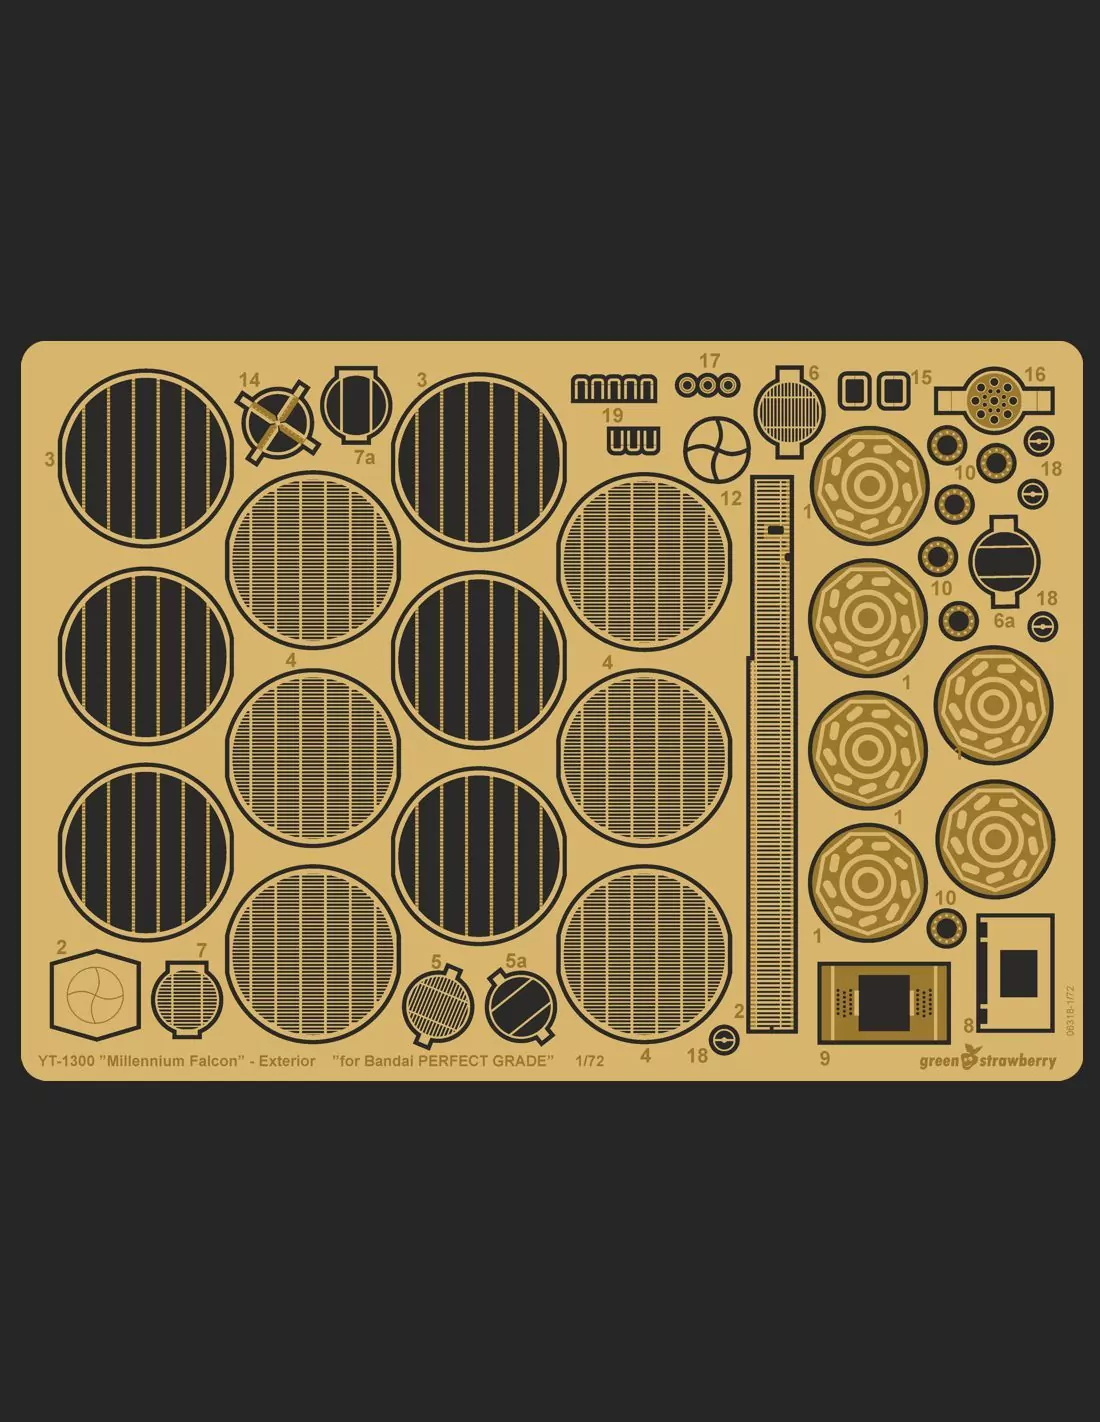
The photo-etch part for the cockpit tube is not that great compared to the actual plastic part. The vents on the other hand do look good with photo etch or even some 3d printed parts so you can see the interior. Paragraphix or GreenStrawberry have sets and I have seen several Shapeways upgrades for the vents as well.

For the lighting system, I do not think the PG on is worth the cost if you buy it separate on the after market. It is nothing more than 6 cool white and 6 warm white 3MM LEDs. There are no effects on them

The absolute easiest solution for someone that requires no soldering or electronics knowledge would be to get pre-wired LEDs
As I mentioned a while ago, I got a bunch here
Get 6 cool white and 6 Warm White 3MM and a 9-volt battery connector (or buy their regulated adapater). Twist all the reds ends together and connect to the red wire from the battery and do the same with all the black wires


if you want to get fancy, you can look at some of the pre-wired flicker effect LEDs.


If you want even cheaper, you can just buy some bulk LEDs and use this calculator to figure out


So in the case of duplicating Bandai's kit, you would get 3mm LEDs. The cool white and warm white typically tend to be around 3 volt 20mA
Again, this is nothing fancy, no effects other than on or off just like Bandai's kit

You could run them off of 2 AA batteries in a battery holder (since each is 1.5 volts each, it would 3 volts to light the LEDs).

Setting up 12 of those LEDs you will need also need 12 1 ohm 1/4 watt resistors wired to each LED

Wiring.PNG


Or if you want to go all out and start adding blinking effects, flickering etc.. and do not want to use pre-wired LEDs than you will have to look into Ardunio or RaspberryPi etc...
 
Thanks so much for the reply, it sounds like the differences between the 1/144 are pretty minimal, apart from the dish. I thought maybe they might have made more modelling changes between versions but I guess not. Much as I love the original trilogy I'm in full on sequel mode at the moment so might go with the TLJ version (that reveal of it on Crait with the shadow flying over the ground :love:)

I'd still go with the Rise of Skywalker Edition of the Falcon, since it includes both, the round and square radar dish. So you have freedom of choice.
 
Analyzer, it's been a while since I've looked. People are actually doing ESB swap-outs for the PG? Before I start a fresh round, do you have any recommendations and what all they include?

I'm still looking for the best PE parts for the rear deck vents and the cockpit corridor Koolshade -- that get the louvered effect of the original parts, rather than flat cutouts. While I can, I'd rather not have to manually do all that precision bending.

Also, are there any aftermarket sources for decals, so I'm not stuck with the standard edition's stickers?

I am not sure where to get aftermarket decals for it

I think korben44 might have scanned and printed them out. You could try contacting him

He also was converting the 3 gear into the 5 gear version

gt350pony66 also converted it into an ESB 5 gear version as well

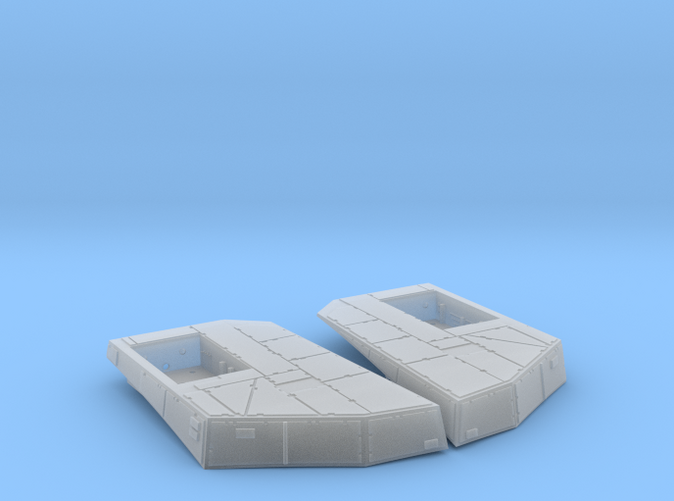
Age of Plastic (nkg ) made some parts like the mainitnenance pits for the ESB version

the 2 additional landing gear boxes are from 308bits
 
Analyzer, it's been a while since I've looked. People are actually doing ESB swap-outs for the PG? Before I start a fresh round, do you have any recommendations and what all they include?

I'm still looking for the best PE parts for the rear deck vents and the cockpit corridor Koolshade -- that get the louvered effect of the original parts, rather than flat cutouts. While I can, I'd rather not have to manually do all that precision bending.

Also, are there any aftermarket sources for decals, so I'm not stuck with the standard edition's stickers?

as for the photo-etch, I think GreenStrawberry's was the one that possibly had multiple layers to help simulate the depth instead of being flat
 
The photo-etch part for the cockpit tube is not that great compared to the actual plastic part. The vents on the other hand do look good with photo etch or even some 3d printed parts so you can see the interior. Paragraphix or GreenStrawberry have sets and I have seen several Shapeways upgrades for the vents as well.

For the lighting system, I do not think the PG on is worth the cost if you buy it separate on the after market. It is nothing more than 6 cool white and 6 warm white 3MM LEDs. There are no effects on them

The absolute easiest solution for someone that requires no soldering or electronics knowledge would be to get pre-wired LEDs
As I mentioned a while ago, I got a bunch here
Get 6 cool white and 6 Warm White 3MM and a 9-volt battery connector (or buy their regulated adapater). Twist all the reds ends together and connect to the red wire from the battery and do the same with all the black wires


if you want to get fancy, you can look at some of the pre-wired flicker effect LEDs.


If you want even cheaper, you can just buy some bulk LEDs and use this calculator to figure out


So in the case of duplicating Bandai's kit, you would get 3mm LEDs. The cool white and warm white typically tend to be around 3 volt 20mA
Again, this is nothing fancy, no effects other than on or off just like Bandai's kit

You could run them off of 2 AA batteries in a battery holder (since each is 1.5 volts each, it would 3 volts to light the LEDs).

Setting up 12 of those LEDs you will need also need 12 1 ohm 1/4 watt resistors wired to each LED

View attachment 1273010

Or if you want to go all out and start adding blinking effects, flickering etc.. and do not want to use pre-wired LEDs than you will have to look into Ardunio or RaspberryPi etc...

Thanks man. I've had a bit of experience with leds so I should be able to make sense of this.
 
just my 2 cents on the subject...I used none of the lighting stuff from the kit except the light diffusing parts for the engines. I made all my own because the kit lighting is grossly insufficient. I think I put around 50 LED's in mine... I went nuts with it:lol:
 
Thx for the tips. I've found some diffused white pre-wired leds on Ebay, which might help to reduce that "twinkle" effect of the windows.
If you don't mind my saying, I used to go the pre-wired route on everything and it sucked. the wires are usually too big to put where you want and you're limited on sizes and variety. I just bucked up and acquired soldering skills and decided on running all my builds on 9V. So I bought bags of 50 or 100 of whatever LED's and then like 1000 of the proper resistors. I got enough stuff to last a long, LONG time and for cheap. I use the 28w size red and black wire on 50 ft rolls. It took a little work to get the hang of it but now my lighting capabilities are boundless...I'm diggin' it.
 
I also did my own lighting. The bandai light kit for the engines is just too weak. I used pre-wired 5mm LEDs, however, since there was plenty of room and wanted to save myself some work. On my current E-refit project, I'm using a mix of pre-wired, SMTs, and strip lighting. I'm no genius at lighting, but as long as the power going into the lighting units is 9v, everything works.
IMG_1769.jpg
 
just my 2 cents on the subject...I used none of the lighting stuff from the kit except the light diffusing parts for the engines. I made all my own because the kit lighting is grossly insufficient. I think I put around 50 LED's in mine... I went nuts with it:lol:

I was mostly demonstrating how easy and cheap it is to get the exact same thing that Bandai offers. 6 cool whites for the engine and 1 warm white for the cockpit back wall. 2 warm white for the gun wells and 3 warm white for the landing gear wells

You are totally correct though, the Bandai kit is definitely underwhelming and does benefit from more LEDs for the engine glow at the very least.

Personally, I am doubling the amount Bandai uses (12 cool whites instead of only 6).

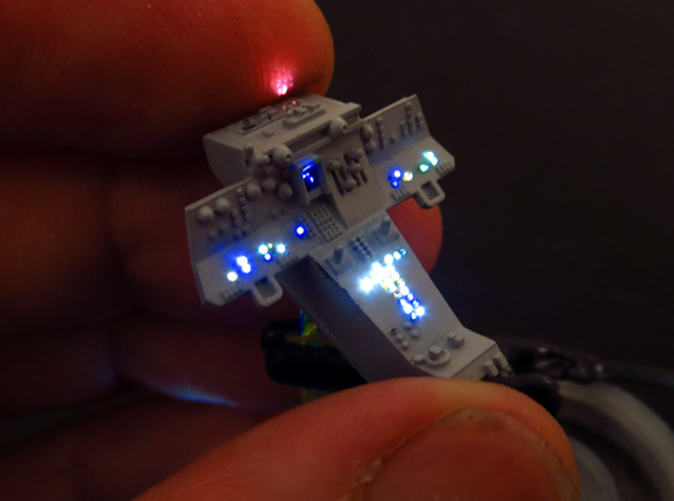
Then you also have the red landing lights, and spot lighting all over the bottom and headlights that Bandai did not even consider and you also have the instrument panel lighting you can do with fiber optics

And as you mentioned, you will have a lot more possibilities for even cheaper if you do your own vs the pre-wired route.

Although for those tiny micro and pico smds I always go the pre-wired route. Those are way to tiny for me to solder
 
I had planned on adding to the light kit, but in the end my lack of knowledge led me to start fresh with a clean slate and build my own. I used two led strips for the engine light. I used dimmers, switches and an ac adaptor from Amazon.

30167088-DB3D-4EF7-A0A5-BC188FF67E33.jpegFB788A73-97D2-4E07-9231-D67583ECA11B.jpeg1BA5E257-B6BF-42B2-96FA-63E121889020.jpeg
 
I was mostly demonstrating how easy and cheap it is to get the exact same thing that Bandai offers. 6 cool whites for the engine and 1 warm white for the cockpit back wall. 2 warm white for the gun wells and 3 warm white for the landing gear wells

You are totally correct though, the Bandai kit is definitely underwhelming and does benefit from more LEDs for the engine glow at the very least.

Personally, I am doubling the amount Bandai uses (12 cool whites instead of only 6).

Then you also have the red landing lights, and spot lighting all over the bottom and headlights that Bandai did not even consider and you also have the instrument panel lighting you can do with fiber optics

And as you mentioned, you will have a lot more possibilities for even cheaper if you do your own vs the pre-wired route.

Although for those tiny micro and pico smds I always go the pre-wired route. Those are way to tiny for me to solder
Oh I agree about the nano and pico...but I think Korban made a foray into that and I'm pretty sure he succeeded LOL
 
This information on lighting is soooo helpful, thanks to all. I have all the parts to light up my Star destroyer myself, and now I know how to put it together safely.
 
So, at the risk of opening up a can of worms here; I have heard rumors that Bandai may be discontinuing the PG falcon? Is there any truth to this? I've been waiting to pick one up because it hasn't been out very long and I just figured I had time...but if I need to go ahead and pull the trigger before they are gone then I will.
 
So, at the risk of opening up a can of worms here; I have heard rumors that Bandai may be discontinuing the PG falcon? Is there any truth to this? I've been waiting to pick one up because it hasn't been out very long and I just figured I had time...but if I need to go ahead and pull the trigger before they are gone then I will.

From what I understand, they are actually doing a repop of it this month or maybe next month I forget. Revell also showed it off so they will be repopping it for Europe as well. After this run, I do not know

BigBadToyStore for example has a pre-order for the standard edition expected "1rst quarter of 2020"

 
Back
Top