how do you put this lower screw in ? what is it holding onto inside of the phaser ? whats the design look like ? and i know its probly ben discused before but what are the spray paint colors for the black phaser ? im of corse talking about the screw in frunt of handle i see installed on some of your guysis phasers .
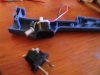
Troydragons I glued in a piece of plastic but you can use other material as well if you like.
Bond it on and it will hold.

The spray paint colors I use are the Krylon fusion paints for plastic, gloss black and gloss white.
You can clear coat them later to change the shine if you want to.
I like it shiny and the clear coat helps to protect the paint.
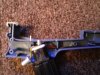
Here's another question for you , Are you guys painting the p1 and p2 before the new metal parts are in ? or are you taping the metal parts you have glue in, panting then installing the other metal parts?
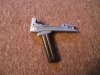
The best thing to do is test fit all the parts before you paint and when every thing fits correctly
remove all the parts and then paint the shells without the parts on it.
Then after the paint dries enough test fit the parts again to make sure they fit correctly.
If they don't, just carefully remove a little paint in those areas with some sanding or an x-acto knife.:devil
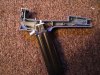
Make sure to test fit the p1 into the p2.
You may need to sand down a little of the back area of the p1 and the p2 area where it touches to allow for the paint thickness.