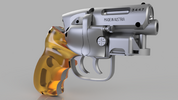
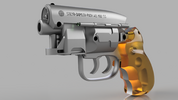
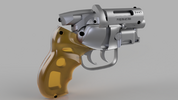
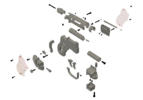
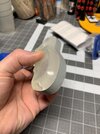
Another Snub-nosed Blade Runner blaster thread because... can you ever really have too many?

Lowbeer

Well-Known Member
RPF PREMIUM MEMBER
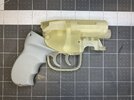
So before everyone gets so sick of Blade Runner blaster and snub-nosed blaster posts they just tell me to take it the hell over to Propsummit already I figured I'd post about my own snub blaster build.

veektohr once described Luke's saber as "a perfect object". This is an accurate description of my feelings about the Blade Runner blaster, but more importantly for this post, also about Dave Goldberg's fantastic snub-nosed blaster design.

Having missed the original run of Dave's blasters by about 5 years at the time I first discovered it, however, I decided to set about trying to recreate it for myself, collecting every stitch of reference material I could about it from across the web.

My goal was to model the blaster exactly as he had in Rhino, matching his progress shots as best I could, tweaking things endlessly until everything looked as accurate as possible (also on the agenda: learn Rhino).

A comparison of the most complete version of Dave's original 3D model he ever posted and my version next to it, representing roughly a year and a half of on-again, off-again effort:
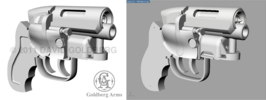
SideBySide_2.png

And the all-important superimposed wireframe:
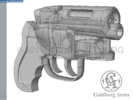
Screen Shot 2017-05-12 at 11.15.44 PM_Cropped.png

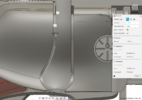
From the beginning I knew that while I wanted the overall shape and design to be as close as possible, I had a few subtle changes I intended to make as well. For the writing and iconography I opted for a scaled-down/modified version of the Steyr-based elements on the big-brother PKD, similarly using almost exclusively hex-head cap screws as opposed to the fillister screws on Dave's original snub. I also knew I wanted to try to do a functional bolt and triggers on mine and that's why, a year and a half into the project, I migrated the whole mess into Fusion 360... which eventually led me to here:
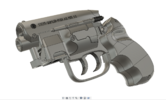
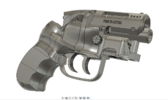
Screenshot 2020-11-29 010612.png

Screenshot 2020-11-29 010528.png

Snub_for_photos_2020-Dec-03_06-41-53PM-000_CustomizedView5154370674.png

ac26498e-ee60-4e0c-8c25-52282cc1ef8d.PNG

Snub_for_photos_2020-Dec-03_07-53-16PM-000_CustomizedView34727759277.png

So, a few weeks ago, after tinkering with this thing on and off for 4 years, I finally sent the whole mess off to Shapeways to have it printed. The box literally just arrived this afternoon and I absolutely haven't posted about this before now because, while a pretty 3D model is great and all, I wanted to have something physical to show for it before I went calling it a "project".

Alas, parenthood calls, so part 2 will have to wait until later tonight.
 
Very impressive work!
Thanks Dave! That means a great deal coming from you!

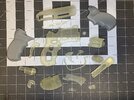
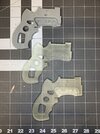
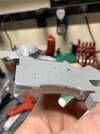
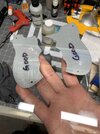
Finally cracked open the Shapeways box (the grips I actually printed myself):

IMG_4494.JPG

So many parts! If only it were, you know, all of them...

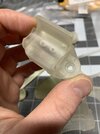
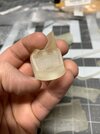
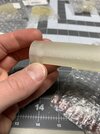
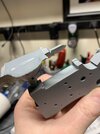
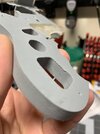
So missing or accidentally duplicated pieces aside the quality is, to put it mildly, less than stellar. I had everything printed in their "Smoothest Fine Detail Plastic" (which was not inexepensive) and just about every piece in this order feels neither "smooth", nor "fine detail" with maybe 4 exceptions.

I honestly can't tell if this part was post processed at all...

IMG_4500.JPG

Like a bunch of the parts in the batch, this one was practically dripping with uncured resin and the surface of it (a completely flat surface mind you) had the texture of some kind of velcro almost.

IMG_4501.JPG

Yet other pieces were definitely smooth and highly detailed. This weaver knob (which I actually even redesigned to have easier to see/print labeling since I submitted the order) came out surprisingly well:

IMG_4493.JPG

And you can even make out the knurling on the sight rod:

IMG_4490.JPG

The magwell had perhaps the cleanest broad, regular surfaces of any of the parts:

IMG_4492.JPG

But at least the Steyr logo on the front was a total wash. The details are so small the actual grain of the 3D printing media is more perceptible than the features:

IMG_4491.JPG

I also doubt the writing on the receiver is salvageable:

IMG_4483.JPG

As disappointed as I was by all the issues, I'm not going lie, after all this time seeing the whole thing mocked up felt like a HUGE validation of the effort I put into getting all the parts of the model both accurate and fitting together correctly:

IMG_4485.JPG
 
That sucks. I'm so sorry. Like you I missed the run.

You did amazing work. I hope you figure out a way to make it real.
 
That sucks. I'm so sorry. Like you I missed the run.

You did amazing work. I hope you figure out a way to make it real.

Thanks, though I definitely share some of the blame. Once I decided I was finally ready to have it printed I was so impatient to have the finished product in my hands that I definitely did not spend enough time making sure that finished product would be what I was actually looking for.

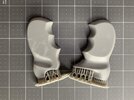
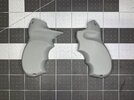
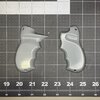
I tried printing it on my Elegoo Mars at home, and the grips definitely came out useable:

IMG_3493.jpg

IMG_4495.JPG

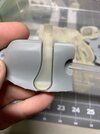
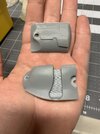
But most other parts required tighter tolerances for dimensional accuracy and I just couldn't get it at home. I even switched to Sirayatech's Blu resin which is supposed to be able to produce parts with tight tolerances, but I had problems with extra resin pooling and curing in places that were supposed to be hollow (even after heating an entire room of my house to 85 degrees for the whole print just to keep the resin fluid enough), and I couldn't get things like the trigger mechanism cover to actually ever mate up with the print of the main frame, which is one of the things that actually works flawlessly on the Shapeways prints, so at least they solved that problem for me:

IMG_3988.jpg

IMG_3989.jpg

IMG_4527.jpg

Sirayatech Grey, Sirayatech Blu, and Shapeways "Smoothest Fine Detail Plastic" with trigger cover in place

At least half of the parts, and some of the most important ones, are definitely salvageable but I'm also going to have to have a lot of them reprinted. I'm looking into other mail-order printing services besides Shapeways. I specifically want it printed in liquid resin, which is what I thought the Fine Detail Plastic was. I have a resin printer at home, but I was specifically hoping to have it printed by professionals that could ensure the dimensional accuracy.

If anybody knows of any mail order places that print in SLA or DLP resin and have had good experiences with them, I'm all ears!
 
Looking very good so far and yes, always a learning curve with printers and SLA/DLP resin or other medium. Eager to see your next update (y)
 
Dude this is looking fantastic! I don't think we'll ever get tired of seeing blasters here. Just keep the pics coming :)
 
I am in no way discussing a run of any kind.

I just feel the need to mention how bad I want one of these with the classic Amber grips. Just mentioning it. No reason.
 
Dude this is looking fantastic! I don't think we'll ever get tired of seeing blasters here. Just keep the pics coming :)
Thank you sir! That's high praise coming from a guy whose own work was being showcased on Tested.com the other day... I remember seeing you post about them on Instagram and thinking "Oh what a coincidence, Adam Savage is building his own Samaritan right now."

Shapeways refunded my money for the worst parts in the original order today, which was a relief (and a not insubstantial chunk of change). Now I'm just waiting on a replacement screen for my Elegoo Mars and I'll give printing the botched parts another try myself.

On a semi-related note, I remember seeing Dave's completely scratch built DLP printer that he used to print the receiver cap on his .38 special version of the blaster years ago and at the time thinking "My god, imagine having that level of printing detail available at home." fast forward 6 years....

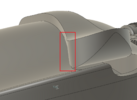
Anyway, while the vast majority of the tolerances I had built in to the model turned out to be sufficient based on the Shapeways prints (very surprising, since the largest in some places was a whopping 0.3mm) one thing I didn't expect while trying to make a static model functional is that the bolt in Dave's original design won't actually clear the right cylinder cover if you're doing anything with it other than gluing it into it's recess at exactly a 90 degree angle.

Screenshot 2020-12-06 151525.png

I'd actually even simulated the mechanics and collisions on a subset of the blaster's parts to check for things like tolerances, etc. but my old machine wasn't powerful enough to simulate all of them, and it just never occurred to me to check the interface between these two parts.

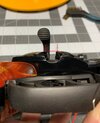
The original, big-brother PKD cylinder cover even seems to accommodate for this, with the "rear" side of the cover being lower than the front, allowing the back-swept curve of the bolt handle to clear it when being lifted:

IMG_4548.JPG

I added enough clearance that now it works even in the simulation. It only works out to about a millimeter around the entire profile of the handle, but it always ends up looking like an enormous gap on the model:

Screenshot 2020-12-07 215920.png

When I originally decided to try to make a version with a functioning bolt and triggers, that was as ambitious as I planned to get with it, however it pretty shortly blossomed into "make a version with a functional bolt, triggers AND can also be entirely assembled with only screws". I swear I thought this was an original idea when I had it, but I recently re-watched the Tested video on Bill Doran's beautiful custom Blade Runner blaster that could also be assembled entirely with screws and realized I must have seen that video... and decided to forget I had seen that video. I even thought I was being original with my whole "bury some hex head screws in resin for functional binding post and weaver knob threads" NOPE all a rip-off. Anyway, that's why this might have taken me as long as it did:

Screenshot 2020-12-08 023540.png

*edit - so many typos
 
While the holidays (and more importantly, the release of Cyberpunk 2077) certainly didn't increase my progress on this project, I never actually stopped making it! So here's, like, 3 weeks of work in 1 post:

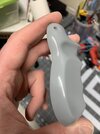
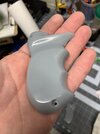
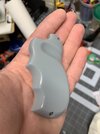
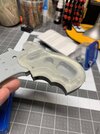
Got the grips as polished as I could stand to without giving myself arthritis. Took them up through 4000 grit on a set of sanding sponges, then hit them with the Tamiya 3-stage polishing system.

IMG_4717.JPG IMG_4718.JPG IMG_4719.JPG IMG_4720.jpg

They're not flawless, but I'm very pleased with how they came out considering I've never polished anything to this extent before. I'm basically following Dave's original process for his own grips with these masters that will go into silicone to produce resin blanks I'll ultimately test my texturing process on. The primary difference being that Dave hand scultped his grips (and cylinder covers) and I sculpted mine in 3DS Max.

After going through 3 replacement LCD screens and a bunch of resin vat shenanigans I finally got my Elegoo Mars back up and running and I printed the right cylinder cover with the increased clearance for the bolt handle and the left cylinder cover which was entirely missing from the original Shapeways order:

IMG_4715.JPG IMG_4716.JPG

I printed them vertically, specifically trying to avoid the "topographical map" effect on the right cover since it's such an organic shape, but the pixel resolution still came through in the finished product anyway. I still think it'll be easier to sand out/eliminate in this orientation. All things considered I think they came out great.

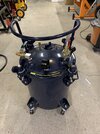
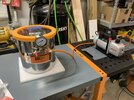
For Christmas this year I decided to gift myself a new pressure pot and vacuum chamber:

IMG_4706.JPG IMG_4705.JPG

The pressure pot is the California Air Tools 5 gallon version they're selling specifically for resin casting (it's just their pressurized paint tank minus the mixer part) and the vacuum chamber is the Baco-Eng(?) 3 gallon chamber with a Robinair single-stage 3 CFM pump.

The vacuum chamber and pump are AWESOME and the chamber held full vacuum right out of the box for over 24 hours. The pressure pot I'm still working on. I removed the stock inlet regulator and replaced it with a simplified inlet and valve arrangement and I've remounted the gauge at a 90 degree angle so I can read it while looking down at the pot (or straight at it if the pot is mounted horizontally on a shelf). Still gotta do the soapy water test when my gasket compound finally cures on the swapped fittings.

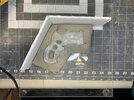
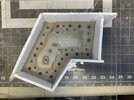
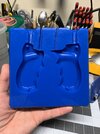
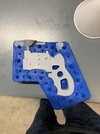
Finally, I clayed up and poured silicone on the main body of the blaster last night:

IMG_4725.JPG IMG_4726.jpg IMG_4732.JPG

I'm happy with the first half so far:

IMG_4733.JPG

I did break the cardinal rule of moldmaking while cleaning up this side, however, and accidentally unseated the master at one point. I'm confident it's a tightly reseated as possible so there's nothing for it but to forge ahead at this point. We'll see how side #2 goes tomorrow.

Some notes on the mold: holy hell I used the WRONG kind of hot glue for this thing... I have a Dewalt hot glue gun and a "Joann's Fabrics" hot glue gun... I used the Dewalt and was almost about to break out my angle grinder to get the damn walls off at one point.

I also used Dave G's method of pouring rice into the mold box first and then dumping that out into a mixing container and marking the side to get the estimated volume of silicone. That technique is sound and worked great in the end, but I definitely should have let the clay get harder first because a layer of rice one grain thick clung to the entire mold when I dumped it out. I also didn't have any ball endmills handy so I just used a generic cone-tipped nylon sculpting tool I had handy for sculpting registration keys... unfortunately the keys worked exceedingly well at capturing a single grain of rice right in their tips. I definitely could have done without spending an hour hand picking rice out of a fresh mold with tweezers last night.
*Edit: Woops, left this in draft too long and lost some pics
 
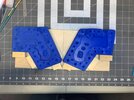
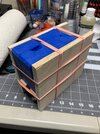
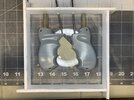
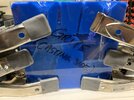
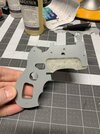
So I built a two sided wooden jig that would allow the frame mold to stand up straight in the pressure pot despite the shape of the actual silicone parts:

IMG_4765.jpg IMG_4771.jpg

This is just a test casting, but I was super happy with how well it came out! I've got to cut one or two more small air vents in the top, but the flashing was all thin enough to scrape off with my fingernail and the shrinkage was insignificant enough that I could effortlessly mate the cast frame with the original 3D printed cover with zero post-processing:

IMG_4773.jpg IMG_4777.jpg IMG_4775.jpg IMG_4776.jpg IMG_4774.jpg

I want to make sure I can accurately drill the various pivot pin holes necessary for the "trigger mechanism" I designed on something other than the 3D printed master so if I screw it up or drill something too big I can start over.

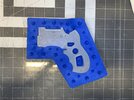
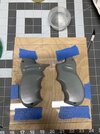
The next step is to cast the grip blanks. I'm trying to figure out how to mount them to the piece of plexi that will ultimately serve as the back half of the mold so I get as flat of a surface on that side as possible when making casts, but also get a solid seal all the way around the base of the masters and ALSO don't destroy the masters in the process... I'm open to suggestions.

IMG_4780.JPG IMG_4783.JPG

All I can think to do right now is superglue them to one piece of plexi to make the mold and then use a different piece when actually casting grips, accepting that the masters will be permanently mounted to the original backing.
 
Is there any reason you can’t drill holes and bolt the grips down to the plexiglass
For a pressure seal. That would also be more secure than super glue.
 
So it turns out I couldn't bolt the originals down per Hirohawa's suggestion because then I'd have the bolts in the castings and I wanted the mounting holes to come through in these castings because I'll need to be able to bolt them down to etch the grip texture into them when the time comes.

In the end I opted to super glue the masters to the back plate permanently. It wasn't ideal, but worked out a lot better than I expected.

Positioning the masters and using some light reading to keep them pressed as flat as possible while the glue dries:

IMG_4785.jpg IMG_4787.jpg

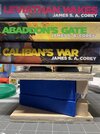
I used slower curing CA glue for this which allowed me a little room to reposition etc. (I also just realized my FIL gave me back my books out of order and it's driving me crazy).

Added some pour spouts and air vents:

IMG_4790.jpg

I thought I was soooo clever with that nail thing. Unfortunately I had them elevated off the back of the mold, so I would have just ended up with dried resin snapping off inside super narrow tubes I couldn't easily clear after every casting. I ended up cutting them all the way through to the mold surface once it cured, resulting in much larger vents than I originally intended. I would have just cut them after the fact with the scalpel, but I don't find that super easy to do for small stuff. Does anyone know if linoleum print block tools work for things like cutting spouts and vents into silicone molds?

IMG_4815.JPG

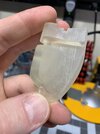
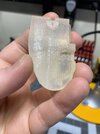
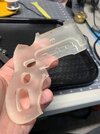
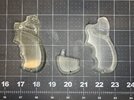
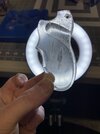
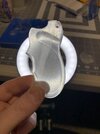
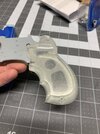
These molds are supposed to be for casting blanks I can try to cut grip textures into, but the temptation to cast some transparent grips as soon as they were cured was too strong so I tried some dumping some Smoothcast 325 I had left over from another failed project into them to see what I got:

IMG_4811.jpg

I managed to pour 1-1/4 grips before the whole mess solidified in the mixing cup. The pot life is SO short. Can someone explain what the practical uses for a resin that cures in 2-1/2 minutes are even supposed to be?
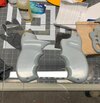
After demolding the 325 grip(s) I decided to try some relatively generic "transparent hobby resin" that I had bought for $20 on Amazon one day on a whim. I think it's basically the stuff you'd pour on bartops, etc. Either way, it had a longer pot life but poured like MOLASSES from the start. It also had much stronger vapors than any of the Smooth-on stuff I've used.
IMG_4812.jpg

The left is the hobby resin, the right 1-1/4 grips are the Smoothcast 325. I do have a pressure pot that's good to go now but I didn't bother using it with either attempt. It might have made a difference with the hobby resin because it was still viscous when I was done pouring, but the 325 would have hardened before I could even get the lid tightened down on the chamber.

The hobby resin seems more "optically clear" where there aren't bubbles, but it was just so ridiculously hard to pour:

IMG_4814.jpg

The 325 was thinner (for the nanosecond it wasn't curing) but every time I've used it it's always bubble city, plus it just seems to be a cloudier "transparent" in general.

IMG_4813.jpg

I'm open to clear casting resin suggestions. I think I'll pick up some Smoothcast 327 to try next. That stuff has a pot life of 20 minutes, which is a hell of a lot better than 2-1/2, and should be enough time to get the whole situation poured and under pressure before it starts curing.

Finally, janky as the whole setup was, I couldn't help myself:

IMG_4817.jpg IMG_4818.jpg IMG_4816.jpg
 
Wow...I'll have to digest and re-read your post a few times over to see what's wrong with the whole thing/problem:unsure:
Now, I'm certainly not a specialist in types of resins (heck, I don't even have a pressure pot:lol:) Do you think that putting some baby powder into the molds before pouring and using a kitchen torch to remove the bubbles would reduce some of the major probs?
Btw, you'll have to give me the name of that fast curing resin. I'm using Alumilite most of the time, because I like to pour stuff fast and have a fast de-molding time... but that's just me;)
 
Wow...I'll have to digest and re-read your post a few times over to see what's wrong with the whole thing/problem

Yeah, sorry about that... my posting skills need work.

TLDR: Once I got the grip blank molds made I decided to try to cast up some clear grips real quick just to see what I got. One resin was too thick and bubbly, the other set too fast and was also super bubbly.

I couldn't hit the mold with a heat gun to try to dissipate the bubbles because of the way it's oriented. It's not an "open face" mold. You can see in on of the pictures above where I've got a sheet of plexiglass clamped on the mold and I'm filling it from the top. There's nowhere I could hit that mold with a hot air gun that wouldn't just melt through the plexi, spilling uncured resin everywhere...

Btw, you'll have to give me the name of that fast curing resin. I'm using Alumilite most of the time, because I like to pour stuff fast and have a fast de-molding time... but that's just me

The super fast setting resin was Smooth-on Smoothcast 325. It's got a pot-life of about 2.5 minutes and a demold time of about 10 minutes give or take depending on the thickness of what you're casting.
 
Not be that person (Ok I will be that person haha!), but whenever you complete and are satisfied with your build, are you planning on releasing the files or selling casts? I'd love to get my hands on a snub nose. I also discovered recently that Dave's kits are no longer available. Thanks!
 

Your message may be considered spam for the following reasons:

If you wish to reply despite these issues, check the box below before replying.
Be aware that malicious compliance may result in more severe penalties.
Back
Top