You are using an out of date browser. It may not display this or other websites correctly.
You should upgrade or use an alternative browser.
You should upgrade or use an alternative browser.
Another MPC Millennium Falcon Modification
- Thread starter Jaitea
- Start date
Ok guy... I was thinking and thought this might give you some ideas... did you know that the full size falcon while sitting in the hanger bay at Mos Eisley actually had 5 actually supports holding it up. The two extras were actually hidden as pipes that were "refueling" the ship. Might be interesting to see if you could put that into this sweet beauty since you'll be displaying it in landed mode. Just thought I would throw it out there for ya to think about!
Jaitea
Master Member
Hmmm, that refuelling tube could be the dc power supply, just make some additional boxes around it with some lights etc

So far so good,...the rear legs have ended up the same height & it looks level:


Adding some details to the legs:

The magnets worked out OK to keep the legs in

Once the front one is done, I'll see if I can find some way to attach the open gear doors to them.
Thanks for looking
John
So far so good,...the rear legs have ended up the same height & it looks level:
Adding some details to the legs:
The magnets worked out OK to keep the legs in
Once the front one is done, I'll see if I can find some way to attach the open gear doors to them.
Thanks for looking
John
SteveStarkiller
Sr Member
Looking good Jaitea, can't wait see more.
3d-builder
Sr Member
This is so amazing I love it what a build up!!!!!:thumbsup
One of the best things about this build is you will end up
with a AMAZING Falcon in a very displayable scale!!! :thumbsup
One of the best things about this build is you will end up
with a AMAZING Falcon in a very displayable scale!!! :thumbsup
Jaitea
Master Member
Thanks very much guys for your support, Angel if you're ever in Northern Ireland give me a shout no problem mate:thumbsup
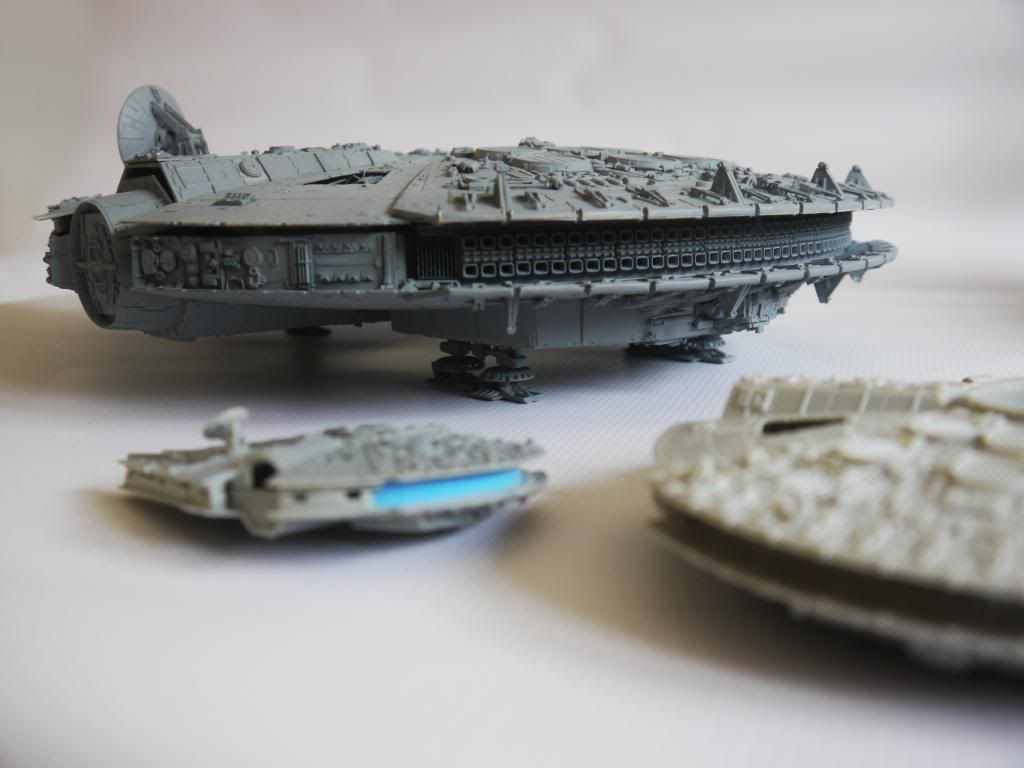
The pieces of the front undercarriage:

Just pushed together, (bird cage baffle not finished yet)


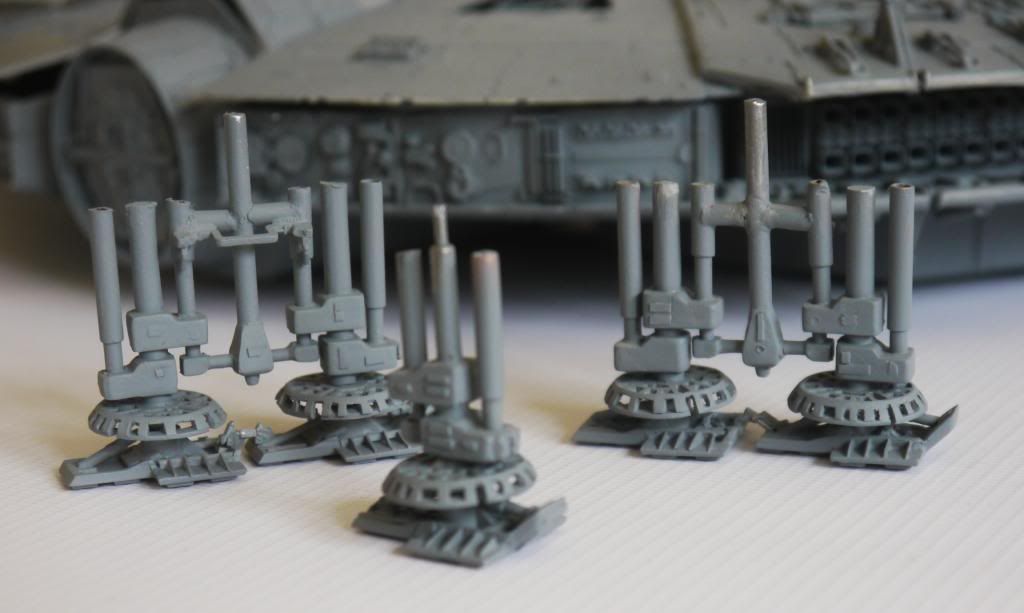
Cutting out the baffles are tedious, here's how the first one turned out......hmmmm....looks like it's been chiseled out of stone:

I used this blueprint to create a template:

The test turned out OK....just some parts needing removed & printed at 29% of it's original size:


I've printed the 5 baffles on acetate:

The image, I printed it at 29% of its size:

I spent a good part of Saturday experimenting with the acetate....no good, it doesn't glue too well, then I tried printing on thin plasticard, I made two baffles & was reasonably happy with them until I put them on the legs.....they just look homemade....late on Sunday night I returned to the original kit part, I filed off all raised lines & details and stuck on one of the templates (printed on sticker paper) I now had a better 'official' guide to cut out the design.
.....done one:

Now doing the rest....as I said....stuck graphic onto part....cut out the details with a blade,....removed unwanted paper, then sprayed with primer to make painted on markings....remove the rest of mask paper....drill out holes, then make into shapes with blade:

Gotta keep on going, get these done so I can move on
John
The pieces of the front undercarriage:
Just pushed together, (bird cage baffle not finished yet)
Cutting out the baffles are tedious, here's how the first one turned out......hmmmm....looks like it's been chiseled out of stone:
I used this blueprint to create a template:
The test turned out OK....just some parts needing removed & printed at 29% of it's original size:
I've printed the 5 baffles on acetate:
The image, I printed it at 29% of its size:
I spent a good part of Saturday experimenting with the acetate....no good, it doesn't glue too well, then I tried printing on thin plasticard, I made two baffles & was reasonably happy with them until I put them on the legs.....they just look homemade....late on Sunday night I returned to the original kit part, I filed off all raised lines & details and stuck on one of the templates (printed on sticker paper) I now had a better 'official' guide to cut out the design.
.....done one:
Now doing the rest....as I said....stuck graphic onto part....cut out the details with a blade,....removed unwanted paper, then sprayed with primer to make painted on markings....remove the rest of mask paper....drill out holes, then make into shapes with blade:
Gotta keep on going, get these done so I can move on
John
Hey John... have you considered printing on thin copper sheets and photoetching it? Would work alot better! ") Just a thought! I got some photoetched parts from FalconKits when he was still producing them and they come out looking perfect. May want to give it a shot. Couldn't hurt and would look more to scale. The process is the same as it would be for making a circuit board (same chemical for etching)... only on one side you paint it with fingernail polish. Then with a laser printer, you print your image on iron on transfer paper and then iron it onto the copper/brass. Then dunk it into the acid and keep watching it until it's etched all the way thru. Could be fun to try... just be careful not to spill the acid because it will stain EVERYTHING... fingers, carpet, chairs, other plastic, pants, shirts, leg hair, the dog, stray cats, etc. (use rubber latex gloves and lots of paper towels!) Lemme know if that would help!
Just a thought! I got some photoetched parts from FalconKits when he was still producing them and they come out looking perfect. May want to give it a shot. Couldn't hurt and would look more to scale. The process is the same as it would be for making a circuit board (same chemical for etching)... only on one side you paint it with fingernail polish. Then with a laser printer, you print your image on iron on transfer paper and then iron it onto the copper/brass. Then dunk it into the acid and keep watching it until it's etched all the way thru. Could be fun to try... just be careful not to spill the acid because it will stain EVERYTHING... fingers, carpet, chairs, other plastic, pants, shirts, leg hair, the dog, stray cats, etc. (use rubber latex gloves and lots of paper towels!) Lemme know if that would help!
Just a thought! I got some photoetched parts from FalconKits when he was still producing them and they come out looking perfect. May want to give it a shot. Couldn't hurt and would look more to scale. The process is the same as it would be for making a circuit board (same chemical for etching)... only on one side you paint it with fingernail polish. Then with a laser printer, you print your image on iron on transfer paper and then iron it onto the copper/brass. Then dunk it into the acid and keep watching it until it's etched all the way thru. Could be fun to try... just be careful not to spill the acid because it will stain EVERYTHING... fingers, carpet, chairs, other plastic, pants, shirts, leg hair, the dog, stray cats, etc. (use rubber latex gloves and lots of paper towels!) Lemme know if that would help!Archive&Future
Sr Member
Any updates to this? I'm dying to see more!
Jaitea
Master Member
Thanks very much for the encouragement guys, and hopefully in the next week or so i'll be getting back to this build......the Ralph McQuarrie Falcon is almost finished!
John
John
harryhoudini
Active Member
Brilliant Job on such a challenging kit!
Jaitea
Master Member
Wow thanks for the comments, I really hope to get back to this build soon......I've had enough of a break from her......on the plus side though because there was a time limit on the RMQ Falcon, because it was a group build, it has sped up my work a bit & also pushed me to face my fear......PAINT, that was something I wasn't looking forward to on this build.
John
John
Archive&Future
Sr Member
..it has sped up my work a bit & also pushed me to face my fear......PAINT, that was something I wasn't looking forward to on this build.
John
Hot damn, I can't wait to see it painted
opcorn. You don't have anything to fear about that, your painting is exceptional!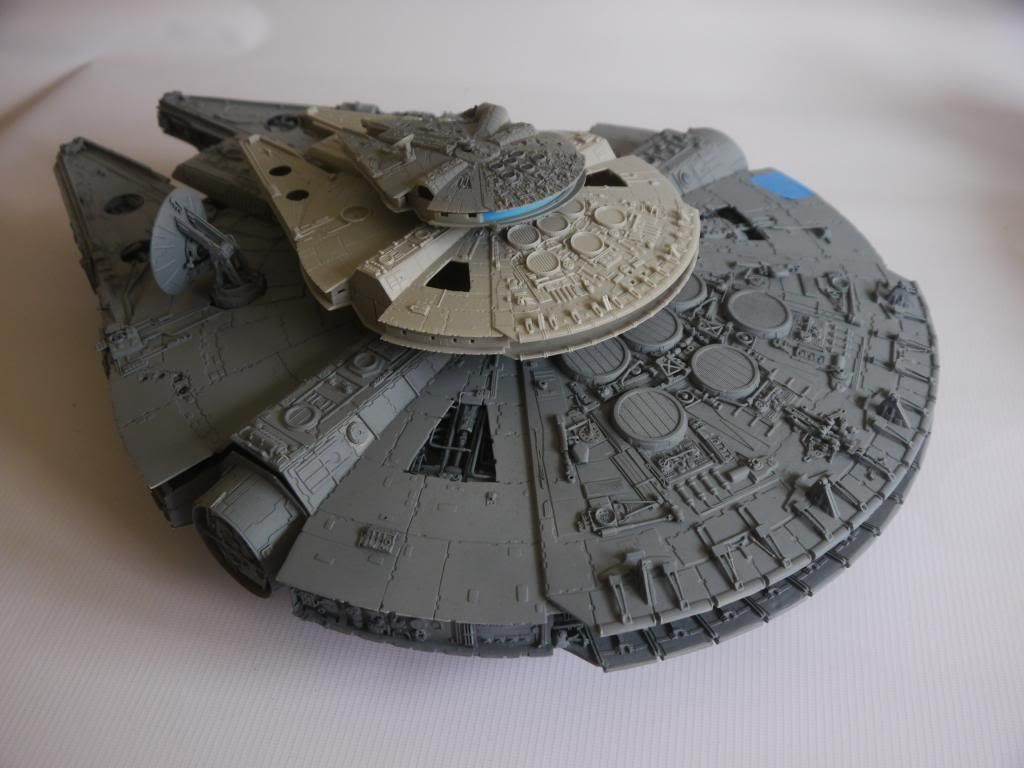
Similar threads
- Replies
- 1
- Views
- 1,288
- Replies
- 7
- Views
- 1,643