Another A L I E N Nostromo crew jacket- Kane's...finished!

Bondo Fett

Well-Known Member
RPF PREMIUM MEMBER
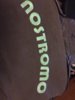
After watching the the many threads here covering the crew's costumes from Alien I decided to wade in and try to put together my own version of the Dallas/Kane jacket. Many thanks to all the members who shared their research and knowledge. I hope the info in this thread will be helpful to others.

I'm making an interpretation of Kane's jacket. His lacks the zipper/lace panels on the chest, so I thought that would be more do-able for now. Here is my number-one reference picture:
kanes_jacket_01-ACTUAL-SCREEN.jpg


As is well known the jackets used were British RAF mkIII cold weather flight jackets, modified by the costume department. I got this one from a nice fella in the Chech Republic. It is heavily worn but in great condition, which is a real bonus for me. He thought it was size 7 or 8, but the tag was too faded to tell, so I crossed my fingers and bought it. Luckily it fits me perfectly, but I'm afraid I have little to contribute to the "what measurement is size 7?" discussion.
IMG_20190112_152443.jpg
IMG_20190112_152534.jpg
IMG_20190112_152715.jpg


The jacket is one of the "green" variant, not the grey/lavender type, but is nicely faded. Next up- dye job.
 
Here is what I intend to use for the stenciled logo across the back. Its a sheet of acetate that I had originally made years ago for my 'Parker' jacket, and never used as intended (that is another story). I hand-cut the letters after laying out the artwork based on my own interpretation of the size and arc of the lettering. Mine is just a tad shorter, and maybe a little flatter in the curve, but I'm happy with it. The picture below it is Kane's SU'ed jacket.
IMG_0011.jpg
a19263ba00b1ae3ac64c01ac957935b1.jpg


I tested out applying the lettering with a sponge using some acrylic paint colored Aqua Green. I used a scrap of the 'beaver tail' from the jacket for a test surface. I'll need to tone down the color a bit, but I like the sponge technique.
IMG_0008.jpg
 
I found if you use a stiff brush, use it as a dry brush with just the tiniest amount of paint and stipple at the jacket you get the mesh effect as seen in the original (it comes from the lining) here is how it looks on mine
 

Attachments

  • IMG_4626.JPG
    IMG_4626.JPG
    56.6 KB · Views: 536
  • IMG_4627.JPG
    IMG_4627.JPG
    36.4 KB · Views: 544
  • IMG_4628.JPG
    IMG_4628.JPG
    61.1 KB · Views: 597
I found if you use a stiff brush, use it as a dry brush with just the tiniest amount of paint and stipple at the jacket you get the mesh effect as seen in the original (it comes from the lining) here is how it looks on mine
Yeah, probably the sponge won't allow me to use enough pressure to pick up the texture from the mesh liner. Thanks for the hot tip, I got a lot of inspiration from your thread!
 
Here is the piping I'll be using along the jacket collar. Got the stock Pink, and also Natural, as well. On a whim I threw it in a gallon of hot water with a few drops of Rit Violet dye for a few minutes and got a much more pale pink. Not sure yet, but I think I like it better than the stab-you-in-the-eye pink stock color.
IMG_0007.jpg
 
Dye job complete. Very pleased with the results. Jacket now has the grey/purple/brown tone seen in so many different reference photos. Here it is in artificial and natural light:
IMG_0019.jpg

IMG_0020.jpg


Huge thanks to member Andy3E. I used your formula for the color and it saved me tons of experimentation (aka time, money, frustration), and made a few small changes. For mine I used three gallons hot tap water in a bucket and added four ounces of Rit Royal Blue, two ounces of Rit Purple, and half an ounce Rit Pearl Grey. Gave it about half an hour of stirring and then gave it a bath in Rit Fixative. I didn't use a lot of dye because the jacket itself was very nicely faded and I wanted some of the original patina to come through. The lower color saturation means it doesn't have that brand-new garment look.
 
Last edited:
Lots of work done, but many pictures lost, dang.
The compression laces I made from ribbon. I wasn't sure about using webbing, I wanted something a little finer and this stuff seemed to match loops I've seen on other military jackets:
Grosgrain Ribbon | Offray Ribbon
It is 3/8" wide in color 'moss'. Here are some pics:
IMG_0013.JPG


I cut about 100 pieces to 1 1/2" and glued them over. I used fabric tape to stick them to another long section so I could sew them down.
IMG_0016.jpg


I stitched them down with just one pass right next to the loop side.
IMG_0018.jpg


For the panels they attach to I found some cotton broadcloth about the same weight as the jacket itself in color 'army green', whatever that means. Its a little on the olive side. I stitched the laces to the outside of the panels so the loop could still have some movement. The whole panel ended up being 3 1/2" wide. I made them arbitrarily long (so they could tuck up under the patch) and finished only on end. I'll have some close-ups later.
 
Finished this old jacket a few weeks ago and I recovered some of my build pictures so here are some close-up details.

The crew patches are from Intergalactic Trading Co., Intergalactic Trading Company - Product: Alien Nostromo Lt. Blue Patch
I've got them from Patches and Pins as well and they are comparable. Both very close to SA. I think the ones from Patches and Pins are easier to remove the iron-on backing, making them a little softer and easier to sew. I've seen these made on a grey background, but from most of the cast and set photos I've seen I have to go with the light blue.
IMG_0003.jpg

I distressed the patches by lightly scratching with some 80 grit sand paper. Go gently, it doesn't take much to shred the embroidery. Also I gave the patches a wash with some white acrylic paint thinned way down with water to about non-fat milk consistency. It was just enough to de-saturate the blue background without interfering with the stitching.

The flight wings come from Magnoli Clothiers, Nostromo Rank Wing Patches by Magnoli Clothiers
The metallic brocade wings are the best ones I've seen that are commercially available and though they are not totally accurate they are darn good looking.
IMG_0247.jpg

I had to give these wings a little wash in some thinned acrylic colors as well, Kane's wings seem pretty hammered. I tried not to over-do it.

I'll be back with some pictures of the completed jacket very soon. Thanks for looking!
 

Your message may be considered spam for the following reasons:

If you wish to reply despite these issues, check the box below before replying.
Be aware that malicious compliance may result in more severe penalties.
Back
Top