You are using an out of date browser. It may not display this or other websites correctly.
You should upgrade or use an alternative browser.
You should upgrade or use an alternative browser.
ANH OB1 lightsaber.
- Thread starter parfaitelumiere
- Start date
Some news,this is the foruth time I make the pommel,hope this time will be the good time!
The main body of pommel is close to 100% accurate to original shape,even smallest details,that's a good thing!
And,of course,inside there is a 30mm diameter room for batteries,end some "technical" details,like cooling system^^
I have a SW show at the end of April,will try to make at least the energy cell(made from AS pommel and booster),not easy!
Hi Chaim
The show is just about 30 km to my home.
I wanted to do machining today,on my pommel,but I have a "torticoli",so I went home sooner,and didn't machine the pommel.
However I found the good drilling tool,will be perfect!
I think today I will make measurments on my prints,for other parts....
The show is just about 30 km to my home.
I wanted to do machining today,on my pommel,but I have a "torticoli",so I went home sooner,and didn't machine the pommel.
However I found the good drilling tool,will be perfect!
I think today I will make measurments on my prints,for other parts....
What's new?
I just achieved machining on the pommel.
I just achieved machining on the pommel.
Last edited:
Sym-Cha
Master Member
Looking good Patrice ") You do realize that is the 'Tunisia-version'-placement onto the booster?
You do realize that is the 'Tunisia-version'-placement onto the booster?
Which in fact could have been the screen-accurate position as well since it is believed that the Mechanismo/Chronicles pictures were taken after filming had ended and the prop needed to be
assembled for that photoshoot. Thus the cubes on the pommel were placed upside down.
-Chaim
You do realize that is the 'Tunisia-version'-placement onto the booster?Which in fact could have been the screen-accurate position as well since it is believed that the Mechanismo/Chronicles pictures were taken after filming had ended and the prop needed to be
assembled for that photoshoot. Thus the cubes on the pommel were placed upside down.
-Chaim
Last edited:
I don't know?
What is tunisia version?
I realized the correct assembly of the AS handwheel^^
Means,45° at the end,and 30° at the clamp side.
What is tunisia version?
I realized the correct assembly of the AS handwheel^^
Means,45° at the end,and 30° at the clamp side.
I achieved the final dimensions of the pommel "cubes"
It will be very accurate when finished.
Will go to treatment today,and come back on friday.
Newt week I will do polishing.
I think the cap will come back today,I will work on it.
It will be very accurate when finished.
Will go to treatment today,and come back on friday.
Newt week I will do polishing.
I think the cap will come back today,I will work on it.
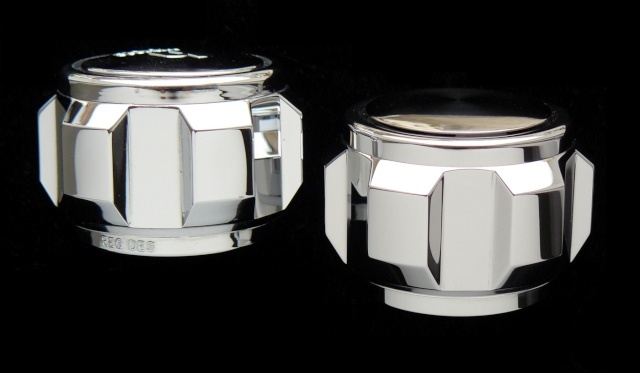
here is a side-by-side pic:

Cubes were rough from machining,and groves were too small,so cubes appear too big.
Now it's ok.
And today th cap came back,so I finished it:

Just the same as original,without blue ou red rim,and without brand.
Cubes were rough from machining,and groves were too small,so cubes appear too big.
Now it's ok.
And today th cap came back,so I finished it:
Just the same as original,without blue ou red rim,and without brand.
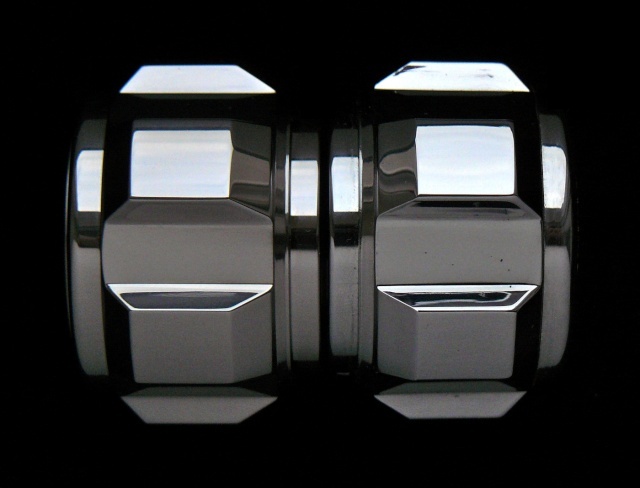
new face-off:
The pommel came back from treatment,now I'm making final shiny polish.

On the photo it's the firts step.
I hope I will make final step today.
It's not easy to remove all flaws or scrtaches from machining,and to keep shape too.
It was really easier to polish the brass pommel!
Makes me remember cutlery.
I began the assembly core of the saber but I made mistakes,so I think I will make a new one.
I think about just a ring,like on original booster,and 3 pillars,then another ring,close to original grenade cap,will make crystal chamber and saber assembly.
I have to make a 45mm long spacer,covered by graflex clamp,hope the new nova soundboard will be short enough to go in a 45mm long room....
The pommel came back from treatment,now I'm making final shiny polish.
On the photo it's the firts step.
I hope I will make final step today.
It's not easy to remove all flaws or scrtaches from machining,and to keep shape too.
It was really easier to polish the brass pommel!
Makes me remember cutlery.
I began the assembly core of the saber but I made mistakes,so I think I will make a new one.
I think about just a ring,like on original booster,and 3 pillars,then another ring,close to original grenade cap,will make crystal chamber and saber assembly.
I have to make a 45mm long spacer,covered by graflex clamp,hope the new nova soundboard will be short enough to go in a 45mm long room....
Oh no...
It's really difficult to have a good luster on steel.
But...
After about 20 hours of work,the pommel is finished,yes,first step ok!
Pics tomorrow...
It's really difficult to have a good luster on steel.
But...
After about 20 hours of work,the pommel is finished,yes,first step ok!
Pics tomorrow...
Here is my pommel displayed with AS handwheel:
Profile comparation:
Profile comparation:
Last edited:
clancampbell
Sr Member
Beautiful, just beautiful!
The lustre of your polished pommel is fantastic!
Incredibly impressive work on the whole saber thus far!!!
Rich
The lustre of your polished pommel is fantastic!
Incredibly impressive work on the whole saber thus far!!!
Rich
Filandrius
Sr Member
That pommel is absolutely insane. It's perfection incarnate. Toutes mes félicitations.
I'm almost as interested in the camera you're using to photograph these parts than the parts themselves! These truly are great pics!
Thanks!
Camera is a simple out of age Panasonic FZ8
Out of age,because the main functions I need are not on this camera....
I modified the first pommel I made from nickeled brass,bave it some wheathering to match the " long time ago from a galaxy far far away"
I will try to make a kind of antique,like medieval or roman look,as it would be original part,and other the replica....
Will have to wheather the booster,I don't really want to do it....
Similar threads
- Replies
- 7
- Views
- 1,276
- Replies
- 41
- Views
- 2,678
- Replies
- 13
- Views
- 1,956