Aliens M56 Smartgun - 3D printed

CZMarty

New Member
After my 3D printed take at Morita guns from Starship Troopers, it's time to tackle another dream weapon prop - the iconic M56 smartgun from Aliens. I don't even remember the first time I saw the movie, but those big machineguns on an articulated mount have been on the back of my mind ever since. Now I have the tools, skills (hopefully) and the time to build one for myself.

As usual, I started with research and reference gathering, anything from found parts lists and similar builds to a library of pictures and scale references. The forum over at Aliens Legacy has been an invaluable source of information, and although some of the older threads are almost gone because of image hostings sites that went out of business, I was able to gather enough data to start working on my design. Having MG42 as the base for smartguns made things so much easier, even though none of the available 3D files are correct (I was able to find one that was close enough, but correcting all the mistakes and inaccuracies would take more time than starting from scratch).

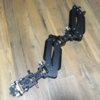
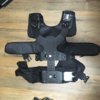
Some of the parts are beyond 3D printing when it comes to durability or size, so I sourced an unbranded "steadicam" vest off of ebay along with a spring loaded arm. The original Cinema Products 3A vest and arm are absolutely out of my budget for this costume, I went with an alternative that should look close enough.
Some of the soft parts for the costume were fairly easy to source, IDF flak jackets are super cheap and work as a reasonable stand in for the M69 vest and Polish wz. 93 BDUs are fairly close to the screen used camo pattern.

The cheap steadicam rig works surprisingly well, it should have no issues with supporting the weight of a printed smartgun
6D4E8EDE-7C65-4F3D-815E-79D2C43601FE.jpeg63847A1D-544B-4118-80C1-CEBC88698A2C.jpeg

I managed to find the correct Kawasaki switch for the front grip, that should make it easier to wire the electronics for a sound/light fx package
IMG_3096.JPG

Here's the first print to get things going, one of two DV9 batteries (the bit that Vasquez and Drake hand over when ordered to disable their weapons)
IMG_3120.jpg

Now for the most interesting and time consuming part, time to convert all those drawings and pictures into CAD files
Receiver_progress.jpg
 
I think there already is a printable MG42 out there, but it might cost you a few dollars. Might be a time saver, but I understand if you would like to design this from the ground up by yourself.

TazMan2000
 
There are couple of models out there, both as printable STLs and some were even on grabcad, unfortunately none of them pass the accuracy test on close inspection. I don't mind using a paid model as a time saver, but I was disappointed with the results of my search.
If you can point me in the direction of a detailed model that looks like it should be spot on, I'd really appreciate that :)

Since I already have a real steel ammo belt drum off of a 8mm Yugo copy, having a 3d model for the gun that's dimensionally accurate is pretty important.
 
Here's an example of a model that looks great at first glance but once you overlay it with a properly scaled picture of the original, pretty much nothing matches, just the general shape.
 

Attachments

  • MG42_grabcad.jpg
    MG42_grabcad.jpg
    112.7 KB · Views: 616
You can try Turbosquid or CGTrader. Not all are printable. But you may have some luck there.

I have never seen the Kawasaki AR125 footrest hangars modelled properly. To me, that makes or breaks the M56.

TazMan2000
 
I'll give those sites another look then. Agreed on the footrests, I have yet to see a scratchbuild or a 3D print that looks like the real deal and the looks of these two parts is pretty crucial. That doesn't mean it can't be done, it's gonna take some time and effort to model them correctly.
One more reason to have a properly scaled MG42, so the footrest hangers don't look too small or too big.
 
Even the original model you posted may look OK, because the handle and trigger isn't on the M56. You may be able to modify something there because the footrest hangers obscure a lot of the front barrel jacket. You're right it's absolutely necessary to have a properly scaled replica.

TazMan2000
 
The badly shaped grip and incorrect barrel jacket shape are just icing on the cake. There's no channel for the charging handle, the top cover is all wrong and once I started working on the model in SolidWorks, it took considerable effort to fix even the smaller errors. With some third party models you reach a point where it's easier and faster to start over than to fix the stuff that's wrong.
The recoil booster/muzzle device is useable without major changes, so there's that.
 
The progress is pretty slow, but I'm almost done with those oddly shaped AR125 hangers. Lots of pretty specific swept cuts and angled surfaces, but I'm pretty satisfied with the results so far
The real kicker is that two step bevel on all the side surfaces, I guess that's why some of the scratchbuild approaches look off when compared to the real deal
1564002803661.png
 
Here's a quick update on my progress, I modelled all the details on the top surface minus that one big hole for a bolt. I still need to make some adjustments to the bottom surface of the model, especially the side that points away from the muzzle.
AR125_progress_2.jpg


Here's a quick and dirty mock up (note that I'll be using a different model for the base MG42)
AR125_progress_3.jpg


AR125_progress_4.jpg


Please let me know what you think. If I made any obvious mistakes during the design phase, it's not too late to correct them.
 
I finished all the added details on the left hand side hanger and I added those lightening cuts on the underside.
AR125_progress_5.jpg

AR125_progress_6.jpg


Some of the details are optimized for printing, that means no added details that would go past that bottom surface (it's easier to print them as separate parts) and also no "MADE IN JAPAN" text.
I ran the left side hanger as an overnight print and I'm pretty satisfied with the results.

IMG_3125.JPG

IMG_3126.JPG


Printed at 0,2mm layer in PLA, final weight just over 100g per side. I didn't have the option of weighing the original bike parts, but I imagine that an aluminium casting is way heavier than the printed copy.
 
I'm glad my take on a 3D printed version did not disappoint. It's gonna take some sanding and filling to make everything nice and smooth, but the shape is right. I printed the other side too and I've got a barely used Reflecta lamp on my workbench, ready to be converted into a shoulder lamp.

IMG_3129.jpg


IMG_3127.jpg


IMG_3128.jpg
 
The receiver-barrel shroud combo is taking shape. Converting sheet metal stampings into CAD without access to the original gun is far from fun, but I was able to get the different radii and transitions close enough to be satisfied with the results. The weapon will come apart in the middle (the trunnion is great for hiding the joint seam) for transport and the front part of the reinforcing tube will also work as a nice barrel stand-in.

Receiver_progress_2.jpg


Receiver_progress_3.jpg
 
The front receiver is starting to look more like a smartgun in progress and less like a stripped down MG42. The Kawasaki struts are positioned based on various screen caps and behind the scenes pictures. I added some reinforcing features to the front of the barrel shroud, now I have to figure out the best way to mount the rear of those bike struts without any obvious screws.

The recoil booster extension will be a printed sleeve around a thick walled aluminium tubing for extra durability - some people reported that cast or printed flash hiders are easily damaged during a con, so I'd like to avoid that.

Receiver_progress_4.jpg
Receiver_progress_5.jpg
 
Made some more progress on the front of the gun, though some of the parts were complex enough to really slow me down. Good thing there are so many reference pics out there for individual MG42 parts. I still need to make room for cables, connectors and for the base of the front grip, plus the light packaged inside the muzzle device is going to require some creative thinking in order to have an electronic muzzle flash that's visible from the sides.


Receiver_progress_6.jpg


Receiver_progress_7.jpg
 

Your message may be considered spam for the following reasons:

If you wish to reply despite these issues, check the box below before replying.
Be aware that malicious compliance may result in more severe penalties.
Back
Top