6 LOTR Costumes in one month: Low Budget

Indy Magnoli

Master Member
RPF PREMIUM MEMBER
As a sequel to last years "6 SW Costumes in 3 weeks with No Budget" thread (http://www.therpf.com/f24/6-star-wars-costumes-3-weeks-w-no-budget-68032/), I now present you with this years Lord of the Rings version:

Last year's build was absolutely insane and took a lot of my time in those short three weeks, so after that I decided I would spread out the collecting at least over the year. So, I got the idea (while still building the SW costumes) that I would do Lord of the Rings for next years Quiz Night. I started trading props like crazy and ended up collecting the following over the year:

Aragorn's Ranger Sword
Aragorn's Ring
Gandalf's Sword
Gimli's Axe
Gimli's Helmet
Sting
Uruk Hai Sword
The One Ring
Galadriel's Ring
Evenstar
Three Fellowship Leaf Clasps

Some were official, some knock offs, but all those props would become the backbone of these costumes. The main point here is... no cash, ALL TRADES! :)

Our team slightly changed from last year, so after a little debating, we settled on the following characters:

Aragorn
Gandalf
Gimli
Bilbo
Galadriel
Generic Uruk Hai

Now, for those who didn't read last years thread, the main goal I was trying to achieve:

GOOD COSTUMES: LOW BUDGET... so on average there was only about $20 of cash spent on each costume. Everything else was made from what we had on hand (and of course a lot of horse trading for the big props).

Kind regards,
Magnoli
 
As with last years post, I'll start with the simpler costumes and work my way up. First, Galadriel:

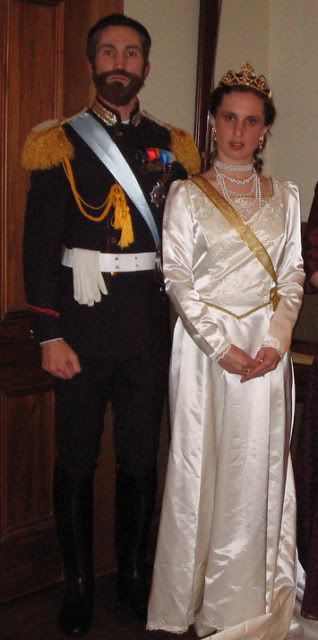
We had a white wedding dress (bought for under $20 a couple of years ago for my wife's Alexandra Romanov costume):

TheRomanovs.jpg


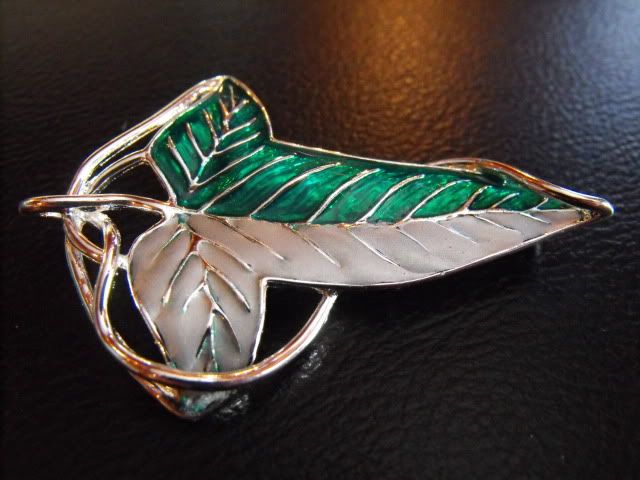
So, using that as the base, we took some cream satin sheets we had and whipped up a simple hooded cape. I had three leaf clasps, so I thought I'd paint on silver for this outfit:

pin-paint1.jpg


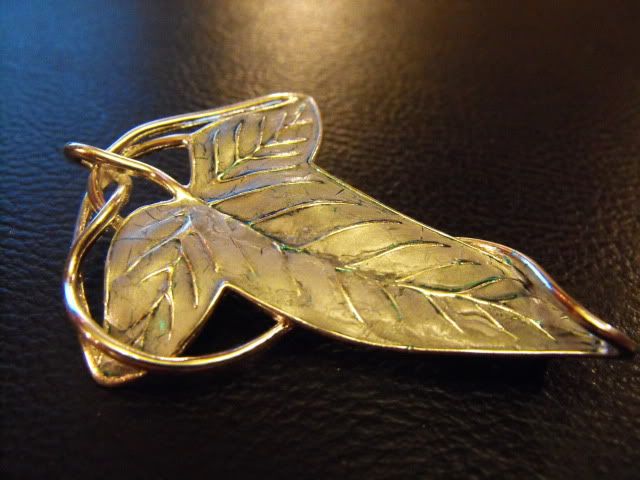
The above photo shows it half-painted with silver acrylic paint. I was careful to leave the silver plated "veins" of the leaf and the edging for contrast. Once I finished hand-painting the leaf, I coated it in a sealant (as I knew acyrlic paint on top of an enameled surface would not last long)... but soon after adding the sealant, the acyrlic began getting a cracked texture, resulting in this:

pin-paint2.jpg


I thought it looked kind of cool, but no one else did, so I scraped everything off and just spray painted it silver. Took me a few seconds after which I thought that I should have just done that in the first place!

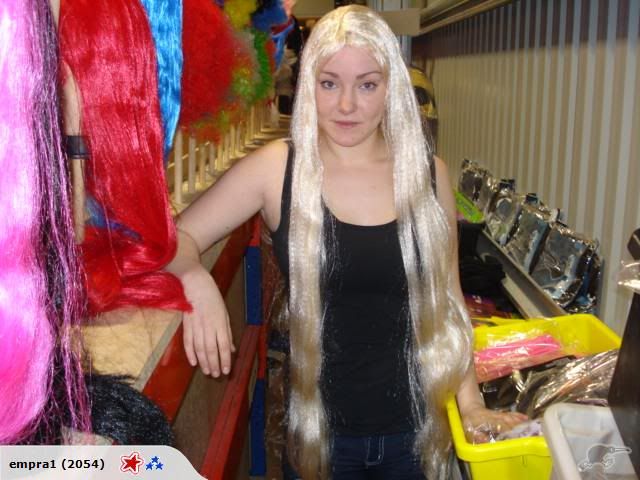
For the hair, we found a cheap wig on a local auction site. Photo from the auction:

139016379_full.jpg


The wig was quite straight, so we plaited the hair, poured some hot water on it, then took out the braids to give the hair a little bit of wave.

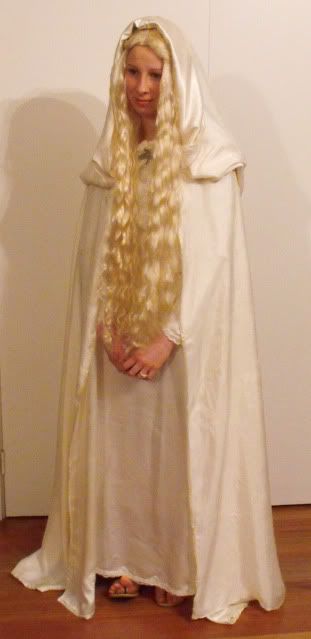
The end result:

Galadriel1.jpg


Simple, but looked the part.

More to come...

Kind regards,
Magnoli
 
Next up: Bilbo Baggins.

One of the ladies on our team is about 5 foot nothing, so she was selected as our team Hobbit. She'd be the about the right age for Frodo in the book, but closer to Ian Holm's age than Elija Wood's, so we opted for Bilbo.

Since I had Sting, I decided to make Bilbo's outfit a cross between his party outfit and his traveling gear. Also, since putting the One Ring in his pocket was a bit dull, we left it on the chain to be worn around his neck like Frodo does.

So... our "actor" already had some short pants in her wardrobe in a tweedy type fabric, so that was taken care of. I have a pioneer type shirt from the Western Warehouse that has shrunk so much since I bought it that it fit her perfectly and was a great match to Bilbo's. So... we only really needed a good vest.

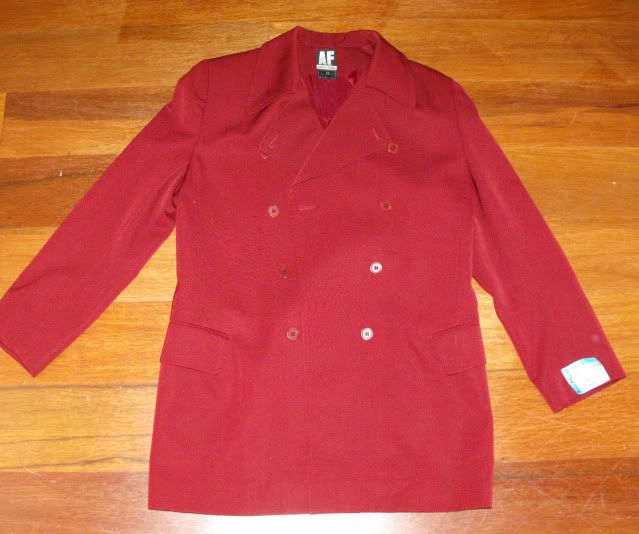
Finding a double breasted waistcoat with lapel for cheap was impossible, so we found a woman's overcoat that we would modify:

bilbo-vest1.jpg


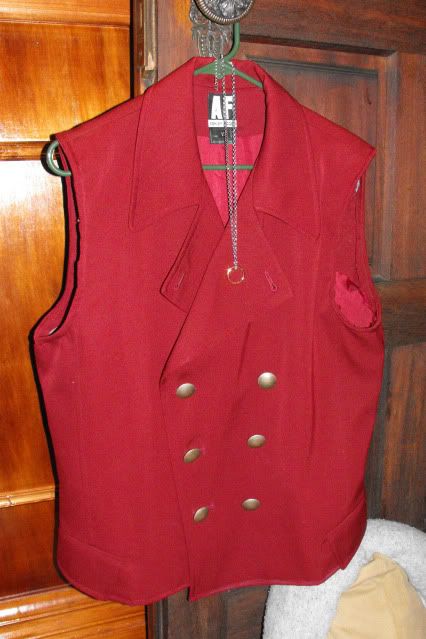
I chopped the sleeves, changed the button placement (from female to male and spaced closer together), added some old metal buttons and shortened it considerably. The end result is a close-enough waistcoat:

bilbo-vest2.jpg


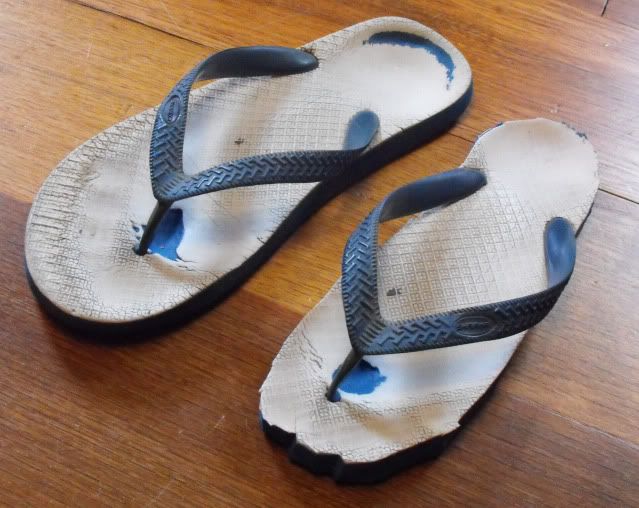
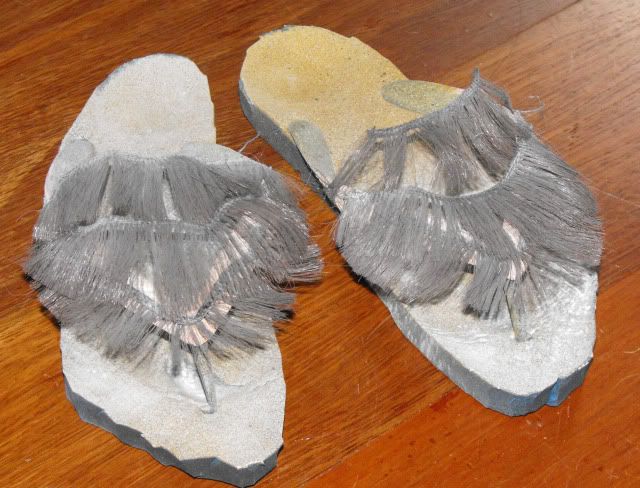
Walking around barefoot, although very common here in New Zealand, I didn't think was practical, so we took a pair of flip-flops (called "jandals" here in New Zealand) and trimmed them to match the outline of her feet (so you wouldn't see the soles sticking out from underneath):

bilbo-feet1.jpg


I then painted the straps a skin-tone, and added some synthetic hair (cut from another wig we had) which I then "greyed" with baby powder:

bilbo-feet2.jpg


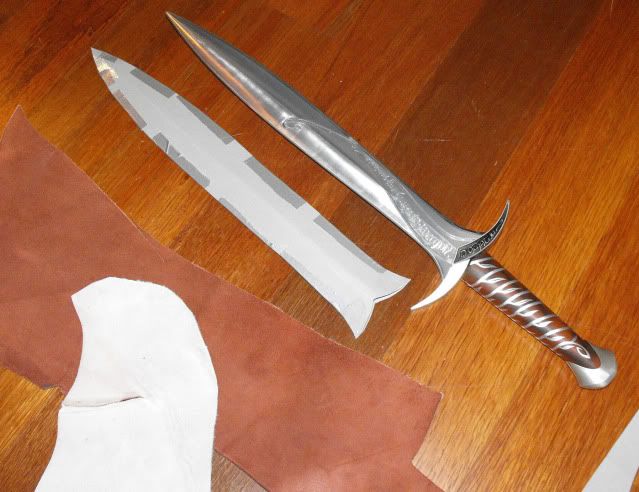
Finding a scabbard for Sting was probably impossible (since I had the larger glowing blade version), so I had to make one quick and cheap. Cut some thick card into the shape of the blade:

sting-sheath1.jpg


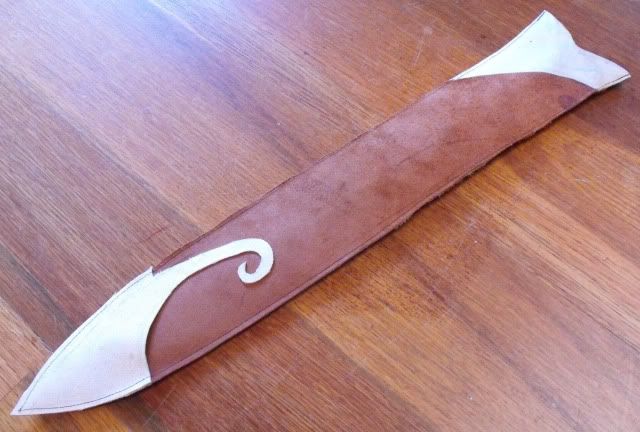
I had some brown leather that I decided to use inside out to get the suede look of the original, but could figure out a quick way of doing the silver parts, so opted to use some leather for those as well (used the white underbelly of another leather I had on hand). I also painted some silver detailing on the white parts, but they were really hard to see:

sting-sheath2.jpg


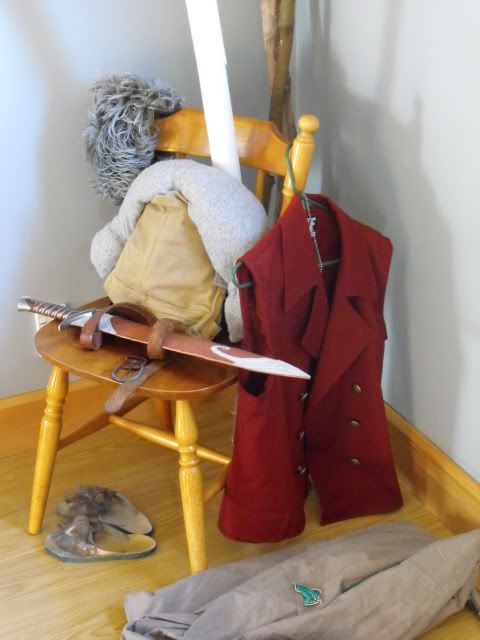
For Bilbo's wig, we had a short/medium length wig in brown, which we lightly curled and then painted white/grey (painted her eyebrows to match). We also added a backpack... I took one of those backpack purse things she had, tied on one of my Indy satchels to it, wrapped some scrap cloth into a "bed roll" and voila, Bilbo Gear:

TolkienQuizNight006.jpg


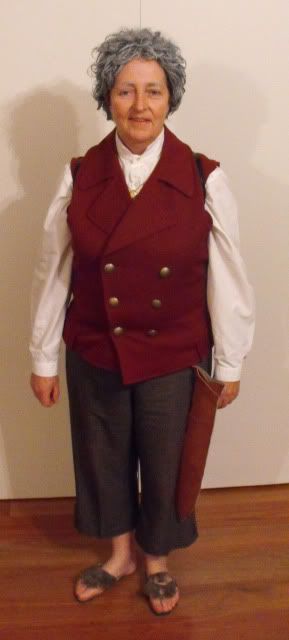
The end result (though without the sword in the scabbard):

BilboBaggins1.jpg


Next up... Uruk Hai.

Kind regards,
Magnoli
 
Last edited:
Your projects are always so inspirational!! Can't wait to see the rest of them!! They look great so far!
 
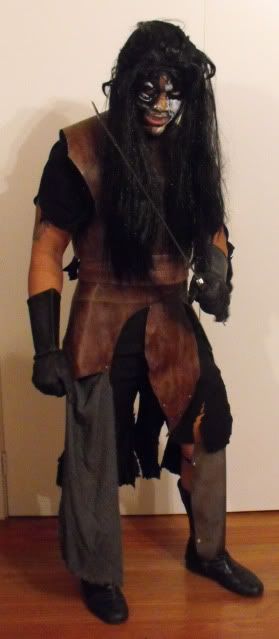
The only "bad guy" on our team this year was an Uruk Hai orc. I based this loosely on Lurtz, but since there are so many orcs, you can't really go wrong...

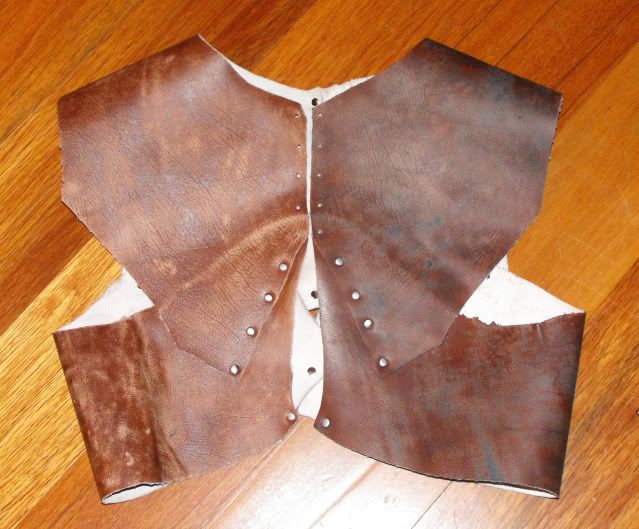
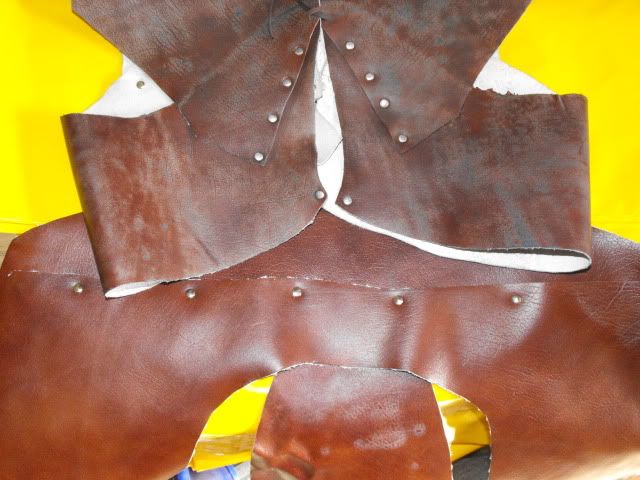
For the "armor" I decided to go all leather since it was what I had mostly on hand and was the quickest thing to work with. So, I started with a bunch of brown leather, a pair of scissors and some rivets. I knew the brown was too light for an orc, so I sanded the brown down and then added some black shoe polish to darken it up. Here is a "before-and-after" of the chest piece:

orc-leather1.jpg


The next photo shows the chest piece aged, but the bottom "loin cloth" part mostly "fresh":

orc-leather2.jpg


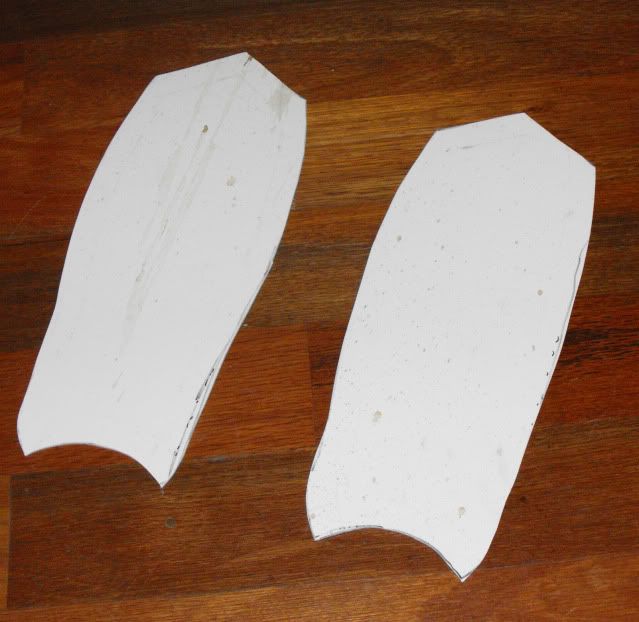
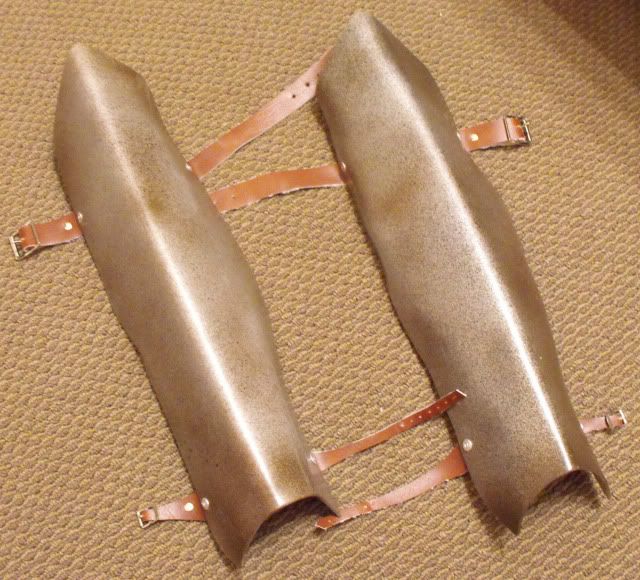
I wanted hard pieces for the shin guards, so I cut some ABS plastic (left over from my Boba Fett project last year, thanks to Blaxmyth):

orc-shins1.jpg


After shaping with a heat gun, some silver, black and brown spray paint and some leather straps and chicago screws, the end result was this:

orc-shins2.jpg


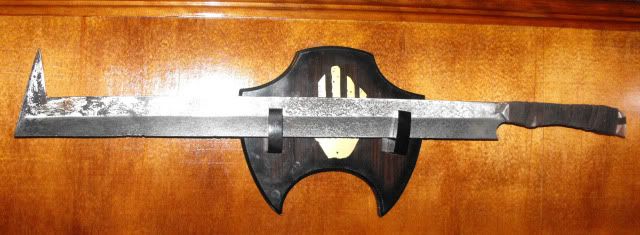
For his sword, I got this cheap knock off in a trade (I think the guy won the auction for like $9):

orc-sword1.jpg


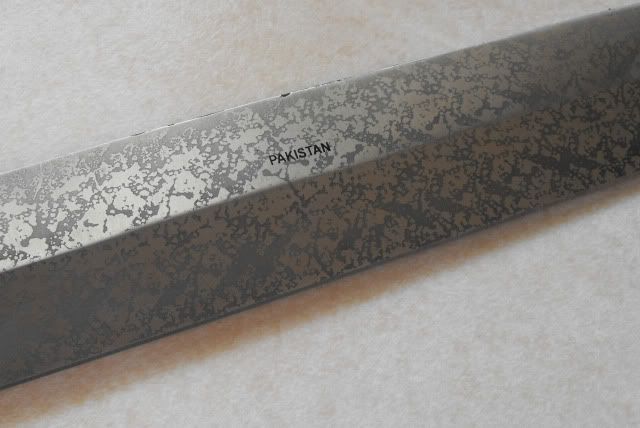
Overall it wasn't too bad for an orc sword. The main problem was the repeating "aging" pattern printed onto the blade and the obvious weld line on the extra point on the tip... not to mention PAKISTAN written on the blade:

orc-sword2.jpg


Pakistan came off in a couple seconds with some steel wool, but the printed "aging" wasn't going to come off without grinding... so I just spray painted patches of black and brown on the blade to cover that and the weld line, dabbing with a cloth as I went to give an irregular aged look.

The suede handle wrap looked pretty authentic as it was, so I just added some Pecards leather dressing to darken it.

orc-sword3.jpg


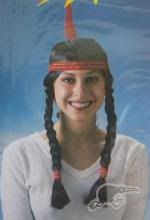
I left they guy who was going to wear this to sort out his own shirt, pants, makeup and wig. He turned up a few days before the night with this:

129825024_full.jpg


But, once we un-plaited the pig-tails, I was surprised how full a wig it was... not as bad as I thought. Unfortunately, on the night, he had most of the hair out and over the front of his armor, instead of over his shoulder... but c'est la vie.

We added a pair of black gauntlets that I've used on tons of different outfits, a pair of black motorcycle boots and some cheap vampire teeth (worn upside down to look more "animalistic" and less "vampire").

I recommend he just put a big white hand print on his face for the make up (since he's a fairly swarthy guy anyway), but he ended up putting some black and brown facepaint as well which ended up causing the hand print to get lost, in my opinion. But... the end result could have been worse:

Uruk1.jpg


Next up... Gandalf.

Kind regards,
Magnoli
 
Last edited:
This is awesome, Indy! Can't wait to see Gandalf's hat - been wanting to do one of those for years. Sing out if I can help in any way. Phil
 
GANDALF:

I can't take all the credit for this one; unlike last year, I had quite a bit of help from my teammates with their costumes. The guy doing Gandalf really gets into it, so when I suggested doing Gandalf, he decided to do both the Grey AND the White (his plan was to change half-way through the evening).

To start us off, we were able to borrow two cassocks (the long garments worn by Catholic priests), one was a "work" cassock so it was a faded black and already had some TLC patches put onto it, the other was a clean white. We had a couple of black belts and a couple of white ones, that we combined to make extra long belts that could be looped over the buckle and dangle down like the originals.

I made a grey cloak last year for our Emperor Palpatine which I knew at the time would make for a great Gandalf cloak:

the-emperor.jpg


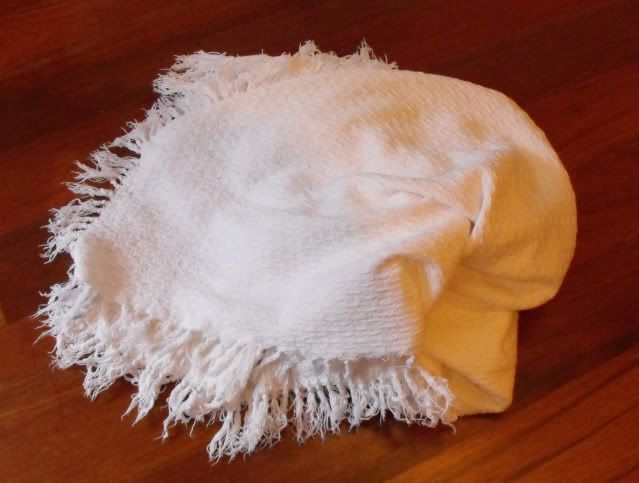
For the white cloak, I found three white blankets at a second hand shop for a few bucks:

gandalf-cape1.jpg


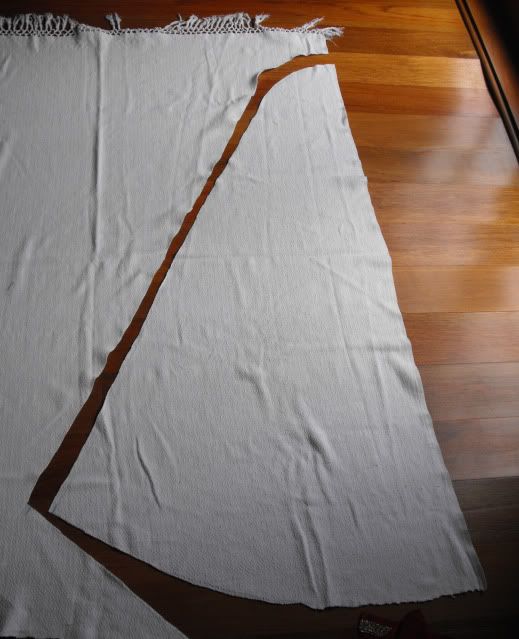
After cutting a few panels (no patterns, just a lot of eye-balling and estimating)...

gandalf-cape2.jpg


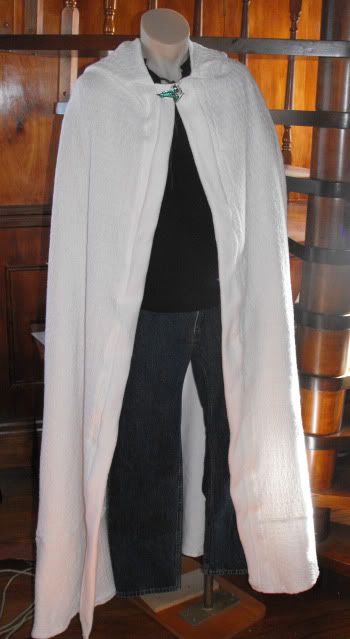
...two blankets for the body, one for the hood and trim, added a fellowship leaf clasp (I know, not accurate, but no one would know):

gandalf-cape3.jpg


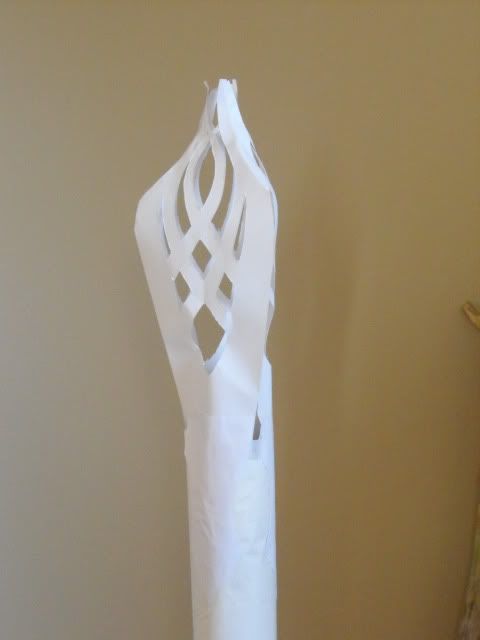
For the staffs, he made the white one at the last minute using paper:

TolkienQuizNight007.jpg


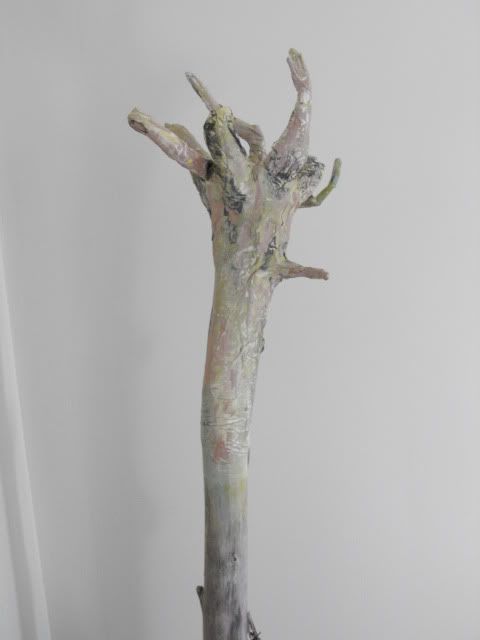
But for the wooden staff, he found an old piece of drift would for the main staff, then made a paper mache top and painted it to match:

TolkienQuizNight001.jpg


I was quite impressed with the finished staff.

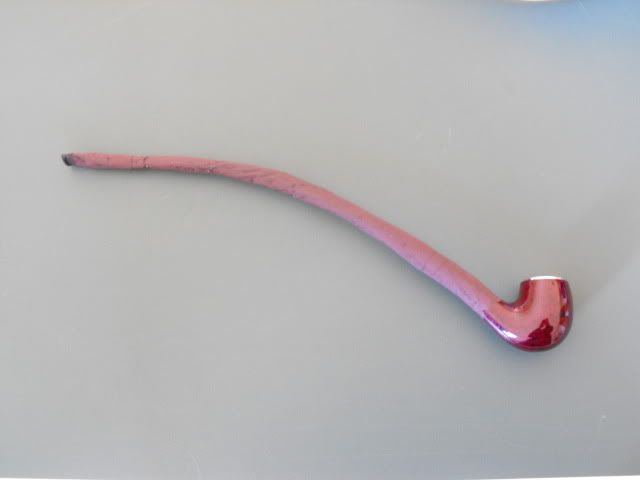
I knew a guy who had a replica of Gandalf's pipe, but... No, our Gandalf wanted to make his own. So... off to the $2 shop to buy a cheap working pipe, cut it down, add some length to the stem, painted it and... voila, a working $2 Gandalf Pipe:

TolkienQuizNight002.jpg


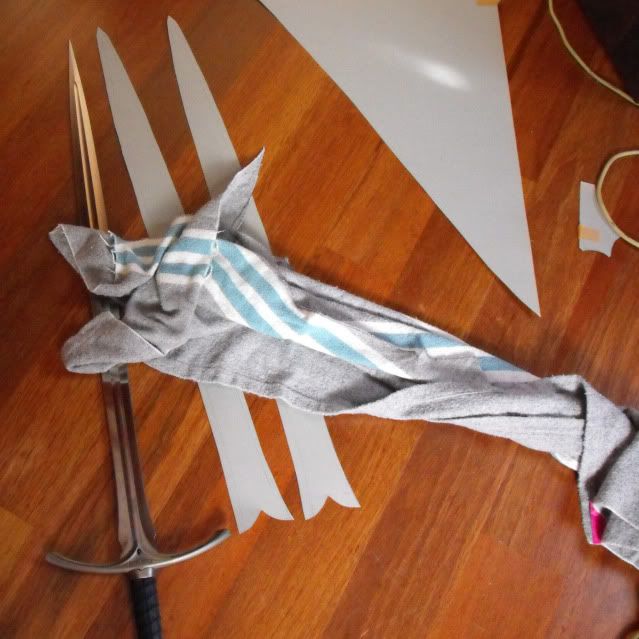
I was able to get Glamdring, Gandalf's sword, in a trade, but it didn't have the scabbard. So, like Sting, I make a card outline, taped the two halves together, added some grey wool (didn't have leather the right color, so used this left over wool from Gandalf's hat) and some dark blue leather at the top and bottom of the sheath.

gandalf-sheath1.jpg


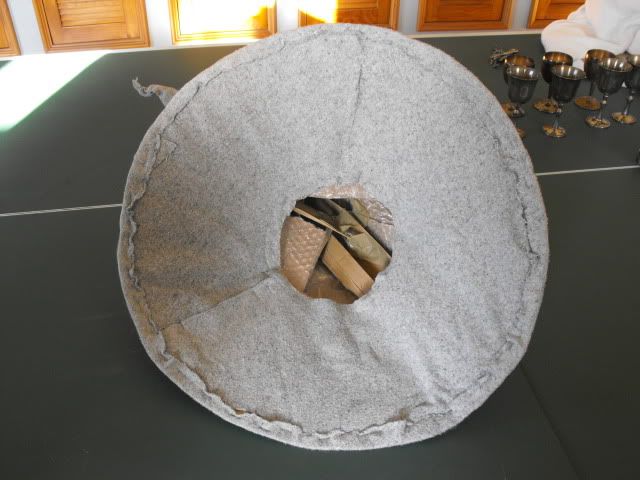
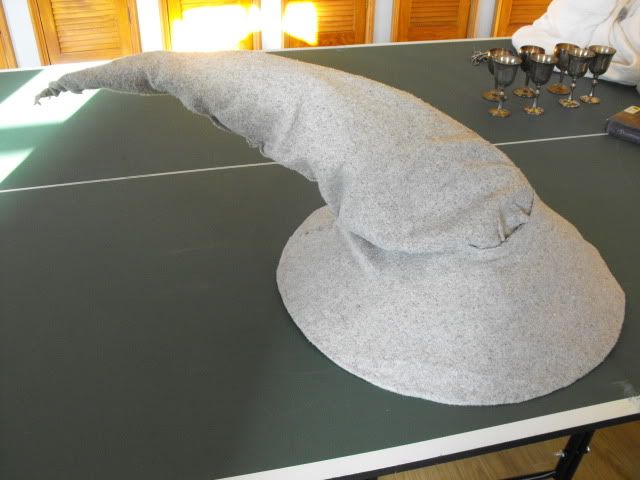
For the hat, our Gandalf made a cardboard "skeleton" and roughly sewed and stapled a butchered grey blanket to form a slightly oversized hat:

TolkienQuizNight004.jpg


TolkienQuizNight003.jpg


We were going to trim it down, but ran out of time... the effect of the large hat worked really well in any case.

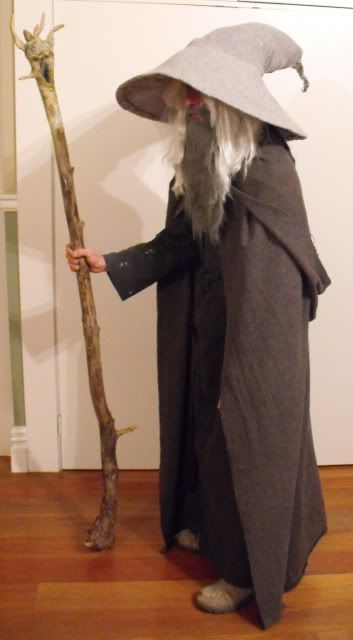
I had a white wig from a Saint Nicholas outfit (just needed to straighten it a bit... again with boiling water) that we used for both versions of Gandalf. For the beard, he combined a few $2 shop wigs to make a long white beard and a really long grey beard.

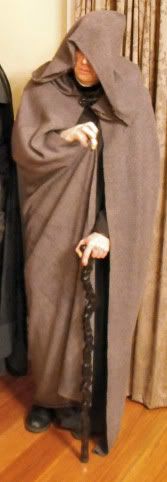
The final effect for Gandalf the Grey:

Gandalf1.jpg


We didn't get any good photos of Gandalf the White as he only changed half-way through the night and we never did a full test-fitting. After the "half-time" break, everyone was seated and ready to begin the next round of the quiz, when Gandalf the White makes his entrance to applause and laughter. I was a little worried no one would notice the transformation, but I was wrong and it went off really well.

Next up... Aragorn.

Kind regards,
Magnoli
 
I was never a big costume-making guy, but you make it look like so much fun that I'm actually tempted to give it a shot. Superb work on all of these. Looking forward to seeing the others.
 
Love it! You're doing great with these. :love LOTR costumes are close to my heart, of course, as is making things from scratch - the way you are putting them together so fast, though VERY inspiring. :D

Thanks for posting the how to's! Great ideas in there!!

(y)thumbsup
 
Now for my own costume... Aragorn:

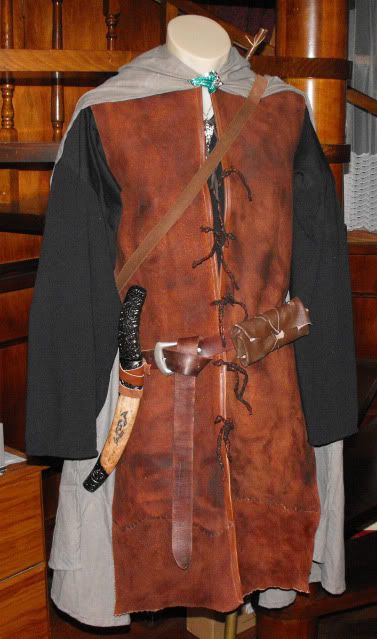
I decided to go with the FOTR Strider outfit as seen in the Amon Hen scenes. I figured this would be the easiest outfit I could do decently as he had shed his jacket and didn't yet have Boromir's bracers.

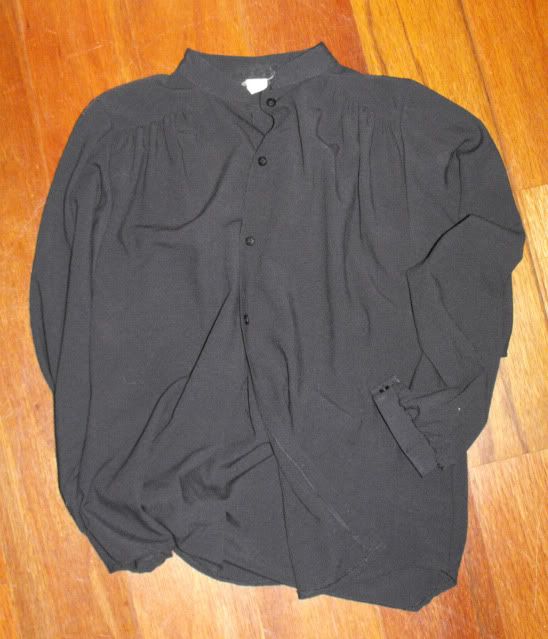
I already had some black pants that would do the trick, and some black Renaissance boots (I just added some leather ties to "flatten" out the top flaps). For the shirt, I found what looked like a "little old lady" shirt at a second hand shop:

aragorn-shirt1.jpg


The sleeves were way too short, so I cut them off at the shoulders and added some cotton twill to the top of the sleeves, then reattached them to the shirt. I cut the original sleeve cuffs off, and hemmed the cuff for a fuller sleeve. I folded the collar in half (horizontally) and stitched it down. I think sewed the front closure down, making the shirt into a tunic, adding more buttons holes on the other side of the shirt, then laced it up with some brown string.

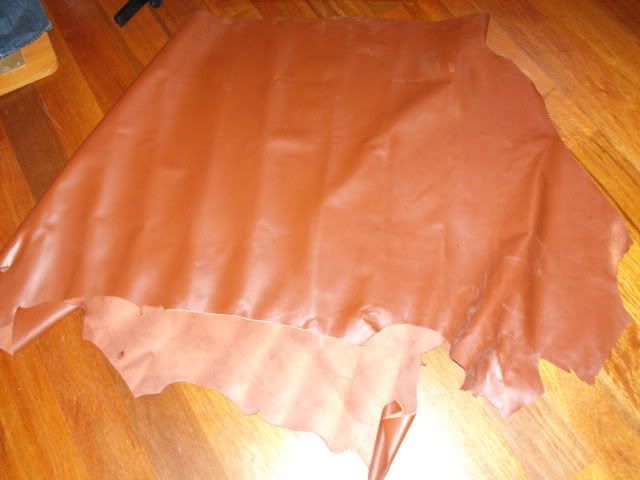
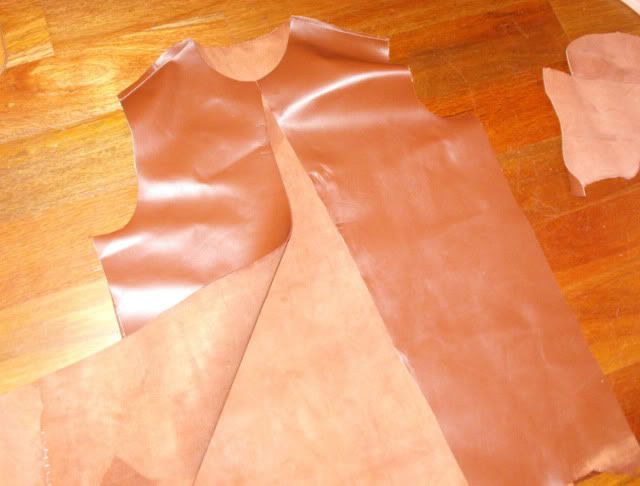
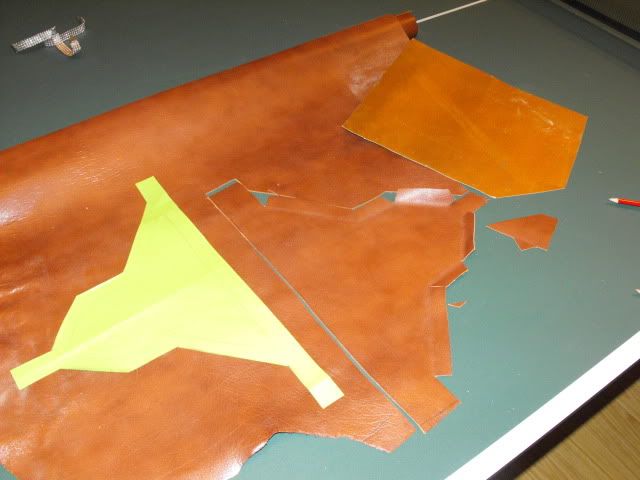
For the leather surcoat, I had a bunch of regular brown leather that had a nice brown underbelly to it:

aragron-leather1.jpg


Using it inside out would produce a decent suede look, although leaving the garment a little stiffer than desired.

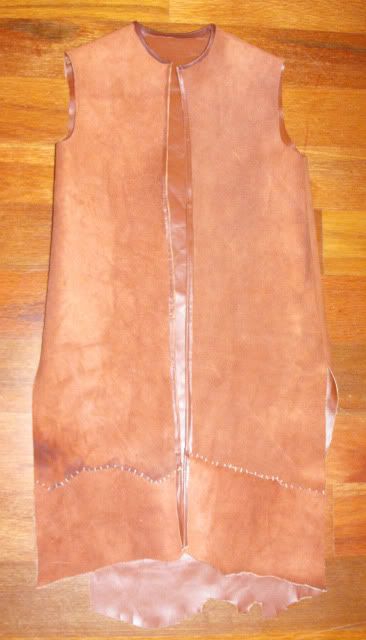
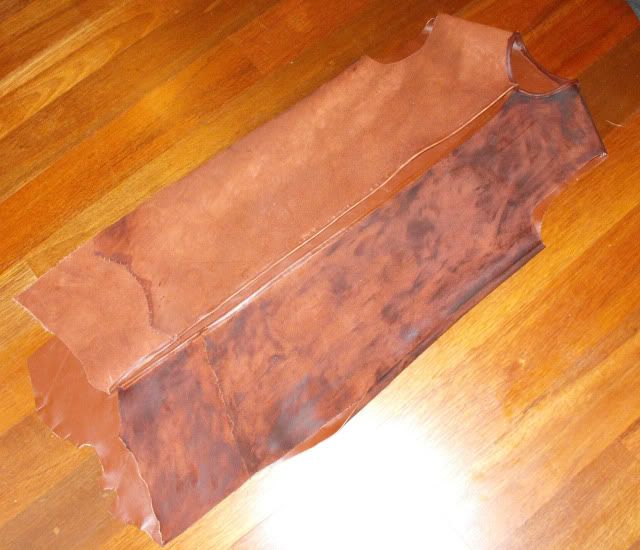
I cut the basic shape out of the leather and starting stitching the seams:

aragorn-leather2.jpg


After extending the front panels with a bit of "frankenstitching", the surcoat really started to look the part:

aragorn-leather3.jpg


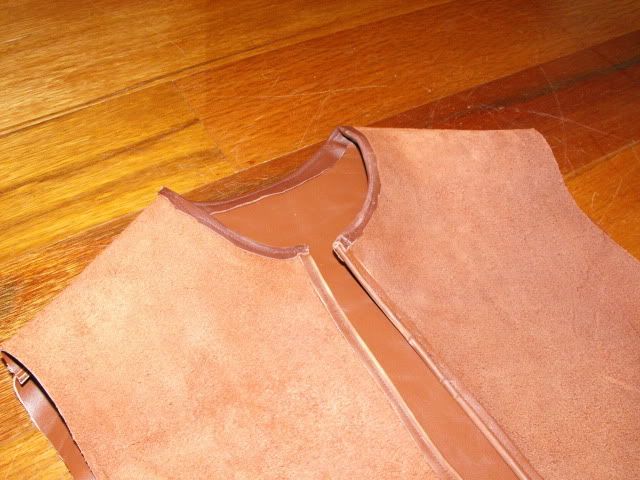
I rolled the edge hem on the front opening but added an extra piping on the neck:

aragorn-leather4.jpg


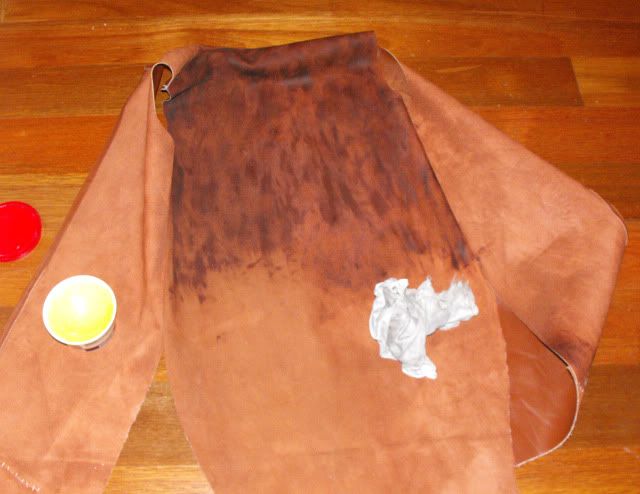
The next step was darkening the surcoat. Adding Pecards leather dressing to the exposed underbelly really darkened it and gave it a well worn look:

aragorn-leather5.jpg


aragorn-leather6.jpg


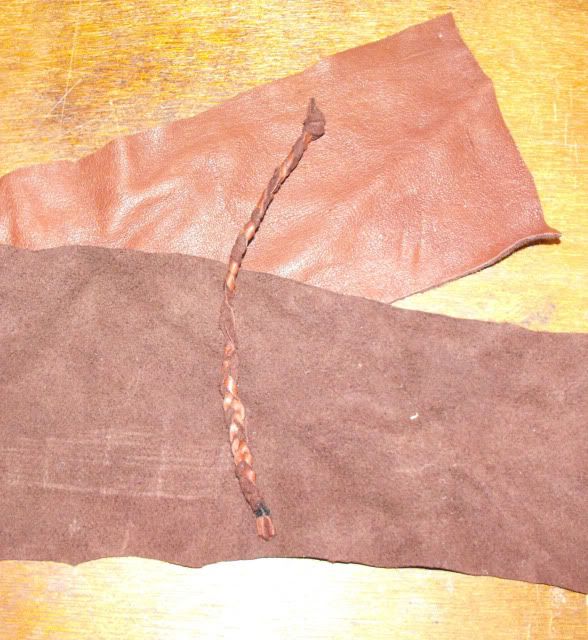
For the leather ties, I took some different, softer leather, cut stripes and braided them to produce:

aragorn-leather-ties.jpg


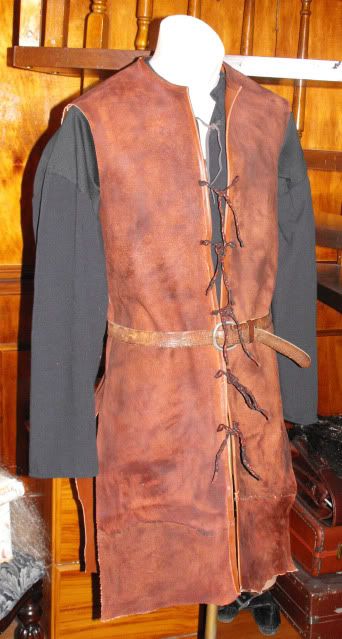
So, shirt and surcoat (with a temporary belt):

aragorn-leather7.jpg


More to come...

Kind regards,
Indy
 
Last edited:
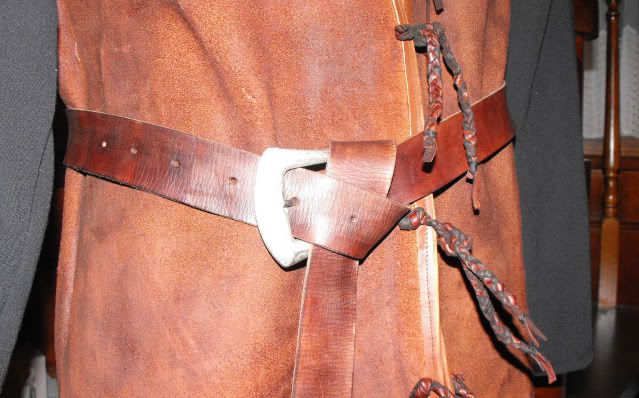
For the belt, I found a cheap belt I cut apart to get the buckle (not screen accurate, but had the look I was going for), dyed a long piece of belting leather, aged it and voila!

aragorn-belt1.jpg


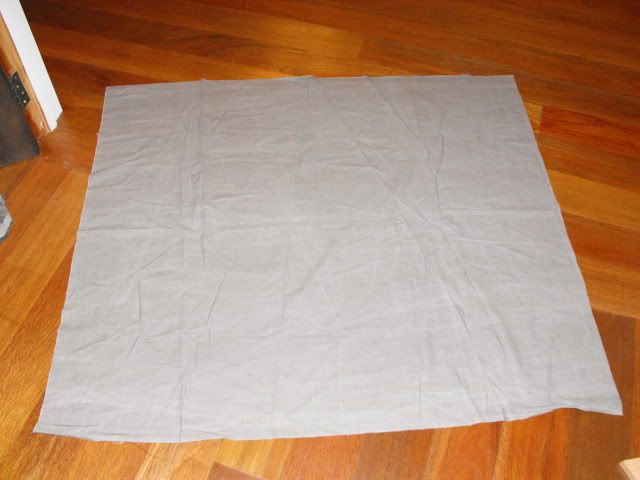
I couldn't find the write material for the cape anywhere (sticking to my rules about low budget, so going to the fabric store and buying several yards of fabric for $10-15 a yard just wouldn't do). A few days before the evening, I popped in to my favorite second-hand store and found a roll of cloth for about $2:

aragorn-cape1.jpg


One thing I've learned about cape-making is that you NEVER have enough cloth. So, my challenge here was to make a long, full cape with a long hood with a tiny amount of material. I made a mini paper pattern to calculate the most economical pattern, which helped a lot in the end. After sewing it up, I added my last Fellowship leaf clasp:

aragorn1-1.jpg


You can also see a generic fantasy knife I borrowed from my brother-in-law in lieu of the elvish knife Strider carries.

I figured I was almost done, but the more I looked at Strider's outfit, the more I realized I needed to have a bunch of stuff on my back for the real Ranger look. So, I grabbed an old army blanket, tied it with one of my Indy bag straps. For the quiver, I took a piece of cardboard, folded it in half, duct taped it and wrapped a piece of green leather, tied on with straps made from the same piece of leather:

0022.jpg


For the bow, I took a piece of bamboo from my backyard, spray painted it black and added a piece of twine for the drawstring and some leather for the grip. For the arrows, I took some smaller pieces of bamboo, spray painted them brown, then sewed on a few feathers I had from some quills I had displayed with my Red Book:

0042.jpg


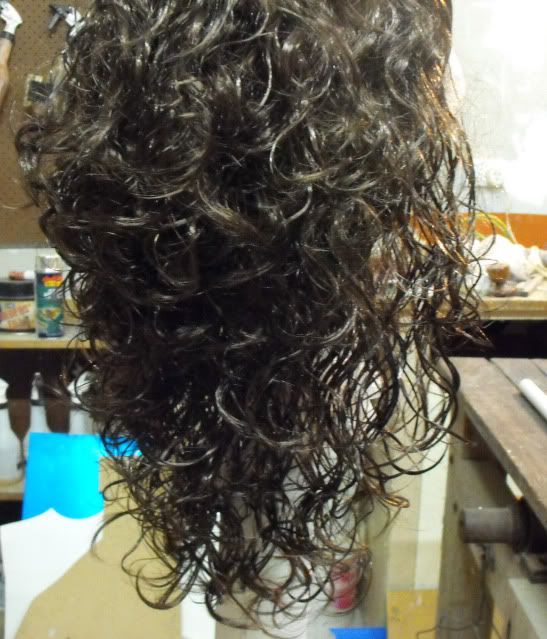
For the wig... I won a really cheap auction for a dark brown wig that reminded me of an 80s rock star. Here's my wife modeling this silly wig for posterity:

aragorn-wig0.jpg


This photo shows how full and wavy the wig was:

aragorn-wig2.jpg


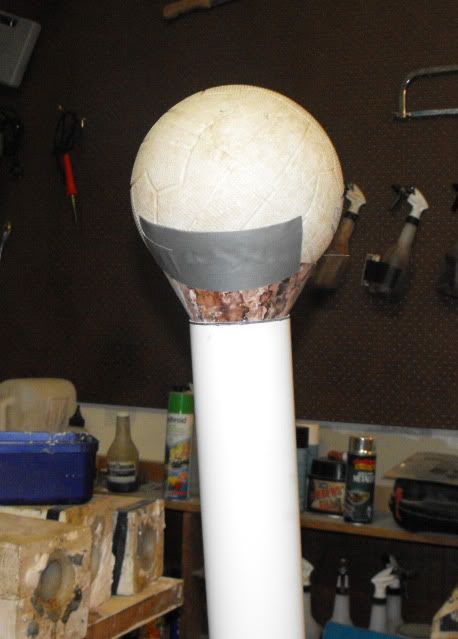
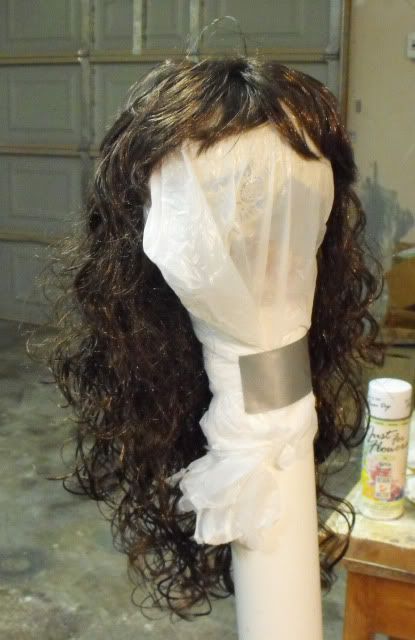
So, the first challenge was straightening the wig. I build a wig "stand" out of a piece of PVC piping, funnel and one of my girls' mini-netballs:

wig-stand.jpg


aragorn-wig1.jpg


I poured boiling water of the wig (three or four times) while combing the wig with a very wide-toothed comb. This really straightened out the wig nicely, while still keeping a bit of wave to the "hair".

The next challenge was thinning it out. Aragorn's hair seemed quite flat and "lifeless", so I ended up unpicking half (if not more) of the hair strands from this wig. I cut the length as well (several times, trimming it to match the photos I had). In the end, I think I shortened it just a tad too much (the problem was probably compounded by my neck, which is a bit longer than Viggo's).

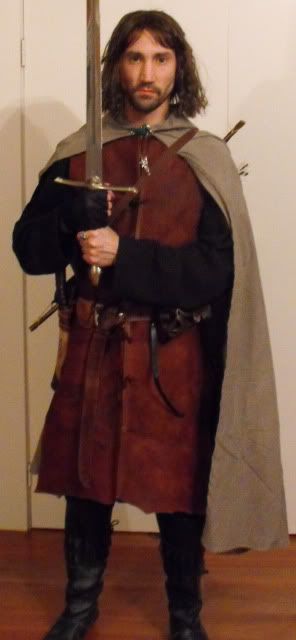
After adding a few other bits and pieces to the belt, etc... as well as blowing off shaving for a few weeks, the end result was:

Aragorn1.jpg


Next up... GIMLI!

Kind regards,
Magnoli
 
Now, on to Gimli...

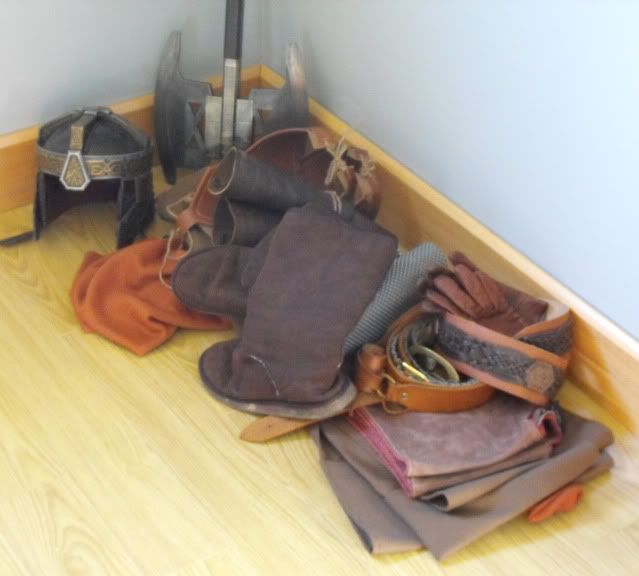
To start: I recommend scrolling back to the first picture in this thread to see what I had to transform into Gimli.

When planning out these costumes, I asked my wife, "So, do you want to be Arwen, Galadriel...?", to which she responded, "I'm always a Queen or a Princess....". I replied, "Ok... I've got another idea". :lol

Now, this costume was very much a recycling of older costume pieces I had, to achieve the basic look. On hand, I had the following pieces:

Gimli's Helmet
Gimli's Axe
Leather Jerkin (Museum Replicas)
Brown Surcoat (made from an old curtain)
Double wrap belt (Museum Replicas)
Leather bracers (hand made over 12 years ago)
Rust brown cape (made from an old curtain)

So, the main things I needed to do was a few bits of leather/armor work and of course, the beard.

I found a really great "fashion" belt at a second hand shop which had these copper pieces that really struck me as Dwarfish. So I added another piece of leather behind the belt to make it wider.

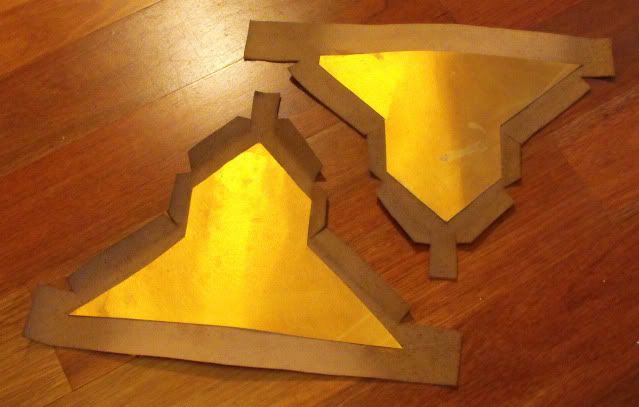
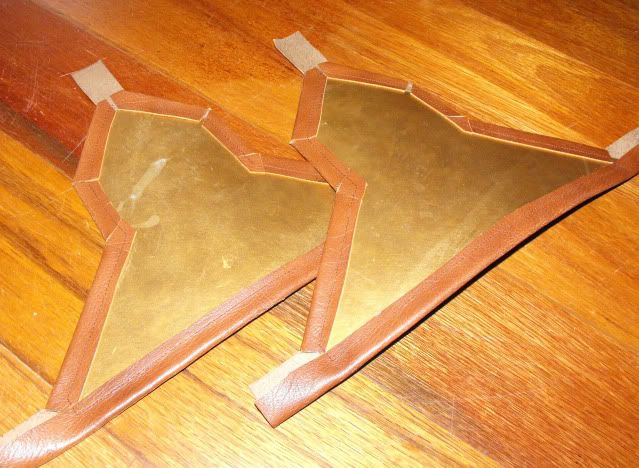
For the shoulder armor, I used some leather and gold-colored card stock:

gimli-shoulder1.jpg


I glued the cardboard to the leather:

gimli-shoulder2.jpg


Then folded the edges over and stitched it down:

gimli-shoulder3.jpg


I used a pencil to "etch" a basic pattern into the cardboard to give a little more depth to the shoulder pieces.

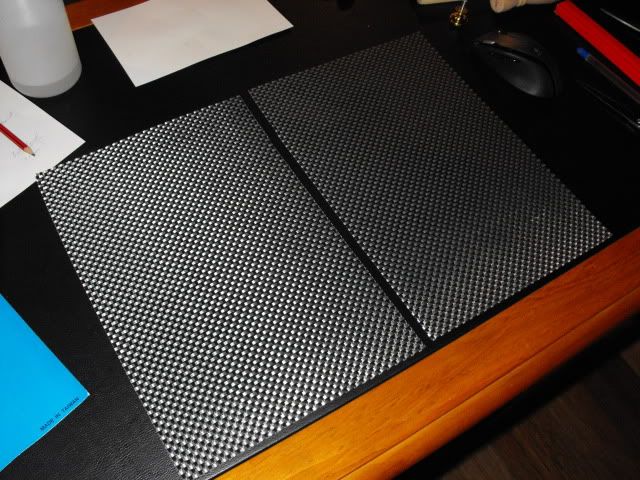
I knew I wouldn't be able to do chain mail cheaply and quickly, so I found a metallic looking woven placemat for a couple dollars that I cut in half:

gimli-chainmail.jpg


...to give the illusion of chain mail around the upper arms.

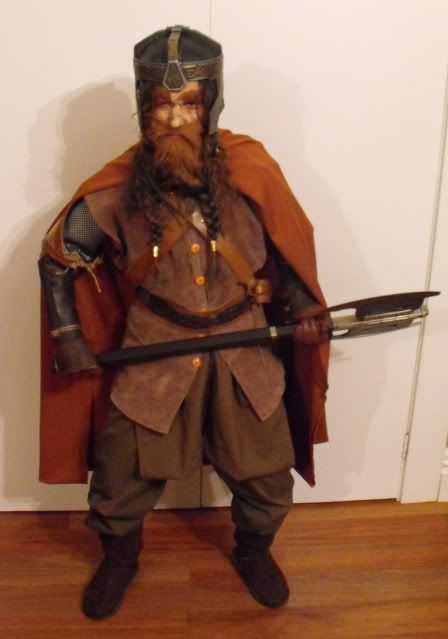
So far, adding a pair of my own brown gloves and some used UGG boots we bought for cheap via auction, this was Gimli's Gear:

TolkienQuizNight005.jpg


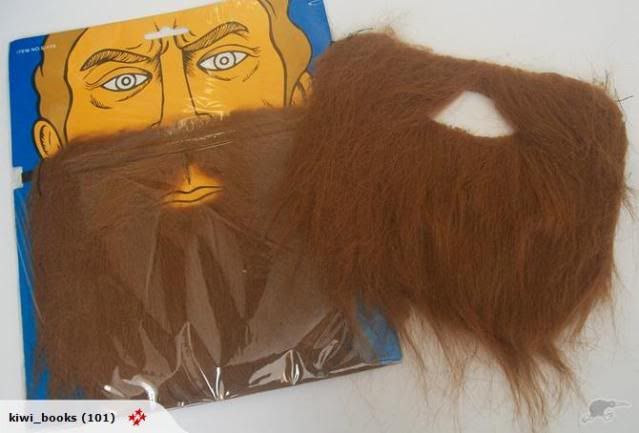
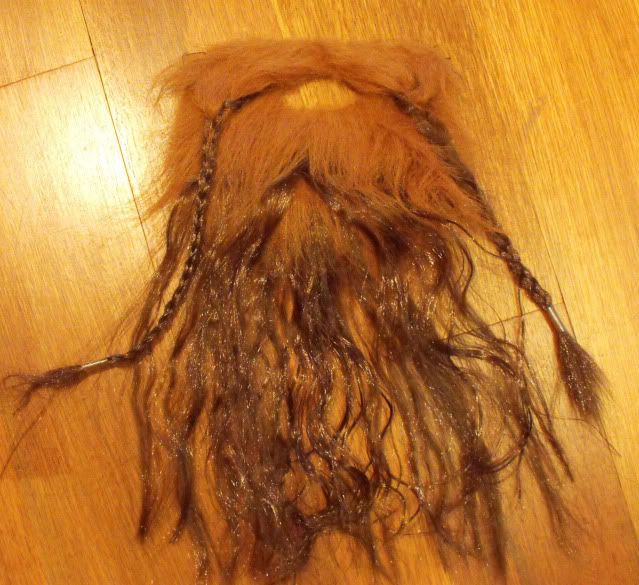
I bought a cheap beard (the same model I used to make my Tsar Nicholas Romanov beard in my first post above):

137864813_full.jpg


I had tons of hair left over from my Aragorn wig pruning, so I began stitching these pieces in layers within the beard. After braiding the mustache:

gimli-beard2.jpg


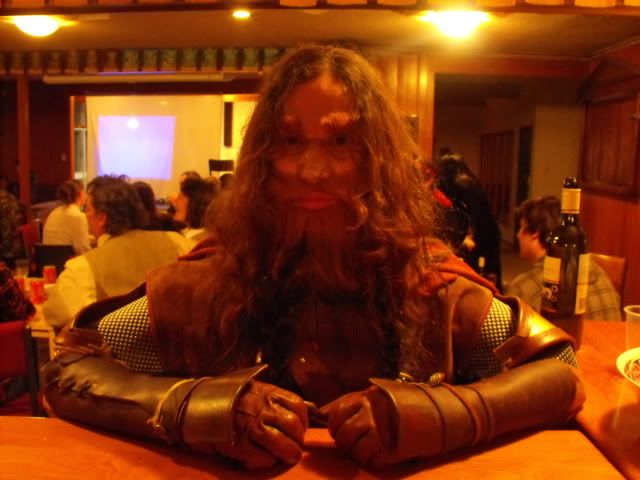
I had some scraps of this beard left over from last year that we made some eyebrows with and with some $2 shop prostetics, a glue stick and some make-up we were able to transform my elegant wife into this:

TolkienQuizNight044.jpg


Gimli1.jpg


This costume was a huge hit, partly because no one expect my wife to turn up dressed like this (quite a few people couldn't figure out who was under all that Gimli even though they know my wife well!).

Kind regards,
Magnoli
 
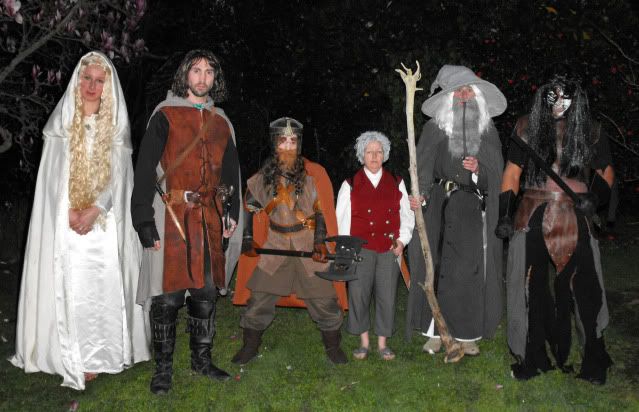
As an epilogue to this adventure in costuming, my wife and I won first prize for best dressed female and male, though our team only ended up ranking 6th out of 14 teams in the actual quiz (last year we took 1st place for the quiz, but lost the costume part of the contest).

And, for fun, here is a photoshopped version of our team (characters resized more accurately):

TolkienQuizNightTeamTolkein.jpg


The larger version can be viewed here: http://i251.photobucket.com/albums/gg291/indy_magnoli/LOTR/TolkienQuizNightTeamTolkein-1.jpg

Kind regards,
Magnoli
 
Back
Top