40k Ignatus Pattern PA

HMZebra

New Member
Hi all, well it's my first post here and my first build so here goes!

I'll be building a suit of Ignatus Pattern Power Armour as my first build, why you ask? Because I want to build a suit of N7, but need to learn the skills prior I feel! Overall it should give me experience in: 3D model manipulation (having to rip my own 3D images and tweak others), Pepakura designer and folder (for the previous and scaling), Pepakura resin/ rondo/ fibre building , Pepakura as a template for foam (to lead into full foam builds), and finally integrating electronics.

Tricky enough for a start? Why not add the factor that I'm a single (Army's POV) JNCO in the British Army and my quarters are a 9ft cube (Rank has it's privilege, otherwise I'd be in a 4man room and this would be impossible!). Should make life fun!

Right, down to the nitty gritty, what exactly is Ignatus Pattern PA? In short it's PA for a non gene-enhanced bod, and it looks a little like this:


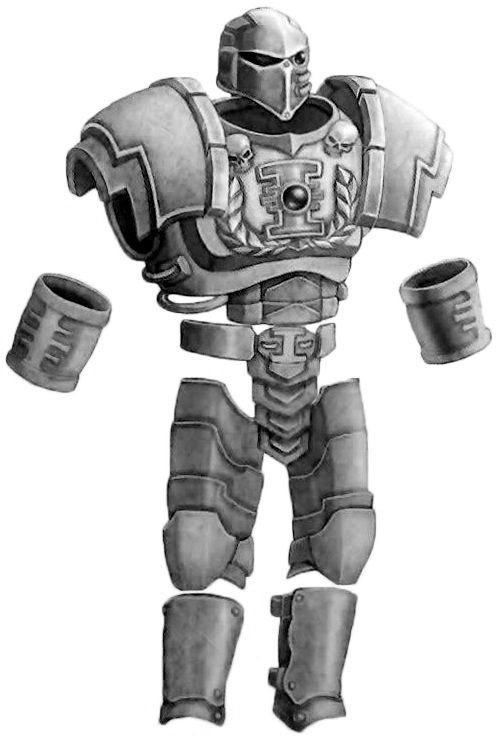
And as it isn't for 8ft super humans, it can be made me sized (6ft4). Also, by most accounts it doesn't come with a backpack, so no taking out unsuspecting civilians!

Where then is this build going to take place? In a corner of my bed space as seen, here!


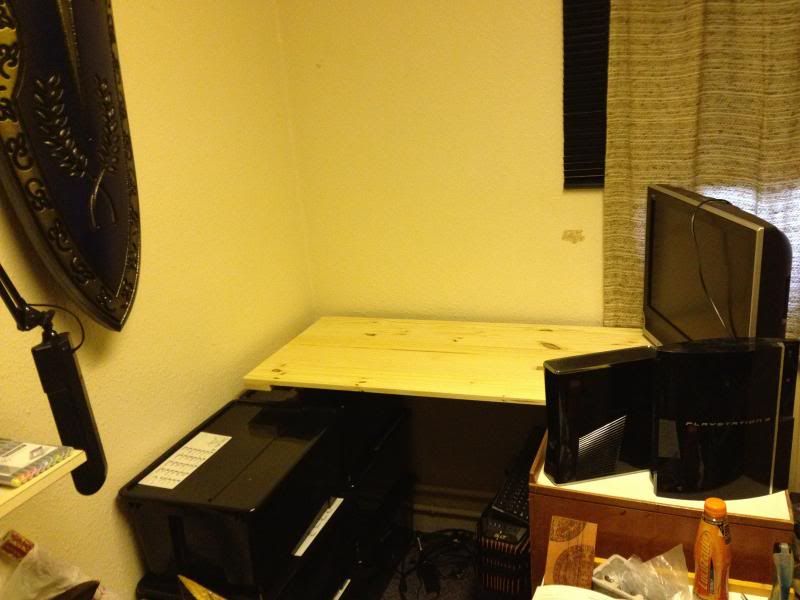
As you can see, it's going to be "an experience" and "character building", just like most other things in the military. Currently the work surface is bonding and will be finalised after COP tomorrow, as it requires a slight lift on the one side.

Ciao for now folks!


Addendum, I'm currently awaiting an admin's action on the Obscurus site as I'll be using a few of their Pep's along the way, and will mirror this there in due time. All credit will be paid to those I stand on the shoulders of!
 
Last edited:
Sadly today was a no-score draw. Whilst I've successfuly got my desk and PC in place (previously I was juggling and tweaking on my laptop, and the desk was bonding for a full 48hrs), I've somehow in the last few months managed to come adrift one printer power cable. Tomorrow morning will be spent trying one of the last places to look, otherwise I may purchase a new printer, which considering the age of the old one might not turn out to be a bad thing.

Also, whilst I've been prying into the .obj file using Blender I've not managed to figure quite how to manipulate it to remove the lower half of the model, so I may have to resort to the tried and true method of spotting which segments go to which part of the model and only printing those.

Still, plans are progress at least!

My intent is to use the following Pep's as initial construction points for the helm and body respectivly. Credit goes to Shiney and Chwwbcc of Obscurus Crusade.


I won't be using the Abs or Diaper from the torso, all I need is the chest, which will be uparmoured with a plate to which freehand foam embellishments will be added.

As for the helm, the basic structure is right. The crown (or air con) ridge will need to be removed, I will also try and find someone who has found an Apothacary helm or similar for the eyepiece. I want to keep that seperate for now as I have plans for that particular part, as it will be an almost full build on its own!


Why is it possibly it's own build do I hear you ask? Because I'd like to incorporate one of these little badgers in it:
http://www.maplin.co.uk/p/chilli-technology-action-camera-3-hd-a15lf

And get a CosPlayers POV on Con's, and take still's or footage for my own records!

I can see this being a Magnet/Magnetic strip job. And for those of you familiar with Wargaming and trying to assemble figures with variable loadouts, you may well se how I'll be approaching this problem.
 
Last edited:
Thanks CLOTHAR :) I'm going to try uploading a vid of my progress at some point, but will settle for a pic. I'm building the GKnight Helm first, and am having fun with the armour seal part. From SM builders POV, do you use the close fit bottom, or do you keep the bottom comparitivly open?

By armour seal I mean where the pen points lower, and more open, slightly higher.


Vid at this time stamp:
Vid Uploading to the tube of you at 99minutes to go.
Vid will eventually be at this link: youtu.be/ZQvRVAivpV8
 
Last edited:
When I built my helm I kept the bottom fully open. Once it was built I made a custom seal/collar that would just slide over my head. I made the collar in two pieces with magnets so that the collar around my neck would easily attach to the bottom of the helmet. I can provide pictures if that doesn't make sense.
 
Fair enough, it sounds sensible nd workable :)


So, Day 3 (effectivly) of the build and I've started the crown of the helm. At this point I'm honestly contemplating pausing and using a baloon to inflate the shape from the inside, having spent a few hours piecing and carefully folding the tabs on the wrong side... Structurally speaking that is. The way I've done it, the vast majority of the tabs are outside. While this makes life easier for the interlocking, it has resulted in minimal assisting force to keep the form.

Plus, as I'm not including the Aircon/Radio crest I've used most of the strips required for this particular part of the build.

I'm going to get Pizza and think about my next step, wether its a pause or a rebuild...


Another Stub Entry.

So, I decided i was unhappy with how the crown went together. So I've decided to Paper mache it a little, and see how the card reacts to a given mix. Worst comes to worse, it's a little distorted and I bulk it up a little, paint it and mount it on the wall as a monument to my sins.

I'm going to buy some superglue tomorrow after work as Masking tape doesnt really cut it.

No pics, the machine spirit in the helmet looks upset.
 
A quick entry before work.

I'm actually pleasently surprised with how well the paper mache version came out. Bearing in mind i didnt have anything save masking tape to support where the (what I'll refer to as) Comms spine should be.

I'll add a second layer in some places, and a first in others using a less dilute mix of PVA as I stopped last night due to slight warping. I ended up using all the metal edges i could find to keep the ears in shape! I think with careful build up, its actually recoverable to a degree.

I've started to recut, having re-folded the helm.pdo (when I'm happy with the final product I'll get a 4shared account and upload my version of Chwbcc's helmet (credit where its due).

Here are some pics with it dry, as of this morning. I believe it workable as a display piece ("battle" damaged), and as a test base for process moving forward.


URL=http://s24.photobucket.com/user/roaringrocker/media/image-1.jpg.html]
image-1.jpg
[/URL

The first was scaled (vertical) to 220, this one is to 240. It looks about right (armour seal issues aside). It also had no Comm Spine, which contributed to the collapse and forward slump of the crown.

Fingers crossed this build will be better!
 
Pics to follow, currently on my mobile.

So, today has been a case of adding to Comm spine and ears. They both went on and the helmet now looks how it should!


The model I'm basing the build on arrived too, sadly it's fi cast and has a little less detail than the original metal but cest la vie.

As you can see from the pic the cloak flows down cleanly, so I feel there's no to minimal extension on the spine, so I'll start that smooth.


I've been thinking (that's what the noise was, not loose change in your gearbox). To add my own flavour I want two helms ultimately, both with a Psychic Hood feel to them. To this end I've added a set of flat planes to the Comm spine that will be matched on the second helm.


The second will consist mainly of the ear, back of the head cradle and the jaw. The flat segments on the Comm Spine will be mirrored, and I'll add several RGB sets with of plugs to go from the helm to an attachable backpiece.

But to return to the present piece. I'm going to carefully add a single layer of paper mâché to bind it together stronger, the single layer will include carefully cut strips to bind notable weak spots such as:
Where the jaw meets the ear,
The ear arch itself,
The back of the jaw.

Adding this layer will also help when I add resin, as it'll stop it finding all the little holes in the crown!
 
Last edited:
Well hello again folks, it's been a few days since my last update.

The helmet has progressed with a paper mache layer to erinforce it whilst I've done some tweaking. I've got 3 pairs of GloSpex on order to work in for hte eyes (most likely will go for blue dispite apparant bleed affects, but we'll see.


I've also put together the first Vambrace (credit to Shiney for the original file and unfold). I did however modify it a little. Sadly to get to my limbs the scale is waaaaaay out of kilter (I'm 6ft4, with lean muscle). So as will be visible from the pic, I've extended the vertical axis by 70mm manually (steel ruler and bic jobby after selective printing.).


Next step for both parts is to resin, then fibre & resin, then bodyfiller&sand.

In between resining and Fibre&Resin for the vambrace however I have one quirk to get in place. I'm going to implant a smart phone in to the darn thing. I have a heavy duty, high impact case that I will cut and create a hole for (backed too) so that I can still be reachable when in costume (pics when its done!)
 
Stub entry:


If the GloSpex dont really work, I've found a set of ballistic goggles from my last Tour that should suffice.


The Eye's have it.
AkA I weep for your world.
 
Good job man. I like to see guys starting off right. Trial and error is the way to go. Finding out what works and doesnt is the way to learn. Keep at it sir.


The above is a pic of the bicep guard from Shineys Arm unfold. I'm going to add one on each arm. It'll hide the cabling for the lighting suite, allowing me to put it overtly on my wrist rather than somewhere else. Hangers for the bicep will be webbing straps and old printer data ribbons as well as other narrow guage electrical cables to help mask the actual cabling.


Concept for the neckseal. currently sparky tape and neodynium magnets. I'll likely recut a new one when it comes to the crunch, but I'll hold onto this for the mean time.

Also, Anyone with advice for battle damage on Fibreglass it'd be useful. I dont want to foam coat this one.
 
So, after an enforced lull, I thought I'd put together something small. So I went for a pistol, at original size its just a wee bit big:


So theres an idea for later.

Then I thought, why not build it on something solid after all I've seen some wooden pistol grip and tmh parts. Then i remembered this:


So I shrunk the scale some and ended up with:


And this is how it looks scaled:


Back
Top