You are using an out of date browser. It may not display this or other websites correctly.
You should upgrade or use an alternative browser.
You should upgrade or use an alternative browser.
1:1 Millennium Falcon Cockpit Replica - Group Build
- Thread starter SteveStarkiller
- Start date
If I ever get to write a Star Wars comic, I'm SO having a shipment of these figure into a plot-line!
I like where you're headed with this... but what will you call them? How about "6RBL-13"
After looking more at the greeblie it looks like some kind of wire terminal...
mattkelly
Well-Known Member
I like where you're headed with this... but what will you call them? How about "6RBL-13"
I will admit, it took a little longer than I wanted to figure out what that meant!
...and I think that's in the realm of possibility.
I will admit, it took a little longer than I wanted to figure out what that meant!
...and I think that's in the realm of possibility.
And I have to admit... It took me a little longer to try to figure out how to write it!
")
I dont know what to even look for... Does anybody have any ideas?
I think we'll have to turn to our resident expert... OK Wavey... go find the part!
Wavey
Sr Member
Them parts do look like they should be on the ends of a 'bus/buzz bar' for wardrobe sized switching boards, as used by a main telephone exchange (such as the G.P.O) - from the days when computers came with a long wooden broom handle incase someone got too close to them. There is a busbar set up in the hold under the electronics that Chewie and Han are welding but the part seems too obvious.... Maybe even a greeblie trap!
...There is a busbar set up in the hold under the electronics that Chewie and Han are welding but the part seems too obvious.... Maybe even a greeblie trap!
Funny you mention that... the greeblie is located there as well mounted vertically the same as in the hold where Han and Leia kiss
Rymo
Sr Member
Actually, the more I look at it, the more it looks like some sort of bearing or clutch housing. Possibly some sort of bracket with a pillow block bearing or clutch attached to each end. Then the wire terminals, or whatever they are, were attached to it's perimeter after the fact. Here's what the part might look like without the terminals surrounding it.

And the round flange things at each end might be part of a clutch or bearing?

And the round flange things at each end might be part of a clutch or bearing?
Last edited:
Hi Gang,
UPDATES - Holes, Paint, Filler, Greeblies and a "giveaway" panel?
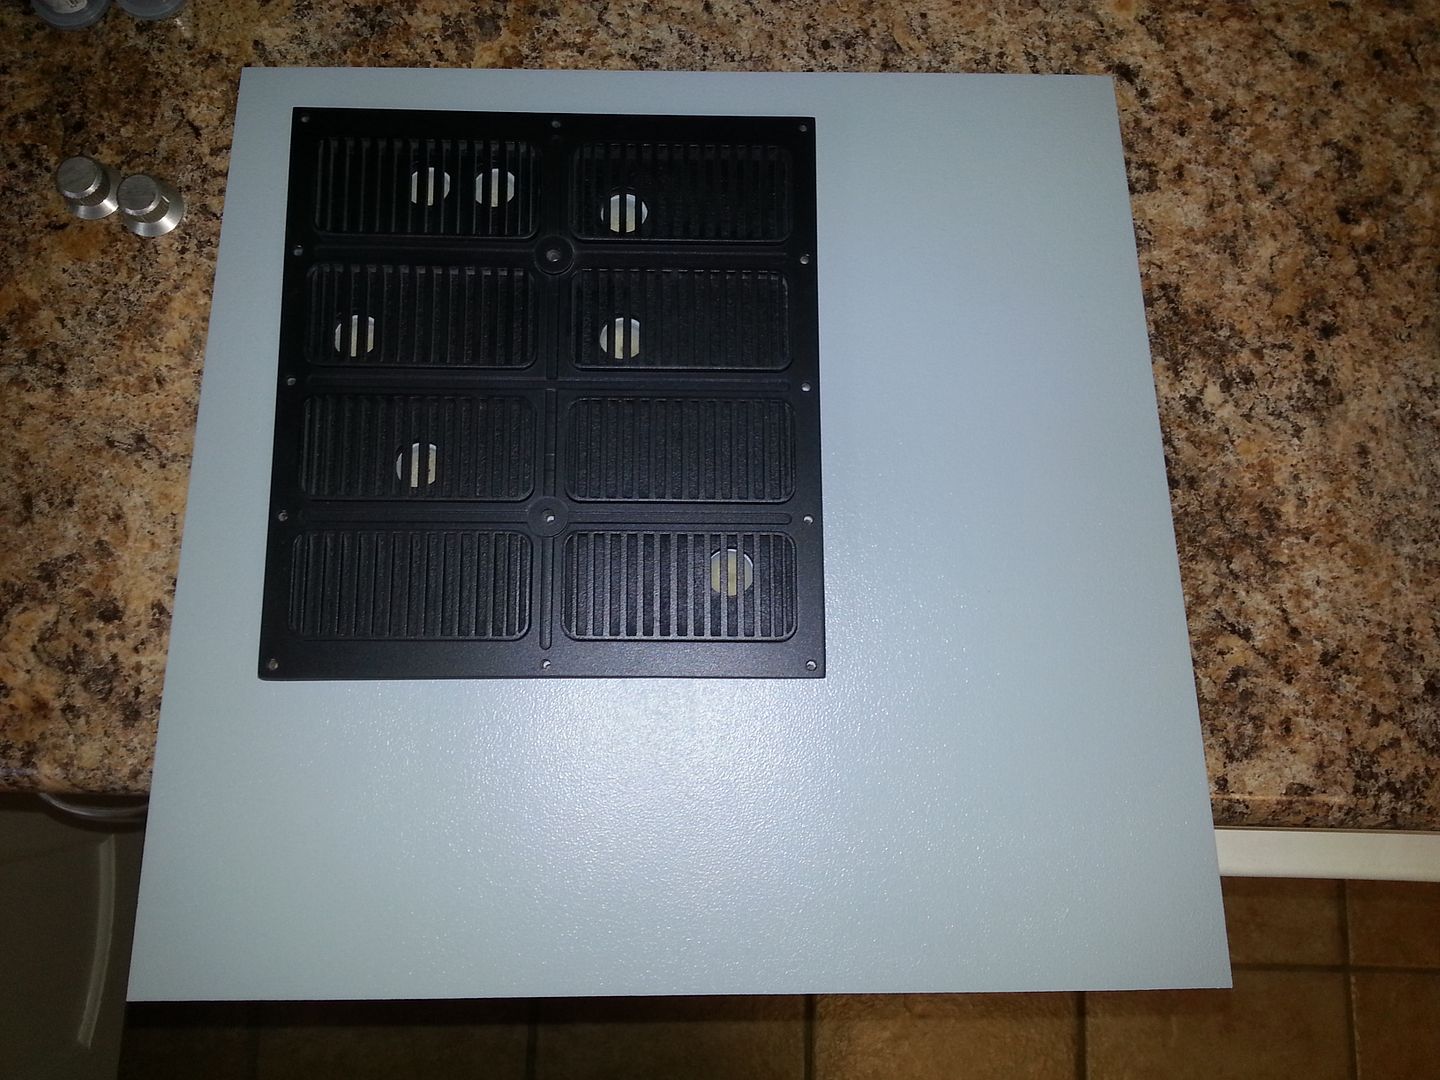
First, I have an extra armrest panel that I am willing to give away (- S&H). OR... I can finish it up with paint, pinstripes and tiles and it can be wall mounted... Interested? Shoot me a PM!
Panel - she needs a good home

UPDATES! Jessie spent several hours at the lab cutting a mess of greeblies - as always a HUGE Thanks to J!
These discs were cut from MDF to fill the holes in the instrument panel


Cover with glue, lightly tap into place and then remove the excess glue

The holes that are still open are now the "top" holes in the panel

Once the glue dried I added filler


Sand smooth, feel for any imperfections then add primer/filler


The primer/filler was key to smoothing this out - it took time for the filler to dry but it turned out perfect!

More and More sanding


Almost there...


Now we cut the new holes


I then flipped the console over and spread glue to the back of the panel where I cut the holes to help stiffen the MDF


We could now mark out the area for the lines of red LEDs


GREEBLIES! For ESB, the original designers changed the console greeblies so now I'm focusing on this design. First off, a new vent type panel for the console nose
Some kind of odd greeblie

1 of 8 vents cut

Basic layout - 1 MDF panel, 1 acrylic panel, 8 MDF vents and 2 acrylic donuts

Those yellow shapes will then bolt into position

Now we transfer the hole pattern to the secondary nose panel


Holes in the panel are now cut - I'll then cut a hole for an LED

Everything still fit?


Sanding the acrylic and prepping for paint

Primed the vents


I then adhered the two panels (MDF and acrylic) together and applied putty on the sides


Access panel

Sides sanded smooth - let's add some primer!

After the primer dried I sanded smooth then painted black


As I was wiping the dust off the brush was leaving a very cool weathered look to the panel

Time to paint the access panel

I applied another layer of the flat black and gently dusted getting a simple weathered effect then added satin clear

LOVE IT!

Showing where the LEDs will shine through

Paying a little homage to the first console I'm going to use these (or similar) for a secondary vent just in front of the LED


More misc greeblies - this is for one of the nose panels

New ESB Ext Panel greeblie found on Han's side

Basic setup

On the inside there is a recessed panel

Adhered


I then designed a donut to fit around the new LED holder/lenses. It will hide the paint imperfections but also black out a little of the LED light shinning through. But I think they need to be a bit thicker

They will be painted black

Jessie also cut this new center console greeblie

Primed

Painted


Sanded smooth and then added silver paint

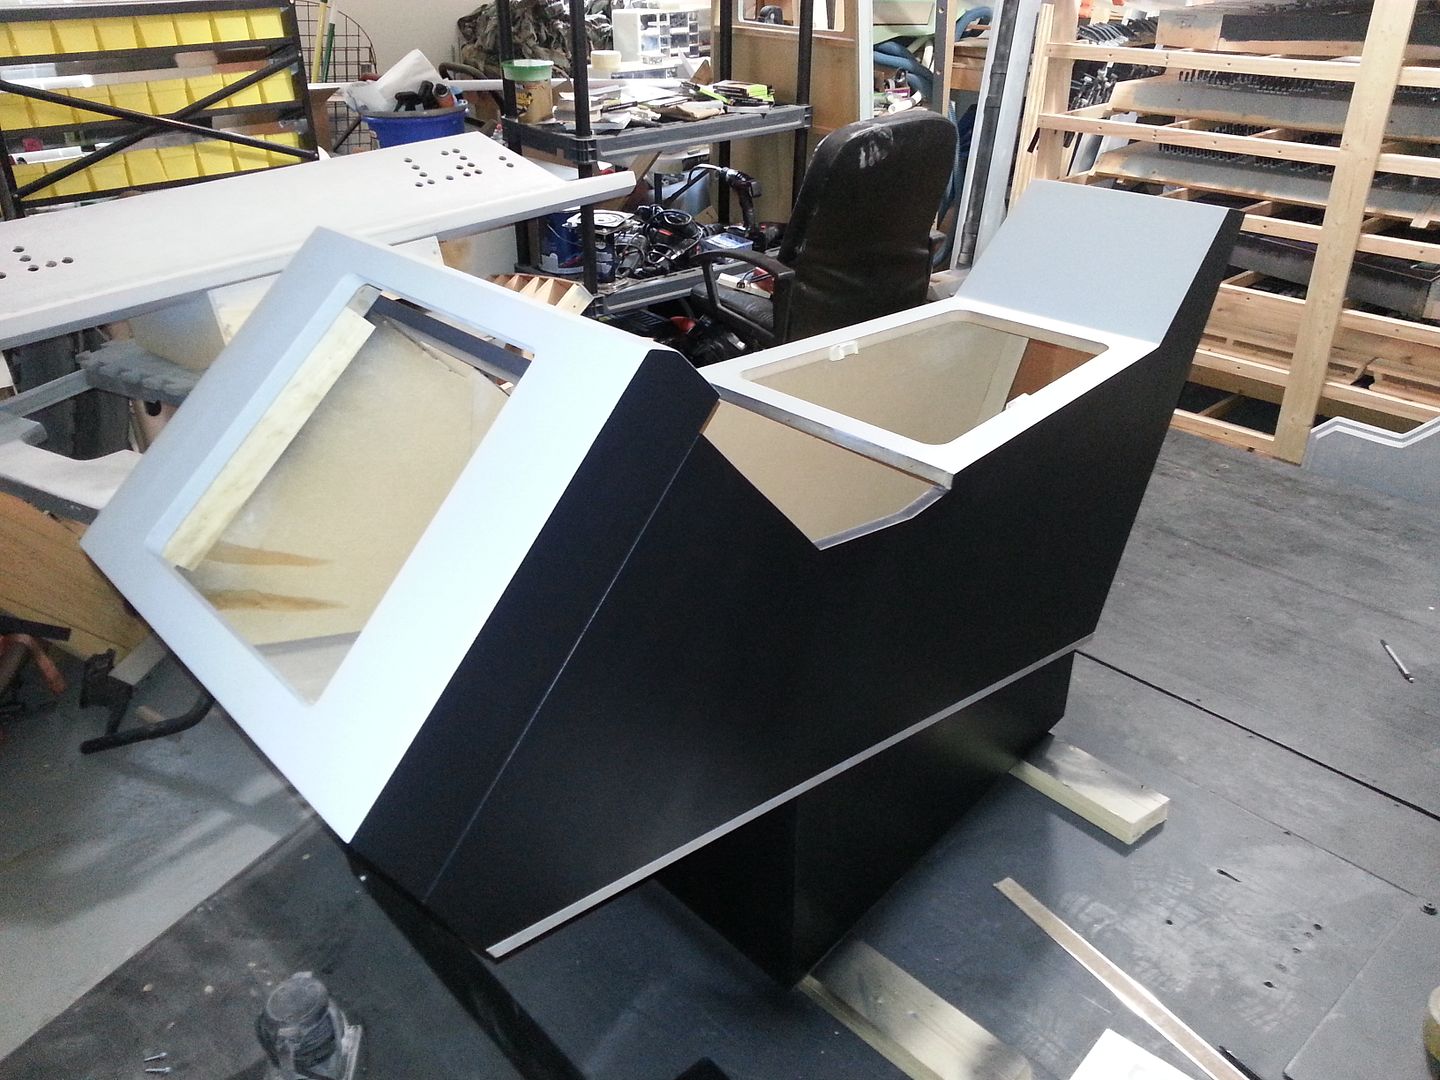
I'm going to great lengths to make this console near perfect. Although the original was quickly put together, I wanted to give the impression this was all done using a machine. So, I'm creating a very solid and smooth throttle housing... more on this later

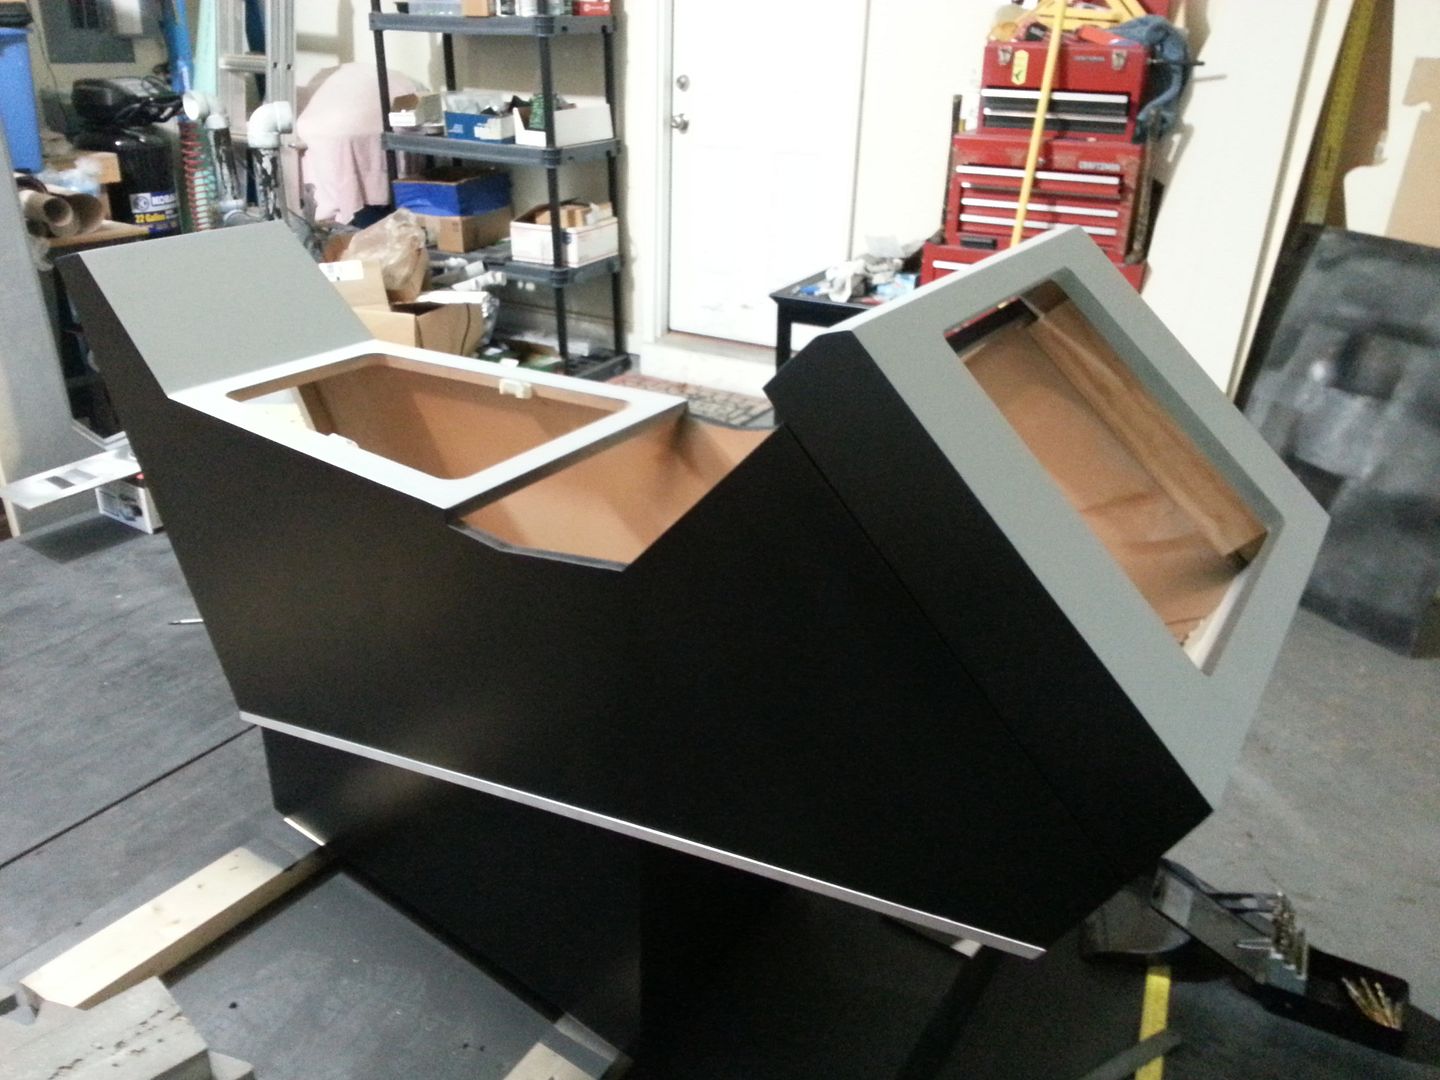
It was then time to address the console paint... I sanded the house paint smooth

The sprayed several coats of the flat black to match the armrest panel - the next cockpit will be painted the same way

Look at that! Nice...


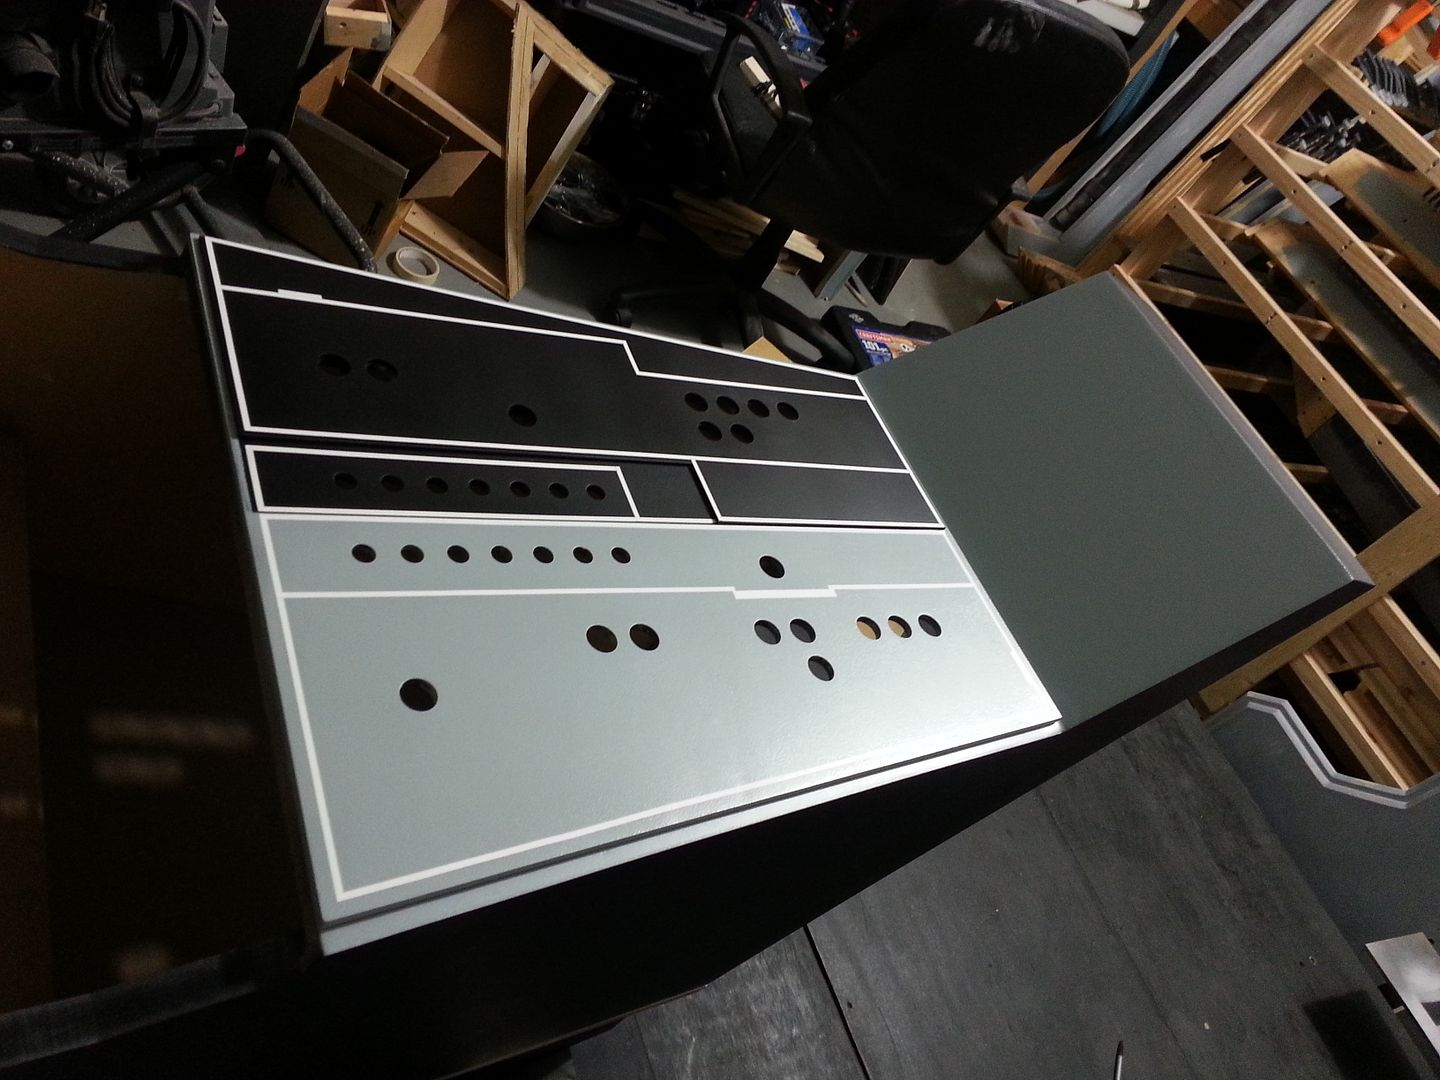
After several coats of satin clear I put the "L" piece back on

Getting her ready for the next phase

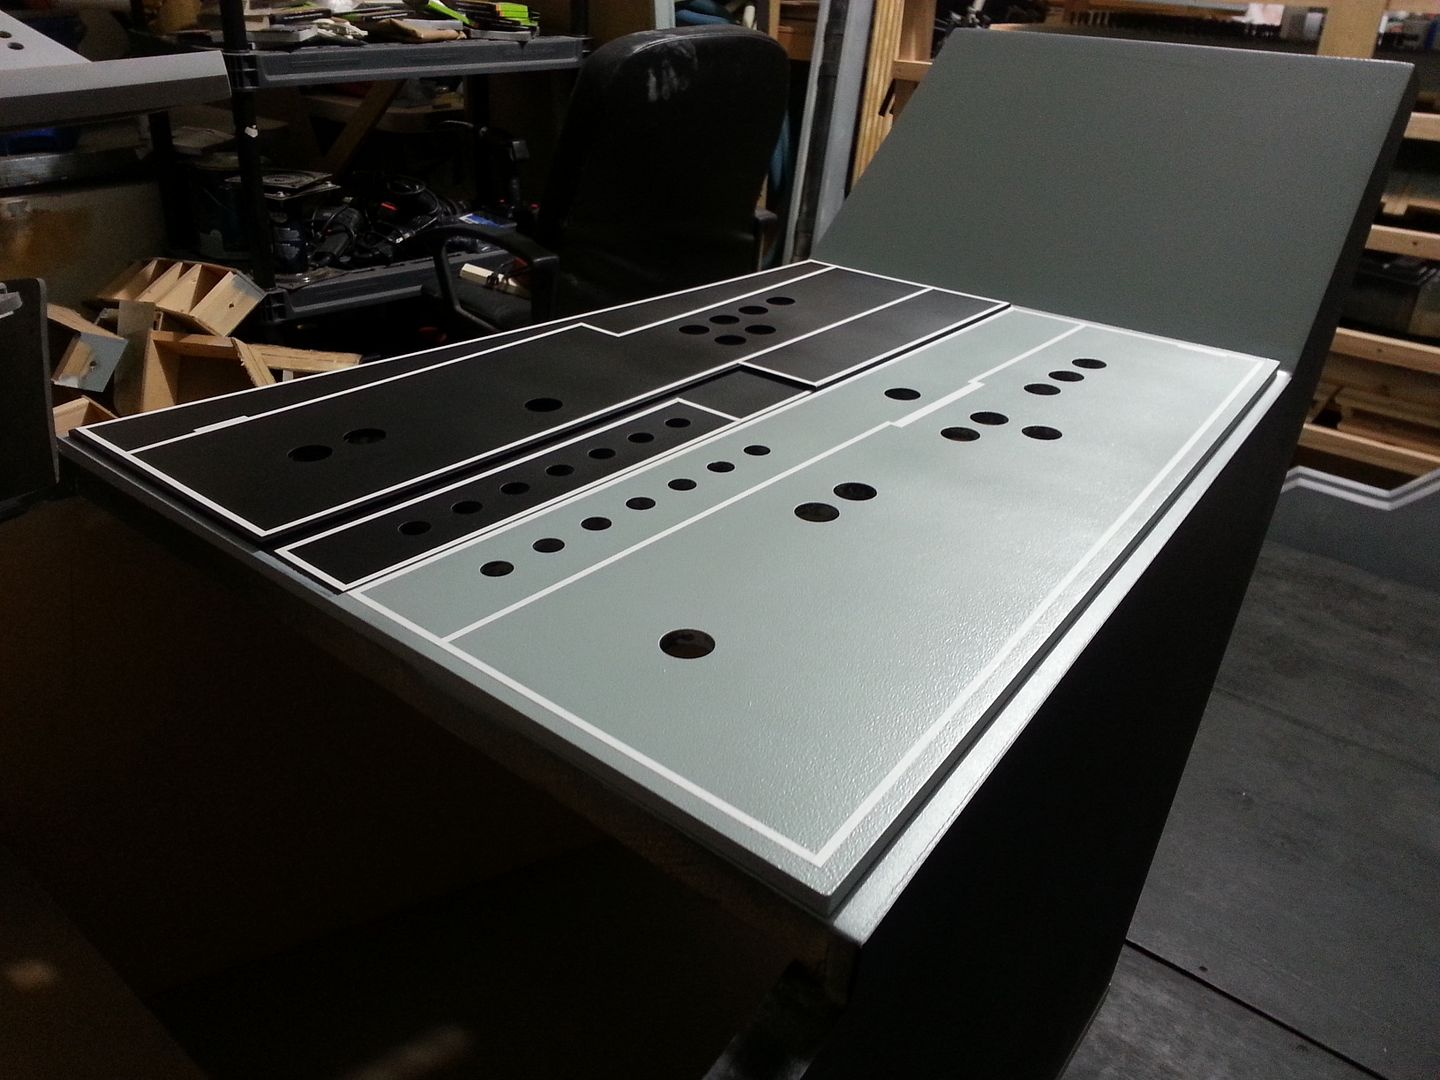
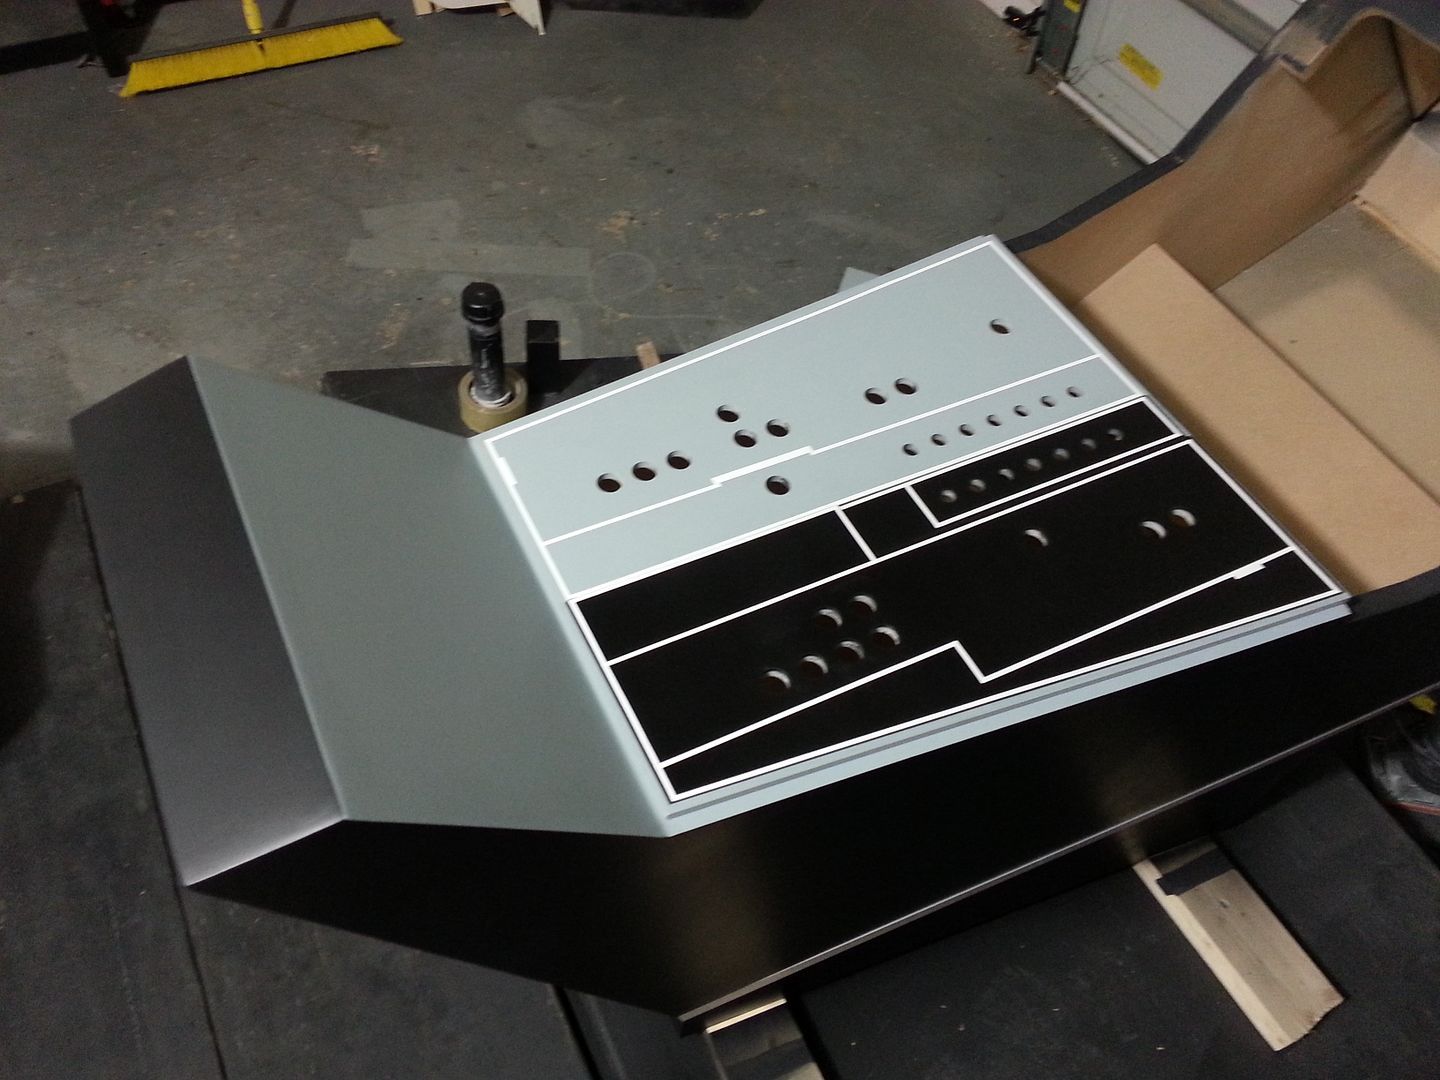
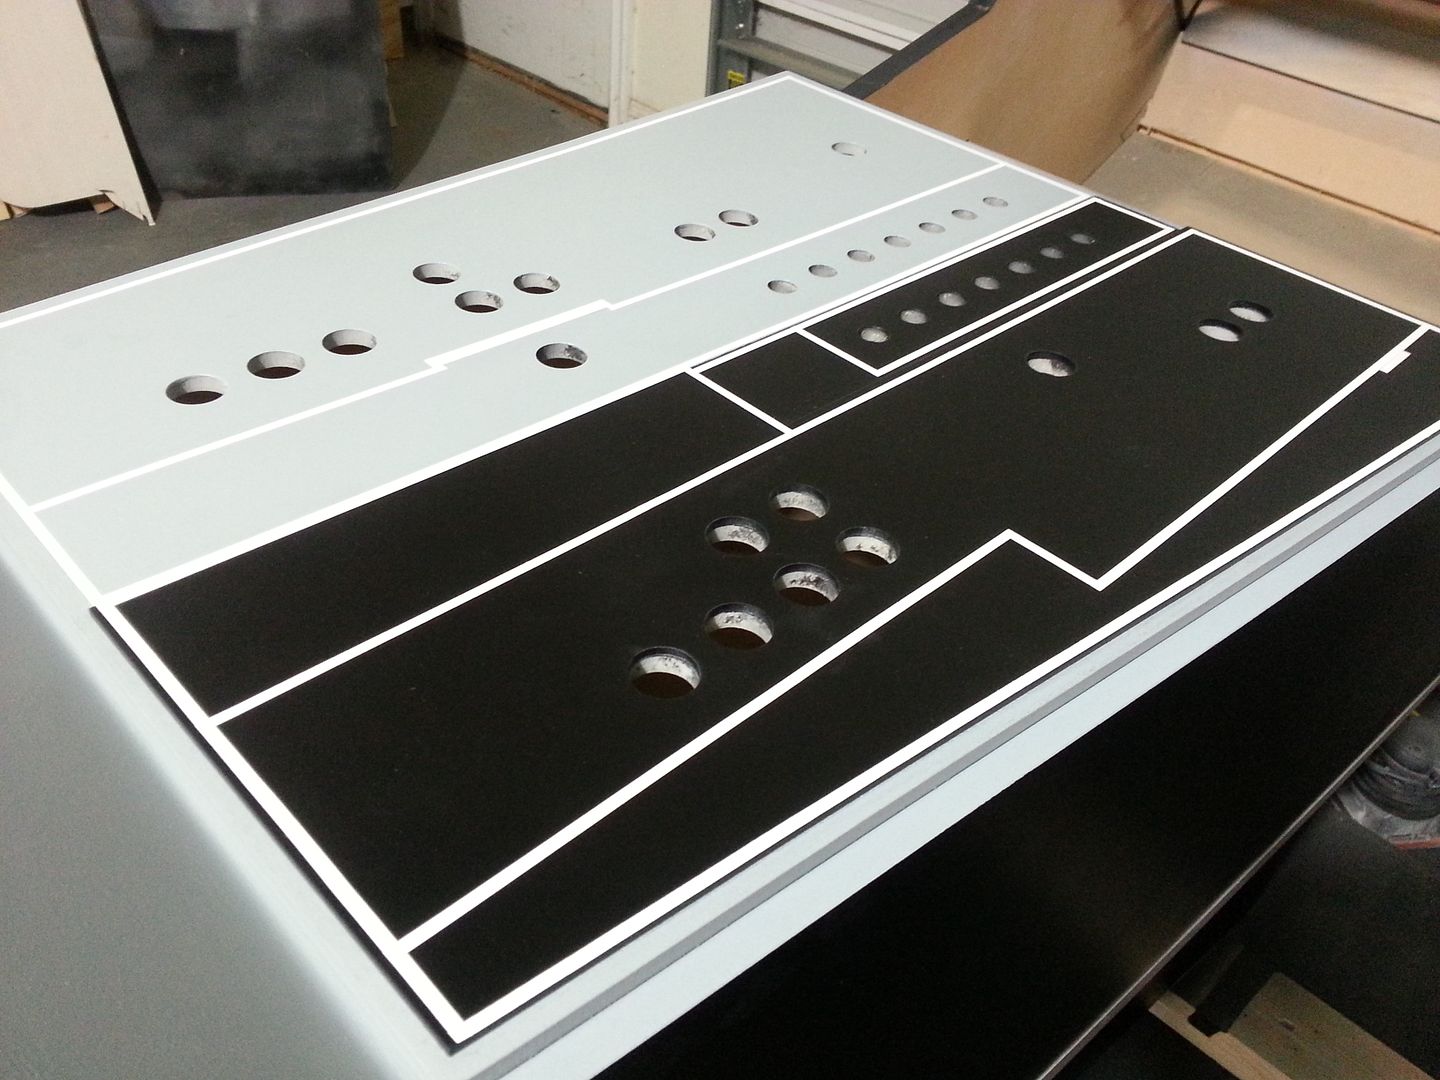
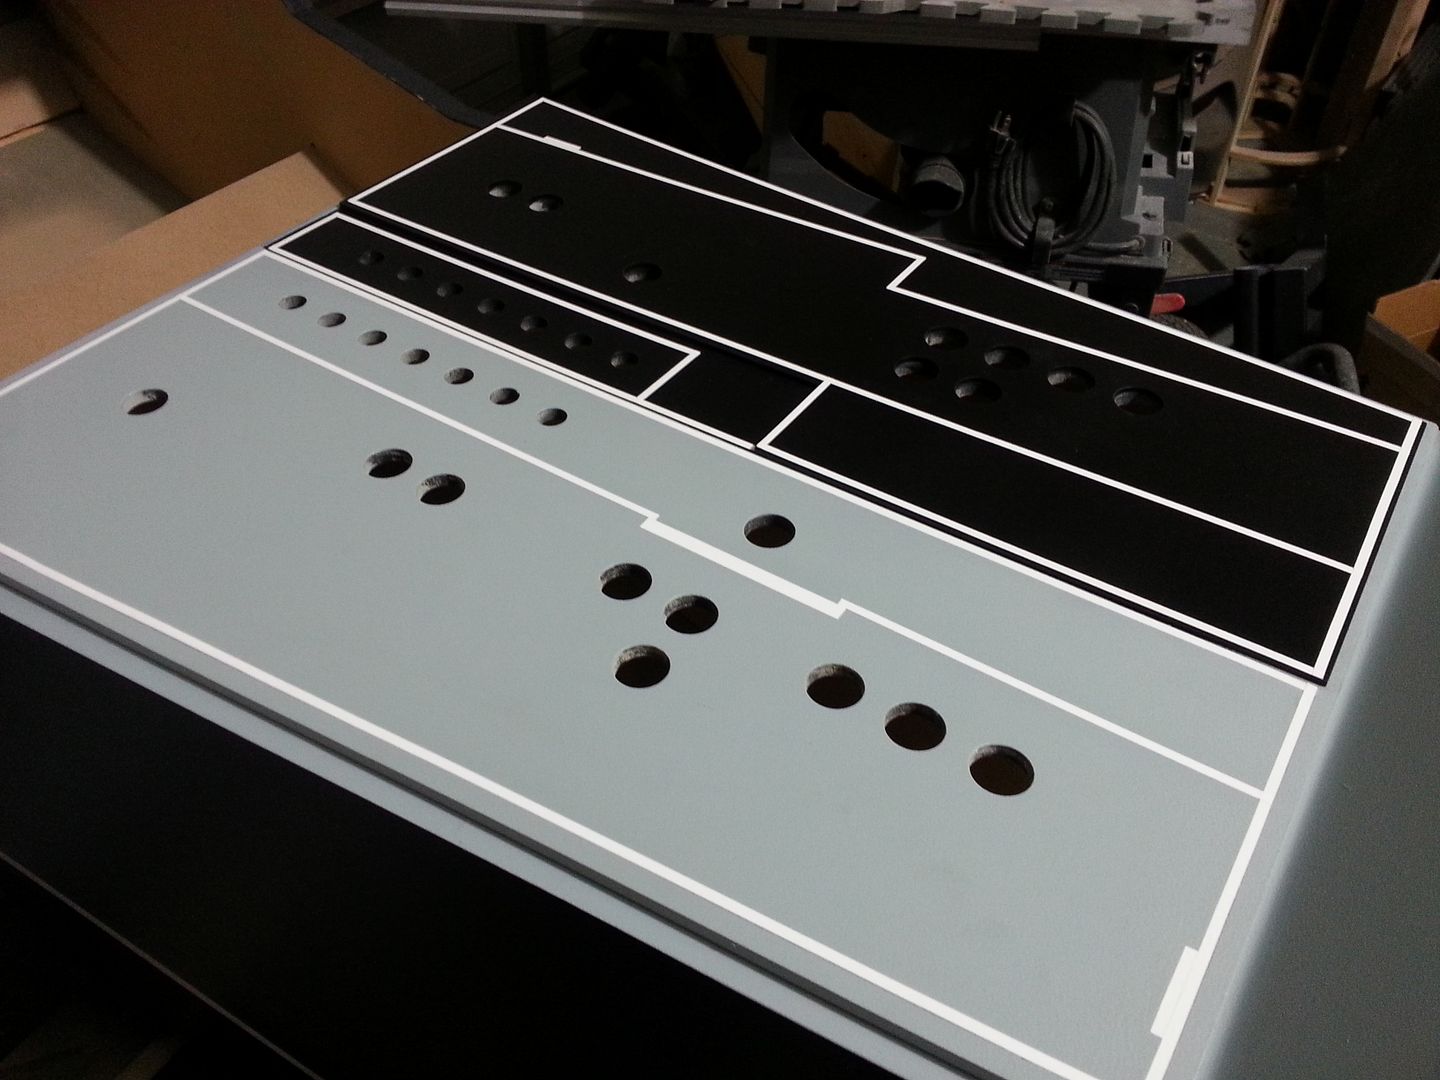
Taped off and added the light grey


Slight touchup work needed


And that's where we are... WHEW... More to Follow!
UPDATES - Holes, Paint, Filler, Greeblies and a "giveaway" panel?
First, I have an extra armrest panel that I am willing to give away (- S&H). OR... I can finish it up with paint, pinstripes and tiles and it can be wall mounted... Interested? Shoot me a PM!
Panel - she needs a good home
UPDATES! Jessie spent several hours at the lab cutting a mess of greeblies - as always a HUGE Thanks to J!
These discs were cut from MDF to fill the holes in the instrument panel
Cover with glue, lightly tap into place and then remove the excess glue
The holes that are still open are now the "top" holes in the panel
Once the glue dried I added filler
Sand smooth, feel for any imperfections then add primer/filler
The primer/filler was key to smoothing this out - it took time for the filler to dry but it turned out perfect!
More and More sanding
Almost there...
Now we cut the new holes
I then flipped the console over and spread glue to the back of the panel where I cut the holes to help stiffen the MDF
We could now mark out the area for the lines of red LEDs
GREEBLIES! For ESB, the original designers changed the console greeblies so now I'm focusing on this design. First off, a new vent type panel for the console nose
Some kind of odd greeblie
1 of 8 vents cut
Basic layout - 1 MDF panel, 1 acrylic panel, 8 MDF vents and 2 acrylic donuts
Those yellow shapes will then bolt into position
Now we transfer the hole pattern to the secondary nose panel
Holes in the panel are now cut - I'll then cut a hole for an LED
Everything still fit?
Sanding the acrylic and prepping for paint
Primed the vents
I then adhered the two panels (MDF and acrylic) together and applied putty on the sides
Access panel
Sides sanded smooth - let's add some primer!
After the primer dried I sanded smooth then painted black
As I was wiping the dust off the brush was leaving a very cool weathered look to the panel
Time to paint the access panel
I applied another layer of the flat black and gently dusted getting a simple weathered effect then added satin clear
LOVE IT!
Showing where the LEDs will shine through
Paying a little homage to the first console I'm going to use these (or similar) for a secondary vent just in front of the LED
More misc greeblies - this is for one of the nose panels
New ESB Ext Panel greeblie found on Han's side
Basic setup
On the inside there is a recessed panel
Adhered
I then designed a donut to fit around the new LED holder/lenses. It will hide the paint imperfections but also black out a little of the LED light shinning through. But I think they need to be a bit thicker
They will be painted black
Jessie also cut this new center console greeblie
Primed
Painted
Sanded smooth and then added silver paint
I'm going to great lengths to make this console near perfect. Although the original was quickly put together, I wanted to give the impression this was all done using a machine. So, I'm creating a very solid and smooth throttle housing... more on this later
It was then time to address the console paint... I sanded the house paint smooth
The sprayed several coats of the flat black to match the armrest panel - the next cockpit will be painted the same way
Look at that! Nice...
After several coats of satin clear I put the "L" piece back on
Getting her ready for the next phase
Taped off and added the light grey
Slight touchup work needed
And that's where we are... WHEW... More to Follow!
mvanwalks421
Well-Known Member
those vents will really tie the console together
Actually, the more I look at it, the more it looks like some sort of bearing or clutch housing. Possibly some sort of bracket with a pillow block bearing or clutch attached to each end. Then the wire terminals, or whatever they are, were attached to it's perimeter after the fact. Here's what the part might look like without the terminals surrounding it.
View attachment 453886
And the round flange things at each end might be part of a clutch or bearing?
View attachment 453887
Hi R,
LOVING the outline you created! Looks like it's back to the drawing board for these little greeblies. UGH!
- - - Updated - - -
Beautiful work for sure Sofa...:cool you're patient for sure.
Hey J,
Thanks so much! Just like your project, we have to show a considerable amount of restraint in order to get things just right! I think we must be crazy!
- - - Updated - - -
those vents will really tie the console together
Hi M,
I really hope they do as well. The greeblie setup from ANH to ESB totally changed. I'm trying my best to be true to the original.
Fingers crossed!
Wow SK, that's a huge update. The new console looks fantastic.
I built a display case/box this weekend and it got me thinking about the sheer amount of "cabinetry" you've made over the course of this build. I'm sure at this point you've got master craftsmen skills.
Here's what I accomplished in the same weekend (I bow to your awesome skills)

Can't wait for the next update.
I built a display case/box this weekend and it got me thinking about the sheer amount of "cabinetry" you've made over the course of this build. I'm sure at this point you've got master craftsmen skills.
Here's what I accomplished in the same weekend (I bow to your awesome skills
)Can't wait for the next update.
Hi Gang,
Not much of an update but I wanted to see what all the effort was for!
Once the pinstripes are added and all the other little surrounding greeblies are in place this will look good
Another coat of the clear satin
How does it all tie together?
Still needs some toggles, tiles and greeblies...
Stay Tuned for More!
Wow SK, that's a huge update. The new console looks fantastic.
I built a display case/box this weekend and it got me thinking about the sheer amount of "cabinetry" you've made over the course of this build. I'm sure at this point you've got master craftsmen skills.
Here's what I accomplished in the same weekend (I bow to your awesome skills
View attachment 454908
Can't wait for the next update.
Hey SB,
Thanks so much! I am thrilled with how the new console is FINALLY coming together. Maruska, Starkiller and Philip did an amazing job getting those files CNC ready. It made all the difference. Also, you get tired of looking at the same ol primer day in and day out, it was nice to get some color added.
Loving the Display Box! The red really makes the gun pop. Excellent work. Do you have any more projects ahead of you?
Loving these updates. Impressive skills and teamwork.
Would love to be able to remake the console I'm building because I see the imprefections and problem areas. But I'm loving the build of it and that's all that matters. Keep up the great work
Hi C,
Thank you very much! Jessie has really been a HUGE help getting all those parts laser cut. And I know the rest of the team is going to hate me when they start the wiring process...
Your console is really coming along. All the 1' tiles and other greeblies are really pulling it together. And you're right, as long as you're having fun - that's the main thing! Speaking of which, any updates?
- - - Updated - - -
I wish I had the time, patience and space to do this. Very impressive work.
Hi J,
Thank you for the kind words. I'm DEF running out of space! But that shouldn't stop you from building. Get out there and do it!
Similar threads
- Replies
- 11
- Views
- 1,124
- Replies
- 2
- Views
- 937
- Replies
- 2
- Views
- 971
- Replies
- 13
- Views
- 2,276