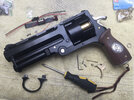
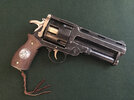
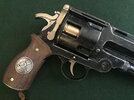
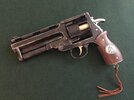
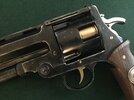
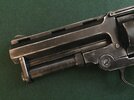
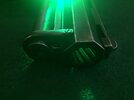
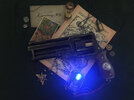
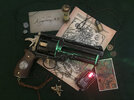
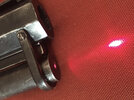
“How big can it be?” - Hellboy’s ‘Samaritan’ revolver by TipTop Workshop/Anders Pedersen

wayouteast

Sr Member
I was recently lucky enough to be one of the first people to get their (bright red and differently sized) hands on the new kit of Hellboy’s ‘Good Samaritan’ revolver from the 2004 / 2008 movies by TipTopWorkshop and Anders Pedersen (available on the TipTop Workshop shop and in the Project Runs forum here).

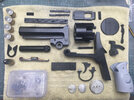
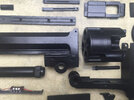
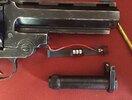
The main parts of the gun are pressure cast resin (black in my case), with smaller details either resin printed or - as a brilliant bonus - cast in pewter. The kit comes with all the hardware - screws, brass pins, springs etc. - needed to assemble the gun, as well as the electronics to create the laser sight and four glowing tracker bullets (all you need to supply is 11 LR44 button cells - 2 for each of the bullets and 3 for the laser). The resin is beautifully cast, with little or no bubbles and requires minimal clean up of excess resin or flash. I started by giving all the parts a really good scrub with household degreaser and soapy water to get rid of any mould-release residue and let them air dry before the small amount of filing, filling and sanding needed to ready them for the next stage. Another quick wash and then a gentle wet-sanding with low grit sand paper finished them off nicely. I left the odd minor imperfection as I knew I was going to be adding damage later!

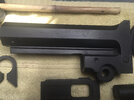
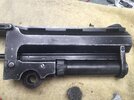
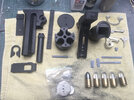
The picture shows the parts all laid out (I’ve already painted and assembled the bullets - see below).
D93918A7-B445-44DD-821D-E25B992BA360_1_201_a.jpeg

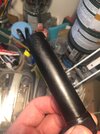
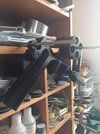
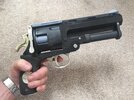
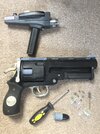
Time for a first dry fit assembly. Damn! This thing is HUGE! (phaser for size reference - in case you assume from the first image that I have a Munchkin size hand)
D686B59B-8220-47B4-B6CA-4AA94EC9C8D2_1_201_a.jpeg D708F5DA-FD63-4C6C-8E63-5B8A1B05BF4F.jpeg

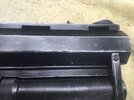
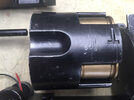
The gun went together really well from the start, although, as you’d expect, there was some adjusting to be done, especially on the resin printed parts. So a bit of sanding and filing was needed at this stage to get the fit of the parts perfect - the tolerances are quite tight, and rightly so. Some experimentation, fitting and re-fitting, and a bit of work is needed to get the cylinder spinning freely, the bullets fitting into the cylinder easily and the various smaller detail parts perfectly attached. Certainly no more than you’d expect from resin printed parts, and all easily accomplished.

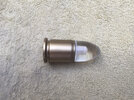
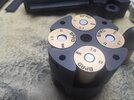
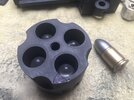
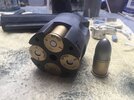
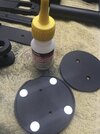
I decided to dip a toe into the water of this build by painting the bullets first, and getting their electronics installed. Each bullet comes in four parts, a resin printed casing and a tip that’s cast (really well) in clear resin, plus an internal housing for two LR44 button cells and a micro-switch, and a resin primer. There's also a green 5mm LED for each bullet. The tip and the casing screw together around the battery holder/LED and the primer fits into the casing end to act as an external switch to light the LED. The design of the internal housing is really very clever and you can put it all together without even having to use solder or wires, using the clear instructions that come with the kit. I opted to add a little bit more strength to mine by soldering the joints, and I ended up glueing the primers to the switches too for extra durability (I didn't want to lose the primers at any point!
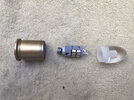
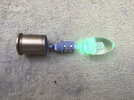
9B65ECA5-7D55-492F-B000-10F4720C2394_1_201_a.jpeg B20C5AAD-DD02-44B7-89F4-3336617C1D08_1_201_a.jpeg 3449B06B-34D0-4492-B51B-0FA9C8CA0B98_1_201_a.jpeg

I primed the casings and the primers, sprayed them both satin black, and then airbrushed Alclad Polished Brass over the casings and ’Stainless Steel’ on the primers.

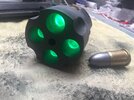
Voila - four beautiful green glowing tracker rounds. I also painted the ‘bonus bullet’ that comes with the kit too - this one brass again plus Alclad ‘Steel’ for the tip.
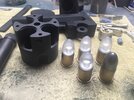
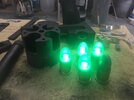
0A0FEB8A-F502-4877-96D5-0ACEDED82751.jpeg 57438F81-1653-4A3E-B124-A16EC01F237D.jpeg 2D760823-6C05-4C0F-8BEE-BF668C9961A9.jpeg 3678F27A-DCD7-4036-A906-3404ECBA6F01.jpeg22F746E1-BBEC-4932-832E-08D0FC1A7F6E.jpeg62627121-AF43-4B45-8AD2-6C0881F1F2E6.jpeg

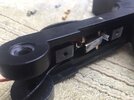
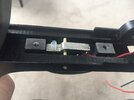
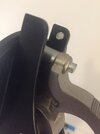
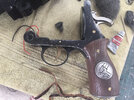
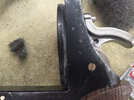
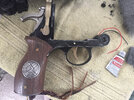
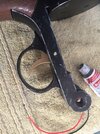
At this point, I drilled out a route for the laser sight wires to go from the little momentary switch under the trigger in the receiver frame through the main hinge of the gun, after advice from DaveChaos at TipTop as to the best way to do this. Note... I didn't drill through the internal resin bushing that fits inside the hinge and which the screws go into. Rather, I drilled an angled hole in the large barrel half of the gun, that carves out a hidden channel in the top of the hinge; this allows the wires to pass over the top of the bushing and into the space in the receiver frame on the other side of the hinge.
C5C5186F-380F-497F-B6B9-5B8962F96592.jpeg574DFB3E-D3E8-4226-B2E2-164FC4F7D670.jpeg3A5445AF-EBB1-4CE8-BB41-881D09D4561B_1_201_a.jpeg

That done, on to the build of the gun, which involved quite a few iterations of putting together sub-assemblies to check for fit, taking them apart to refine and fettle things, re-assembling them etc etc...
 
Last edited:
The building of the gun took place over a few days, as I refined the fit of the various parts (minimal adjustments mostly due to the splendid engineering of the original parts).

I did have a couple of relatively minor issues as I was test assembling and putting together the various parts of the gun, and these took some time to address, even though the fix was usually pretty obvious and readily accomplished.

The (very cleverly designed) battery holder for the laser was impossible to slide fully into the sight housing due to an imperfection in the inside of the cast part getting in the way. There was an easy fix, which was to fully drill out the 'socket' for the back end of the sight housing where it fits into the main barrel half of the gun so that the bit of the battery housing that extends from the housing has somewhere to fit. This worked fine. I did think about just cutting the end off, but I decided against it, as I didn't want to lose the little angled 'grab' that enables you to pull the holder out of the housing tube. I sanded the holder a bit, but deliberately kept it a tight push fit to keep the laser centred on the hole in the front of the housing through which it shines. Dave is aware of this issue and I think it may be fixed in later kits.

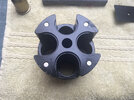
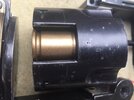
The cylinder pin is printed resin. Mine ‘flexed' when the weight of the cylinder was added to it, especially when the cylinder was loaded with bullets. This flexing made the cylinder 'wobble' when it spun and rub slightly on the cylinder cover, receiver and top connector. Unfortunately, even though I sanded the pin lightly to reduce its thickness very slightly and oiled both it and the hole through the cylinder to ensure the cylinder's rotation around it was as frictionless as possible, there was enough stress on the pin that the end of it eventually sheared off flush with where it enters the barrel piece (I suspect because of the friction stress of the wobbling cylinder when it rotated).

This was a bit dismaying and took a bit of thought to fix, but I did sort it in the end. I managed to get the sheared off end out of the barrel. Then I carefully drilled into most of the length of the pin from the 'barrel end' and inserted a 1.5mm steel rod into the hole (leaving the rod to stop short of the threaded end of the pin so that the M3x20 screw that fixes the cylinder to the pin could still be used). This rod protruded far enough at the barrel end of the pin to go through the sheared off 'end' and a bit further... actually into the barrel part itself, where I drilled a matching 1.5mm hole. Once the two broken bits of the pin were slid over the rod, I used JBWeld to both fix the broken bits together and to weld the whole pin, including the internal rod, into the barrel housing. It means I can’t remove the pin from the barrel (if I ever wanted too) but it's a very strong mend and the pin itself is now both dead straight and 100% rigid, with no flex, meaning the cylinder always spins 'straight'.

Sorry... for some reason I didn't take any photos of this part of the build, but I hope the above is clear anyway!

I did wonder whether the cylinder pin, being such a key mechanical component, might be a part that could usefully be metal in future runs (cost/price allowing of course) and I know Dave and Anders are looking at making some slight changes and improvements to some of the parts in the future.

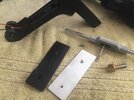
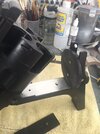
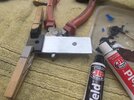
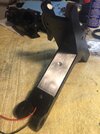
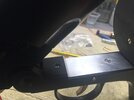
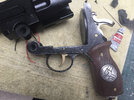
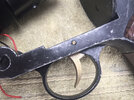
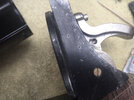
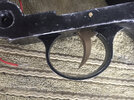
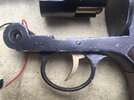
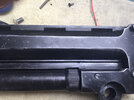
Another issue was the receiver lid, being a 2mm thin resin casting, ‘bowed’ upwards when the trigger and its spring were installed due to the pressure of the spring against its underside. In my case, this actually prevented the cylinder from spinning. I tried substituting a weaker spring (from a ballpoint pen) as well as cutting down the spring that comes with the kit, but neither fully solved the problem. In the end, I ordered some 2mm aluminium sheet, and made a new receiver lid out of that, using the original resin part as a template and welding the raised bit of the original part to the new aluminium plate with JBWeld to get the correct profile at the front. This worked perfectly with the cut down original spring, and gave me a really nice trigger feel as well as a rigid receiver lid.

This is good, since the trigger is used to activate the laser sight through a cleverly situated momentary switch under its front end, and the spring is integral to the way this works.

15D7D374-9A46-4AA5-826B-0B031B77641B.jpeg 284E651F-918F-4A3B-9700-30D59EF73949.jpeg 56F22674-E27D-4085-B6B2-032137B649E8.jpeg 668AF327-7E57-4CED-963E-B6790B83D8C8.jpeg FA704969-B504-4AA9-8183-74D9D4C9A84F.jpeg 1B968AA2-0288-4A71-95D6-F7679F7A1644.jpeg AA91429B-CFFC-4087-9187-DF1BAE017727.jpeg

One other tip for the receiver lid... To get it really securely fixed (and also to ensure the trigger guard fits snugly up against the receiver underside, you might need to drill and tap slightly further in the ‘pegs’ at each end of the guard and use slightly longer screws to fix the receiver lid through the receiver itself and into the trigger guard ends. I used 3M x 12mm screws in the end.

Finally, when I added the magnets that help the cylinder ‘lock’ into position at the end of its spin, and and put the cylinder disk and the cylinder cover together, the cover still stood slightly proud of the disk, even though I sanded its 'raw' side flat. This slightly interfered with the free spinning of the cylinder, which still rubbed against it at a couple of points. If anybody has the same issue with the cylinder sticking or rubbing, the solution (obviously!) is to sand the cover side of the assembled part once the two halves (disk and cover) were attached. It took some elbow grease, but afterwards the cylinder spun freely and (usually) locked into place at the end of its spin very satisfyingly.

237D2097-AE4F-4107-B51F-7AA0ADE870B5.jpeg A1E65EE8-E1B6-452B-BFFB-29E0BB4C3F7A_1_201_a.jpeg

Anyway, such challenges are all part of the fun of making! After all the tweaks and adjustments, my final ‘dry fit’ assembly went smoothly, mechanically and aesthetically, and I could get on to the fun bit… painting and finishing! But first… I needed a hammer...

37C8EBFD-9295-4E7B-965E-93CCCF6B2733.jpeg
 
Last edited:
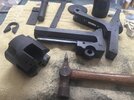
In the movies, the gun is considerably beaten up, showing a lot of hard use and covered in the dents, dings and scratches of a lifetime fighting monsters. So I spent a very satisfying (if slightly worrying) hour or so with a hammer, a couple of screwdrivers and various other pointy things, attacking my lovely sanded, cleaned up parts and adding ‘battle damage’. I was careful to concentrate my attentions on those parts of the gun that would naturally be susceptible to such damage, taking my cue from asavage ’s amazing scratch-build of the Samaritan out of machined aluminium (both utterly inspiring and also brutally out of my league! :D) and in particular the distressing he did to his gun.

82FFBD91-CBB8-4E33-BA71-0D7580AF4BB1_1_201_a.jpeg 4FF7F1AC-2353-49F6-919B-82E9A02CCFC5_1_201_a.jpeg C143AD50-BE40-4441-802A-996907256643_1_201_a.jpeg 31B4E637-97E2-44F7-9E65-184AA1E6F4E2_1_201_a.jpeg 0D8AE369-93A9-439C-9B10-8AF7499EAB3E_1_201_a.jpeg C0B36E8A-2EC2-456F-B616-E7CE1039655E_1_201_a.jpeg

I prevaricated for some time over the painting options. The two main questions I was asking myself were:

a) Should I paint the whole gun ’steel’ first,, then black, then gunmetal and then sand back to the steel to mimic the effects of ‘natural’ weathering? Or should I stick to my usual, familiar technique of painting the gun black, then gunmetal and adding the wear and tear afterwards with Rub ’n’ Buff or similar (as I believe the original prop gun was treated)?

b) Should I splurge on a home electro plating kit to actually plate the pewter hammer, trigger and release lever with nickel, then brass? Or should I take the ‘easy’ option and just paint them?

In the end I decided to a) reduce the overall number of paint coats by painting the gun black then weathering with silver - just to err on the side of safety with some of the tight tolerances, and b) paint the hammer, trigger and release lever rather than plating them - for cost reasons!

I primed everything before painting the whole gun, including the ‘brass’ bits, satin black, including all the screw heads. The next day I rubbed down the whole gun with fine steel wool to dull the surface. Then I used coarser steel wool gently to add some fine scratches and texture back. All the ‘black’ parts, again including the screw heads, were then airbrushed with Alclad Gunmetal. The brass parts were airbrushed with Alclad Polished Brass. Once the hammer was touch dry I gave it a very light overspray with Alclad ‘Polished Aluminium’ to replicate the ‘silvered’ look of the original prop (which I believe was actually silver-plated bronze). I also detailed the hammer and the release lever with a couple of (hand-brushed) steel accents once they were touch dry. Everything was then set aside to fully cure overnight. The wooden grip was painted using a technique that I’ve often used on resin that supposed to be wood. I painted the grip with a very loose, streaky finish using Vallejo Model Colour acrylics in a variety of shades of brown, red, ochre and yellow. Once that was dry I gave it several applications of black and Burnt Umber washes. Finally, once that was all fully dry, it got several coats of dark tinted wood wax, each coat allowed to dry and then polished with a soft cloth. This gives what I hope is the quite subtle, layered ’sheen’ that actual wood has.

28F0A648-785A-4F54-B43E-A62BF3919C4B.jpeg 9922EBFE-3F3C-4D1C-B832-75BB2EC278A2.jpeg 2EA4E3DC-0F5B-46DA-8EE3-7AFCE945ADC4.jpeg 10B19FDA-CE5A-4AA8-9F92-3E803E2DAC41.jpeg DE22AADD-3FDB-4313-AF08-251DD4ED3F8C_1_201_a.jpeg 6C1AF92C-8EDF-411C-A0D9-EE6CB908E38C_1_201_a.jpeg 12409A6C-32BF-43E7-8F65-1666785AF14B_1_201_a.jpeg C22E3E12-3170-4535-810F-BF957D315175.jpeg77656C39-ECB1-4330-9245-7901B2952C46_1_201_a.jpeg

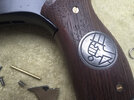
I chemically blackened the pewter handle emblems and plate using the technique shown by Dave from TipTop Workshop on his own amazing Samaritan build. This involves using ‘stained glass black patina’ on the parts (easily available from Amazon or eBay) and then polishing the parts with wire wool. The effect is just wonderful and gives the metal a really authentic age.

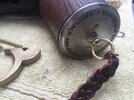
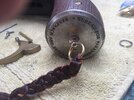
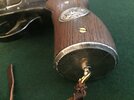
At this stage I also braided the leather straps/thongs that are tied to the ring in the handle plate, as well as swapping out the silver ring supplied for a movie-accurate brass ring.

2B7A6478-E0A2-4AE8-A3A7-B8A8940F63B1_1_201_a.jpeg B51EE2B9-F2F8-4DF4-97E0-F5C8BA162BD9.jpeg EAC41317-B0F2-403F-857C-15AE4053A319.jpeg

Time for the fun bit... adding even more age and experience!
 
Last edited:
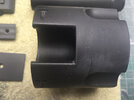
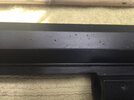
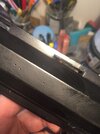
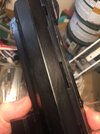
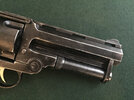
Time for final assembly and weathering! The gun all fitted together beautifully, and I was really happy with how it worked, and how it looked. But it was still a bit ‘factory fresh’, unlike the real one, which is VERY well-worn. I spent a day or more adding several passes of weathering, mostly with Silver Rub ’n’ Buff with very sparing touches of Molotow Chrome on sharper edges and corners. This was concentrated on edges and areas likely to be worn. For the little dings and dents I used a cocktail stick to outline each one with a tiny amount of Rub ’n’ Buff. I tried to be subtle, and if too much is applied it’s easy to gently take the silver back to the underlying black with fine steel wool. I also used coarse steel wool just touched into Rub ’n’ Buff to apply light scratches and marks in a random way (except for the sight housing where the scratches were added in such a way as to suggest it being ‘screwed’ into place.

I discovered that light machine oil, which I was using to lubricate various mechanical elements like the cylinder and the main hinge, does not play nicely with Rub ’n’ Buff, which is a wax. The oil dissolves the wax and strips it right off… so I had to work around this. In fact, the occasional meeting of the two worked in my favour, since wiping off the mixed oil and Rub ’n’ Buff added some nice very subtle areas of wear to the black.

The weathering will mellow a bit anyway with handling, and the advantage of ‘additive’ rather than ‘subtractive’ weathering is that you can always add more to touch it up later!

41173B86-A119-47AD-A232-A6291BEE3B83_1_201_a.jpeg 52BE44B3-995B-451A-9ED0-F749AD6C59C6_1_201_a.jpeg FD475BB0-6C10-4FA1-A5D4-4D60108D45A2_1_201_a.jpeg 856CA6FB-C91C-4A80-AA6E-FCC2016F43AB_1_201_a.jpeg 9723A14F-BA83-4E76-B1A7-B0CE678CC40D_1_201_a.jpeg B40CA389-6CAB-47E3-8586-4F8A19074A43_1_201_a.jpeg 435E9737-E471-44C7-954F-8E4925D1FE71_1_201_a.jpeg 9D176902-164C-49D2-A8BE-9D4C201E8436.jpeg 3CB561E9-F963-46A1-971E-D489457B071D.jpeg 48C7E39B-4142-473B-B777-18216EB6D82B.jpeg FF3EF186-C1D5-4A3D-82B5-7298B575BBCC.jpeg BA9955BD-52CE-4083-81C6-78886BDA9BC6.jpeg BDCEEF02-979D-46BA-AF53-8C75081082E0.jpeg 7141E5EC-597B-4928-936B-D0382368214C.jpeg 2F732ADA-BD59-4B1F-93DE-40A0AE82BA1E.jpeg 4850170C-5C3B-4787-9EA7-72DEE642BF52.jpeg E90C2B5D-EB0D-4372-8600-60A00B7AF2E8_1_201_a.jpeg 42FF9588-DB53-42B0-B194-D9C4056641CC_1_201_a.jpeg6B197F86-2C15-4DD5-B9F7-79136D26D2C2_1_201_a.jpeg

Just a bit of last minute attention with a few light passes with wire wool, just to blend everything in a bit, and it was done...
 
Last edited:
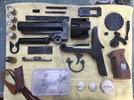
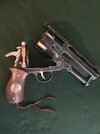
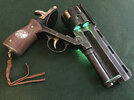
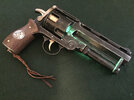
And that’s it. I’m very happy with the way the Samaritan turned out. The only thing I still have left to do is to wire in the laser itself. A wire detached itself from the diode housing and, in my repair attempt I think I may have damaged the diode itself. Maybe I left the soldering iron in one place too long and overheated it… I don’t know. Anyway, the laser started only working intermittently and then failed altogether. So I’m waiting on some replacement red lasers from eBay, and one of those is wired into place the gun will be complete. I may upgrade it in the future if newer parts become available (especially that cylinder pin!) and I have an extra set of bullets on order for display purposes too. But for now, I’m calling it done.

5A70F6B9-5806-4FBE-8864-BC29F1667E4C_1_201_a.jpeg 889B90FC-F101-40BB-A13B-268492C00578_1_201_a.jpeg A4DA44FA-6F08-4DA2-AD6E-99447C61DEEE_1_201_a.jpeg 9EFDCC49-BAE3-44BE-B0AC-EB1983EE894E.jpeg 1DB300C0-C624-42BD-B7B4-0EE3B7755D2F.jpeg FEC4AADB-357A-42C4-9469-1E55DCD2BBCA.jpeg 6E381011-EDF7-4F4B-9BBC-2F200DFAB00F.jpeg 7D3BF537-65DE-4F48-9122-2CBEB76964AB.jpeg DBC4BE86-7092-4D2D-BDC7-3634AB196D4E_1_201_a.jpeg 09193E9D-4AC7-4A35-82D5-7D21644DE3EE_1_201_a.jpeg 655572BB-D3FC-4D40-900F-CA306426A62A.jpeg

It’s an absolute beast! Even in resin it’s really heavy - what the original must be like to hold for any length of time I hate to think! It looks really impressive, and is a very welcome addition to my small Hellboy collection (thanks to Pocko and podman for the Sammael manuscript, tarot card and Kroenen envelope, Jintosh for the charms, and McKrats, Droidronaut and Tenshidono (on Thingiverse) for the STL files for the St. Dionysus reliquary, belt locator and Lemurian talisman respectively).

18DEF6C9-50D3-4E8C-8D21-B4C65652D24B_1_201_a.jpeg 1F35B9BD-A005-4725-A44D-C2082D4F264A_1_201_a.jpeg 6E1B0144-7C65-43BB-A74A-8892D0C63C9E_1_201_a.jpeg ADE24B71-40B8-4E84-A6EB-46A350A1594B_1_201_a.jpeg

Thanks to Dave at TipTop Workshop, and to Anders Pedersen, for a fantastic kit and superb customer service. I’ve bought several TipTop products, including Luv’s blaster and Deckard’s PKD blaster (again engineered by Anders P and which I'm about to start building in the next few days) and never been less than delighted with the quality and the service. I heartily recommend this kit to anyone who enjoys Hellboy!
 
Last edited:
This pleases me to no end! You have done a wonderful job and I'm super please you're happy with this kit! Your insight to the build is super valuable to me. Myself and Anders are working on fixes for the problems you encountered.
 
This pleases me to no end! You have done a wonderful job and I'm super please you're happy with this kit! Your insight to the build is super valuable to me. Myself and Anders are working on fixes for the problems you encountered.
Thanks for the kind words, Dave. The kit is a real pleasure to work on, and I think you and Anders have done an incredible job. Thanks again! :cool:
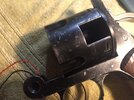
 
This was an amazing read, and it came at a good time! Haha, I just spent the better part of my night watching asavage's scratch-built samaritan, and absolutely wanted to learn how other makers would handle the aesthetic sides of this challenge.

Your weathering job is gorgeous! The very slight silvering you achieved with the Rub N Buff is something I've been trying to figure out for pages. I recently bought some simple 3d prints in order to practice before I attempt something big like this again, after learning with my Replicant Blaster that I still have quite a ways to go. Are there any good guides or tutorials out there for such a technique? I've read a little on it, but have been having trouble visualizing it without visual aids.

I also really appreciate your long-form writeup of the journey. This is all really useful to teach someone like me exactly how I should be thinking about projects like this.

Awesome work! Seriously, this is so cool.
 
awesome, thank you for sharing! you have been super fast at that build, it's quite impressive!
I'm working slowly on mine from time to time and will eventually share my work on it but it will probably take ages to finish as I'm slowly replacing pieces one by one by metal ones that I'm scratch building :)

again, awesome result (y) and thanks again Dave for making this available, such a cool prop and one that is difficult to reproduce from scratch :)
 
The very slight silvering you achieved with the Rub N Buff is something I've been trying to figure out for pages. I recently bought some simple 3d prints in order to practice before I attempt something big like this again, after learning with my Replicant Blaster that I still have quite a ways to go. Are there any good guides or tutorials out there for such a technique? I've read a little on it, but have been having trouble visualizing it without visual aids.
Thanks so much for the kind words!

I picked up the 'rub 'n' buff technique as I went along, really, from (like you) watching video tutorials from the likes of Adam Savage, Bill Doran at Punished Props and many others! If you do a search for 'weathering' and 'rub 'n' buff' on You Tube there are some fantastic demonstrations.

I think, if I have any word of advice on the technique, it's to always start with a much much smaller amount than you ever think you'll need, and 'creep up' on the final effect. A tiny amount of the stuff goes a very long way, and it's terribly easy to get carried away and over-weather without even noticing!

I squeeze a tiny amount on to an old plastic lid or something, dip the tip of a pinky into it and then rub most of that off on a piece of paper towel before lightly running my finger along the part I want to 'wear'. It's far easier to add more than to take too much off! A very light touch helps too. You don't really 'rub' the part, as much as lightly skim it. For smaller 'point' areas, like the 'dings' on the Samaritan, I use makeshift tools like cocktail sticks, Q-tips or rubber sculpting tools, and again the lighter touch the better.

The other thing is to remember that it's 'wear' that you're simulating, and therefore only some of the item will have it. Research the 'real' item or something equivalent for where those areas are likely to be. Wear and weathering often works by contrast with unworn areas, so again less is more! Wear also tends to 'fade' into the unworn areas, so sometimes very light, faint multiple passes work best, each one slightly smaller than the one before, leaving the 'bare metal' effect only for the very edge to give a slightly feathered effect.

I like to use a Molotow chrome pen, too, very sparingly for sharp edges and corners where there's the most extreme wear. I use the edge of the tip, not the end, so I have more control over the amount of 'chrome' that's deposited.

And, as always of course, practice makes perfect. And it's better to practice on scrap bits and bobs than on a precious and much-worked-on prop! :D

Hope this helps a bit, and good luck!
 
awesome, thank you for sharing! you have been super fast at that build, it's quite impressive!
I'm working slowly on mine from time to time and will eventually share my work on it but it will probably take ages to finish as I'm slowly replacing pieces one by one by metal ones that I'm scratch building :)

again, awesome result (y) and thanks again Dave for making this available, such a cool prop and one that is difficult to reproduce from scratch :)
Thank you! I'll look forward to seeing your Samaritan in due course. I'm impressed at your scratch-building metal parts for it... that will make it even better, I'm sure! Thanks again for the kind words!
 
Quick postscript... the replacement laser(s) arrived from eBay after I'd posted the build thread above. Everything was already wired and ready to go to other than just connecting the laser itself and mounting it in the housing. So it took about 10 minutes to add that final touch!

4EEAB264-621D-4B25-995D-07624659530B_1_201_a.jpeg F8BEF77C-4BD6-4371-90D6-01F4A227D3AB_1_201_a.jpeg

If anyone else wants or ever needs a replacement laser, these are the ones I used (UK eBay link but I'm sure the equivalent will be available elsewhere). They seem to be a straight one-for-one swap with the one provided with the kit and fit in the holder perfectly.
 
And, as always of course, practice makes perfect. And it's better to practice on scrap bits and bobs than on a precious and much-worked-on prop! :D

Hope this helps a bit, and good luck!
Thanks so much for taking the time to write all this out. I'll definitely take all this into account as I play with the material, and now I know exactly what I'll be watching tonight to learn more!
 
Oh! I was also curious. I know you replaced the lanyard ring - how were you able to source that? So far I've not found any fabricated ones, and the real things are all 50-ish dollars.
 
Oh! I was also curious. I know you replaced the lanyard ring - how were you able to source that? So far I've not found any fabricated ones, and the real things are all 50-ish dollars.
Ha! I cheated! :lol: It was difficult to find solid brass rings at something close to the right size. So I compromised with a hollow brass ring like these. It passes anything but the closest of inspections. You have to cut and insert it quite carefully as it's prone to squishing, but it looks pretty good once attached.
 
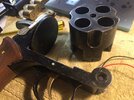
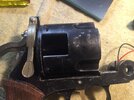
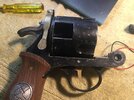
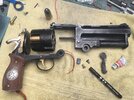
Congratulations on your spectacular build and many thanks for the detailed thread. I am progressing at snail's pace on my build but absolutely enjoying every second of it. DaveChaos and Anders have done an incredible job on this kit and I'm glad I jumped on the wagon from the get-go!

Thanks to you, I'm now inspired to make a few tweaks including swapping out the lanyard ring for a brass one, fabricating the receiver lid out of aluminium, etc.

Here's where I'm at now.
20210612_163018-01.jpeg


I consider this my first draft and will continue layering on subtle nicks and discolorations as you did.

Anyway, just wanted to convey my admiration and respect for your bar-setting work. Cheers!
 
I'm loving the tiny dings and such y'all are adding in as you go. Its really neat to see it work in much the same way with aluminum that it does with the resin, so far as the way the material takes the dings goes.

With both of your builds, it's really doing a great job of tricking my brain into thinking "these are solid metal."

When budget is on my side I totally want to attempt this one too.
 

Your message may be considered spam for the following reasons:

If you wish to reply despite these issues, check the box below before replying.
Be aware that malicious compliance may result in more severe penalties.
Back
Top