My New Series Doctor Who Tardis Build (image heavy)

re: My New Series Dr Who Tardis Build (image heavy)

Getting going on the walls has been slowing going this week. The two side and back walls are each made up of a sheet of 1/4" plywood with applied 1x boards on the show side that simulates a raised panel door.

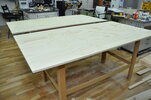
To begin I cleared out a place to put two tables up on which I placed a sheet of plywood to assemble the walls on. I spent some time making sure they were flat and straight, which was much more difficult on one of the pieces. It's pretty important to have a flat table to build a laid up panel like this so it has a good chance of staying flat. It's not so critical on the walls, but the doors need to be flat for sure.

I had the same problem with finding acceptable boards to use as before. In most cases I had to buy 1x8s just to be able to get a board 3.5" wide out of it. Even so, half the boards I bought had to be returned as each board had many defects to be worked around and many were not usable at all. I first marked all the defects that needed to be hidden, either by putting it face down on the attached side, or under a trim board, or would be removed with later machining. Each board was marked for its final orientation, and they were all marked for the first end cut, and the length cut that left me with the best 83-3/8" required for each board.

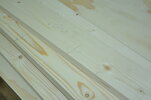
The applied raised panels all have the same edge treatment, which is to put a 45 degree chamfer on exactly half the thickness of the board. Easy on the vertical boards, much more difficult on the horizontal boards due to the two precise end of board cuts and the exact length cuts require. More on this part later.

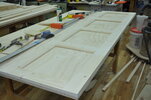
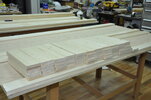
Here are the tables ready to go.

DSC_0820.JPG

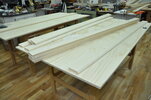
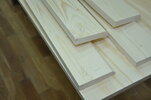
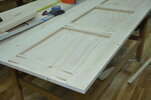
This is the vertical boards after all their cuts and edge treatment.

DSC_0822.JPG

Finished boards showing orientation marking.

DSC_0823.JPG

DSC_0824.JPG

DSC_0825.JPG

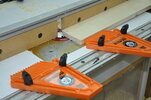
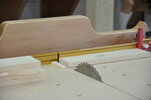
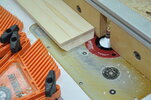
This is the router setup for chamfering the long edge of the vertical boards. The orange feather boards help hold the board against the fence so it doesn't slip away and I get an incomplete chamfer.

DSC_0821.JPG
 
Last edited:
re: My New Series Dr Who Tardis Build (image heavy)

I worked on the boards that get applied to the walls and doors today. Each of the boards gets an edge treatment that is a 45 degree chamfer, with the ends of the rails (the horizontal boards) receiving a two step treatment so they fit against the stiles (the vertical boards).

Here's a completed set of the pieces that will be be attached to the 1/4" plywood wall sheet. This makes one have of one wall. 1 down, 5 to go on the walls. The doors get the same thing, but on both sides.

DSC_0829.JPG

This is the back side of the completed piece, showing the pocket holes used to attach the pieces to each other.

DSC_0834.JPG

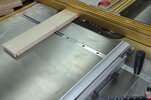
The panels each take 5 rails, there are a total of 10 panels, so I had to cut 50 pieces, plus I cut some extra to use for setup and in case of found defects or errors. This was done on my cross-cut sled.

DSC_0827.JPG

DSC_0828.JPG

The next step is to cut a notch on the end of each board.

DSC_0830.JPG

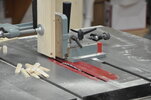
Then, using a tenoning jig, the angled cut that fits against the 45 degree chamfered long edge on the stiles is added.

DSC_0831.JPG

Last, one or both sides of each rail receive the same chamfer that's on all the stiles.

DSC_0832.JPG

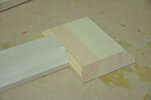
This is what the joint looks like when it's completed. This one happens to fit perfect, but because the boards I'm working with aren't all perfect, not all joints are perfect. Not a big deal as the weathering on the Tardis is so severe you'd probably not notice, but sill annoying.

Another way to do this is to just attach the boards to the plywood without any edge treatment, and then run a bearing guided 45 degree router bit around the each of the edges. It means you have to then go back and finish the inside corners square with a hammer and chisel, which would be a lot of chisel work, but you have to do the windows either way, so it is probably just as easy. This is how they did the prop from the Eccleston season.

DSC_0833.JPG
 
Last edited:
re: My New Series Dr Who Tardis Build (image heavy)

My god.... so beautiful.....

This is easily some of the best woodworking I've ever seen.
 
re: My New Series Dr Who Tardis Build (image heavy)

it is like watching a master painter paint. This is one nice piece of carpentry.
Glad your sharing in such detail.
 
re: My New Series Dr Who Tardis Build (image heavy)

It's so sturdy, even genghiskhan himself can't break into that thing. And he tried.
 
re: My New Series Dr Who Tardis Build (image heavy)

Not much to show for the weekend's work. I really thought I'd be done with the walls at least, but I'm far short of that. One good thing though was I installed a new tool today, which is something I always look forward to.

Part of the delay was my fault and the result of deciding to use Gorilla glue to attach the first wall panel to the plywood. I wanted to use it because though it's not a gap filling glue, it does fill gaps better than wood glue, which doesn't at all. With the boards not being completely flat on all surfaces, I went with Gorilla. Knowing it foams out during curing a lot, I protected the panels with painters tape, which was definitely necessary. So much came out I had to spend a couple hours cleaning up the dried squeeze out, though happily not off the panel since the tape protected it. Part of the joy of building something for the first time is not being able to predict everything that will happen.

I used Titebond III on the second half of the panel, which went fine so that will be my plan on the remaining panels. This is the strongest glue and it has a longer open time than either Titebond I or II.

Preparing to do the actual gluing I marked the window locations, which had to be cut out with a jigsaw first, and after gluing, a bearing gilded flush cutting router bit was used to trim the plywood to the edge of the overlay boards.

At the end of the day, I started work on the pieces that surround the wall panels and form the outside trim. It's a small piece that gets a cove cut into the edge and is the part the three wall panels attach to. I need one side done so I can put up the first wall and make sure it's all going as planned.

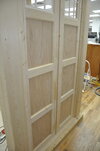
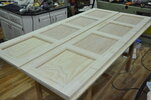
Here's a finished wall panel.
DSC_0839.JPG

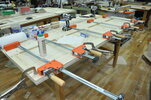
This is the setup for attaching the second stile when making up the panel overlays. It has to be glued then clamped and screwed pretty quickly since the glue begins to stick in a few minutes and that make things hard to adjust as you go along.
DSC_0837.JPG

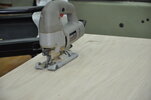
To cut the windows out, I marked them with the overlay in place, and cut close to the line with the jigsaw.
DSC_0835.JPG

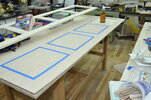
Here you can see my first try with Gorilla glue that went wrong. You can see the panels protected with painter's tape. Good thing.
DSC_0836.JPG

This is the router setup used to trim the window plywood edges flush.
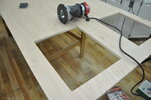
DSC_0838.JPG

This is the router setup that puts the cove in the edge of the board.
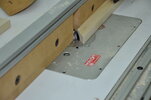
DSC_0841.JPG

Here I'm putting up some gauge blocks that I'll attach the boards to. This way it's much easier to put it in the exact place it belongs, which is 1-1/8" from the outside of the posts. UPDATE: You'll see later that I ended up using biscuits to attach the trim strips, so these gauge blocks weren't necessary with just one of them being used to mark the front edge of the trim board.
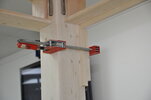
DSC_0840.JPG
 
Last edited:
re: My New Series Dr Who Tardis Build (image heavy)

So uh...I have this 83 Trans Am that I'll trade you for it :cool


Just incredible...I'm going to have to come see this soon!
 
re: My New Series Dr Who Tardis Build (image heavy)

I wasn't able to be at the shop very much this week so there's not much progress to show.

I changed my mind on how I would attach the trim that frames the walls and doors up the posts and across the bottom of the sign boxes. As they are only 3/4" thick and stick out 1-1/8" and have the cove on it, I was worried it wouldn't be strong enough unless it was attached with biscuits. Setting up to cut the slots is a bit of trouble because when you cut slots like this you have to reference your fence against the same point of they won't line up. Easy on the pieces as I just put them face down on the table and set the fence on it, but on the posts and sign boxes, there's no "table" to put them on. For the sign boxes, I drew a reference line and temporarily clamped a fence in place, on the posts I had to change from my Porter-Cable tool to a friend's Dewalt as his would "just" let me set the fence far enough to reference against the front of the post.

In the build, the trim piece that attaches under the sign box is not connected to the trim pieces on the inside of the posts. It's just a miter corner where they meet when assembling the Tardis. I'll be a little surprised if this joint remains perfect during repeated moves.

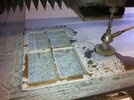
Much earlier in my build plans I had decided to make the window frames out of PVC sheet material. This is because it's a simple overlay on the acrylic windows with very narrow muntins, at only 1/2" across. I first tried cutting and gluing the material, but it was a lot of labor to do, so I thought I'd see how the material cuts on a waterjet. So today, I visited the shop I use for that and they cut the pieces for me from my drawings. It cost more than I expected as the cutting speed was slower than I expected and they charge by the minute, but the results are very acceptable and I feel the pieces will be much stronger for it with the absence of glue joints in the muntins.

Here's a short YouTube video I took with my phone today: Waterjet Cutting PVC

Before fitting windows in the first wall, I had to square up the corners on the plywood left by the router when I cut the window openings. Pretty quick work with a sharp chisel.

I had the PVC cut just slightly oversize on the height and width so I could fit each to its opening, and then just pressed them into the wall just to see how they fit. The windows will be a sandwich of the PVC, four 1/8" clear acrylic panes and two panes of 1/8" pebbled Lexan (the lower corners). Behind that will be sign white acrylic and some kind of a light source that I *hope* will fully diffuse like the prop's light does. I know the prop uses EL sheet to accomplish this, but the cost is very high for the large panels required for each window x 9 panels, counting the door sign. I'm planning to attempt it with an array of LED lights. More to come on this.

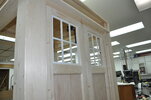
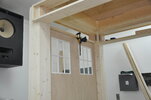
This is a look at the first panel just propped up in its spot.

DSC_0844.JPG

DSC_0845.JPG

This is the back side of the panel. I have yet to decide how to *fix* this in place during assemble without resorting to using screws run into the wood.

DSC_0843.JPG

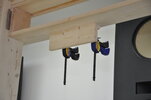
This is the setup I use to align the biscuit cutter for the trim installation on the bottom of the sign box.

DSC_0842.JPG

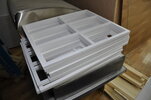
Here's the stack of PVC window frames.

DSC_0846.JPG

This is the material being cut on the Waterjet.

waterjetwindow.JPG
 
Last edited:
re: My New Series Dr Who Tardis Build (image heavy)

Simply incredible woodworking. Thank you for cataloging the details so thoroughly.

You're giving me encouraging ideas for a TARDIS garden shed in my back yard...

--Brian
 
re: My New Series Dr Who Tardis Build (image heavy)

...I hope people find it useful to see the process and people who know this stuff don't get too bored.

Bored? Not a chance! I'm loving your step-by-step documentation of this build. I'm sure there are lots of other "nuts and bolts" builders who feel the same.

Thanks for all the construction photos!
 
re: My New Series Dr Who Tardis Build (image heavy)

Fantastic build. Do you have suggestions for those of us that don't have such a complete woodshop?
 
re: My New Series Dr Who Tardis Build (image heavy)

I did my build in one half of a two-car garage, and a very small woodshop. If you have the room to assemble it, and the ability to make the cuts you need, you're set -- although more space and more/better tools always makes the job easier, of course!
 
re: My New Series Dr Who Tardis Build (image heavy)

What deck5 said...

I have a lot of room now, compared to my garage shops in the past, more tools as well, but I never found either to be limiting. It just takes longer and maybe you have to sort out a different way to approach some of the steps in the build.

In this case, I'm trying to avoid using nails though the prop itself is built with nails, but that's just a personal preference. Unless you were planning to move a build around a lot like I am, you could easily get by with nails for much of the assembly and that would definitely save lots of time and effort.

I'd recommend a finish nail gun for it though the good news is you can buy compressor and nail gun packages at home depot and lowes for $150 or less.
 
re: My New Series Dr Who Tardis Build (image heavy)

Got all the windows in yet?

Not yet. It's been slow going getting the walls done. Started on the doors today, but now out of the shop a couple of days, and xmas so there probably won't be too much progress to show.

I have ordered LED tape to experiment with for the window backlighting. Coming from China so it may be some time before it arrives. Windows will have to wait for that testing since they will be an assembly based on my current thinking.
 
re: My New Series Dr Who Tardis Build (image heavy)

Very cool, can't wait to see more. :thumbsup

What are you going to do for the light on the top, just a regular on/off switch type of thing?
 
re: My New Series Dr Who Tardis Build (image heavy)

Very cool, can't wait to see more. :thumbsup

What are you going to do for the light on the top, just a regular on/off switch type of thing?

Things are planned for the electronics. My friend Scott, who did the electronics for my holochess tables, has been tinkering with it. We're working toward a remote controlled materialization / dematerialization cycle, pulsing top light and ability to play mp3s. Not too many choices, trying to keep it pretty simple.
 
Last edited:
re: My New Series Dr Who Tardis Build (image heavy)

Sounds sweet, can't wait to see it :thumbsup

And if I ever get the space I can wait to try and make this myself.
 

Your message may be considered spam for the following reasons:

If you wish to reply despite these issues, check the box below before replying.
Be aware that malicious compliance may result in more severe penalties.
Back
Top