My New Series Doctor Who Tardis Build (image heavy)

re: My New Series Dr Who Tardis Build (image heavy)

Back to Tardis building... I'd like to not veer off to a TB admin bashing thread. There are some great things about the site. I make decisions on the forums I run as well, and I'm sure some of those haven't been too popular either.

Now that I've spent some time looking more closely at using the Gardman lantern, I've decided it really isn't a great substitution for the correct lantern. But, it also doesn't look like I'll be able to track one down, certainly not very soon.

So, I sketched up a profile of it tonight, and Primrodo is going to sketch up one as well. Hopefully we can get this close enough that I can machine it, cast it and use it on my build. More to come on this.
 
re: My New Series Dr Who Tardis Build (image heavy)

The only thing that could make this thread more awesome Philip is if you actually had a New Yankee Workshop show style video of the build.

I think it would be pretty funny if you had a Wookie in a flannel shirt speaking in a Boston accent. And wearing safety glasses. Can't forget about shop safety! Or the "measured drah-ring" that can be ordered at the end of the 'show'...

I can only wonder what Norm Abrams would make of it?:lol
 
re: My New Series Dr Who Tardis Build (image heavy)

Philip when you are complete you should consider creating a TARDIS Build Manual for the NST using the measurements of your build and the step by step construction documentation. Non Profit of course. I have been pulling photos of the actual build off the web and placing them in relation to your photos and your build is virtually flawless.
I might consolidate everything into one place on my site. Just takes time.
 
re: My New Series Dr Who Tardis Build (image heavy)

I think your Padme needs a pet. Once you have finished the Tardis I think you should make a K9 to live in it. Not as big a project as the console and with your skills it woluld be quick to do.
 
re: My New Series Dr Who Tardis Build (image heavy)

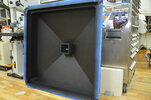
After finally getting more of the blue and clear paint, I've mostly finished painting the pieces. I haven't sorted out the PTO door lighting so I will probably have a part to paint there, and I haven't made the top light yet, so a bit more painting there as well.

I ended up putting two coats of the flat clear over the inside of the three big wall panels and the inside of the top.

DSC_0734a.JPG

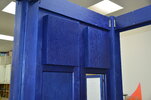
I started installing the window backlight boxes on the doors as I knew they would need to be trimmed on the hinge side where they would hit the post when opening.

You might not be able to see it, but the side that's trimmed is cut off at about 27.5 degrees. I'll probably still put a door stop on each side to prevent the light box from banging into post.

I'll get a photo later, but these push onto the door using four speaker grill pegs that are on the boxes, and receivers for them installed around the window. Seems to work well, as hoped.

DSC_0731b.JPG

A lot of work is being done on the electronics as well. My friend Scott (scottinthebooth) has it all designed and we're strategizing on how and where each piece gets placed. I'm trying to make this all pretty much plug and play with as few wires showing as possible. We'll see how we do.
 
Last edited:
re: My New Series Dr Who Tardis Build (image heavy)

wow ,that's amazing!
I'm building a wood shop in my barn and now I know what the 1st. project will be!
 
re: My New Series Dr Who Tardis Build (image heavy)

A lot of work has been going on with little to show for it.

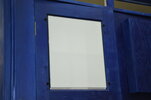
First up, here's a couple photos of the speaker grill connectors I'm using to easily attach the window light boxes.

DSC_0755a.JPG

DSC_0752.JPG

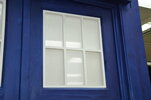
I've started installing the window assemblies into the walls. Three to go now. I'm using black latex paintable caulking on the inside to hold them in.

DSC_0754a.JPG

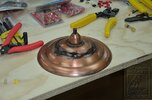
I took just a few minutes today to use J-B Weld to attach the two top parts of the Gardman lantern. I'm just using this topper until I can get the correct one.

dsc_0758a.jpg

Most of the work the past several days has been making plans for how to bring together all the electrics and electronics. Because I have plans to be able to easily transport the Tardis, I wanted this to be pretty much plug and play, but also with no more wiring showing than absolutely necessary.

To begin with, Scott came up with some two pin connectors that could be panel and wire mounted. With these, I did a wiring diagram that allowed me to plan for using short patch cables in just a few places, while running most of the wires in a post and the sign boxes.

Since there's quite a few DC amps running around the lights, Scott also specified 13 3 amp circuit breakers, one for each lighting assembly. I was also able to panel mount each of these in the sign boxes.

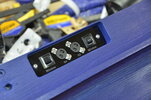
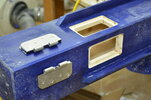
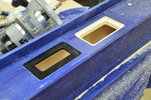
Here's one of the finished connection points in a sign box. It's the back sign box and the two window plugs, plus their circuit breakers.

DSC_0742a.JPG

DSC_0745a.JPG

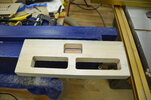
To install each of the connection points, I had to three different router templates, using a small pattern bit to cut 9/16" deep pockets. They had to be deep because some of the plugs are male, and they have to be below the surface or they would interfere with the walls during assembly.

This is the router template being used for one of the pockets.

DSC_0737a.JPG

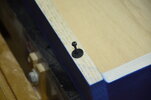
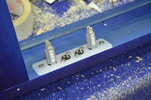
The back right post is adjacent to where the power supply and main electronics box will sit so the wires will go up that post before splitting off to the windows, signs and beacon. This required a different strategy for the connectors since I don't have access inside the post to hold the nuts for attaching the through screws. To solve this, I'm making assemblies that completely install from the outside, being held in with SS wood screws.

DSC_0747a.JPG

DSC_0748a.JPG

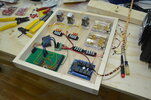
And finally, this is the status of the electronics as Scott has built up so far. We're laying them out to install in this box with an acrylic piece on the front to mount all the pieces on, which will ultimately get another box on top of it to protect it from prying fingers.

Inside is the power blocks that will attach to the 70 amp DC power supply, 8 channel remote control, VMusic for the sounds, VMusic control, relays for lighting control and a circuit for the beacon, along with interfacing for programming of the chip on the board.

DSC_0749a.JPG
 
Last edited:
re: My New Series Dr Who Tardis Build (image heavy)

Holy cow... that is just too awesome. This is good motivation to get cracking on my own Time Machine :) This is gonna be one crazy week.

-Gary
 
re: My New Series Dr Who Tardis Build (image heavy)

Wow, I absolutely cannot wait to see this complete. Are you planning on making a video and doing a demat effect?
 
re: My New Series Dr Who Tardis Build (image heavy)

Wow, I absolutely cannot wait to see this complete. Are you planning on making a video and doing a demat effect?

I will.

It has dematerialization and materialization effects with the beacon pulsing timed to the sound effect. Initially I'll just be using amplified PC speakers. Haven't really sorted out a permanent solution since I don't want to hang speakers on the outside.
 
re: My New Series Dr Who Tardis Build (image heavy)

What about small Ipod speakers ? You could hide them in the corners and though they would be visable I would not think they would be very noticable.
How heavy will the finished Tardis be ?
 
re: My New Series Dr Who Tardis Build (image heavy)

What about small Ipod speakers ? You could hide them in the corners and though they would be visable I would not think they would be very noticable.
How heavy will the finished Tardis be ?

I really want bigger sound than possible from really small speakers. It was suggested that I build two Daleks and make them the speakers, but I'm probably going to pass on that good idea.

I'm not sure what the entire Tardis will weigh. Only the base structure is heavy, everything else is quite light. I can easily move around even the entire top.
 
Last edited:
re: My New Series Dr Who Tardis Build (image heavy)

Holy cow... that is just too awesome. This is good motivation to get cracking on my own Time Machine :) This is gonna be one crazy week.

-Gary


Word!!!! I'm taking the rest of the week off to get K.I.T.T up to snuff.... :confused
 
re: My New Series Dr Who Tardis Build (image heavy)

Man, I wish I had a week. I definitely need it after getting slowed down with the snow over the past two weeks. I'm coming to the office early just to have some afternoons. I'm taking Friday off for a final push. Heck, I'll probably be messing with stuff up till sometime Saturday morning ;)
 
re: My New Series Dr Who Tardis Build (image heavy)

I really want bigger sound than possible from really small speakers. It was suggested that I build two Daleks and make them the speakers, but I'm probably going to pass on that good idea.

I'm not sure what the entire Tardis will weigh. Only the base structure is heavy, everything else is quite light. I can easily move around even the entire top.

Or make K9 the speaker, smaller than a Dalek and the Tardis was his home. A couple of speakers in him should give out a good amount of sound.
 

Your message may be considered spam for the following reasons:

If you wish to reply despite these issues, check the box below before replying.
Be aware that malicious compliance may result in more severe penalties.
Back
Top