My New Series Doctor Who Tardis Build (image heavy)

re: My New Series Dr Who Tardis Build (image heavy)

As I worried earlier, I did run out of blue paint right as I was finishing the first coat of the very last panel. I'll have to get a quart of it on Monday to finish up.

I thought to take some photos of the painting process to show the steps.

Starting with the sandblasted wood from earlier, I blow it all off really well and put down one coat. I try to get it on even, a medium coat. I'm very careful to not put down so much paint it runs, but I do want it completely covered with paint.
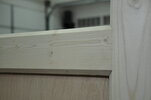
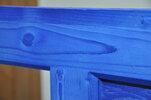
DSC_0018.JPG

DSC_0025.JPG

Since it's lacquer, it dries really fast, especially where there's soft wood removed by the sandblasting, and that means in 15 minutes I can move to the next step, which is to go over the entire surface with a green Scotch-brite pad. This removes any fuzzies that were raised by the sandblasting, but also there are many places where the grain is flat and peaks on the surface. These places are very annoying because where the grain meets the surface it peels up, sometimes even lifting an entire piece of the surface. The photo below is what this looks like after I've used the pad in an area like this. I first run the pad across the board, then along the board, many times and eventually it will stop catching splinters. I blow it all off again and get ready to apply the second coat.
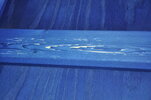
DSC_0020.JPG

Here you can see the Scotch-brite pads. Notice all the splinters in the one I used. Even doubled over I've had quite a few of the splinters in my fingers since I don't like to sand with gloves on. Not the most fun part of the build
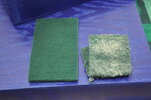
DSC_0021.JPG

Then I apply the second coat. First I'll go over any area that bare wood is showing with a light coat, then the entire piece, and then back to see if there are any places that need filling. The nice thing about this paint process and the lacquer is it allows you to go back and add paint without worries about uneven finish.
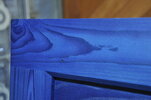
DSC_0019.JPG
 
Last edited:
re: My New Series Dr Who Tardis Build (image heavy)

I've been silently observing your good work! What will you build once this is done?
 
re: My New Series Dr Who Tardis Build (image heavy)

I've been silently observing your good work! What will you build once this is done?

Haven't really decided yet. Could be an outdoor capable Tardis or a larger DIY CNC than the one I built last year. There's always something to build though.
 
re: My New Series Dr Who Tardis Build (image heavy)

Haven't really decided yet. Could be an outdoor capable Tardis or a larger DIY CNC than the one I built last year. There's always something to build though.

How about a Tardis Console??? :love

REALLY looking forward to seeing the finished product! This is hands down the best Tardis build I've seen. Hope to make one myself one day.
 
re: My New Series Dr Who Tardis Build (image heavy)

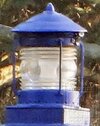
1/1/18 I was able to later locate a lantern that matched the one on the Matt Smith Tardis, and with a nice reference photo from the prop shop, was able to make the topper needed for an accurate replica.

Though I've been sidetracked a couple days working on a project for somebody, I did get more paint today. As soon as I can get back to it I'll finish painting pretty quickly. One think I noticed is the flat black I used inside the top and on the one panel that's finished gets marked up very quickly. I may go ahead and put some clear on them to hopefully make it easier to take care of. You can see in any of the photos that show the inside of the base where dust is all over it. It just takes a damp cloth to wipe that away and the black shows up undamaged again.

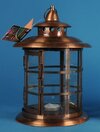
I spent just a few minutes at the end of the day taking the Gardman Garden Lantern apart. This becomes the very top of the Tardis light. I had believed this was the same piece that was used on the Matt Smith prop, but was advised today it's not, but is a good substitute. I'd really like to get the same topper, but haven't made any progress on that yet.

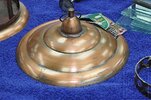
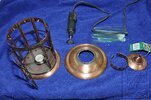
First I removed the glass panels. Then I used my Dremel with a cutoff blade for steel to cut through the three places the top was attached to the lower cage. Then from the inside I cut the three little tabs that were holding the very top on. Then I had to cut completely around the bottom of the straight section from the inside. That straight section has to be completely removed and the very top connected the lower section without it.

Here's a photo Primrodo sent me of the Smith Tardis lamp.

smith-lamp.jpg

Here's some photos of the Gardman and work on it.

gardmanlantern.jpg

dsc_0028.jpg

dsc_0027.jpg
 
Last edited:
re: My New Series Dr Who Tardis Build (image heavy)

This looks a bit easier to use for the body and glass ,the top part is not close .
 
re: My New Series Dr Who Tardis Build (image heavy)

Thanks for the painting description! Why do you do the scotch pad thing after starting the painting and not before?
 
re: My New Series Dr Who Tardis Build (image heavy)

It is a damn shame it cannot be shown on TARDIS BUILDERS....


Ok I've read the thread, what's particular about the build that prevents it from being shown?

I'm curious because I don't see any real difference between it and any other build over there.
 
re: My New Series Dr Who Tardis Build (image heavy)

Ok I've read the thread, what's particular about the build that prevents it from being shown?

I'm curious because I don't see any real difference between it and any other build over there.

Apparently the issue is with the Watermark that Philip has on his photos. The New Wookie Workshop. The mods on TARDIS BUILDERS are holding to the rule that you are not allowed to promote or sell anything in the threads. While they seem to understand the Humor of the watermark they are not prepared to make any exceptions.

Personally I think those types of decisions should be made on a case by case basis and this build is excatly the type of excitement that board needs. Just my humble opinoin and I apologise to Phillip for drifting a bit on his thread.

Philip when you are complete you should consider creating a TARDIS Build Manual for the NST using the measurements of your build and the step by step construction documentation. Non Profit of course. I have been pulling photos of the actual build off the web and placing them in relation to your photos and your build is virtually flawless.
 
re: My New Series Dr Who Tardis Build (image heavy)

That's a shame. I was actually surprised to see this here and not there, especially with the build quality.

I guess case by case doesn't exist there :( Most forums I'm on (including my own) give you a bit of leeway once you've established yourself as a contributing member.

Anyway, I could really derail the thread here, so I'll turn it back over.

But I agree, this is above and beyond work that the community at large could really learn from.
 
re: My New Series Dr Who Tardis Build (image heavy)

lol they would not let him post because of his logo, that seems very silly, but I guess each to their own.
Philip do you actually use the logo for trading or is it just an omarge (sp?) to Norm.
 
re: My New Series Dr Who Tardis Build (image heavy)

But I agree, this is above and beyond work that the community at large could really learn from.

Exactly. Best Tardis build I've ever seen. :) Their loss!
 
re: My New Series Dr Who Tardis Build (image heavy)

This sums up the issue Scarfwearer, who runs Tardis Builders, has with my photos. This is his words from his site when he addressed the issue after it was brought up.

"We're a hobby site. We've been fairly strict about not allowing any form of business activity or promotion on the site from the get go. While this particular watermark may not have a business motivation we can't judge the intention in each case, so we apply the same rule to all. Watermarks are a contentious subject and people have quite polarised opinions about them, so if people want to talk about it any further, we should take this offline."

I personally haven't ever, had nor heard, of an issue with watermarks similar to mine but that's neither here nor there. He has the issue and it's his site so I respect his decision.

I don't trade under the name, nor does the website it comes from have anything to do with anything other than my having fun with Norm Abram and The New Yankee Workshop, of which I'm a big fan. You can see for yourself at New Yankee Workshop and Norm Abram Fans!.
 
re: My New Series Dr Who Tardis Build (image heavy)

Methinks some board moderators need to pull their sonic screwdrivers out of their.....

:rolleyes
 
re: My New Series Dr Who Tardis Build (image heavy)

Thanks for the painting description! Why do you do the scotch pad thing after starting the painting and not before?

It's a good question.

I assumed it should be done in that order as well, so that was my first test.

What happened was it didn't remove all the fuzzies. Some, sure, but after painting the first coat, the boards have to be scrubbed again. Since it has to be done again after the first coat, it's easier to just wait till it's painted to do use the Scotchbrite. The fuzzies and splinters actually break off easier with paint on them than they do before painting, so it makes the whole process a little easier.

This is different than the same process you'd use if putting down a water based finish on wood. Like a stain then polyurethane. In that case, you have to first raise the grain with water, sand to remove them, maybe even do this a couple times, then start your finish application hopefully not raising the grain now.

Hope that helps.
 
Last edited:

Your message may be considered spam for the following reasons:

If you wish to reply despite these issues, check the box below before replying.
Be aware that malicious compliance may result in more severe penalties.
Back
Top